Admin Station / Configuration - User Manual
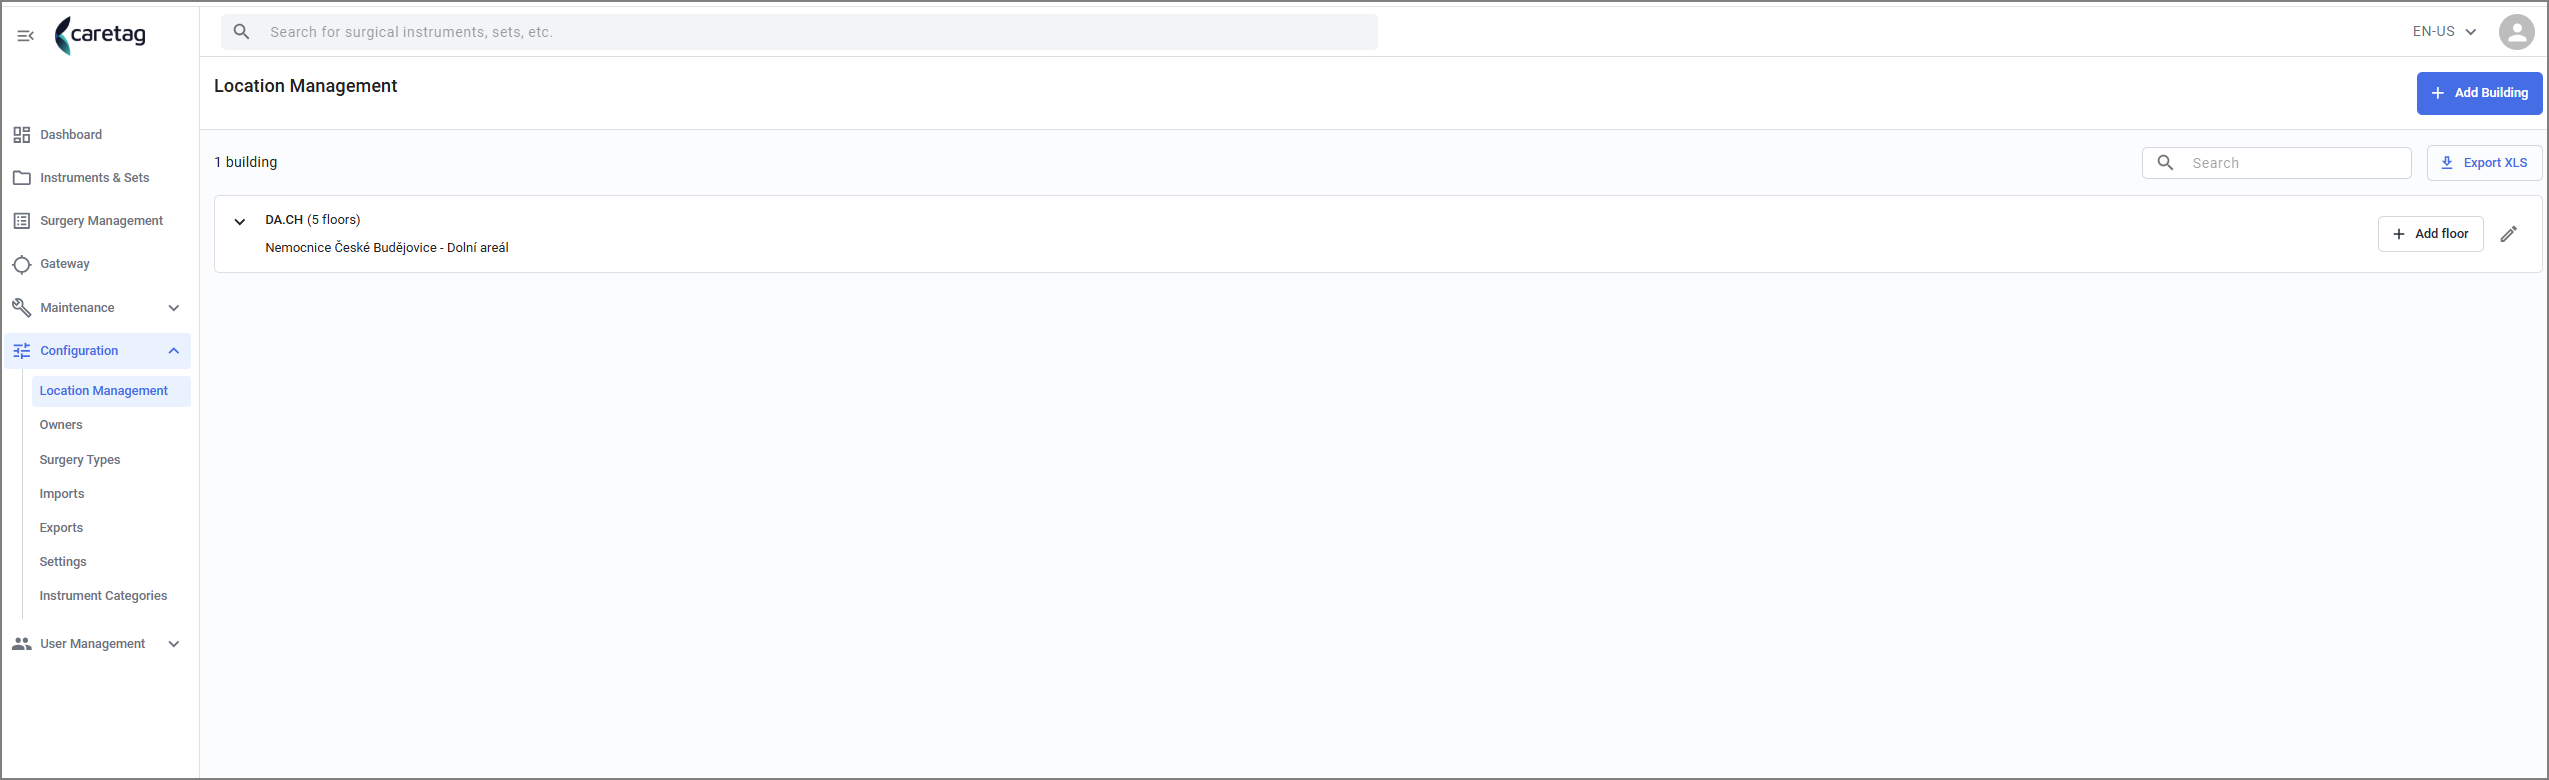
- Configration had 7 sections: Location Management, Owners, Surgery Types, Imports, Exports, SEttings, Instrument Categories.
Imports
Adding hundreds of instruments and packing sets individually can be time-consuming and tedious. To streamline this process, the import feature allows users to add multiple instruments, packing sets, user details, and more in bulk. Simply follow the format of the sample XLS or JSON files provided for each import category, upload the files, and within seconds, all the data will be uploaded and available in the appropriate tabs.
There are 3 tabs here: All, In progress and Completed.
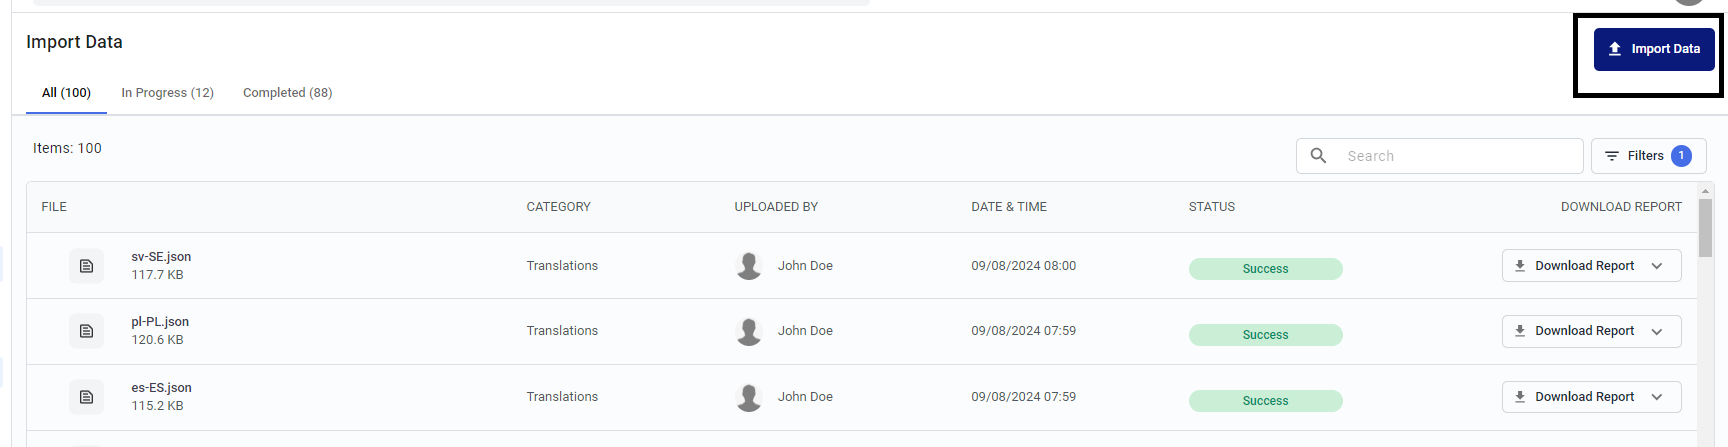
In the Import Data section, the user can see a table view that shows File, category, uploaded By, Date and time of the upload, status of the file and an option to download the report.
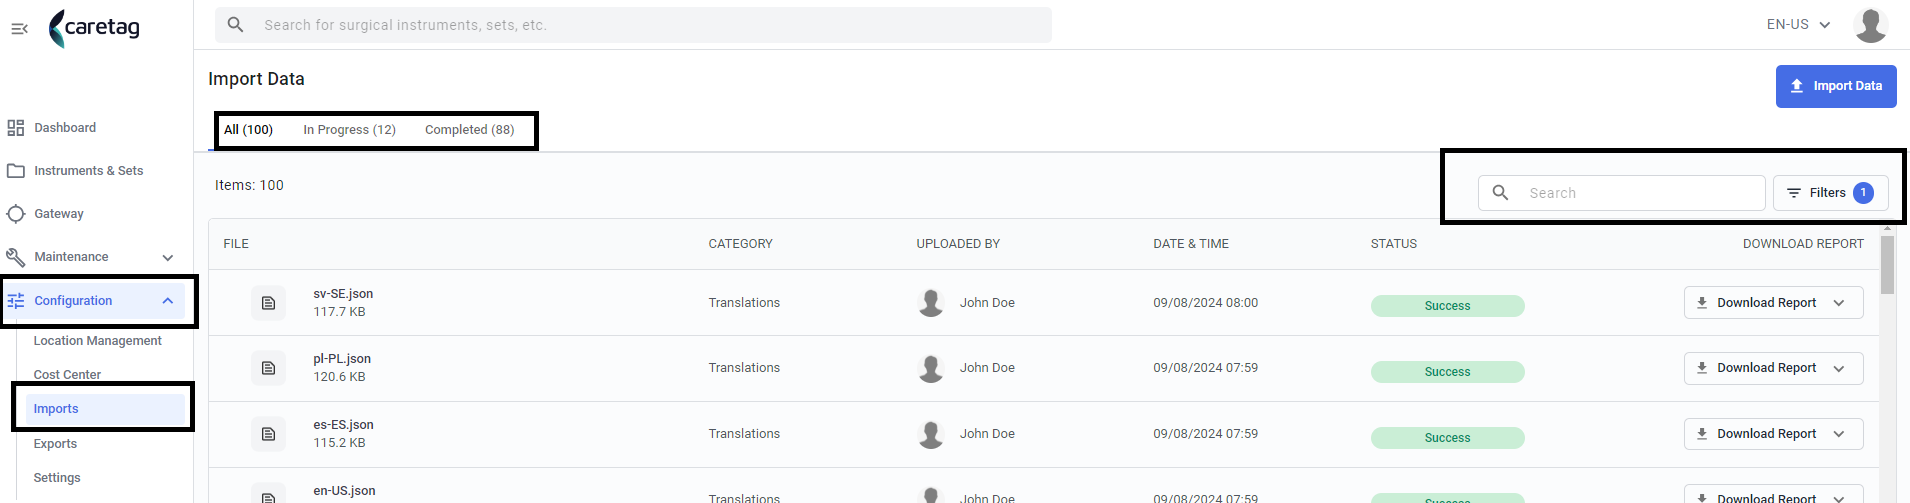
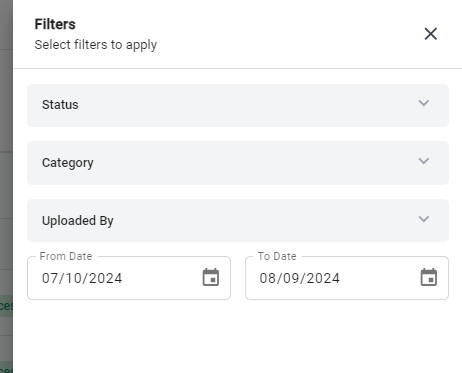
There is a serach field where the user can type the name of the file to easily find it or they can use the filters to filter any specific category/dates/staus.
New Import
To upload a new file click on the Import data button
Select the Import Category
In this initial phase, users are prompted to select a category for importing data. Once a category is chosen, users gain access to its definition, an overview, and a sample file. This sample file serves as a practical guide, providing users with insights on how to appropriately prepare their files for uploading.
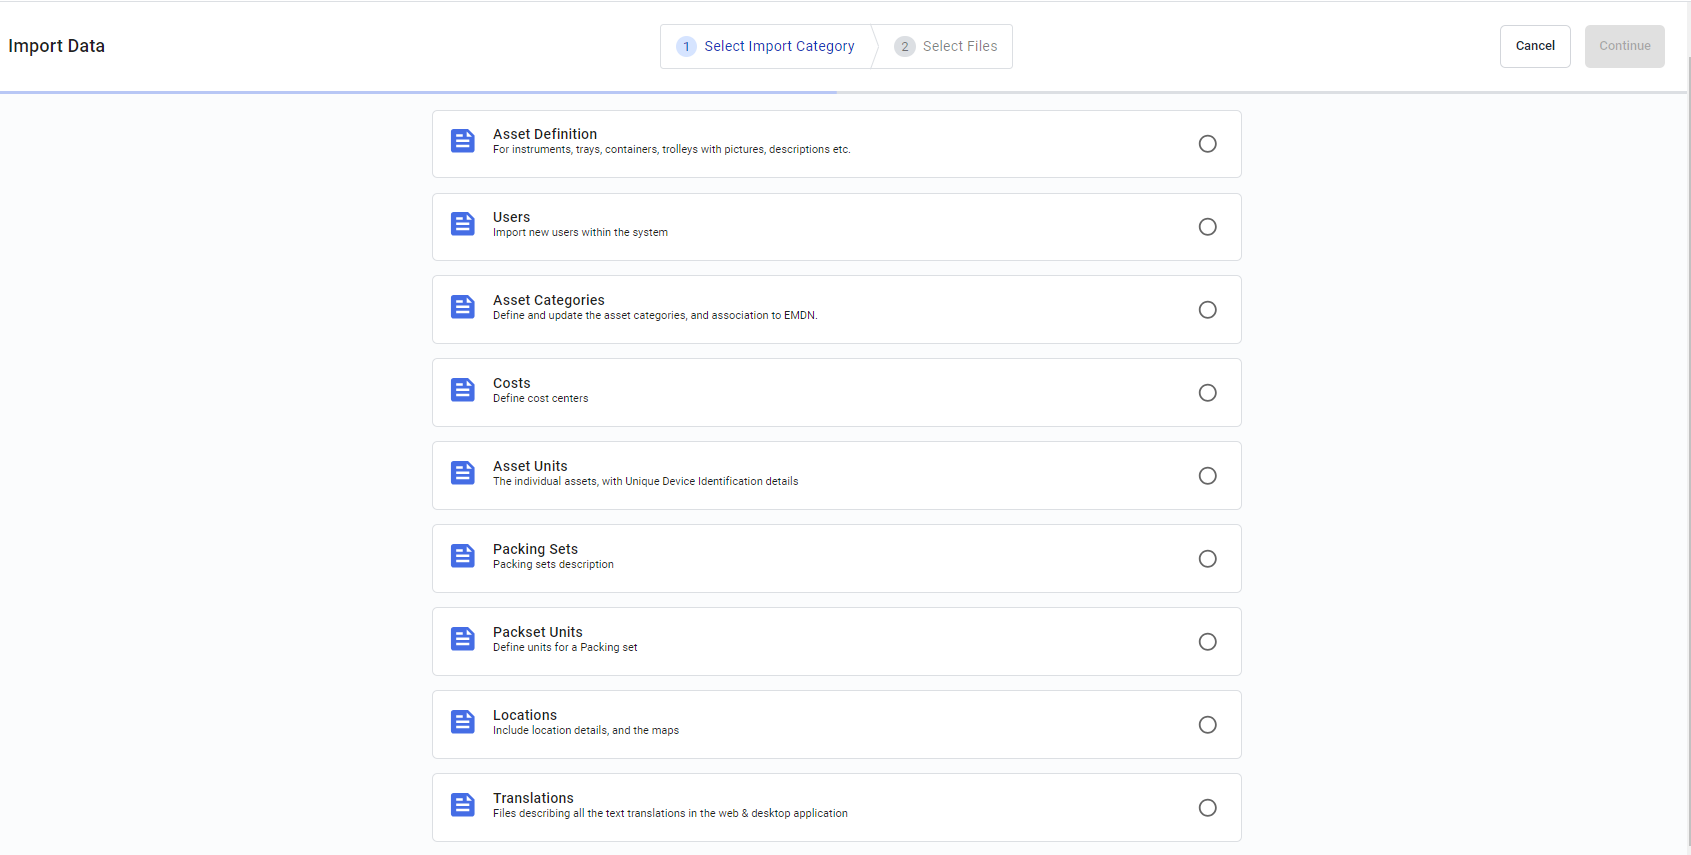
The category and their relevant descriptions are below.
| Category | Description |
|---|---|
| Asset definition | To import instruments, trays, containers, trolleys with pictures, descriptions etc |
| Users | To import new users within the system |
| Asset Categories | Define and update the asset categories, and association to EMDN |
| Costs | To import instruments, trays, containers, trolleys with pictures, descriptions etc |
| Asset definition | Define Cost centers |
| Asset Units | The individual assets, with Unique Device Identification details |
| Packing Sets | Packing Sets definition |
| Locations | Include location details, and the maps |
| Translations | Files describing all the text translations in the web & desktop application |
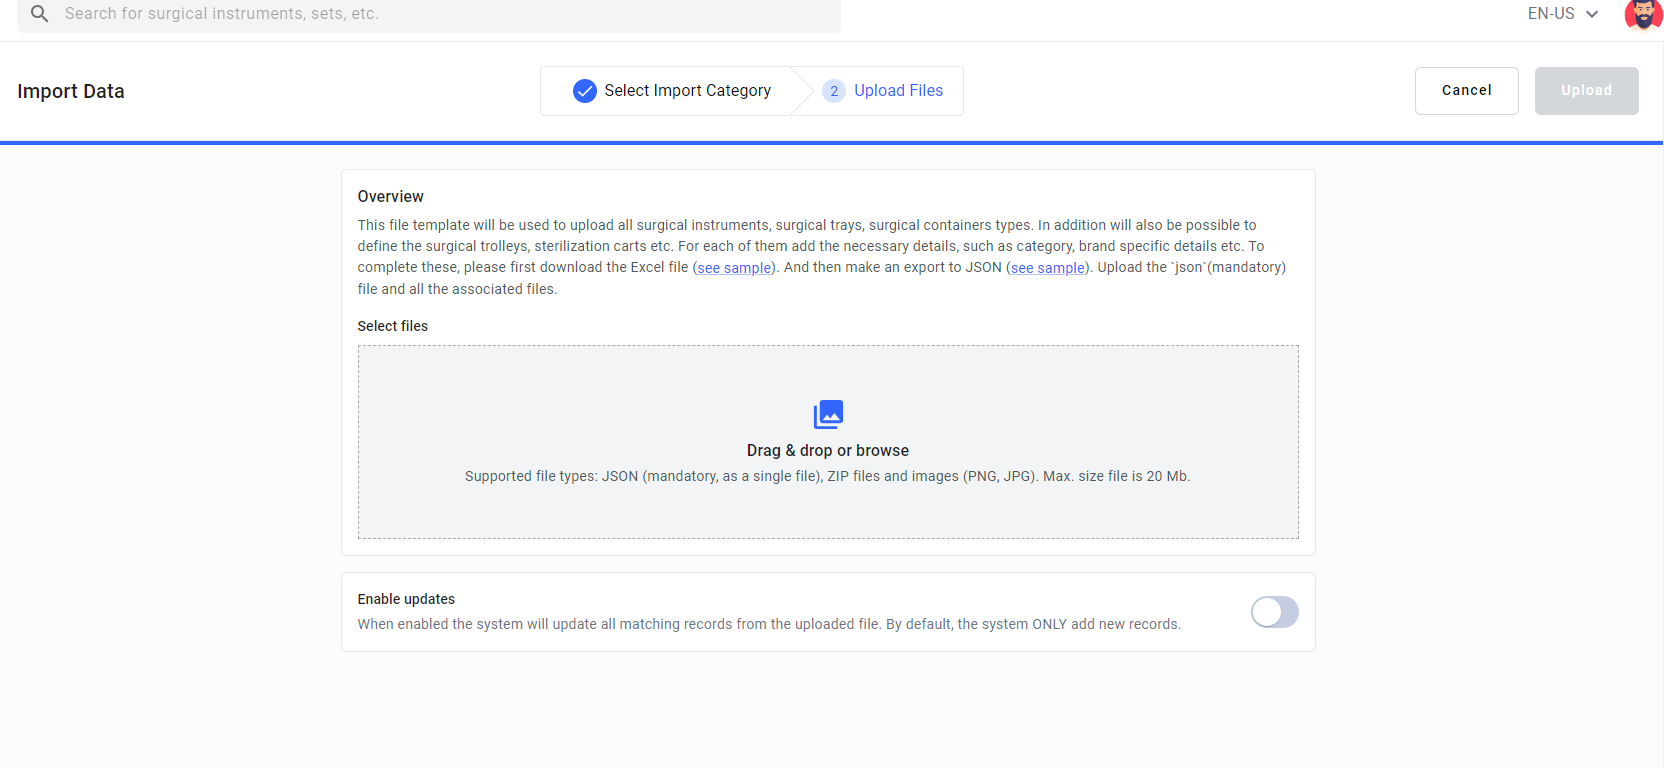
After choosing the category, simply click the “Continue” button to upload the file. Here, users have access to a brief description of the category, as well as sample files provided in both Excel and JSON formats. These files are available for download, enabling users to prepare their own files accordingly.
User can upload the file from their computer or simply drag & drop. Keep in mind that the file uploaded must be converted to json or excel type for the import to be processed.
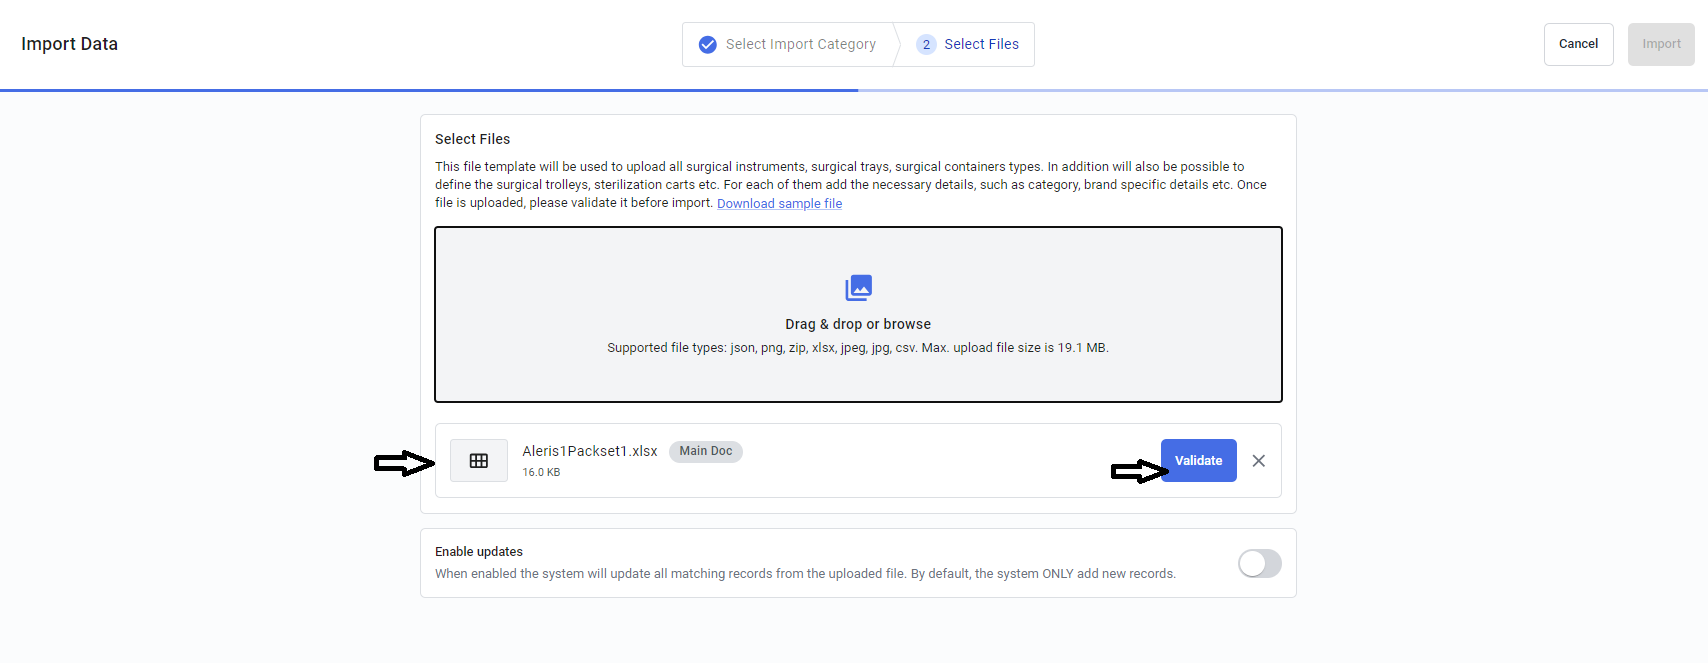
Upon uploading a file, the page view will resemble the image depicted below and the users need to validate the uploaded file by clicking the validate button.
Once the file is validated, it will display the valudation results as shown below. The user can check the warning or error report by cliciking the view detailed report.
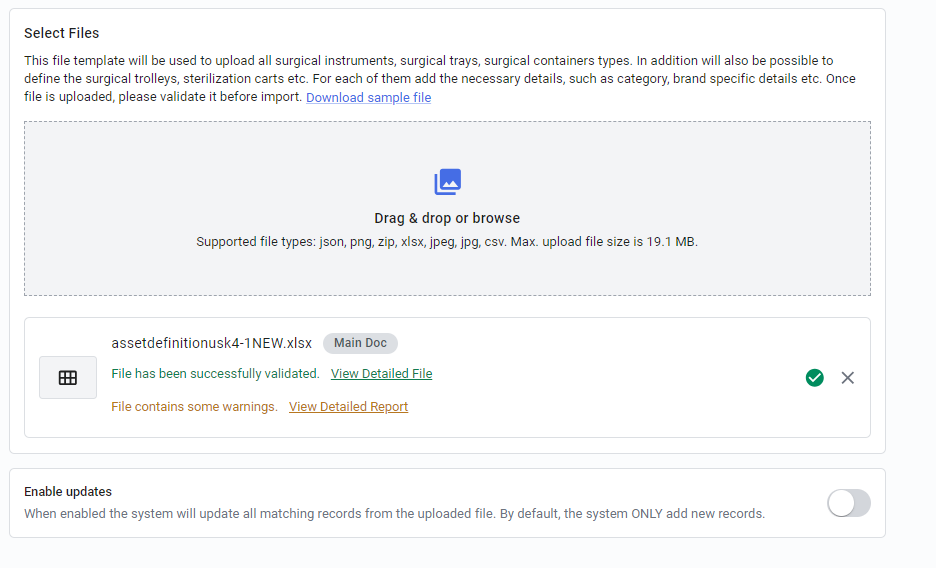
After the validation, if there are no errors then the file is ready to be uploaded. Click the Import button, the page will transition to the “All” tab. Here, you can view the uploaded file along with its status, denoted by either “In progress”“Success,” “Warning,” or “Error.”
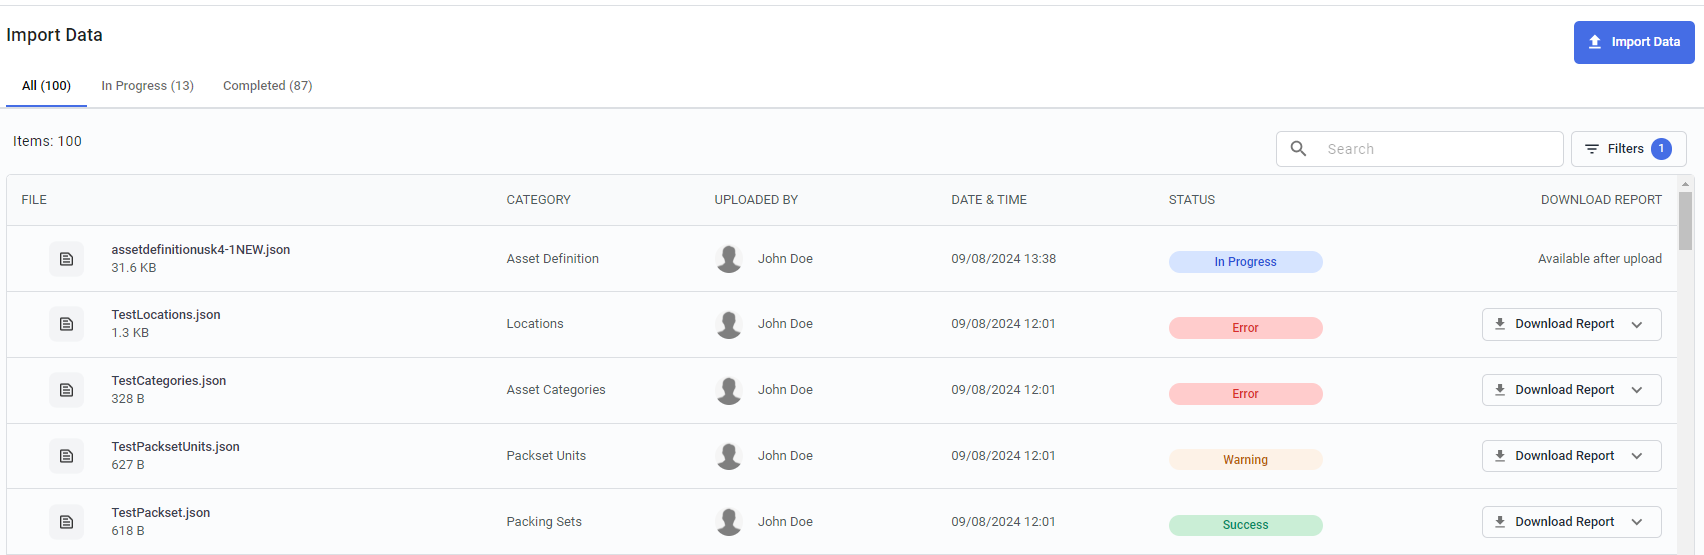
Once the status changes to success, the data uploaded is ready to be viewed/used in your web Admin.
Error/Warning Status:
When there is an error or warning status, download the report to see the error.
Here you can see the error as “Could not parse json file”

Import Categories and Results
In the previous section, we discussed the various import categories. Now, we will guide you on where to view the results for each category after the upload is complete.
Asset definition:
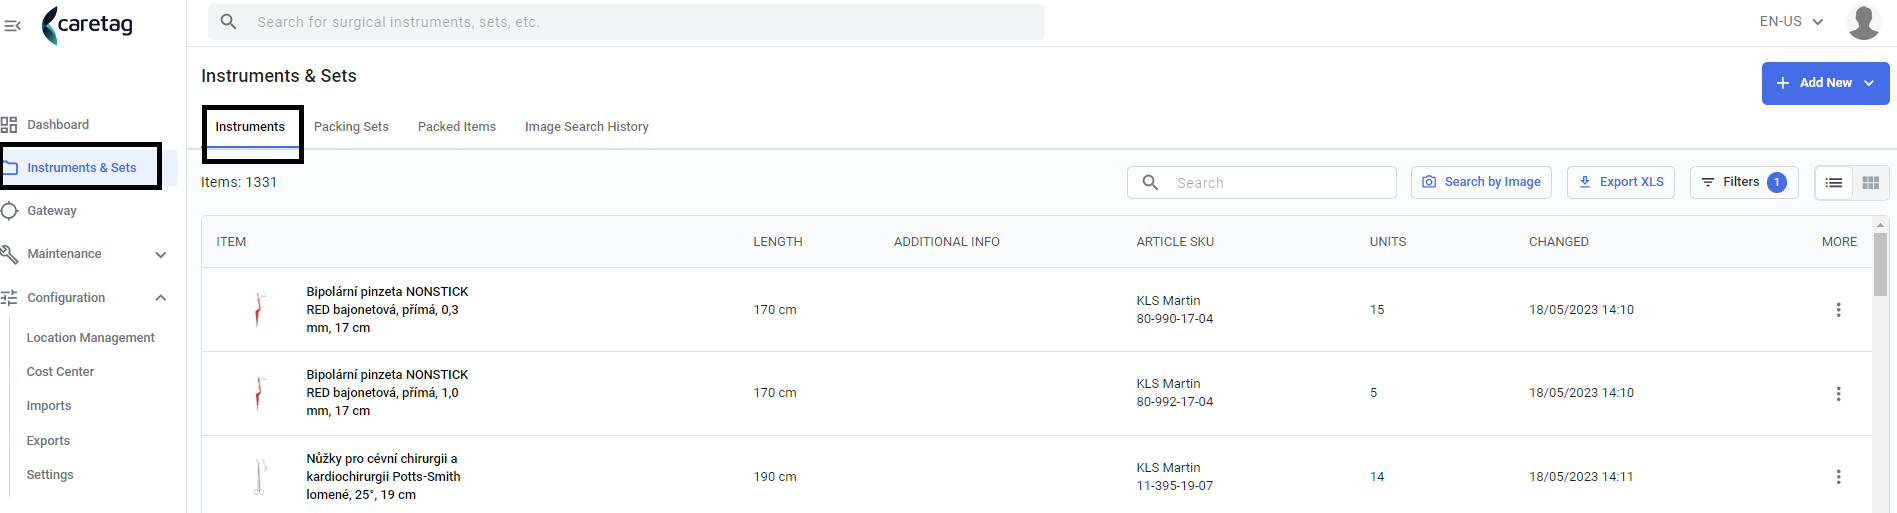
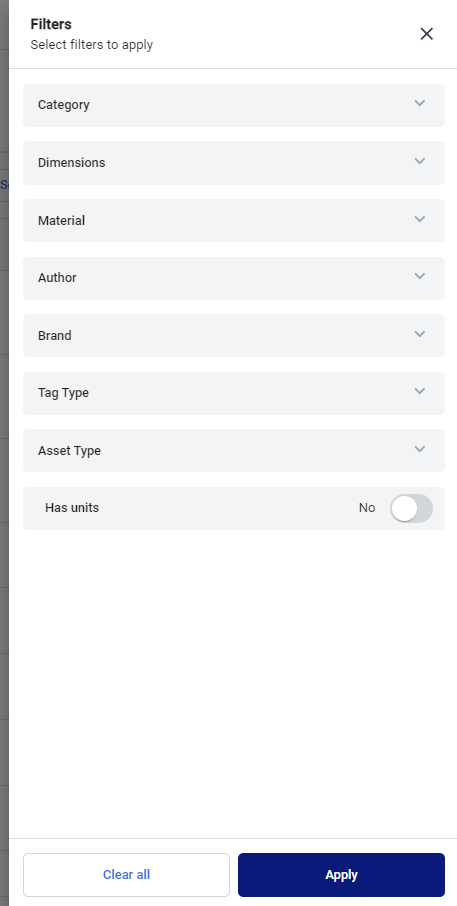
The results of imported asset definition files can be found in the Instruments and Sets section under the Instrument tab. To view the newly uploaded instruments, ensure that the “Has Unit” filter is unchecked.
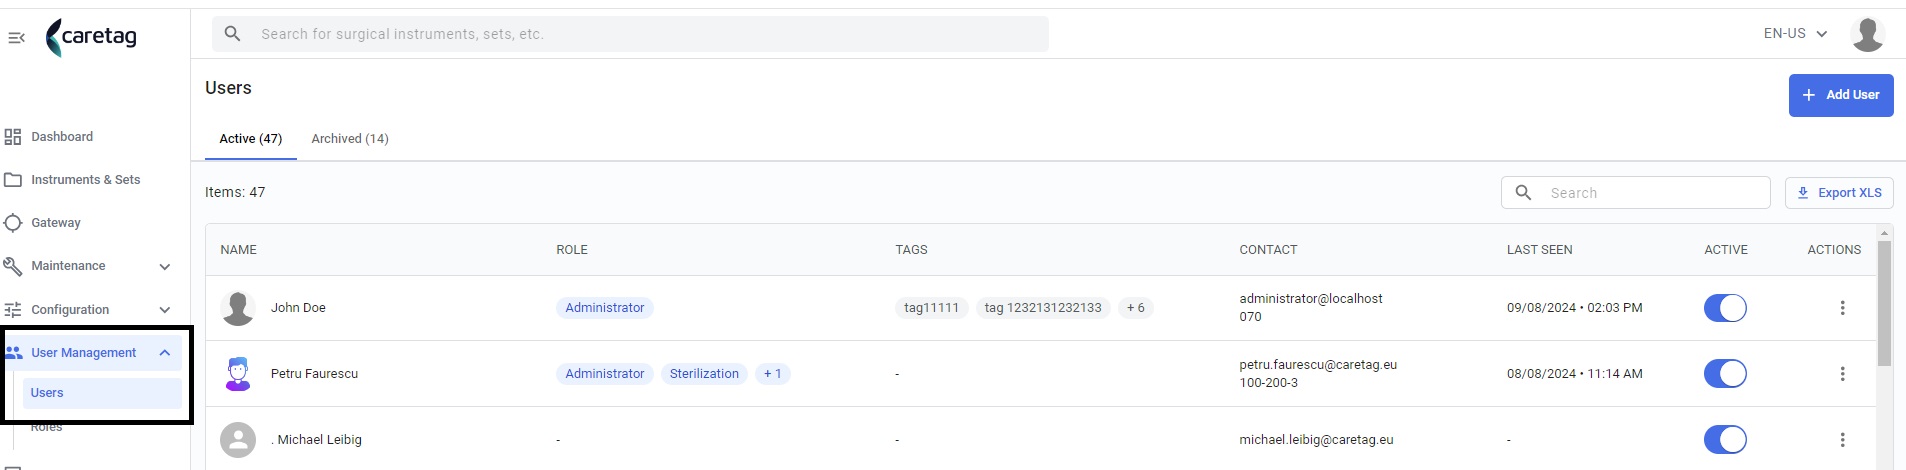
Users:
The results of the user category can be seen in the User management section.
Asset Category:
The results of the Asset category upload is seen in the Select Category while adding a new instrument.

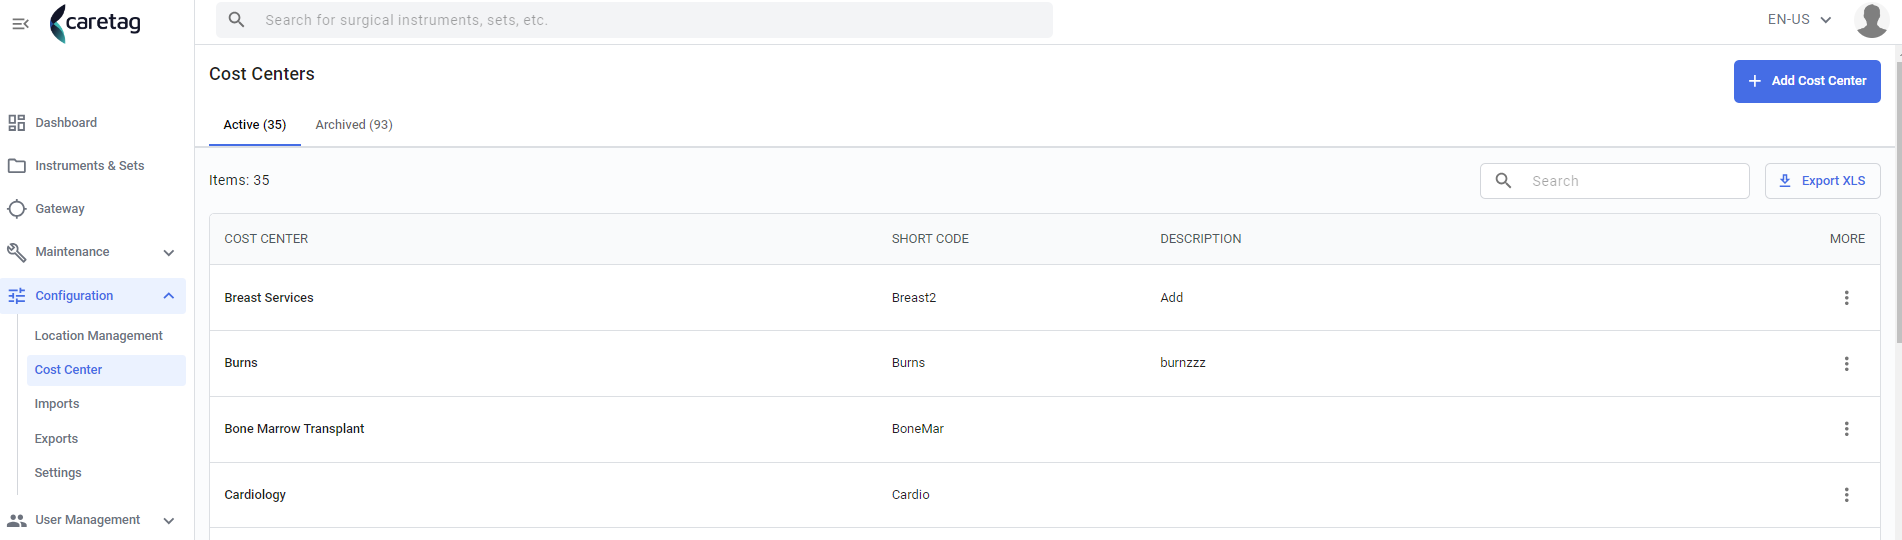
Costs:
The results of the Costs upload file is under the cost center section in the Configuration
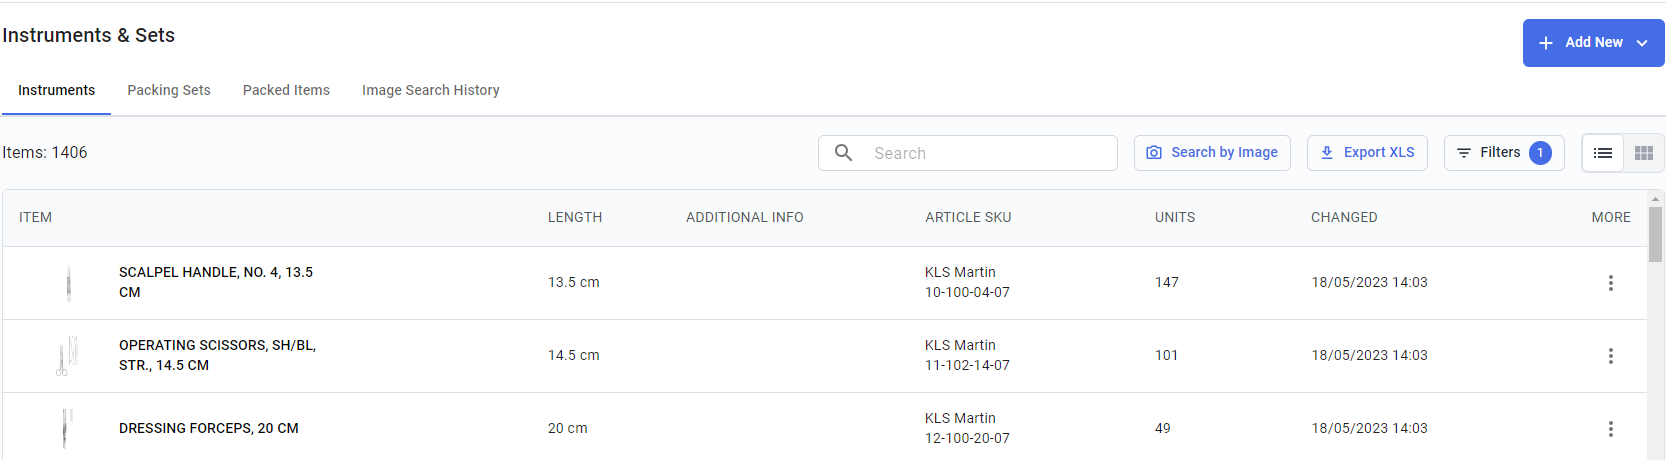
Asset Units:
The results of the Asset unit upload are seen in the Instruments tab-Units
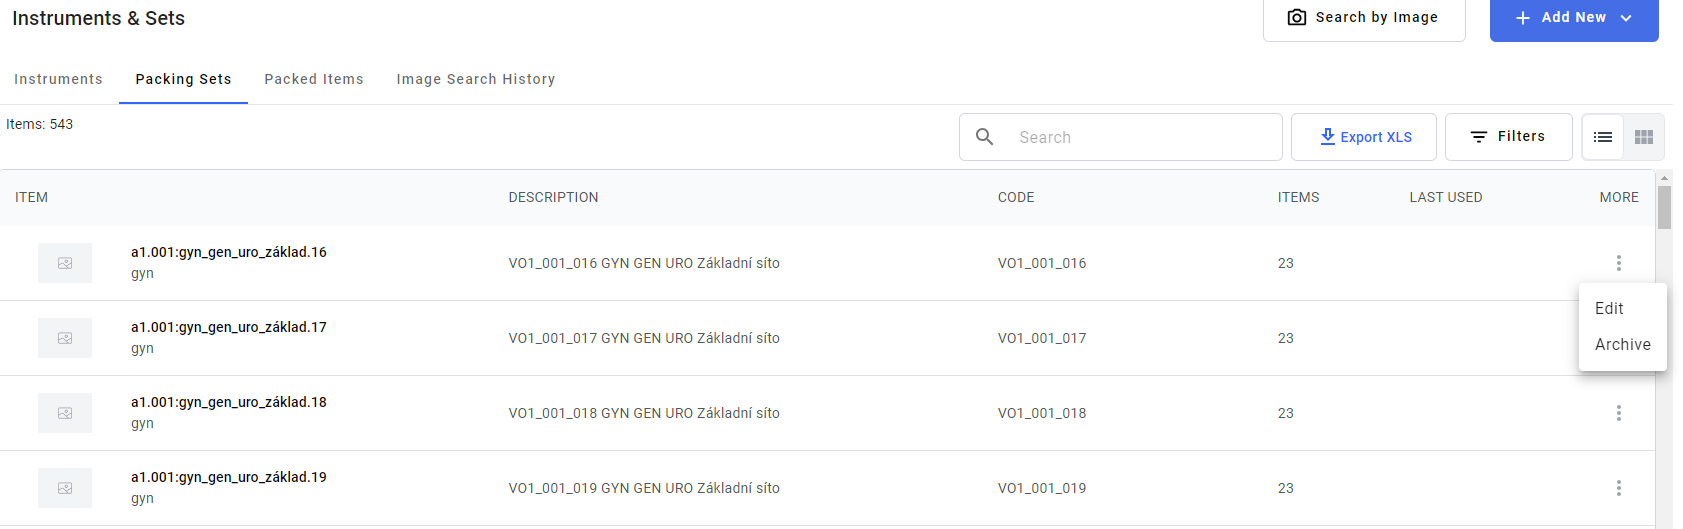
Packing sets:
The results of imported packing set definition files can be found in the Instruments and Sets section under the Packing set tab. To view the newly uploaded packing sets, type the name of the packing set in the search field.
Packing set units:
The results of the upload are seen in the packing sets-units
Location:
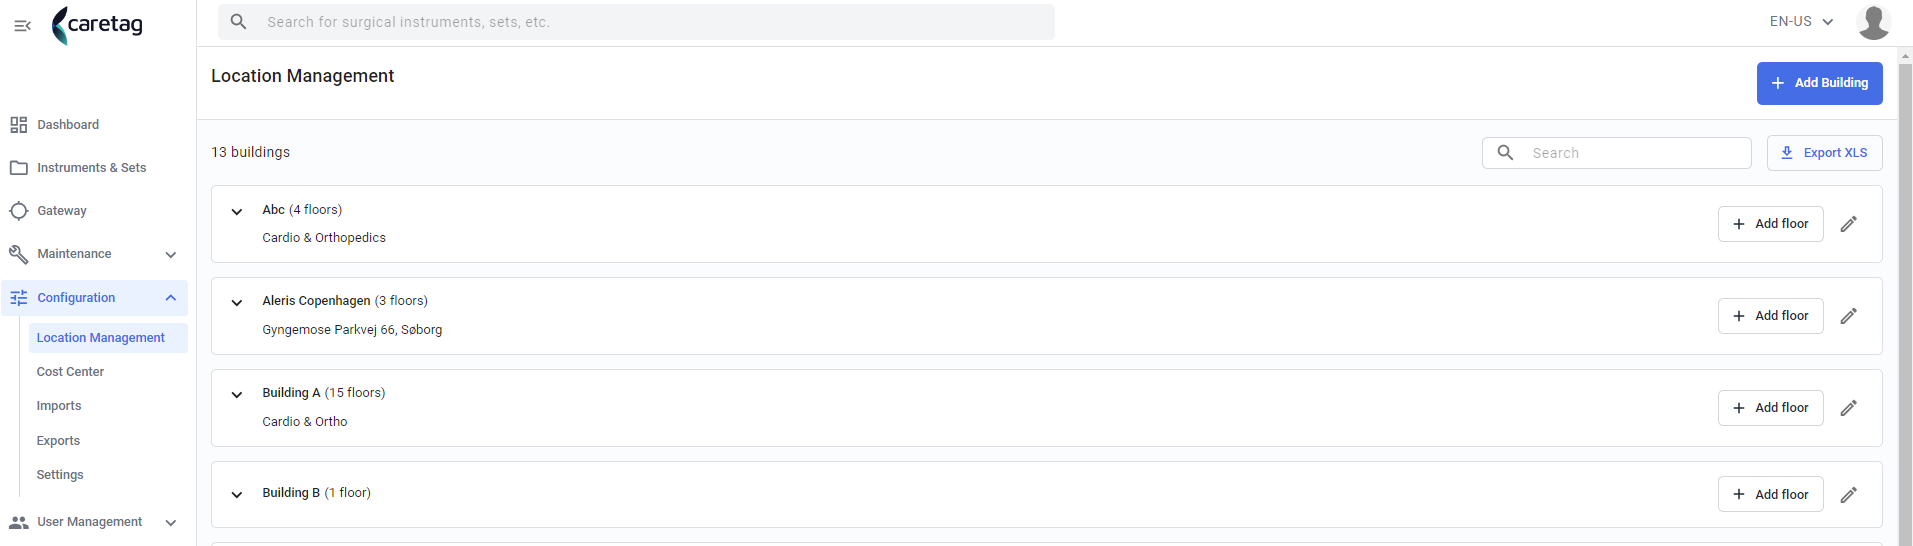
The results of the location upload are viewed under the Location Management section in configuration.
Translations:
Translation files are uploaded to display the translated text within the Desktop applications. Once you upload the translation file, you can open your Desktop applications(Technical Station, Packing Station, Checkbox Station, Info Station, and Smart OR Info) to verify that the translated text is properly displayed. The results of the translation uploads are visible in your desktop applications and not in the web- Admin station.
    Note:
    To apply the translations to your web admin, please submit a support ticket,
    and we will proceed with the necessary steps.
Exports
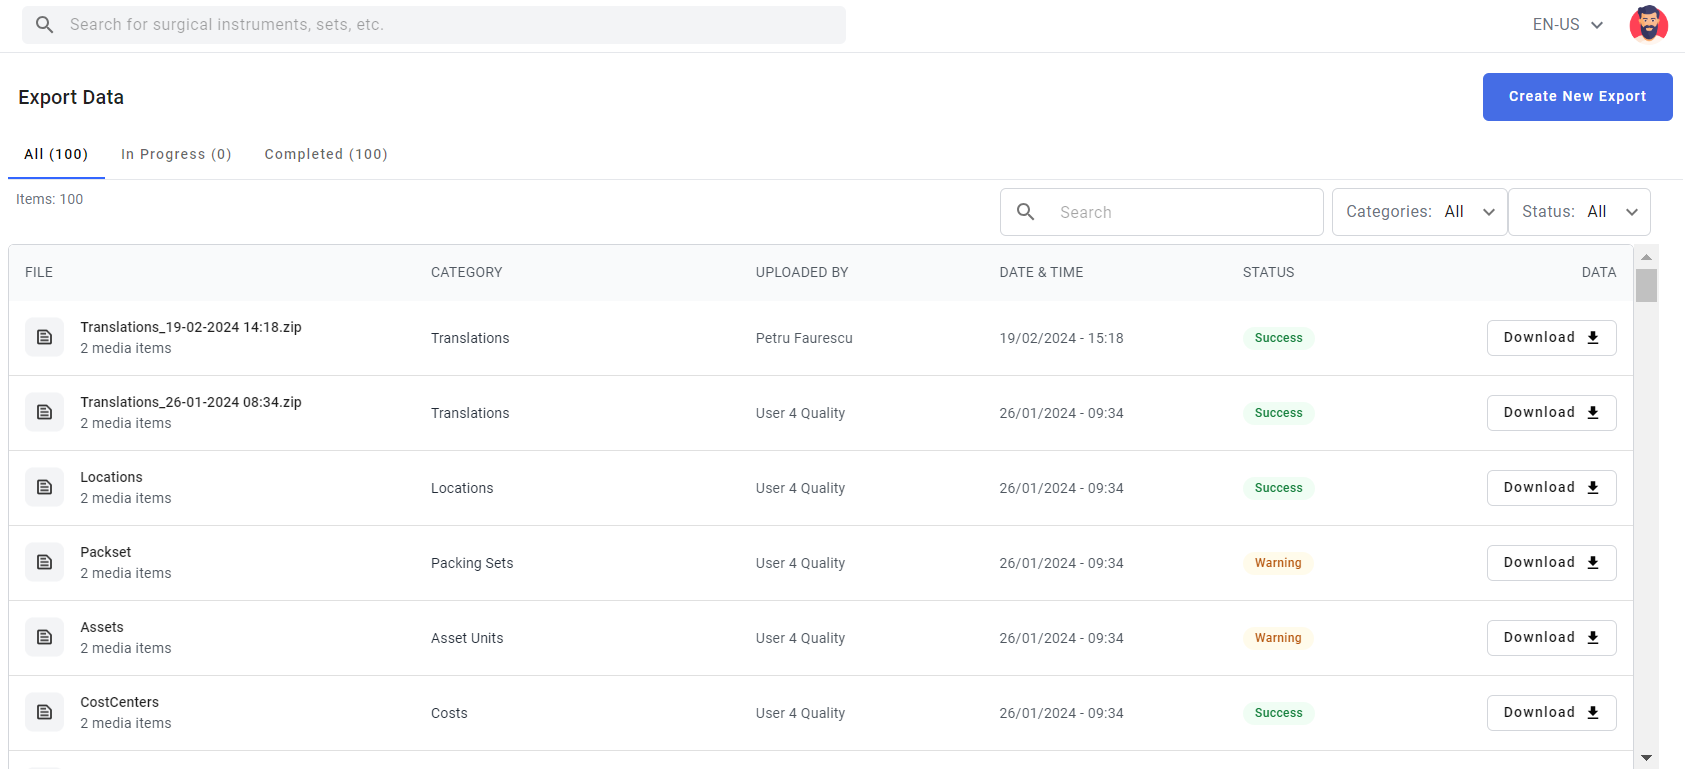
Export Data helps the user to export the data present in the web application/Admin Station by category.
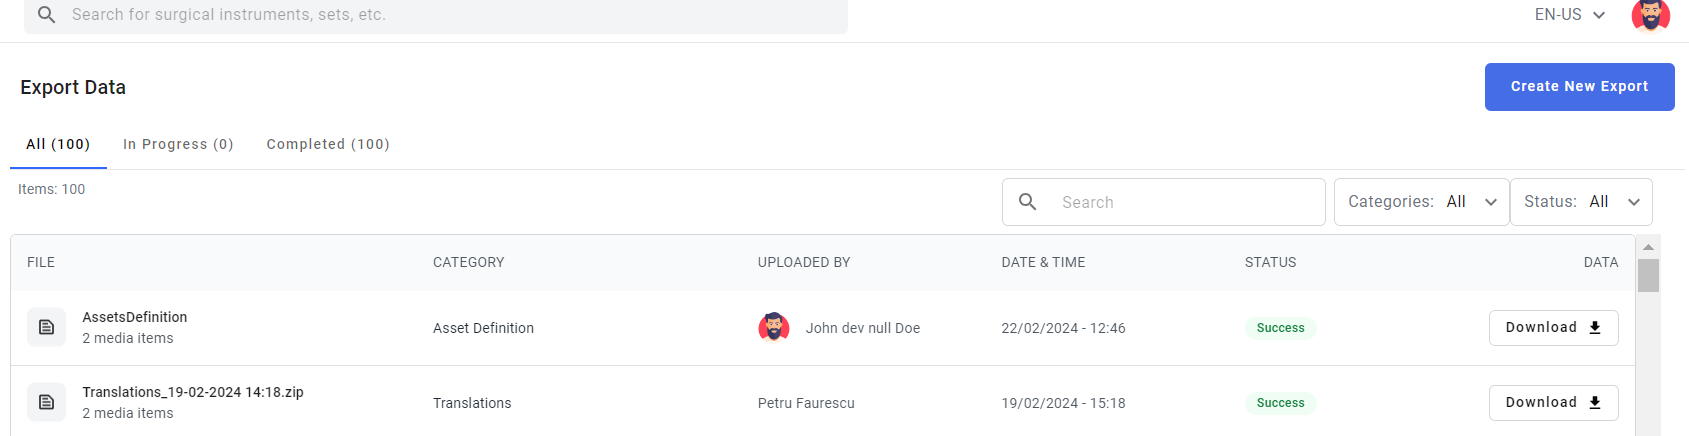
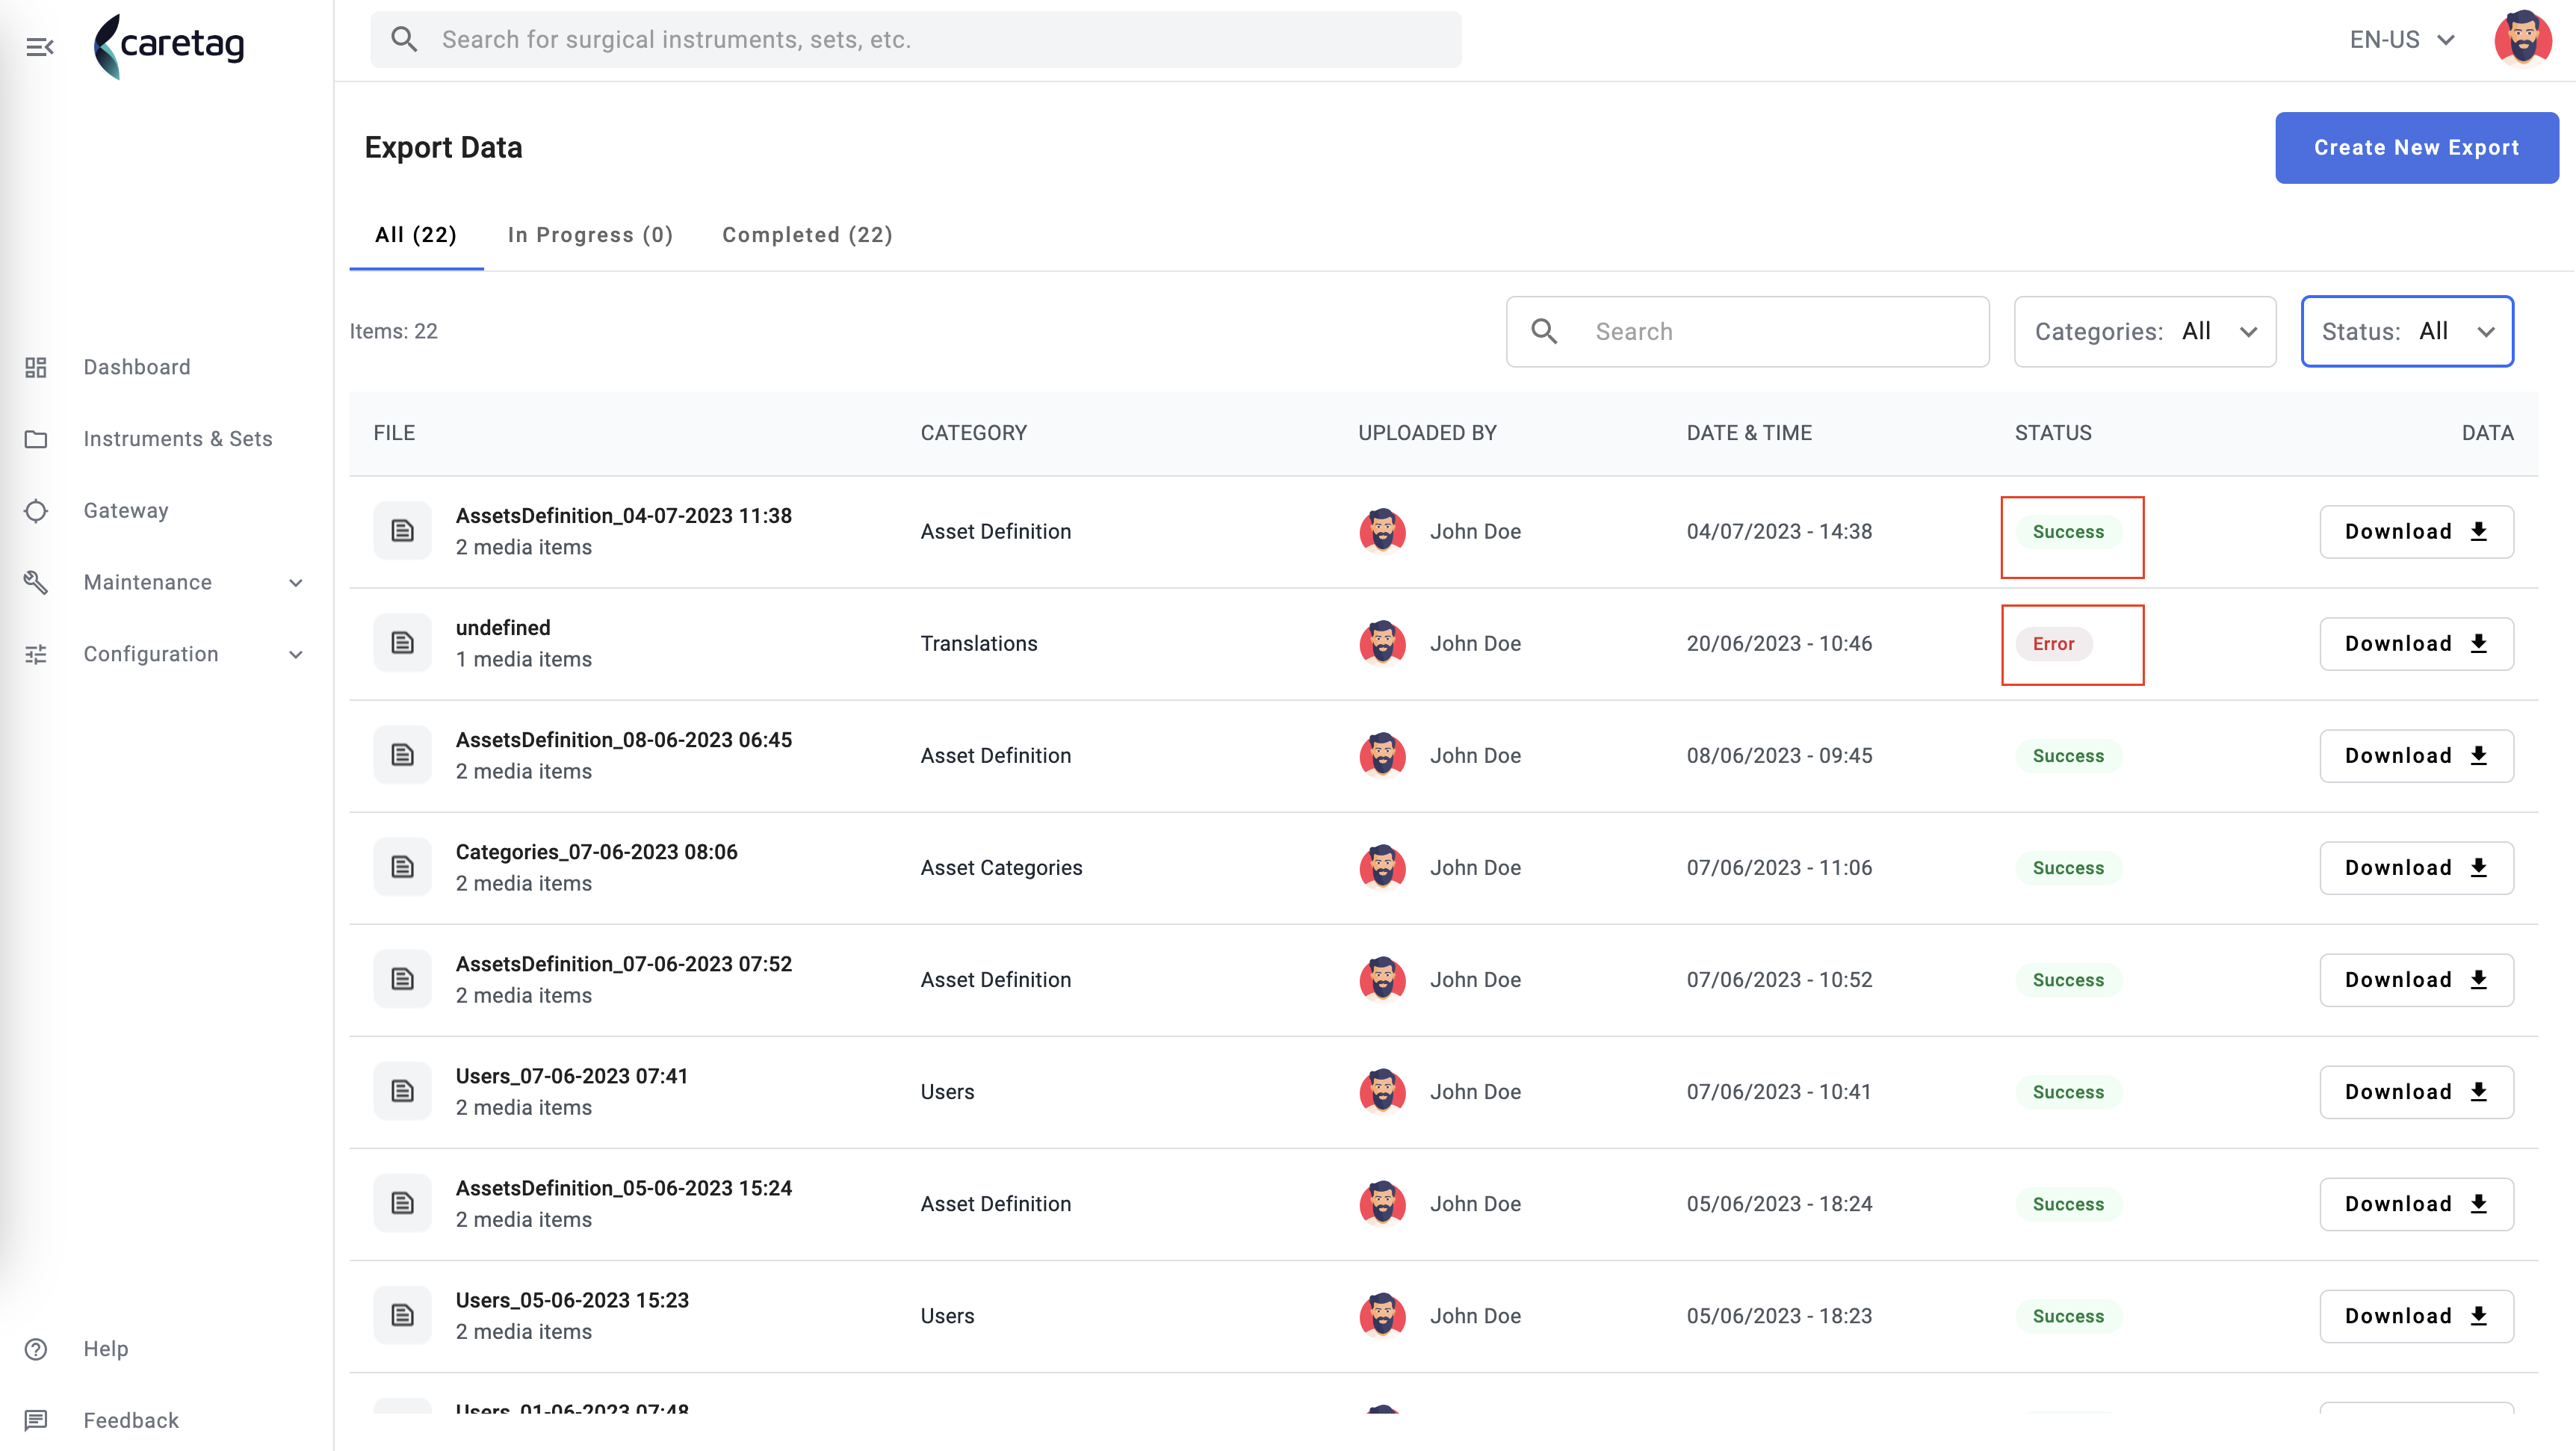
In the Export Data page, you can see a table view that shows File, category, uploaded By, Date and time , status of the file and Data to Download.
New Export
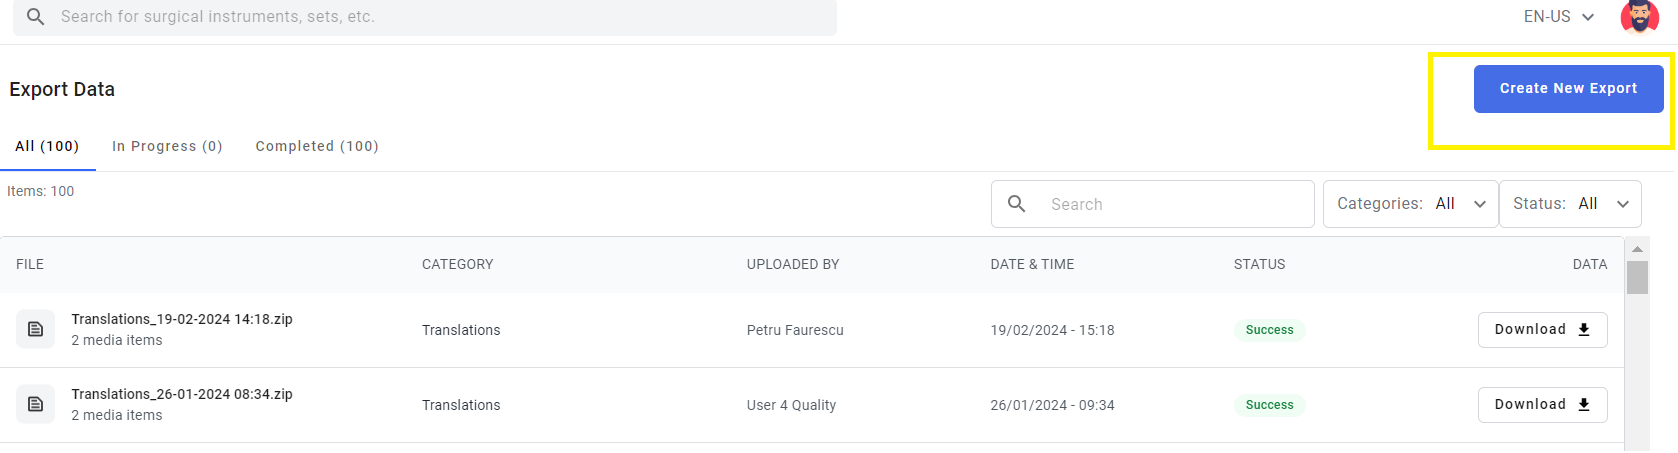
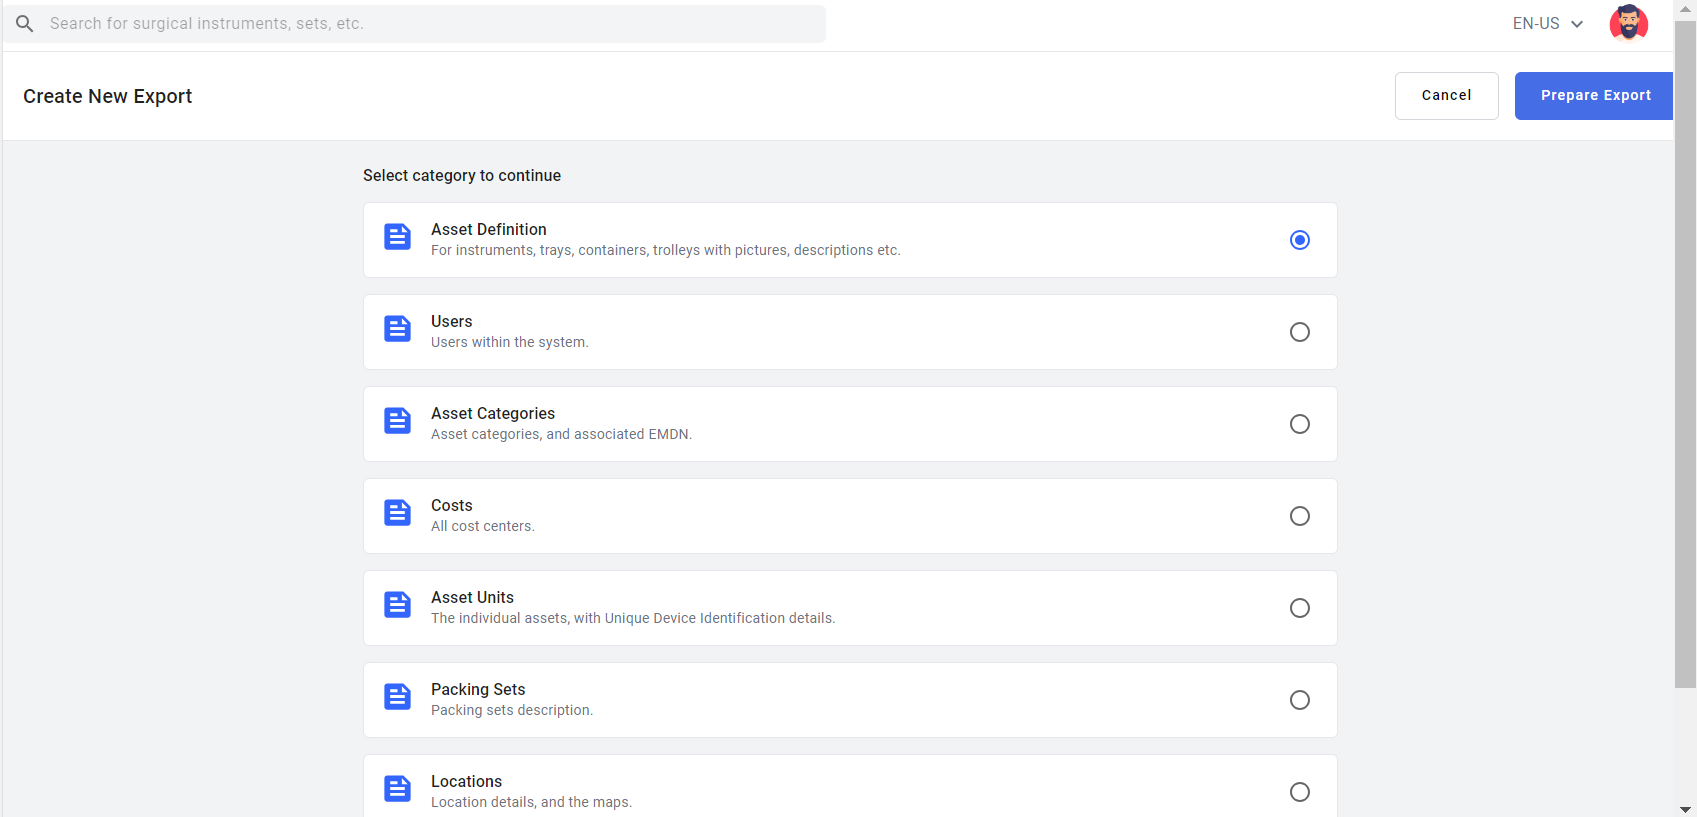
Clicking on Create New Export button, displays the categories available for export.
Select one of the categories to export the data and click prepare Export button.
A small prompt will appear on the screen saying the download is in progress. Once it is downloaded, the exported file will be visible in the completed or All tabs.
All tab:
Completed tab:
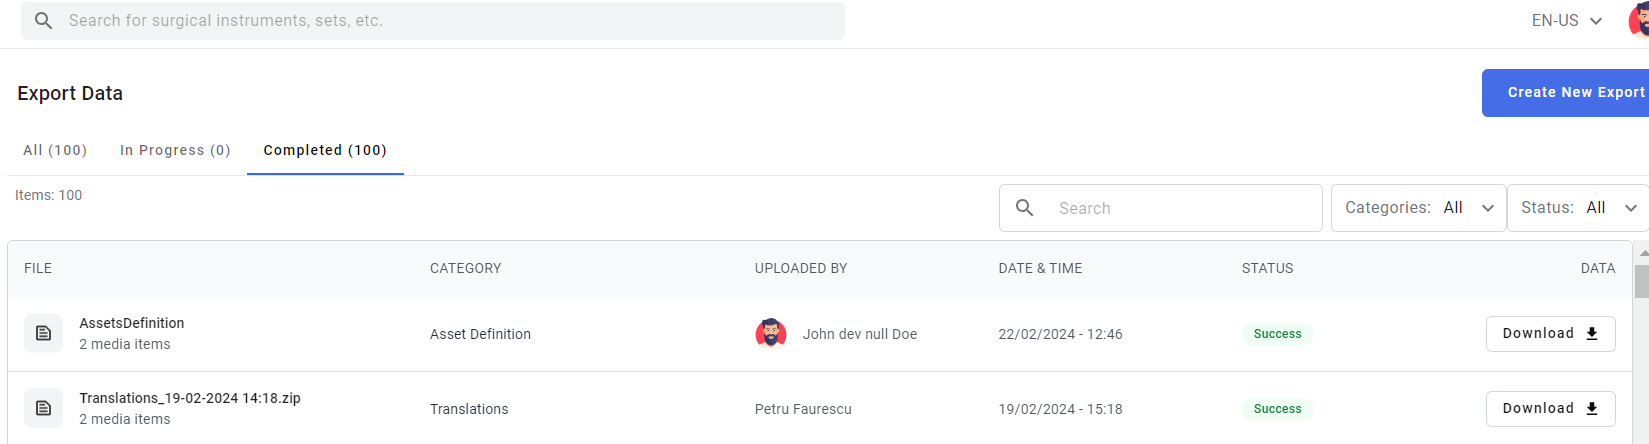
If the export was successful, the file will be downloaded properly, if the export fails, an error will be displayed as a toast notification and an error report can be downloaded to see the error.
Location Management
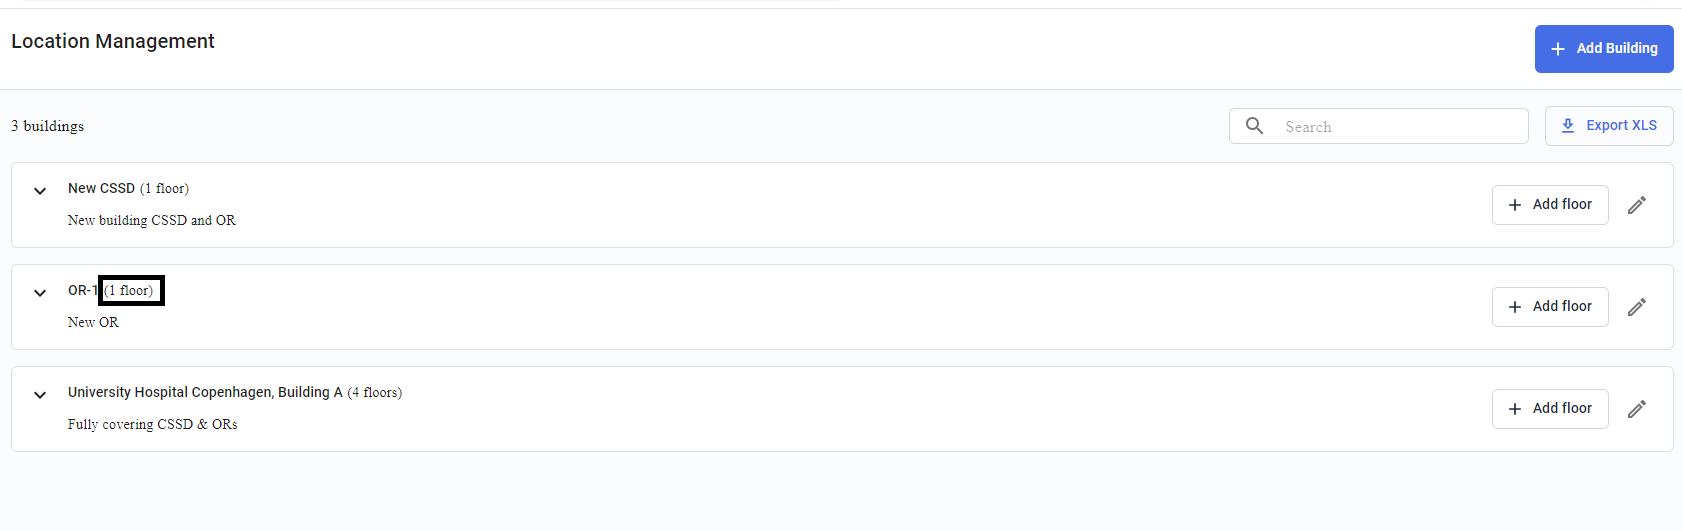
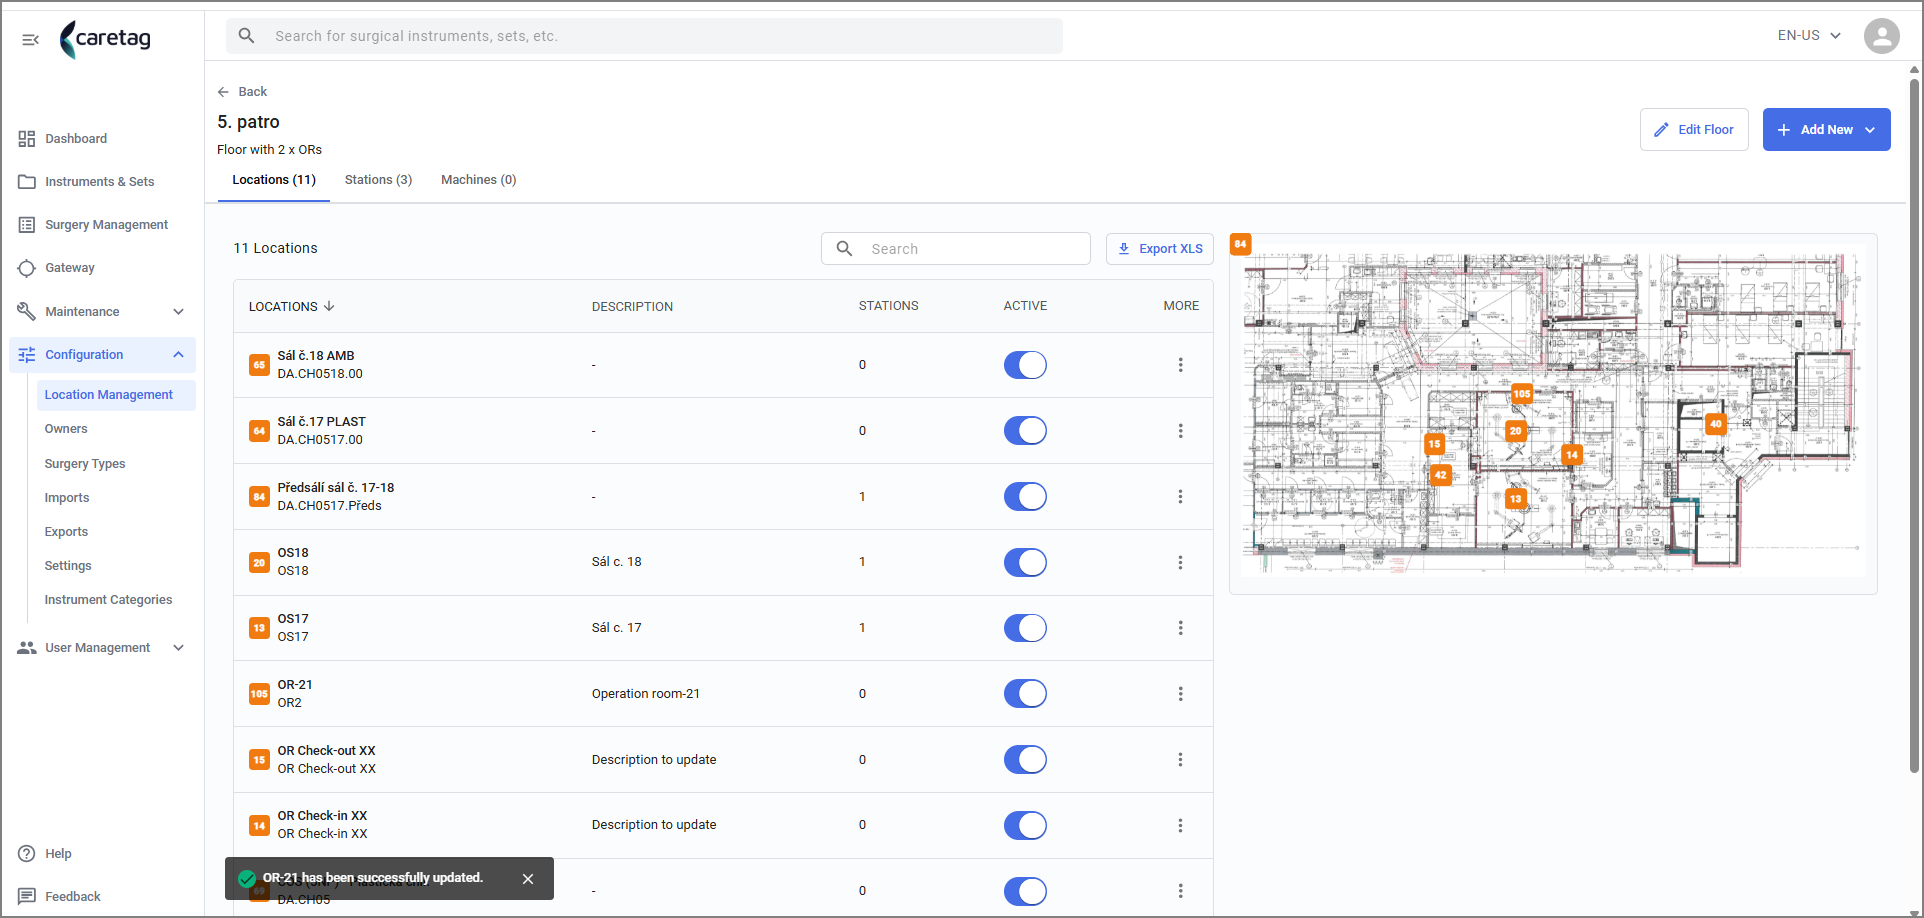
Location Management is found in the Configuration section. This page provides an overview of the building where all processes occur, including floor plans, stations, and machines.
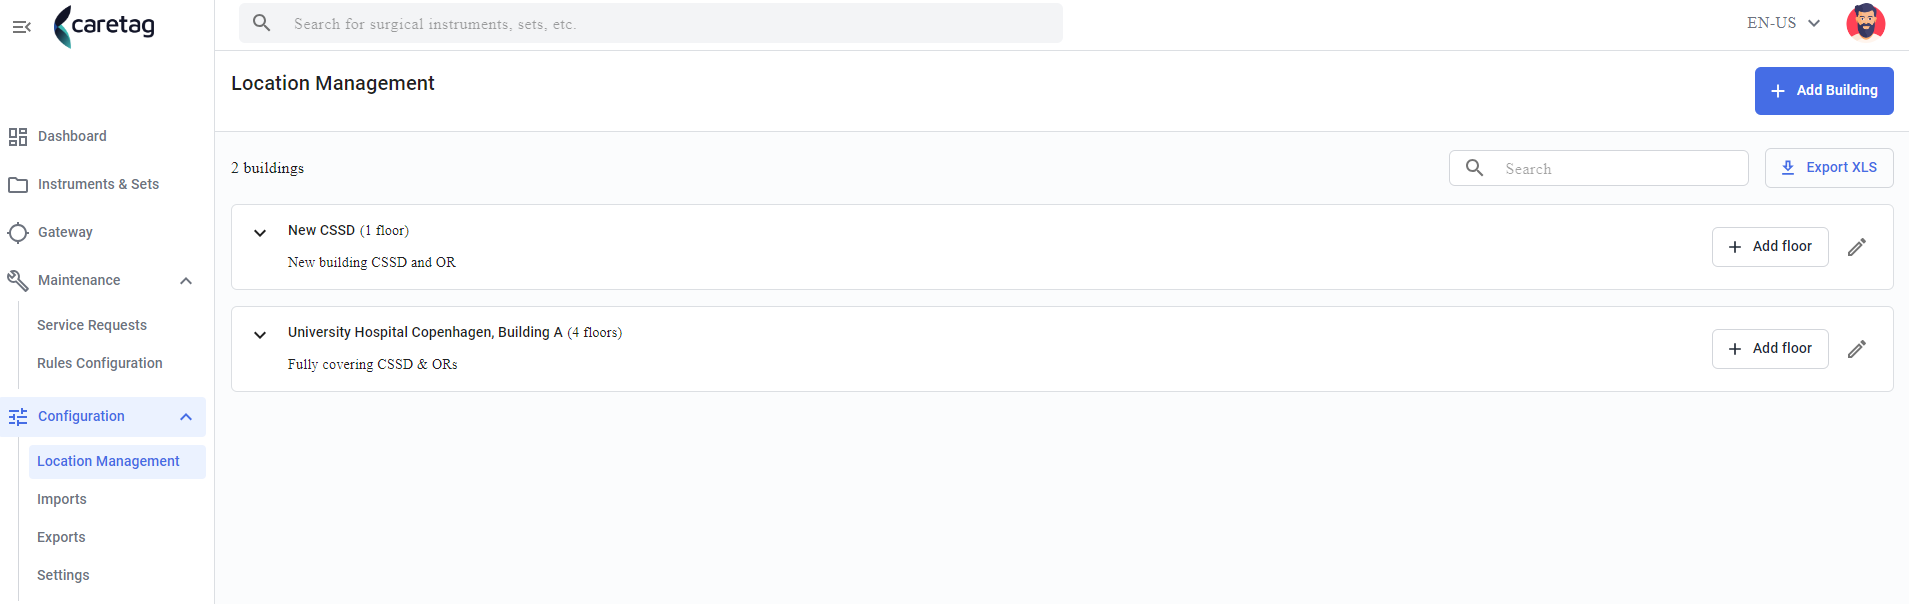
On the main Location Management page, users can view the building name and the number of floors it contains. To see detailed information, users must expand each building to display its floors, then click on a floor to view the number of locations, stations, and machines associated with it.
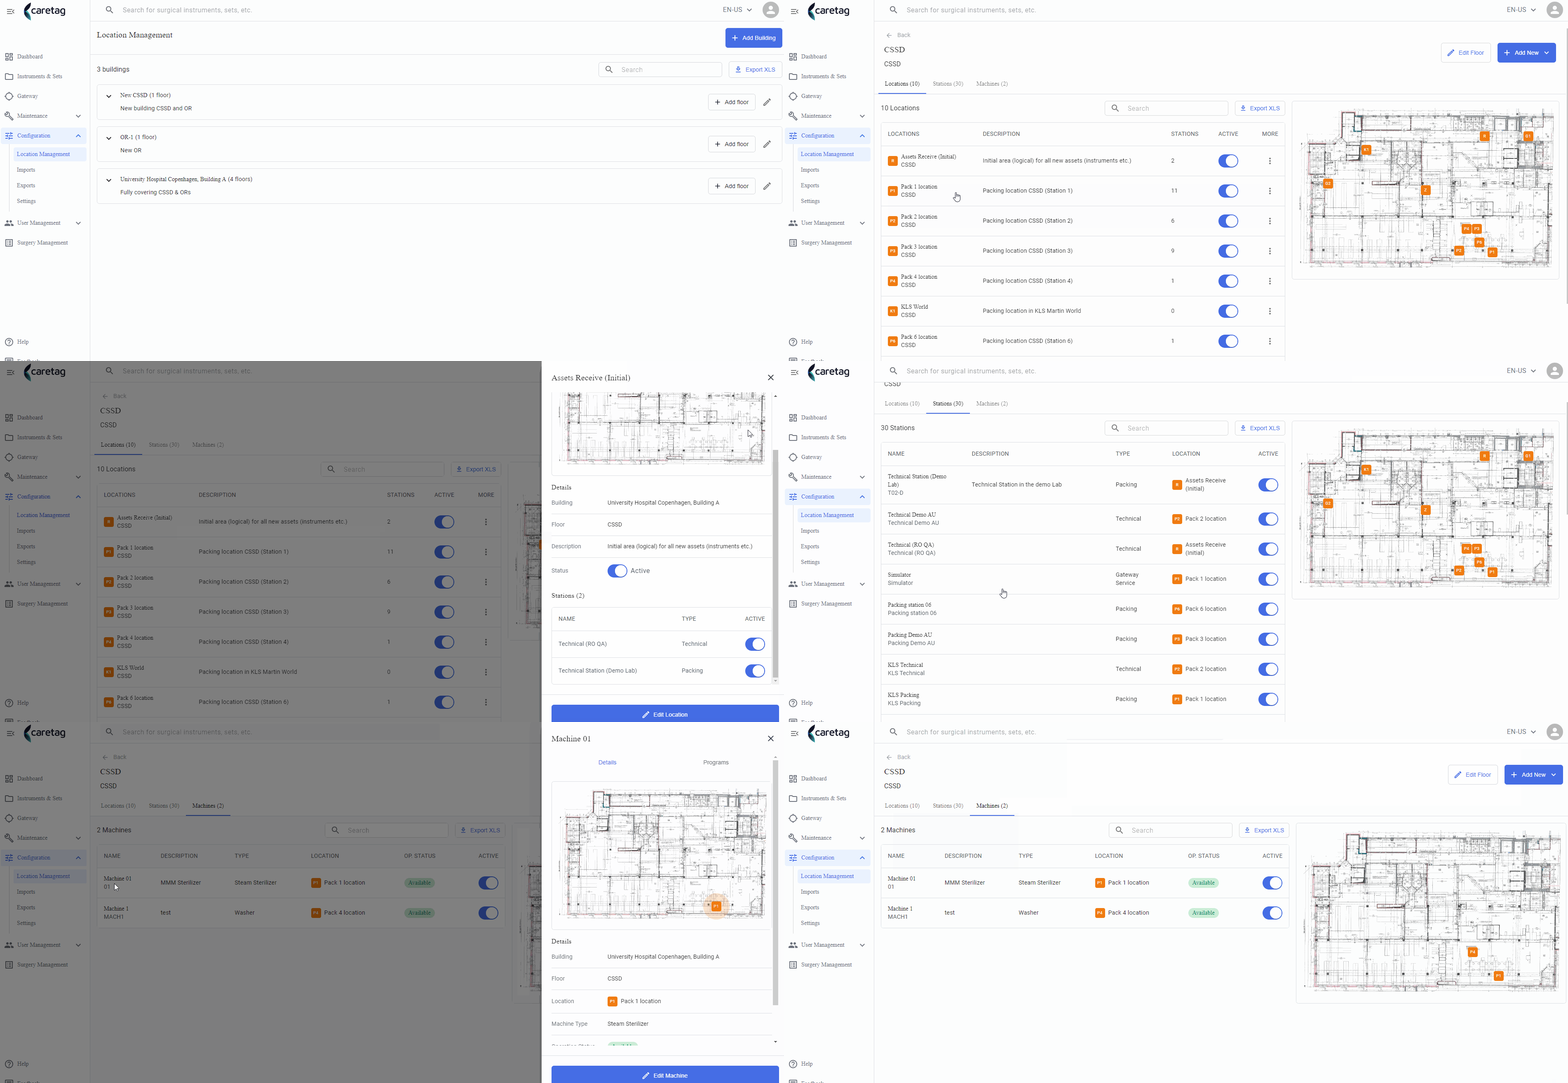
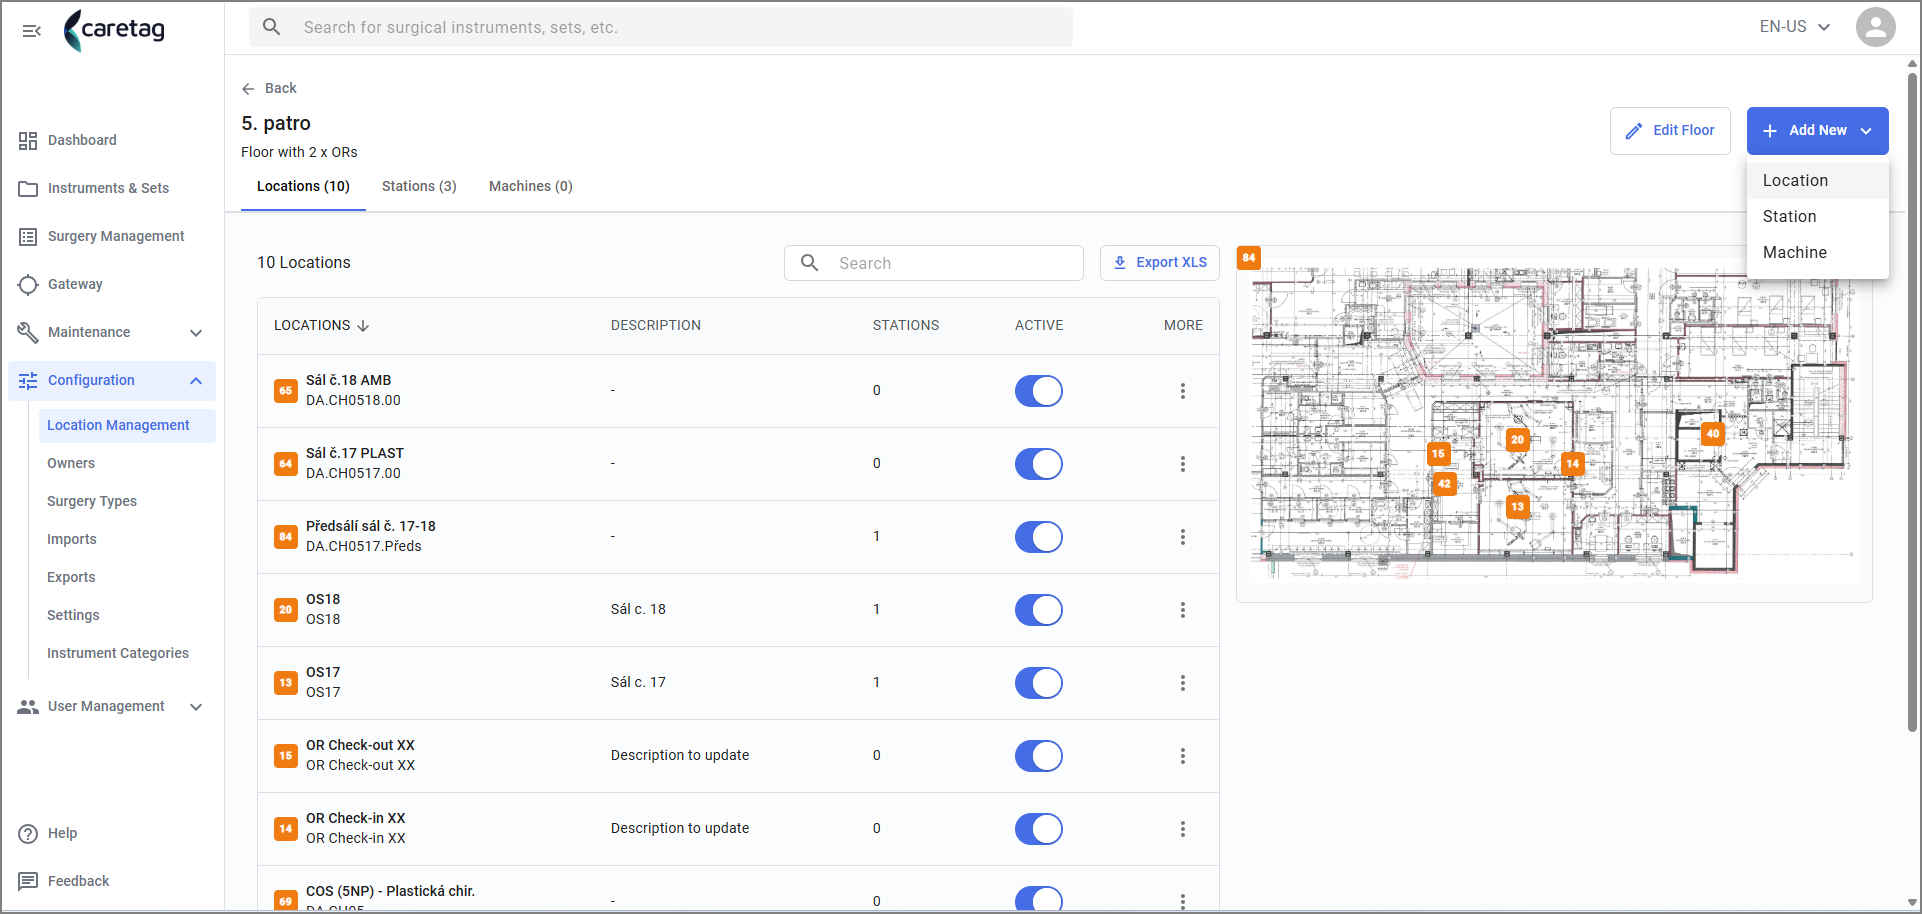
In the GIF, it displays the name, description, status, and an edit option for the location. The same view applies for stations and machines, showing their respective details and the ability to edit them.
Add New building
Click the Add building button and add a new building.
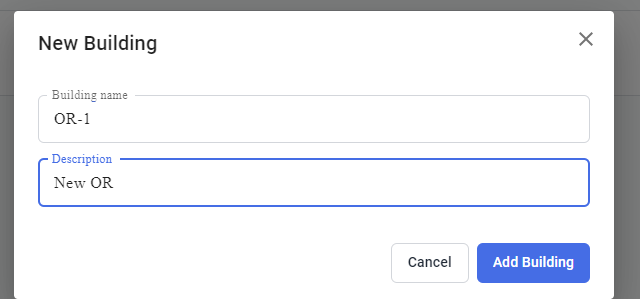
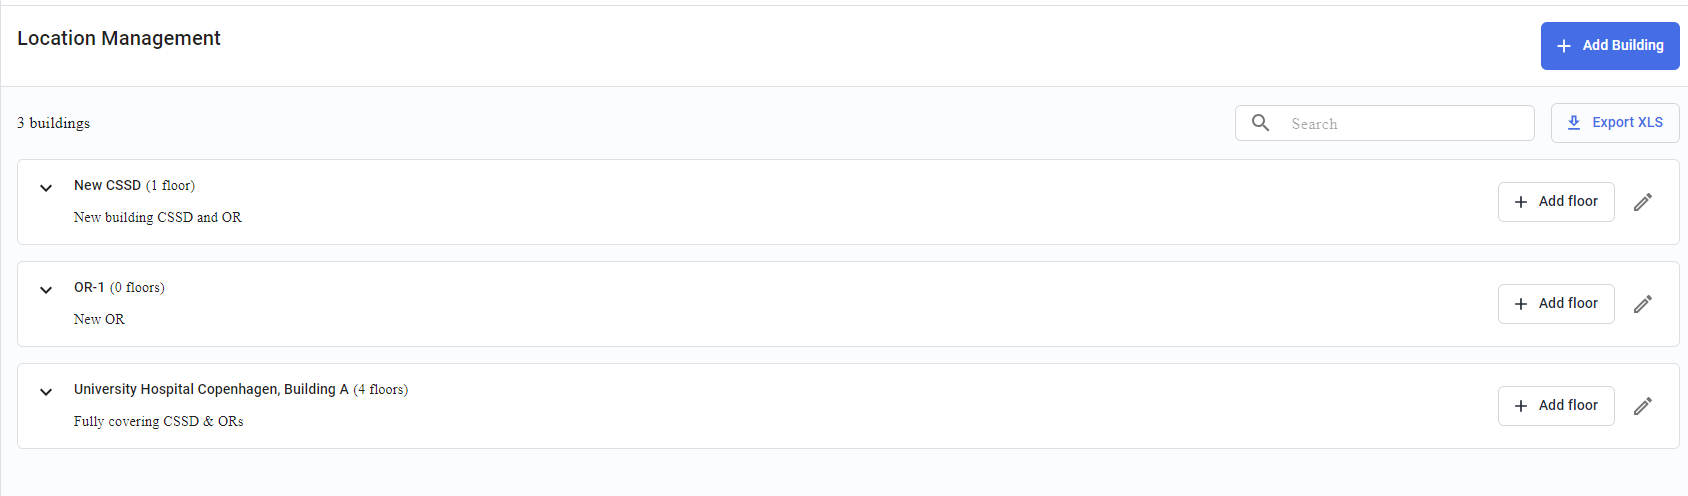
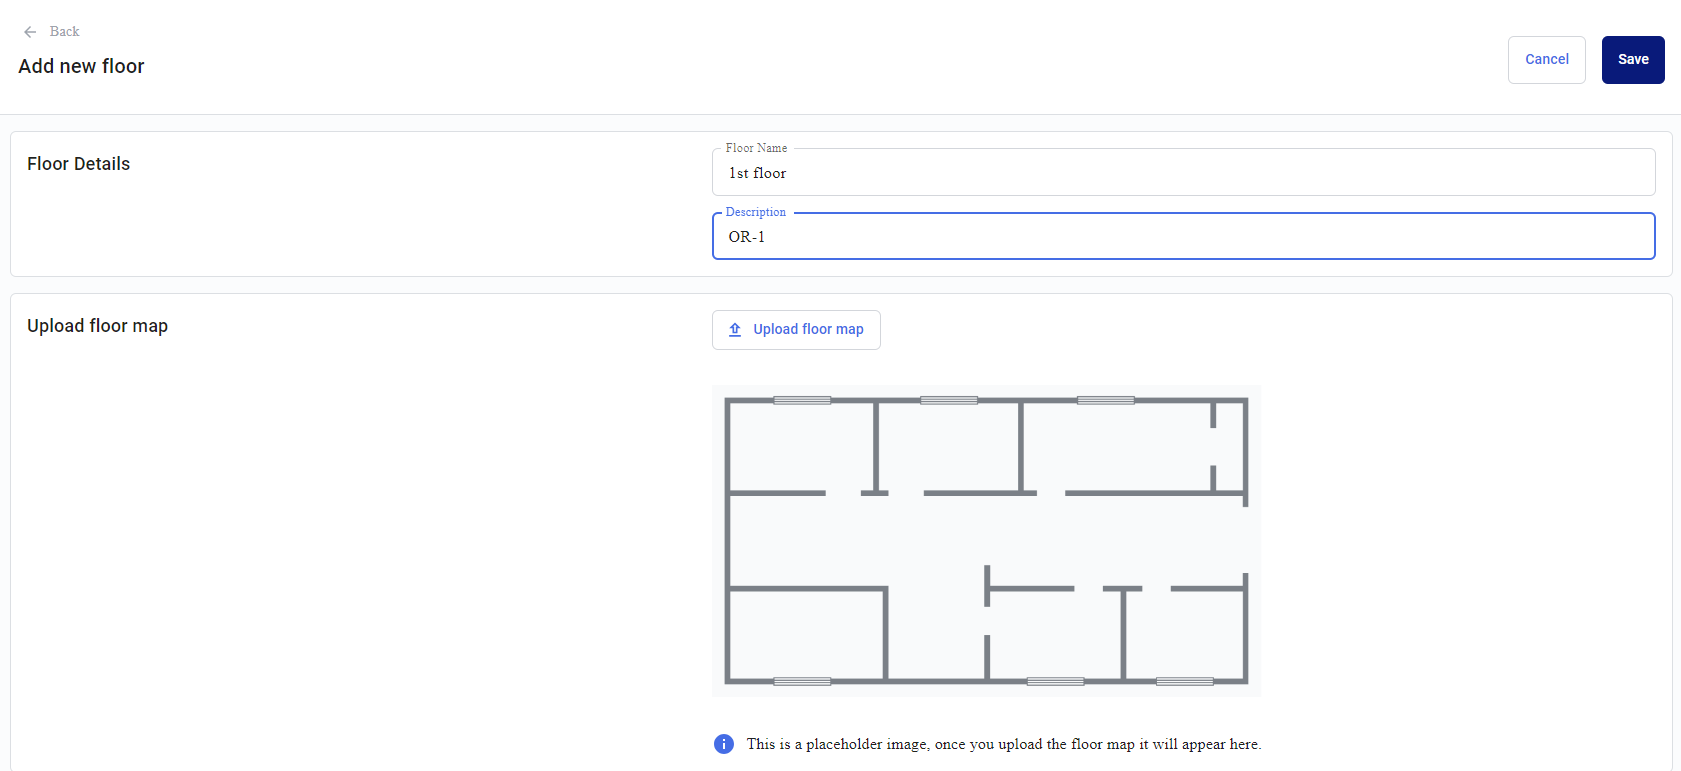
Then add one or more floors to it by clicking on the Add Floor button. A map of the floor is needed, but it can also, be saved without it and added later.
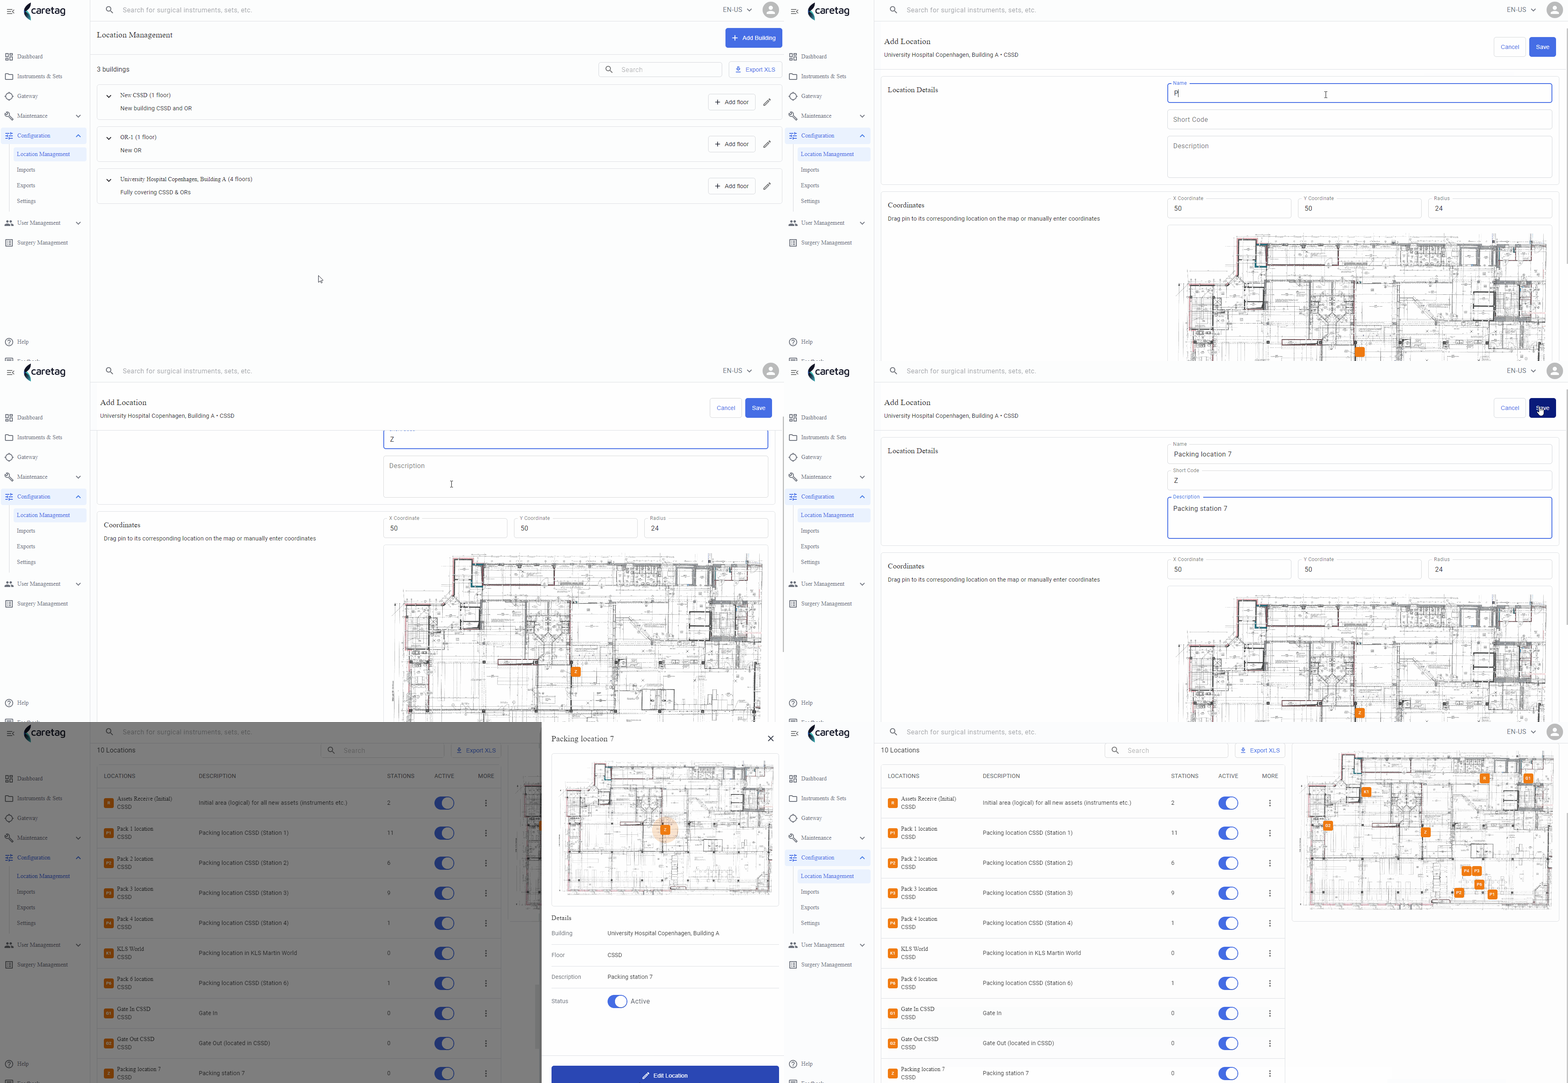
Add Location
The user can add new locations and assign stations and machines to specific floors within a building.
- Click on the Add new button and selection Location
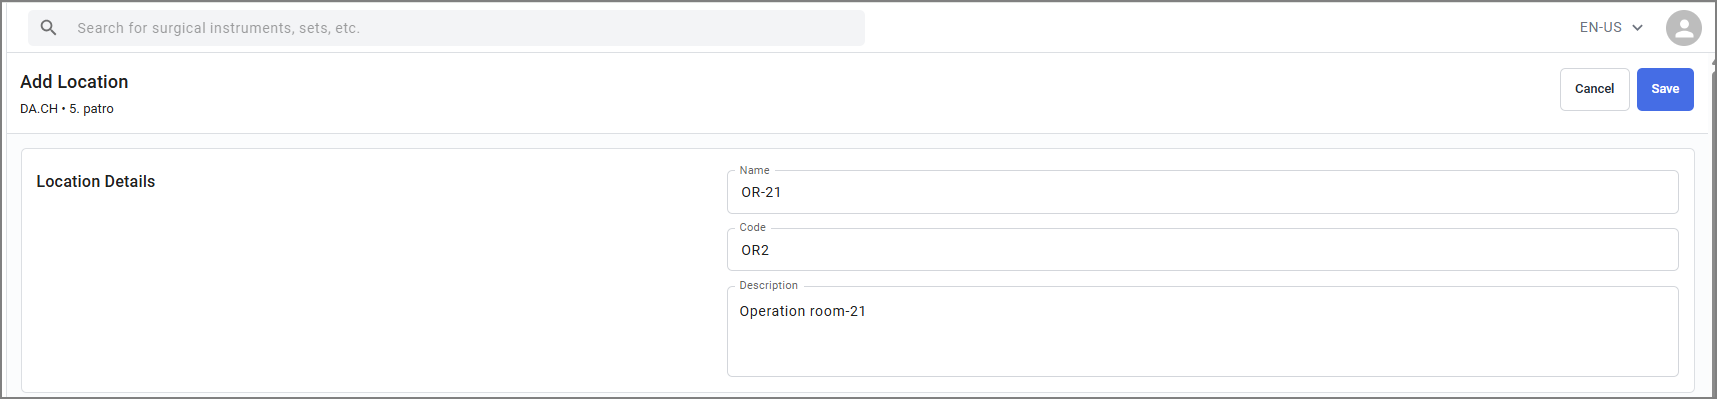
- Enter the location name and a short code, such as OR-2 which will be displayed on the map coordinates.
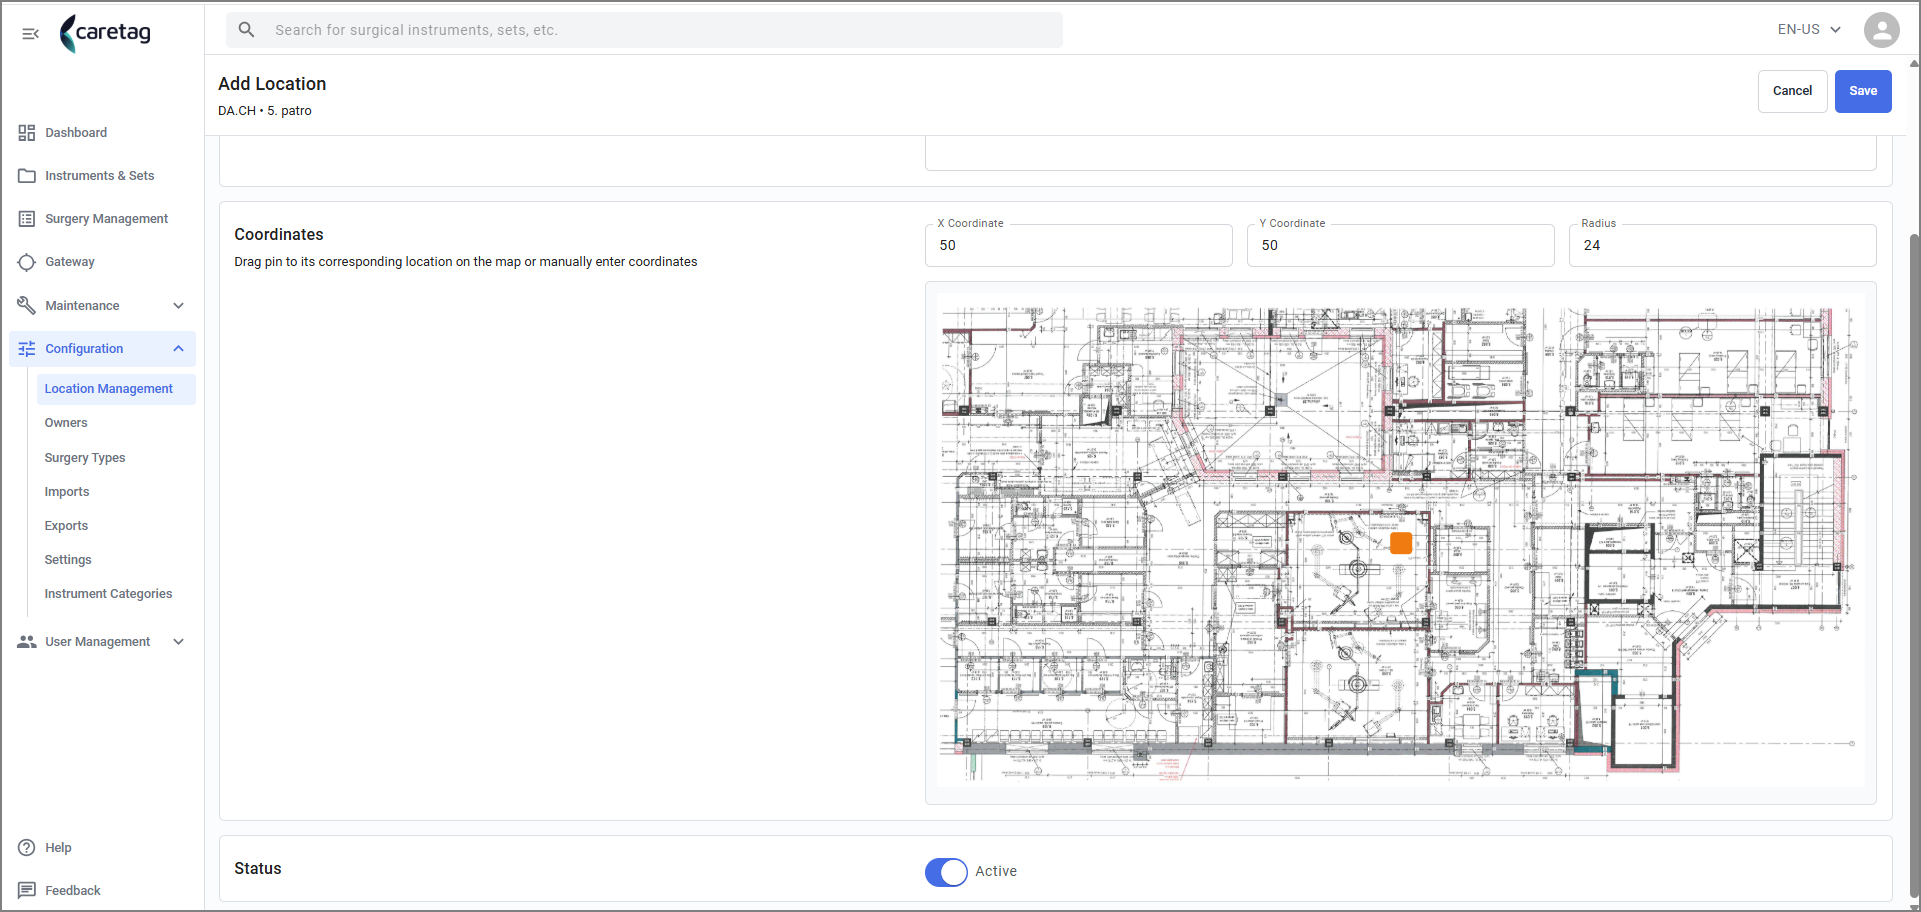
- Coordinate details are automatically mapped, the suer can also move the coordinates according to the location.
- Once saved, a message appears as “Location created” and it can be seen in the list of locations.
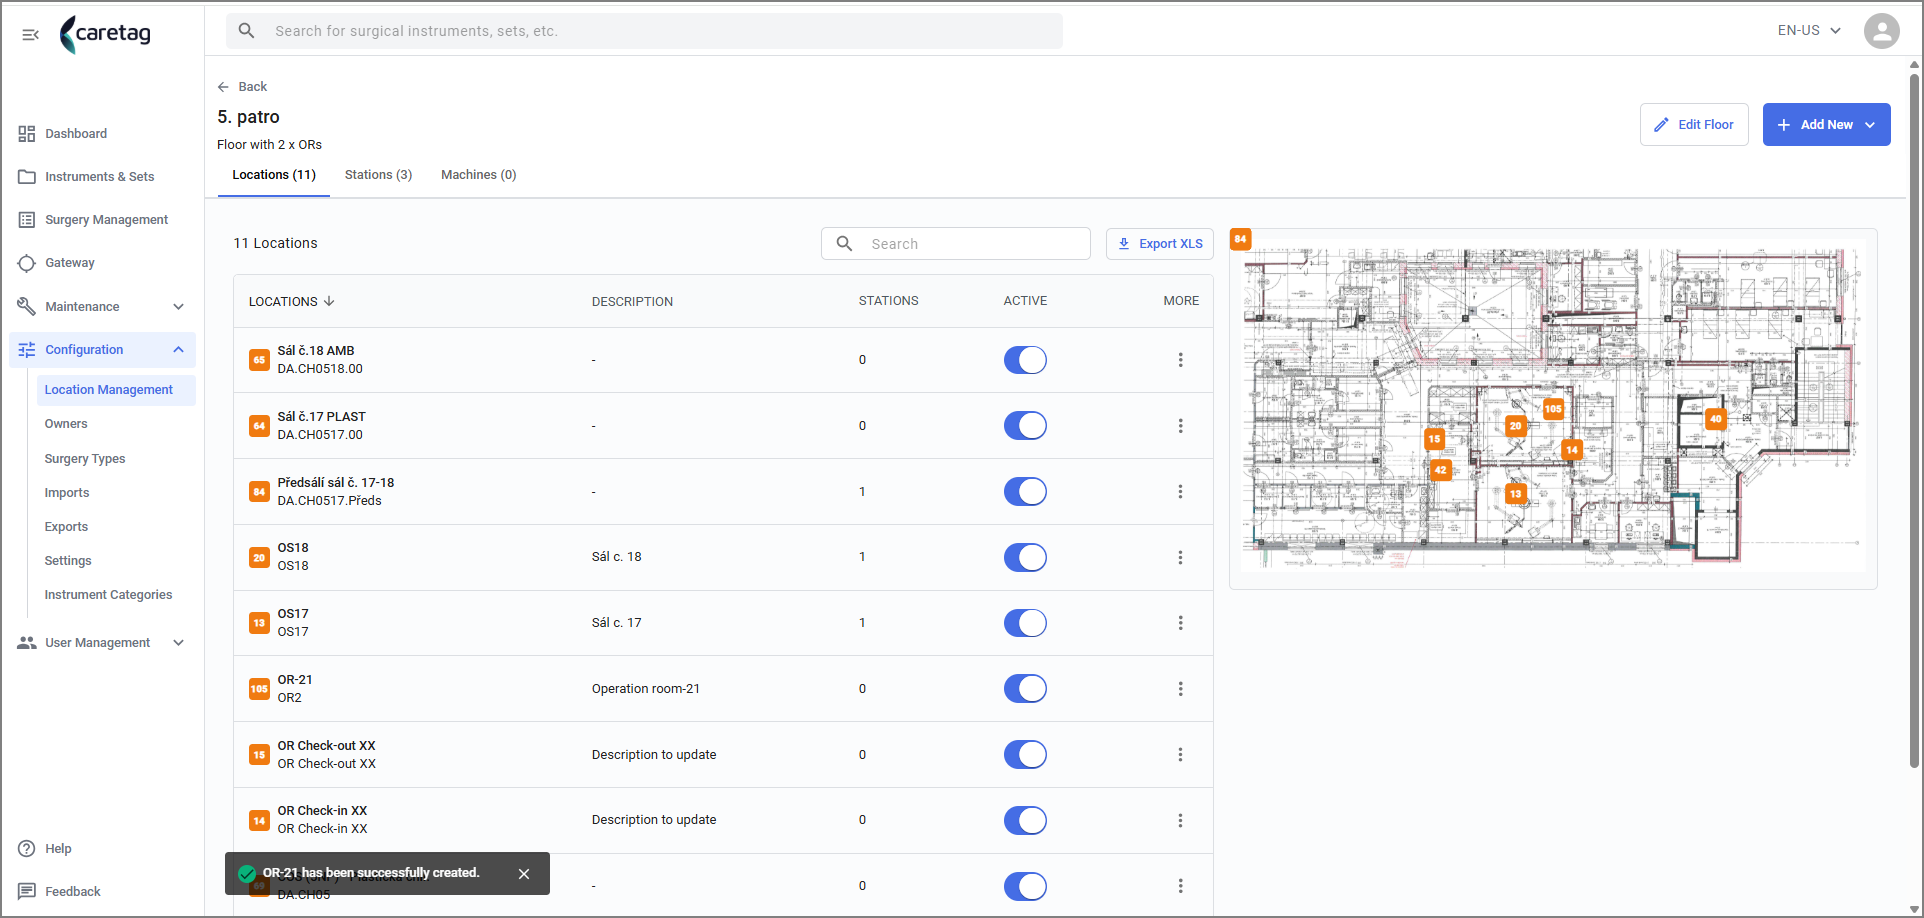
Edit Location
- To Edit the location, click on a location and press the edit button
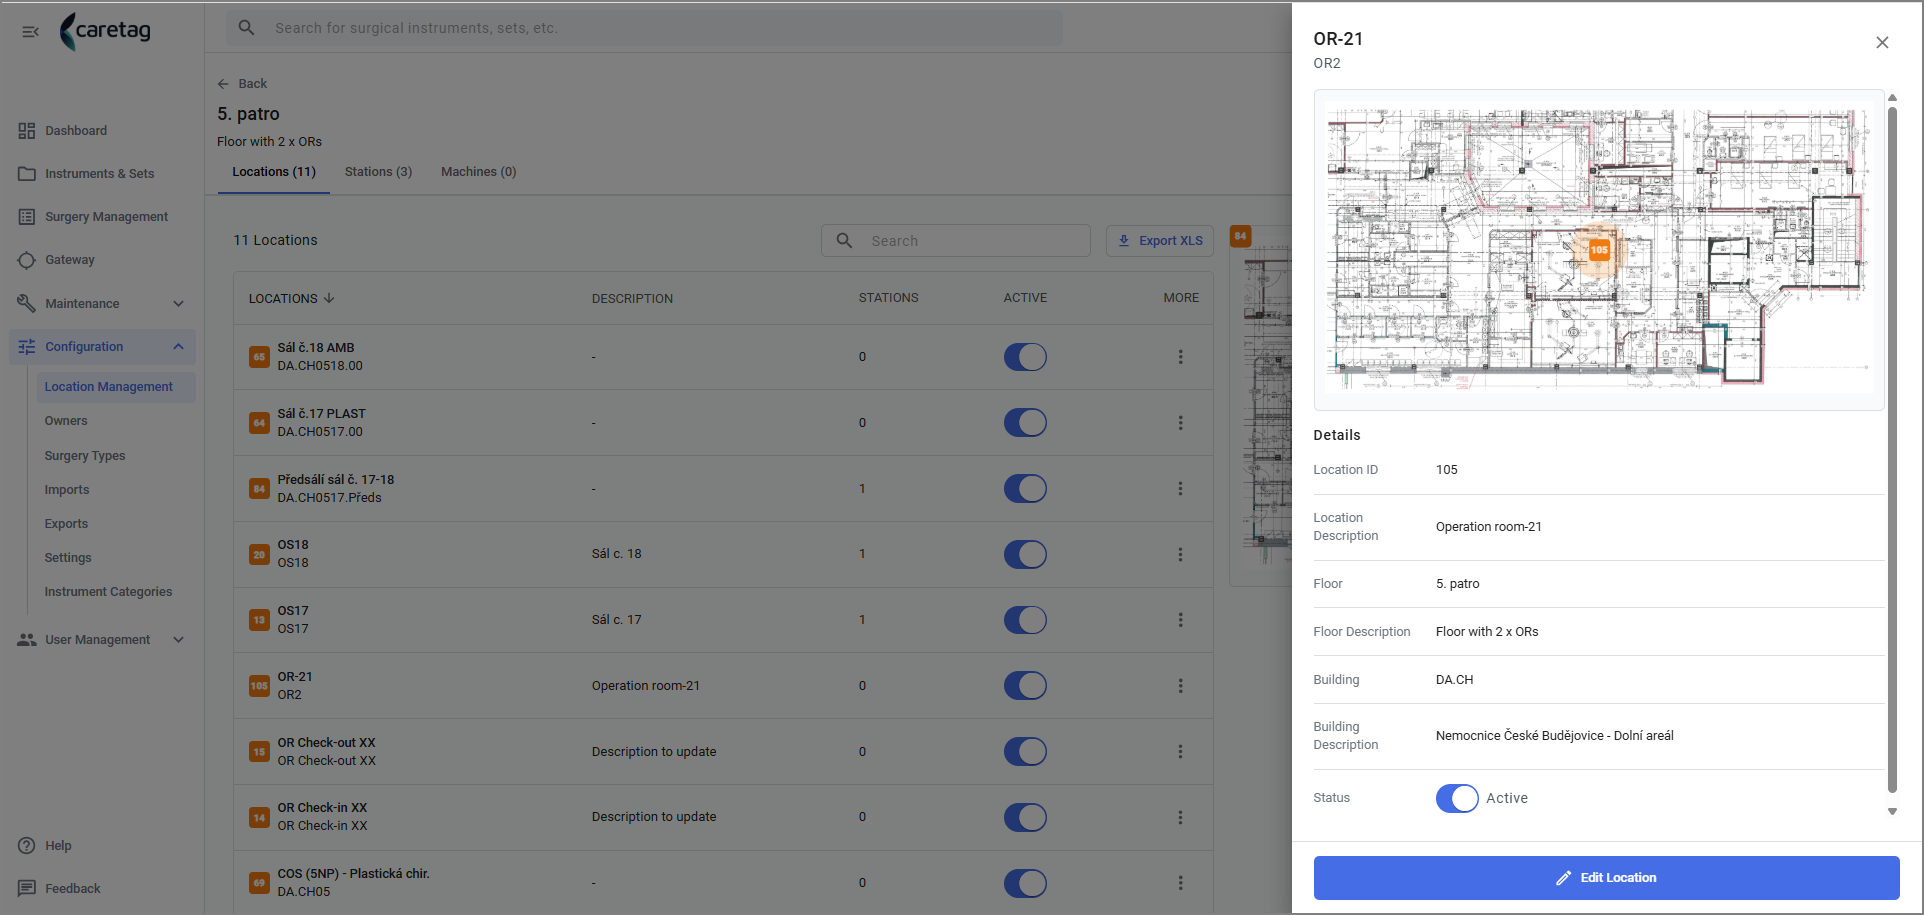
- It displays the fields you have entered while adding a new location.
- Location ID is automatically generated and it is also located in the Map
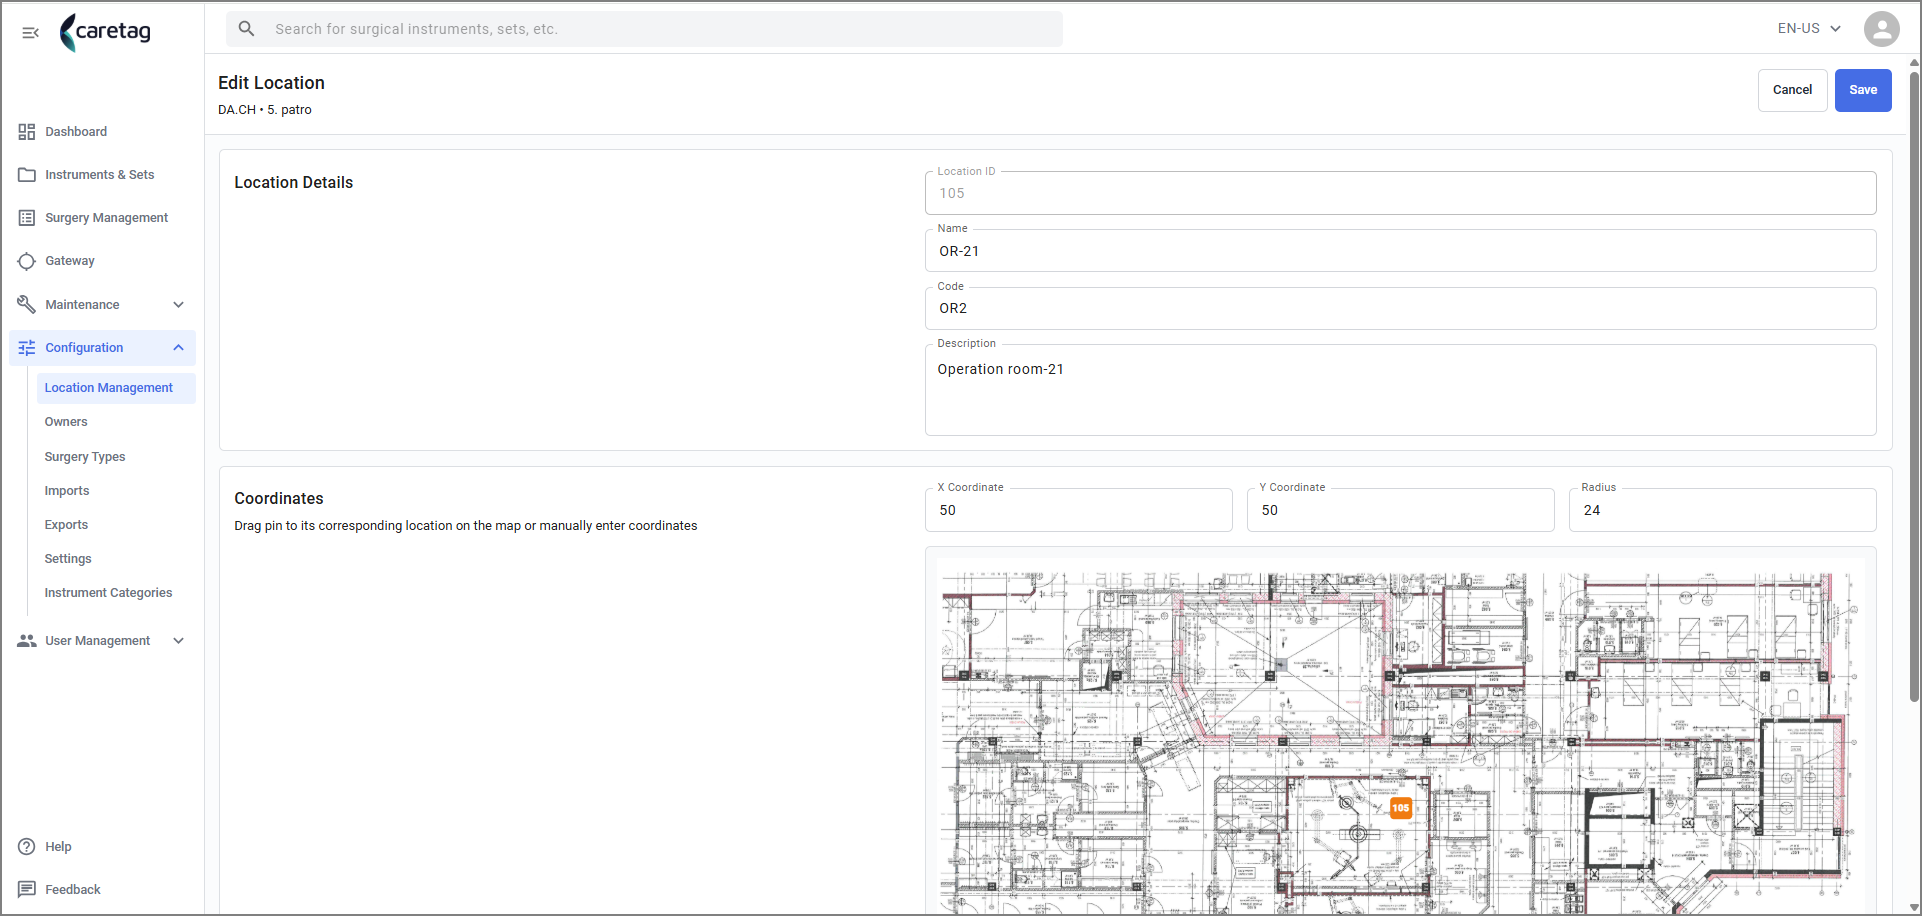
- Move the coordinates and save it
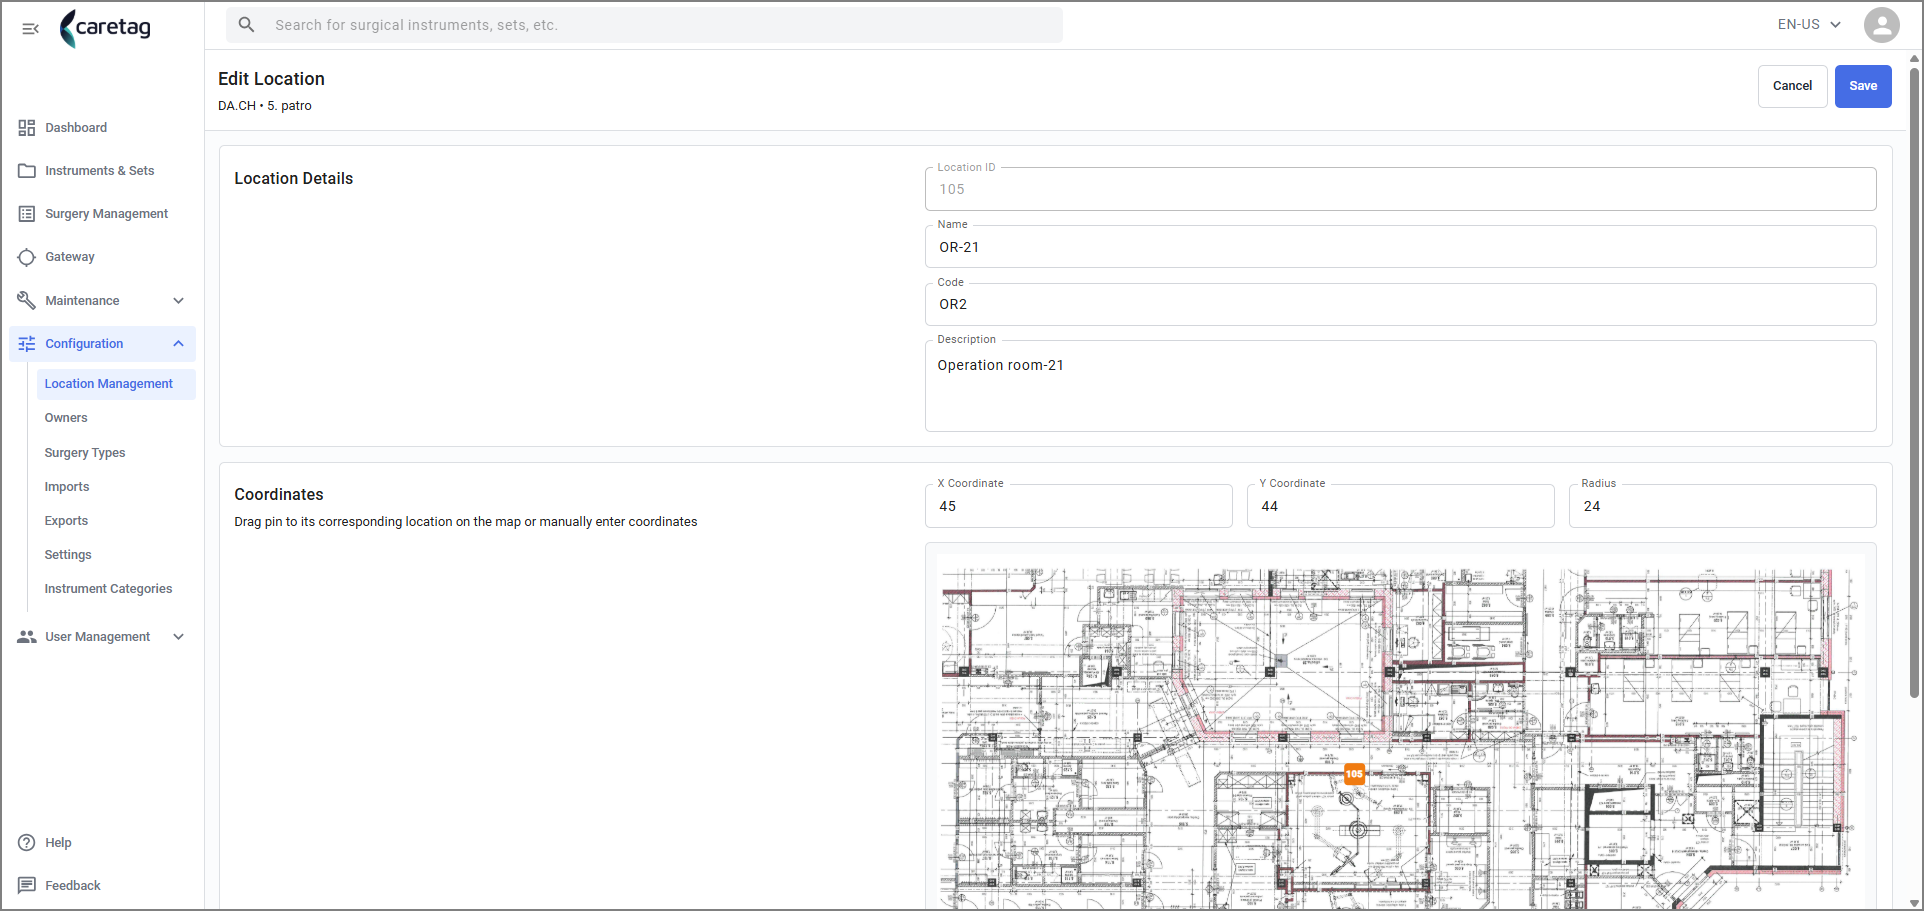
- Location is updated.
- In the below gif file, we have displayed a short video of adding a new location.
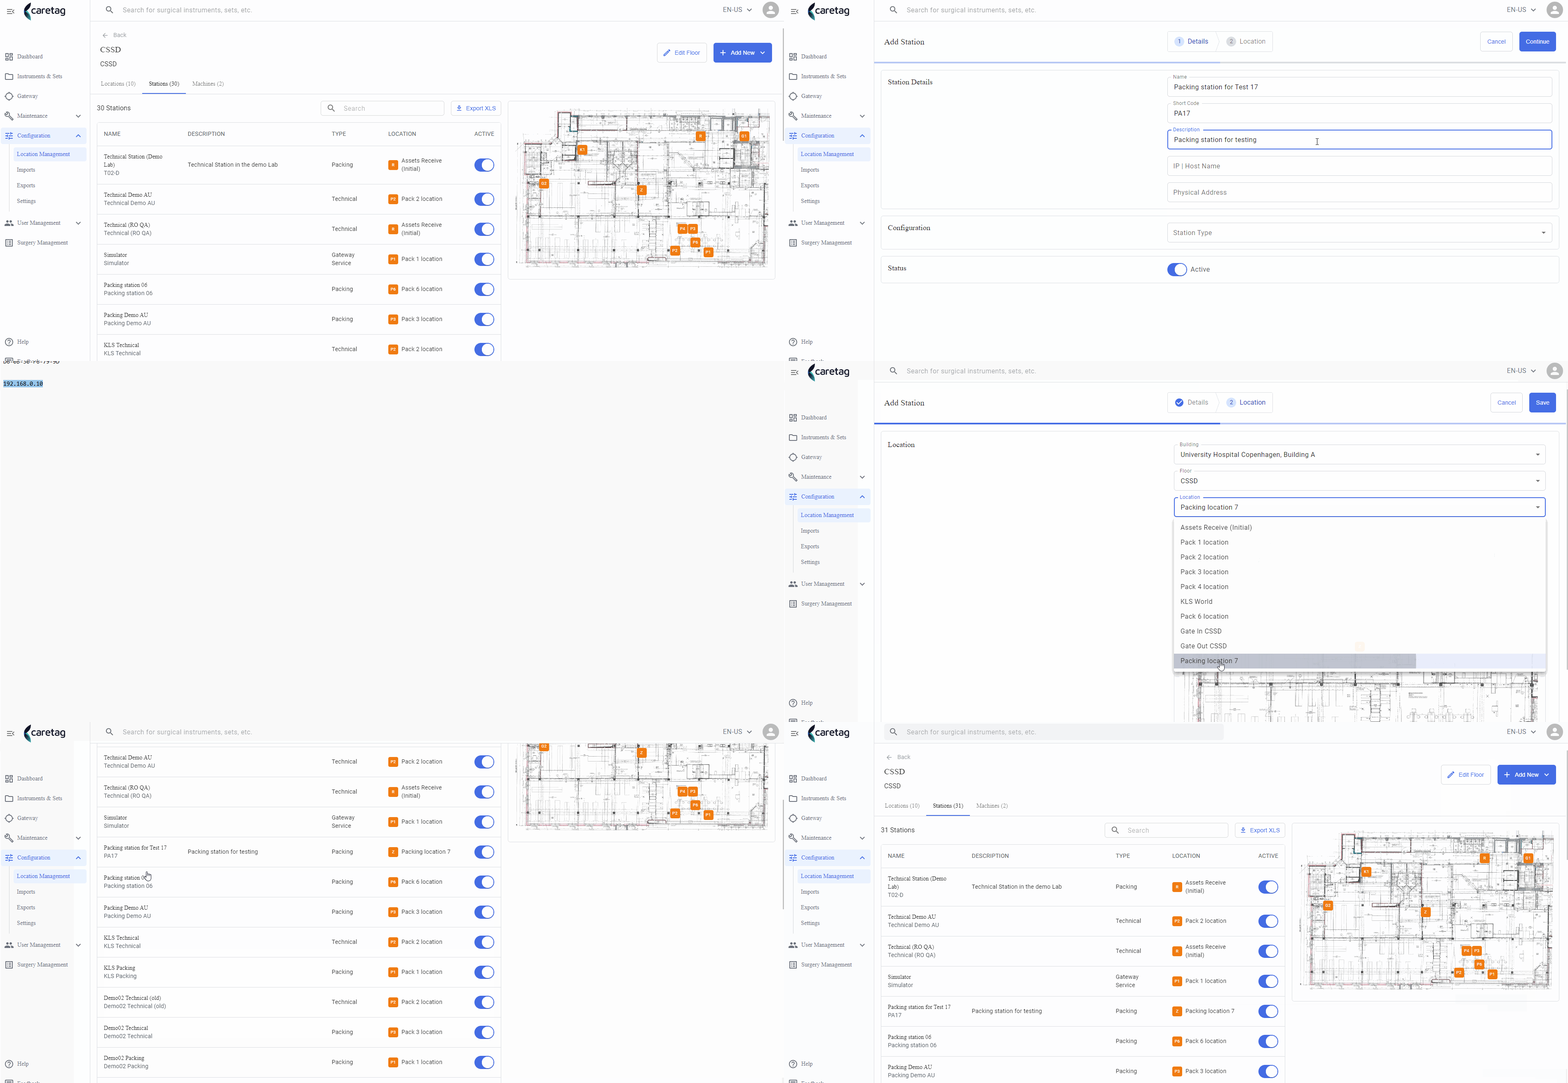
Add Station
-
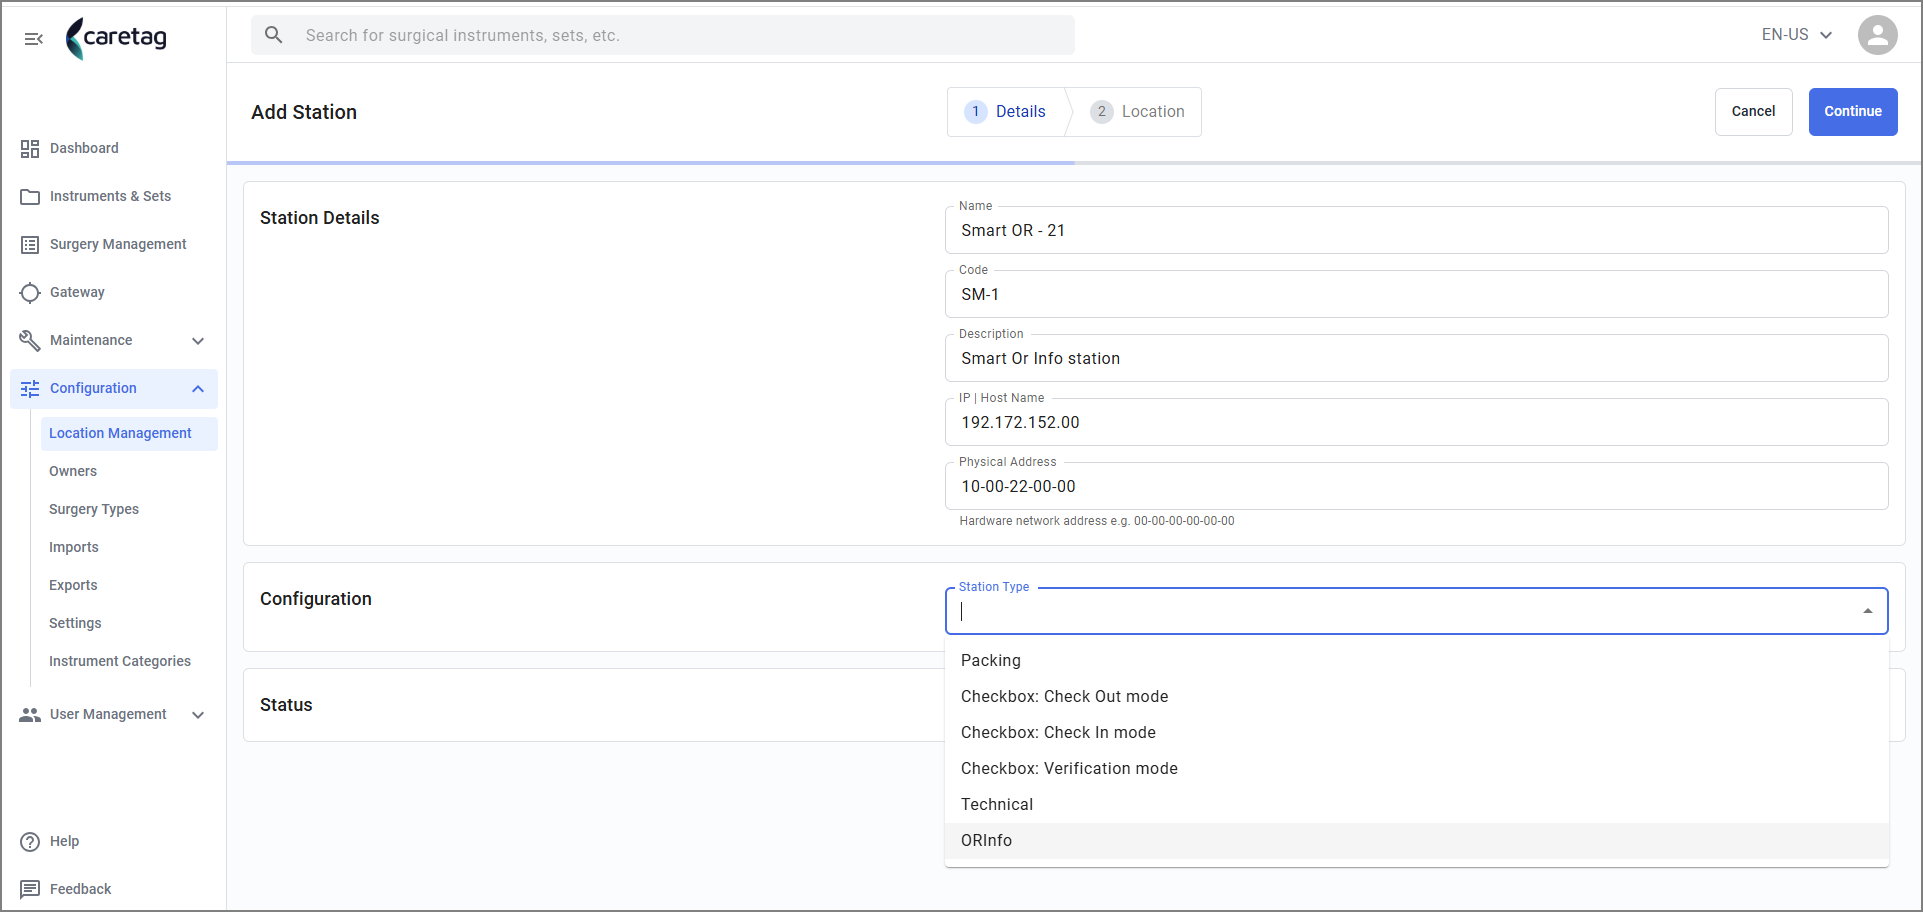
To add a new station, the user needs to enter the station’s name, a short code, a description, its IP address, and physical address. Additionally, the user must select the station type and its location.
-
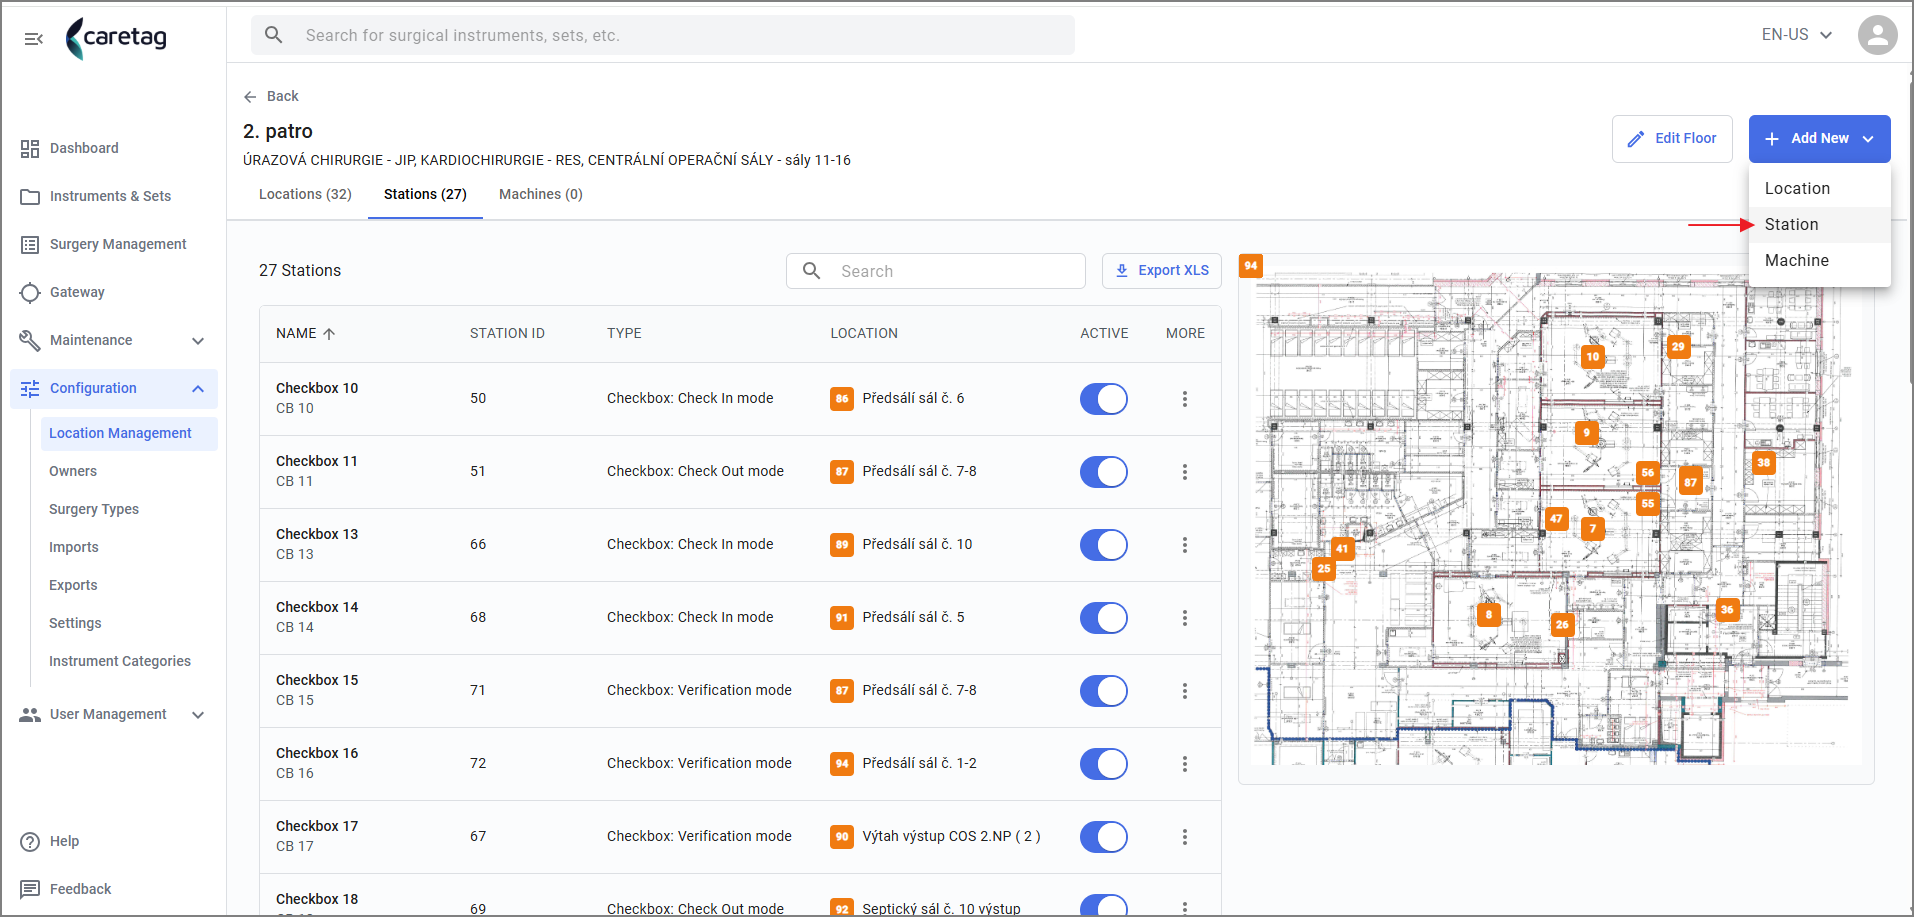
Click on Add new button and select station
- Fill the details, in the below table we have provided the description for each field.
| Detail | Description |
|---|---|
| Name | Enter the name of the station |
| Code | A short code |
| Description | Description of the station |
| IP | IP address or Host name |
| Physical Address | Physical address of the Machine |
| Configuration | Select the type of the station. Here we are adding new Smart OR station, so we click on OR Info station |
| Status | Enable the station to be active |
- Enter the Location details, in the below table we have provided the description for each field.
| Detail | Description |
|---|---|
| Building | Name of the building |
| Floor | Floor |
| Locationn | Select the location from the list |
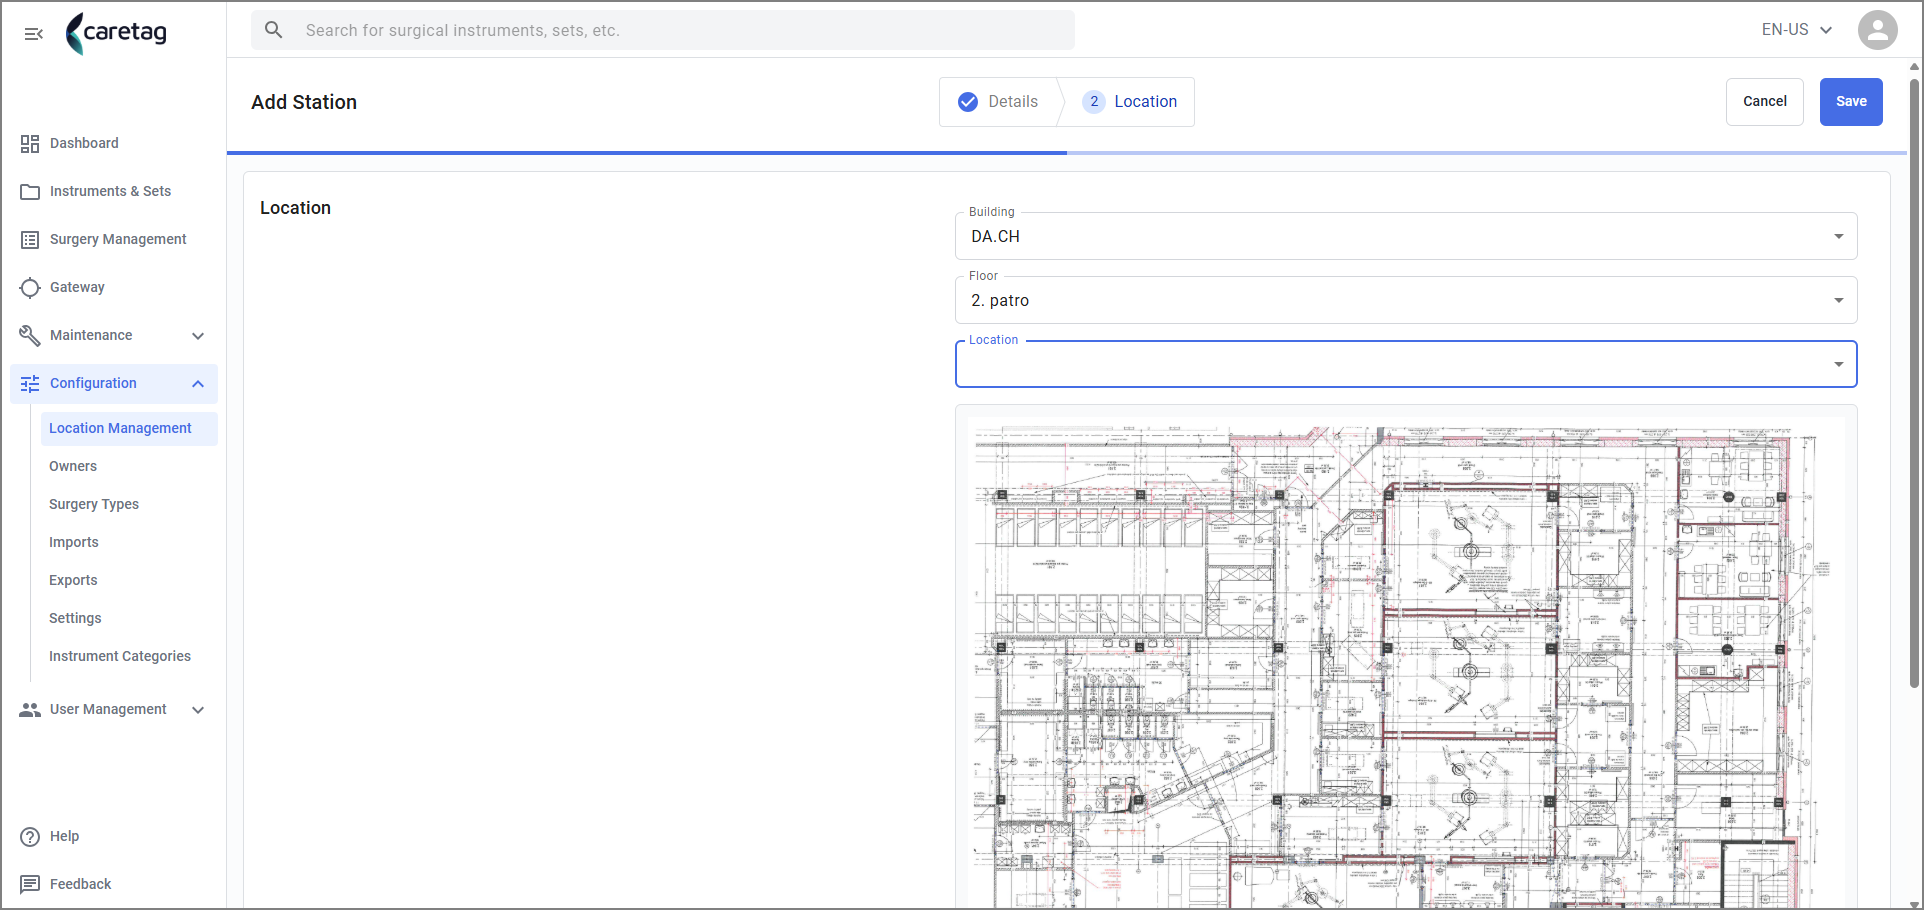
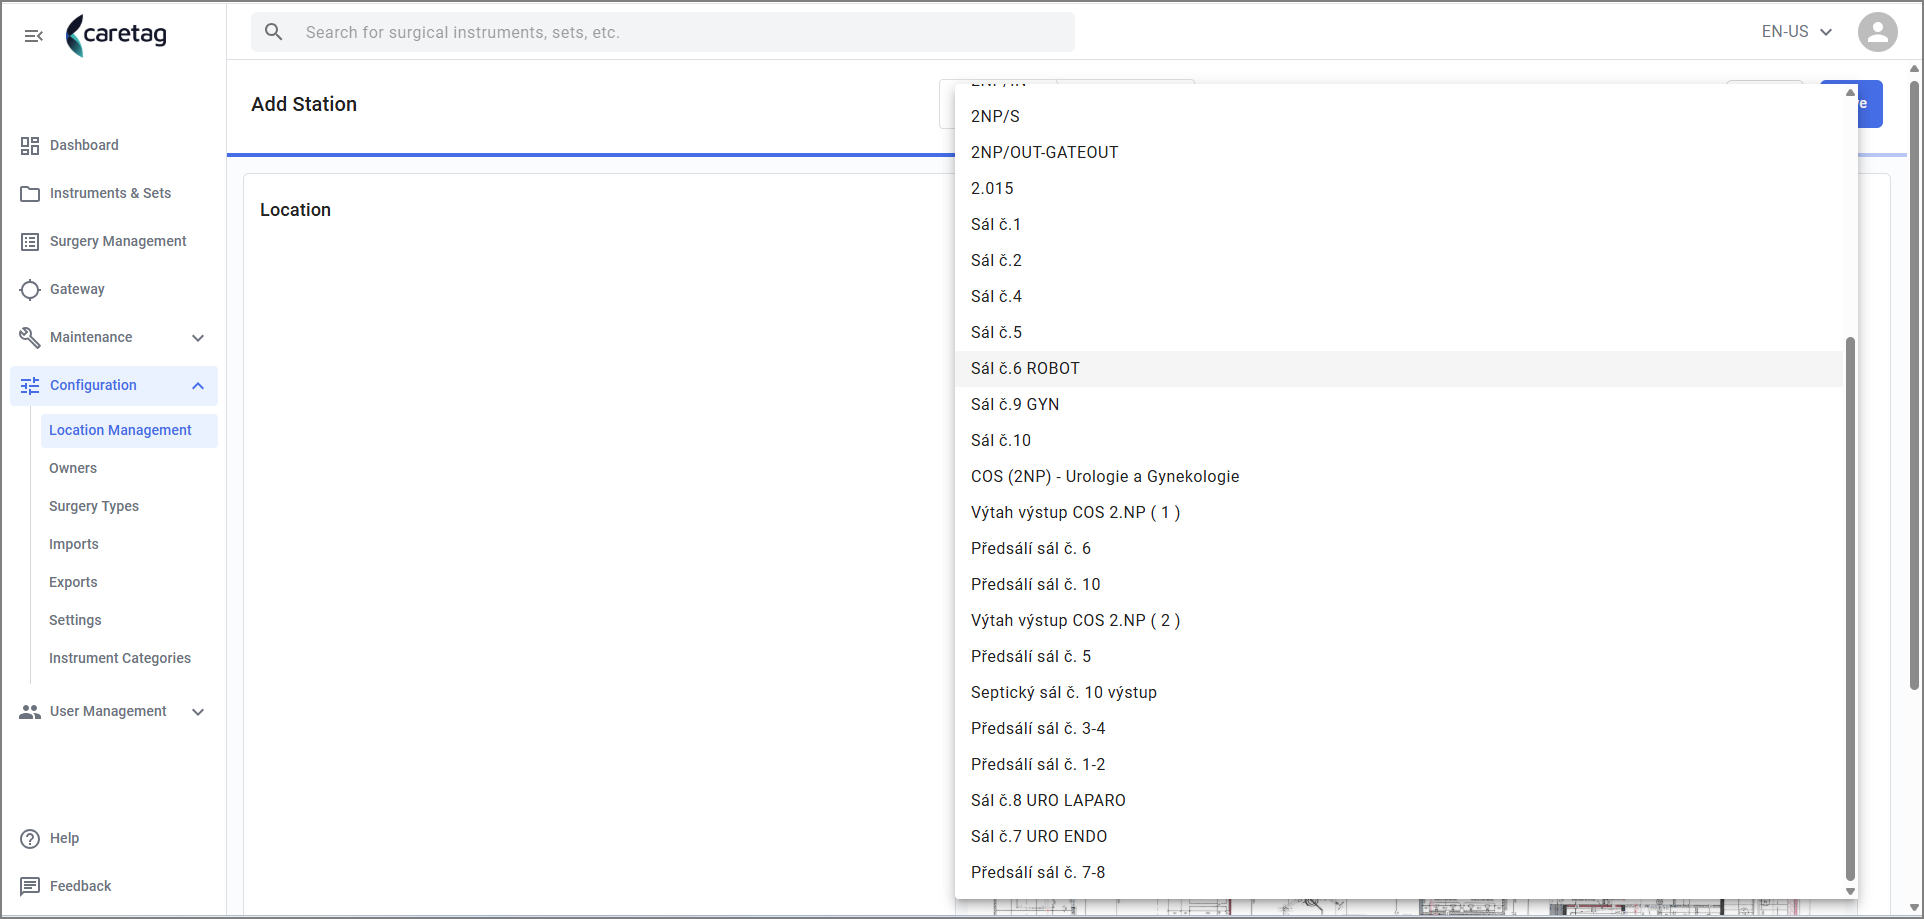
- Select the location from the list. You can add one or more locations to one station.
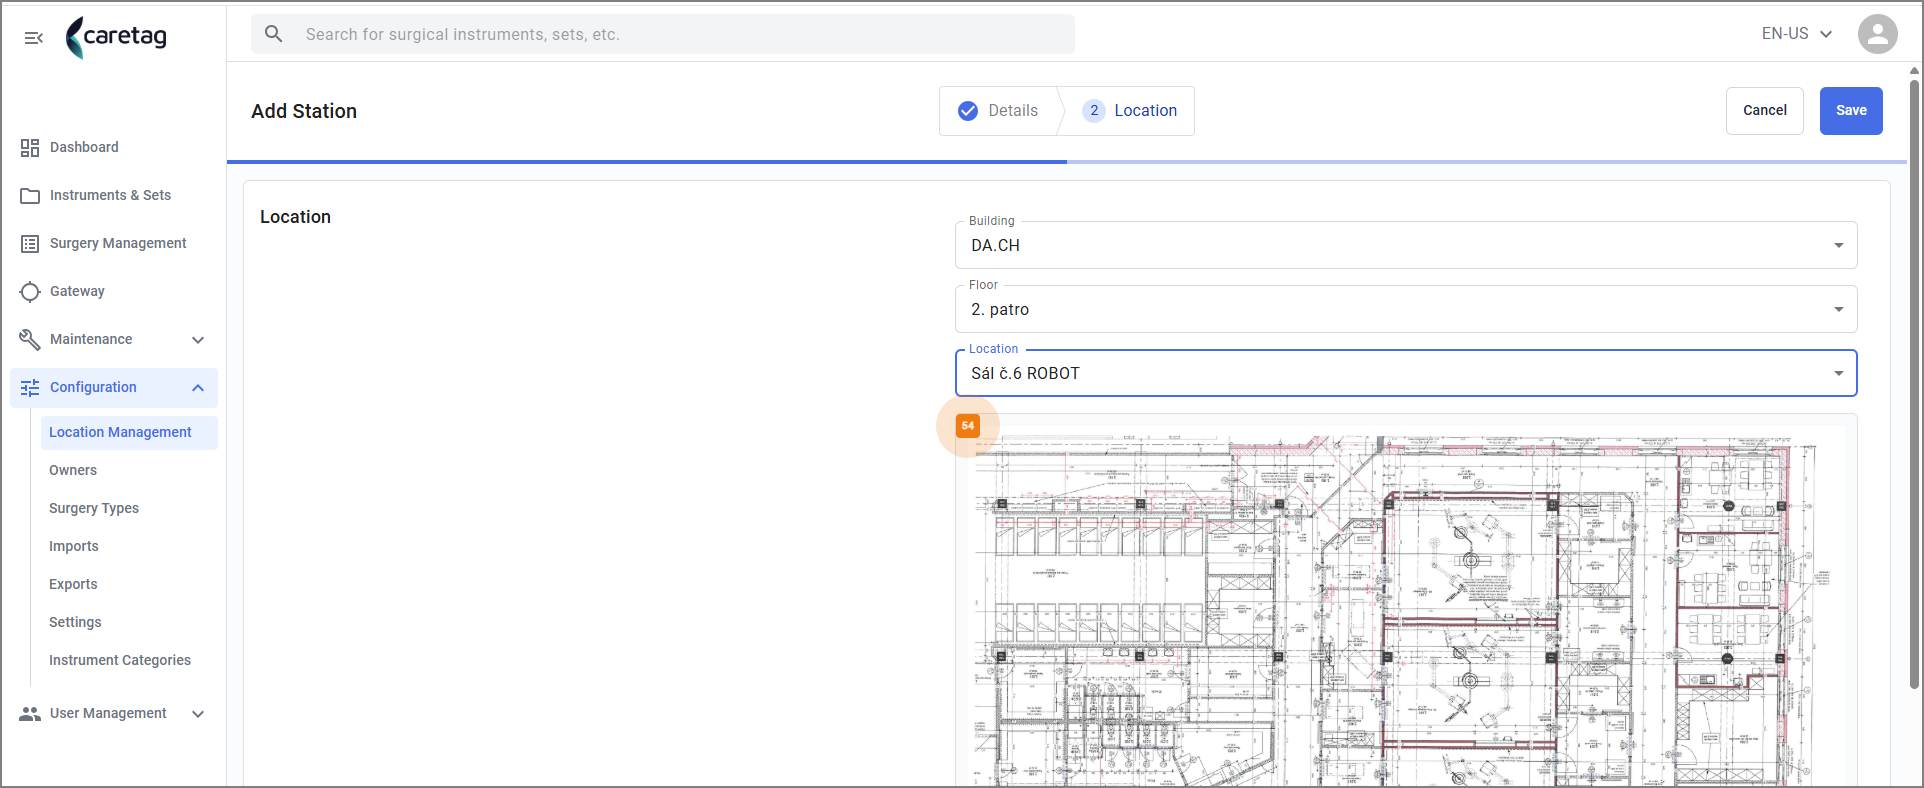
- Location is added and the map updates the location of the station.
- Click the save button
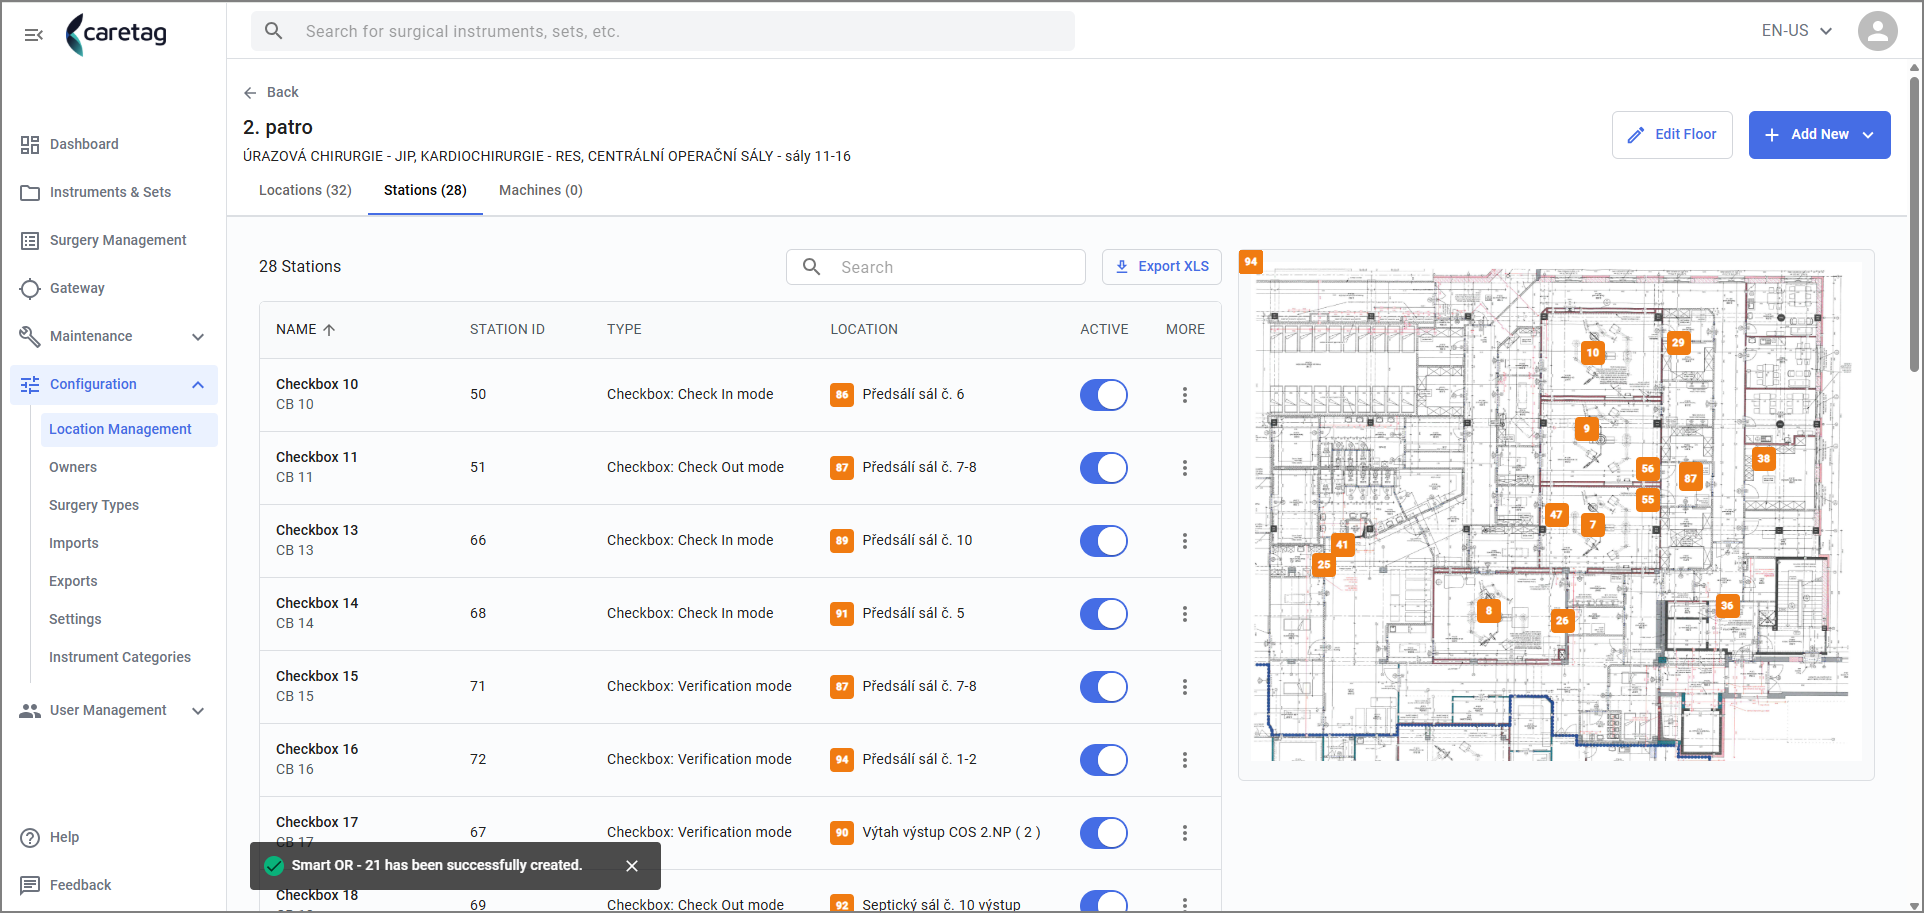
- New station added message appears in the bottom of the page.
- In the below gif file we displayed the overall steps of adding a new station
Edit Station
-
The user can edit the station and add or remove the linked locations, change the type of the station, reader type etc.
-
Click on the station, an overview of the station will open on the right side of the page.
- Click on Edit station button
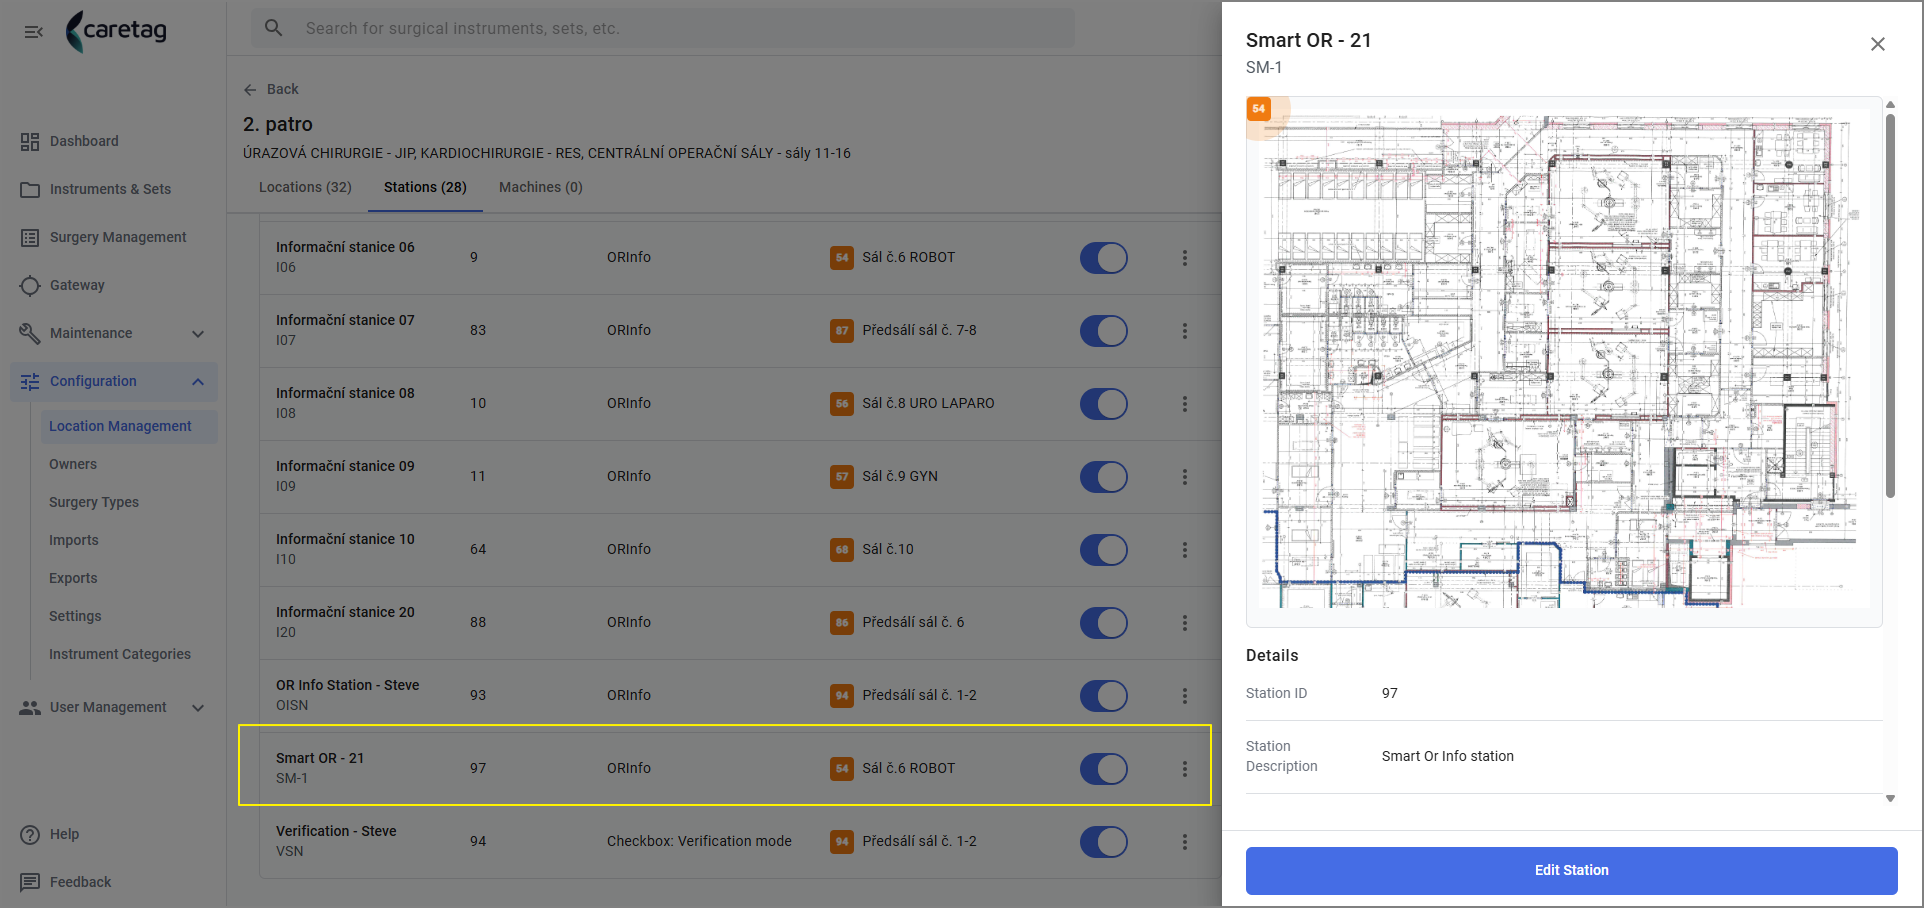
- In this page, you can see the details you have entered while adding the new station and also the Station ID which is automatically generated.
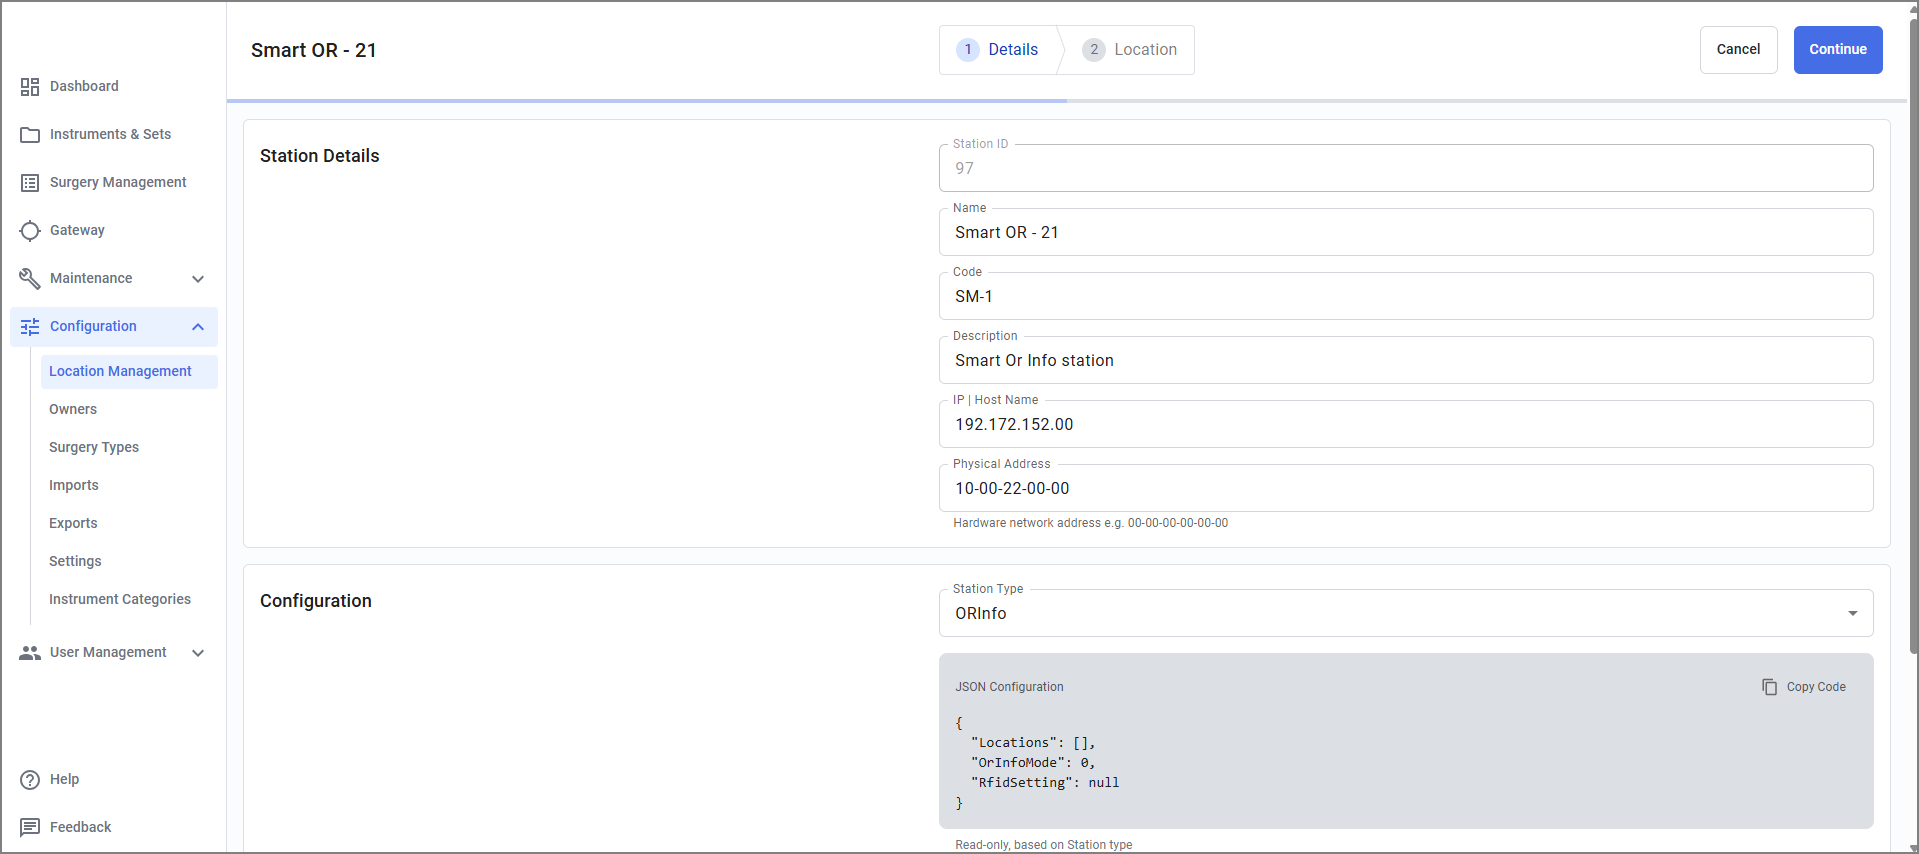
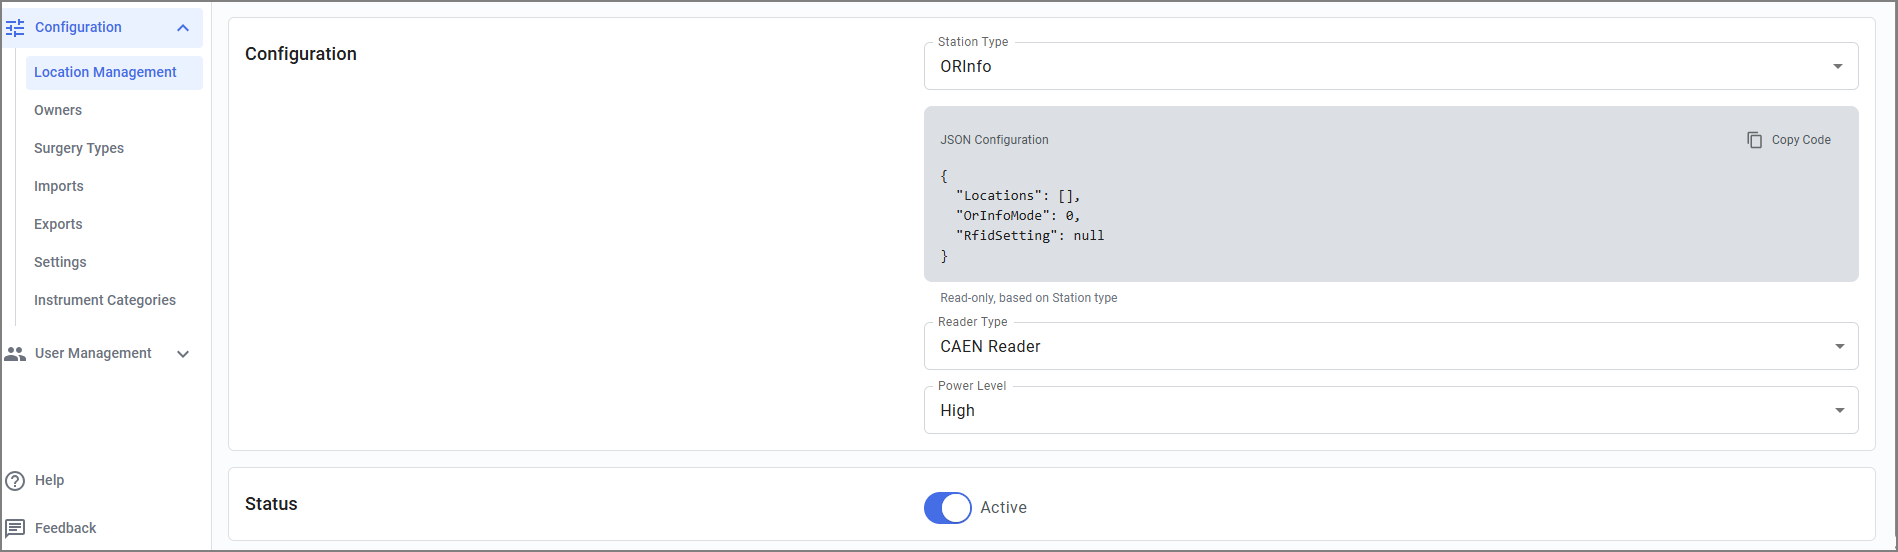
- The Json Configration file is added automaticaly when a new station is added.
- The current reader type is CAEN Reader, if the reader type is changed in this machine, then the user can select the REader type from the REader field.
- Click the Location tab.
- The current Linked location for this station is displayed
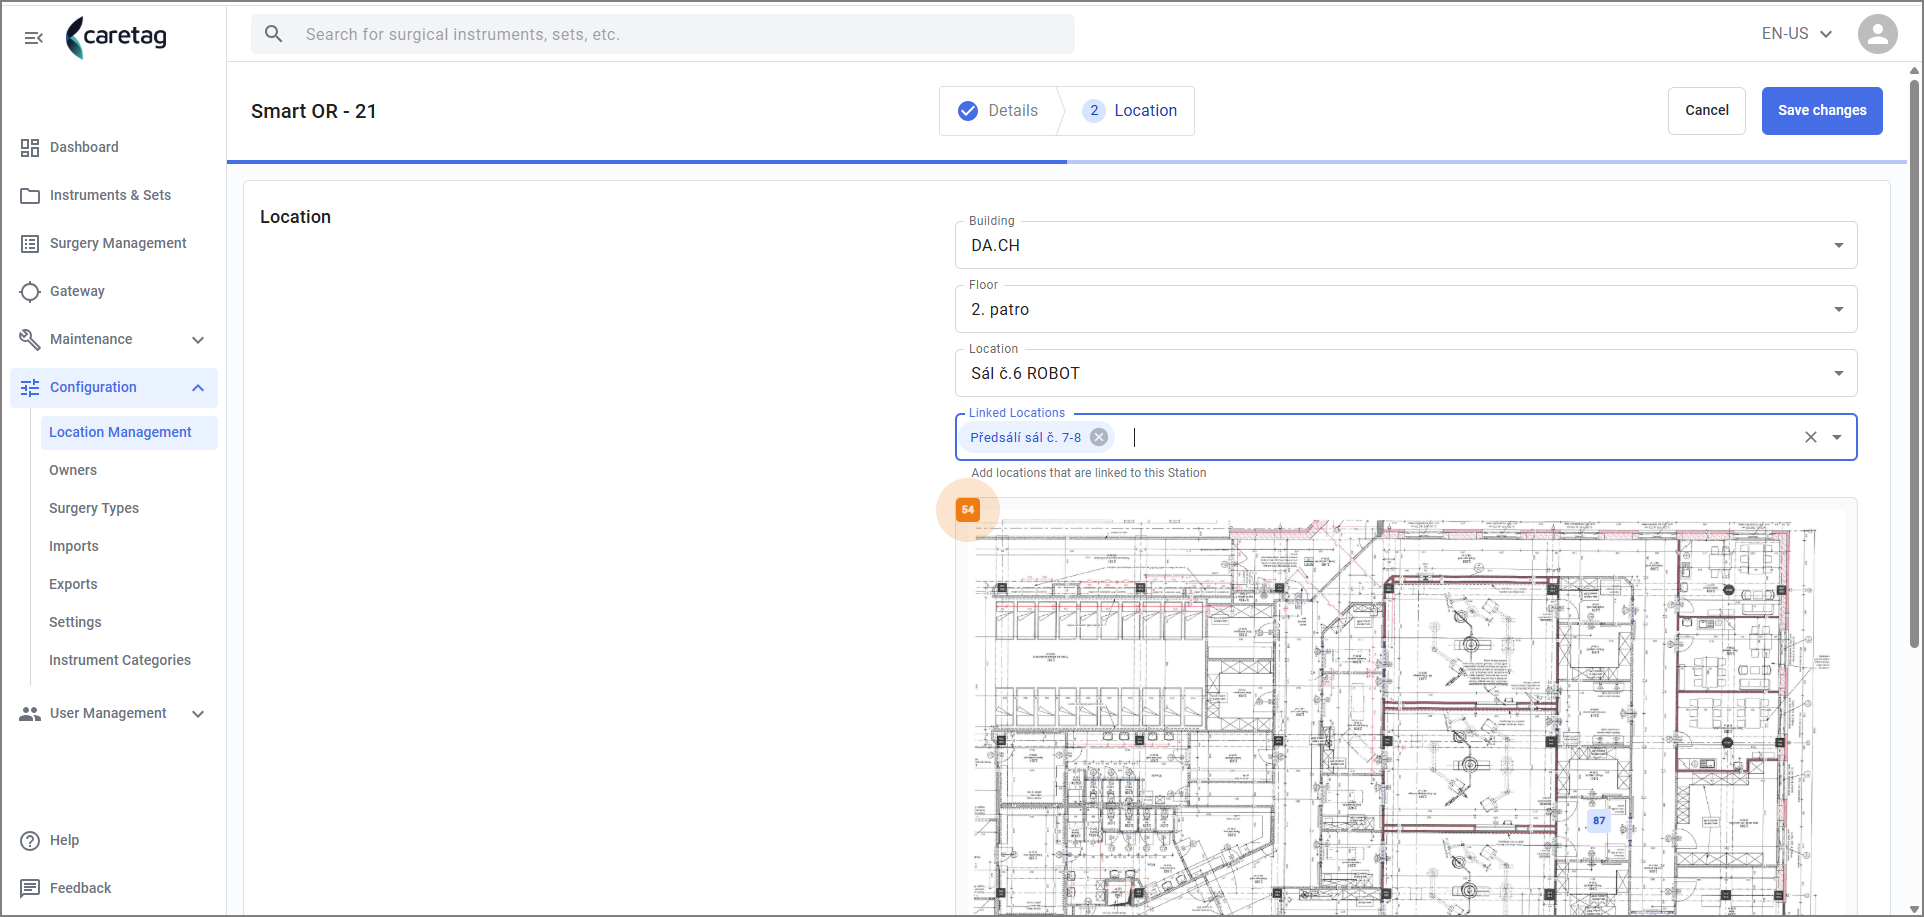
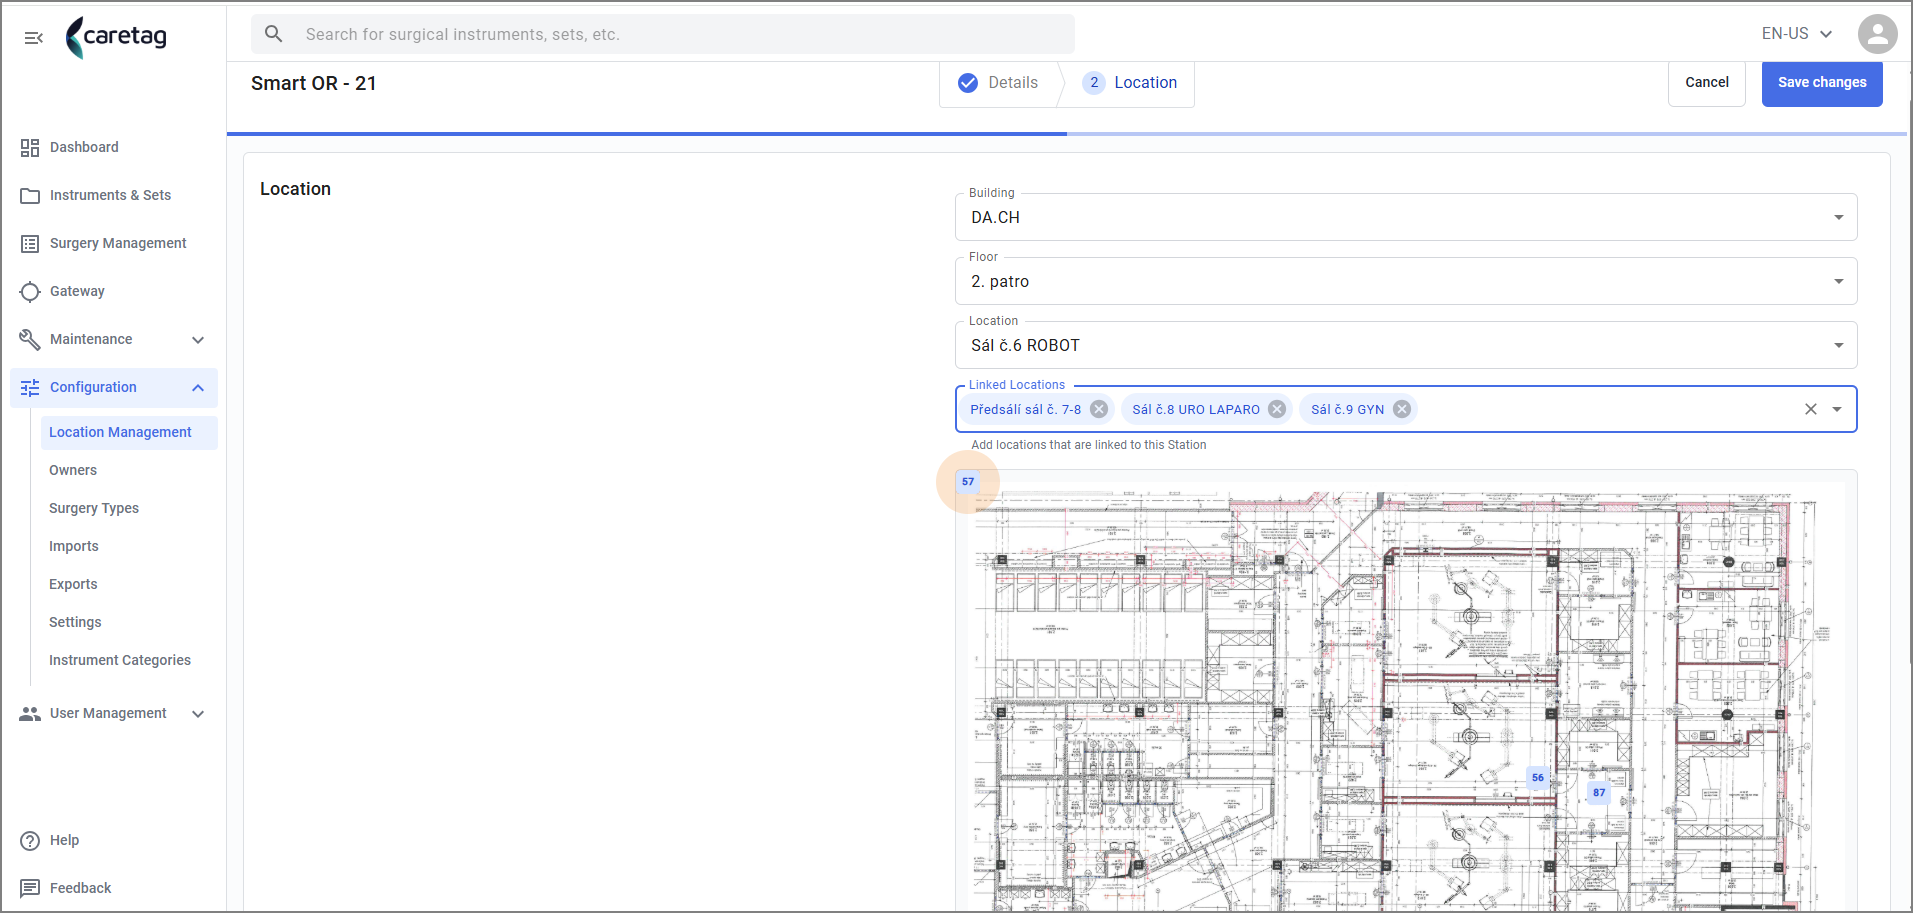
- Click in the Linked locations field and link more locations if needed.
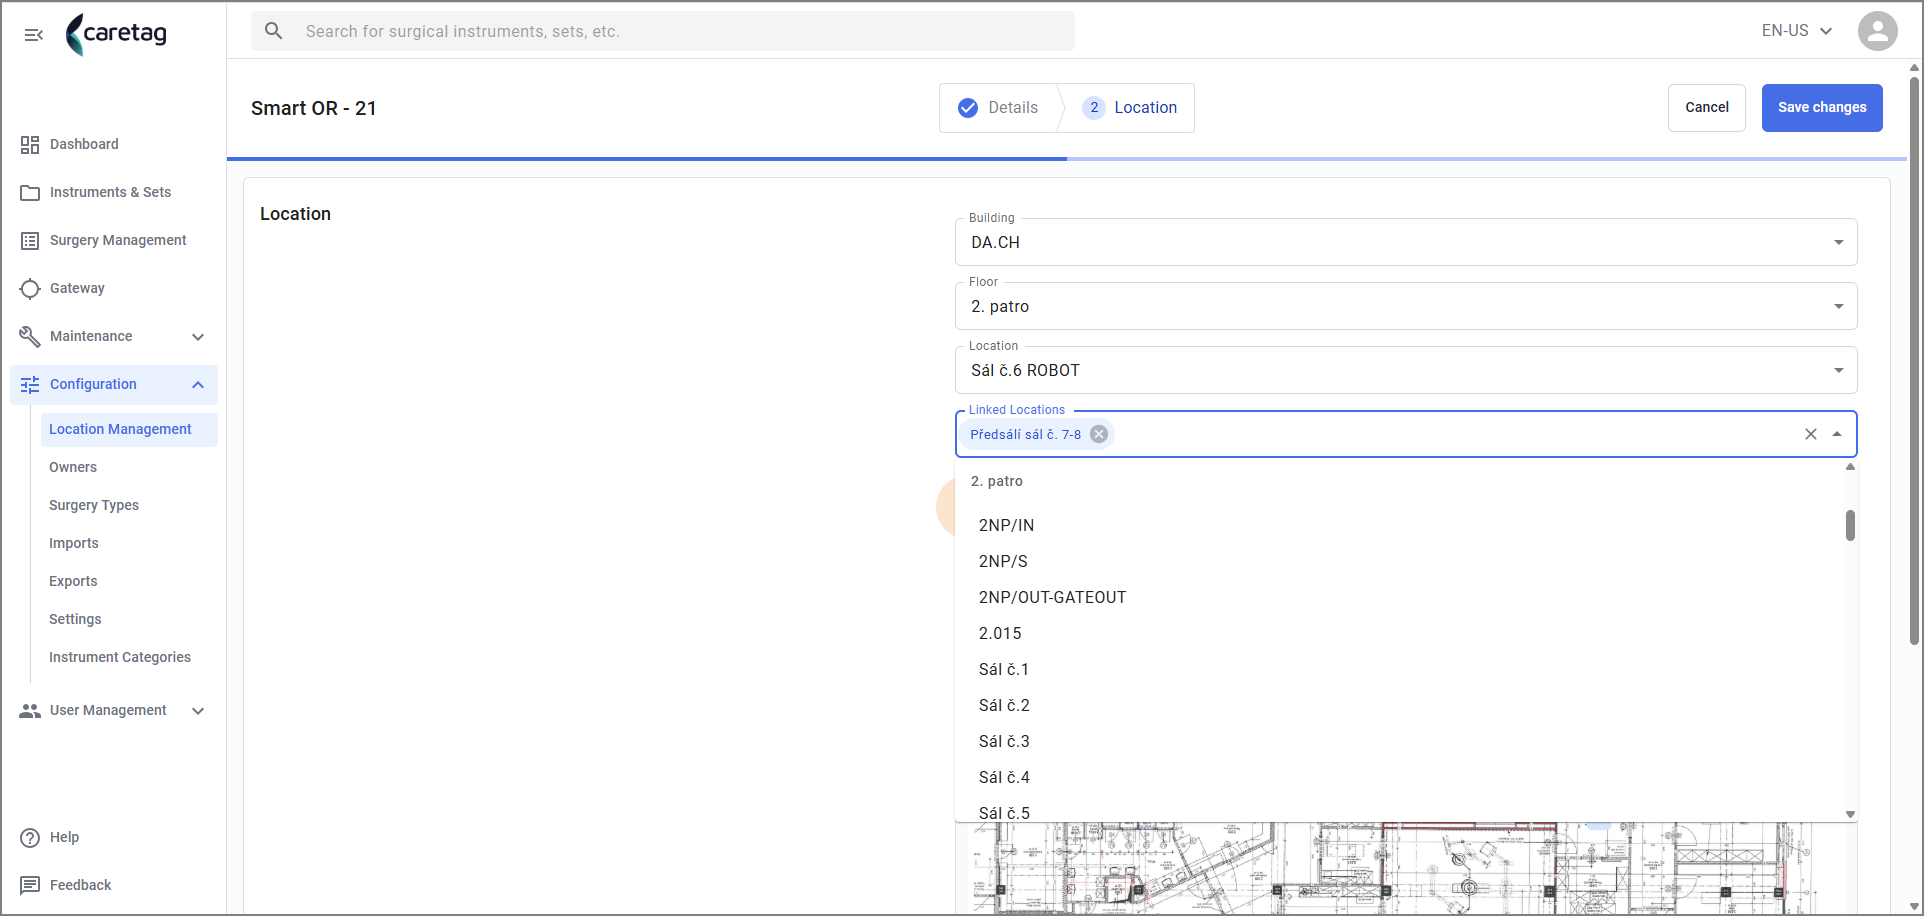
- Save the changes
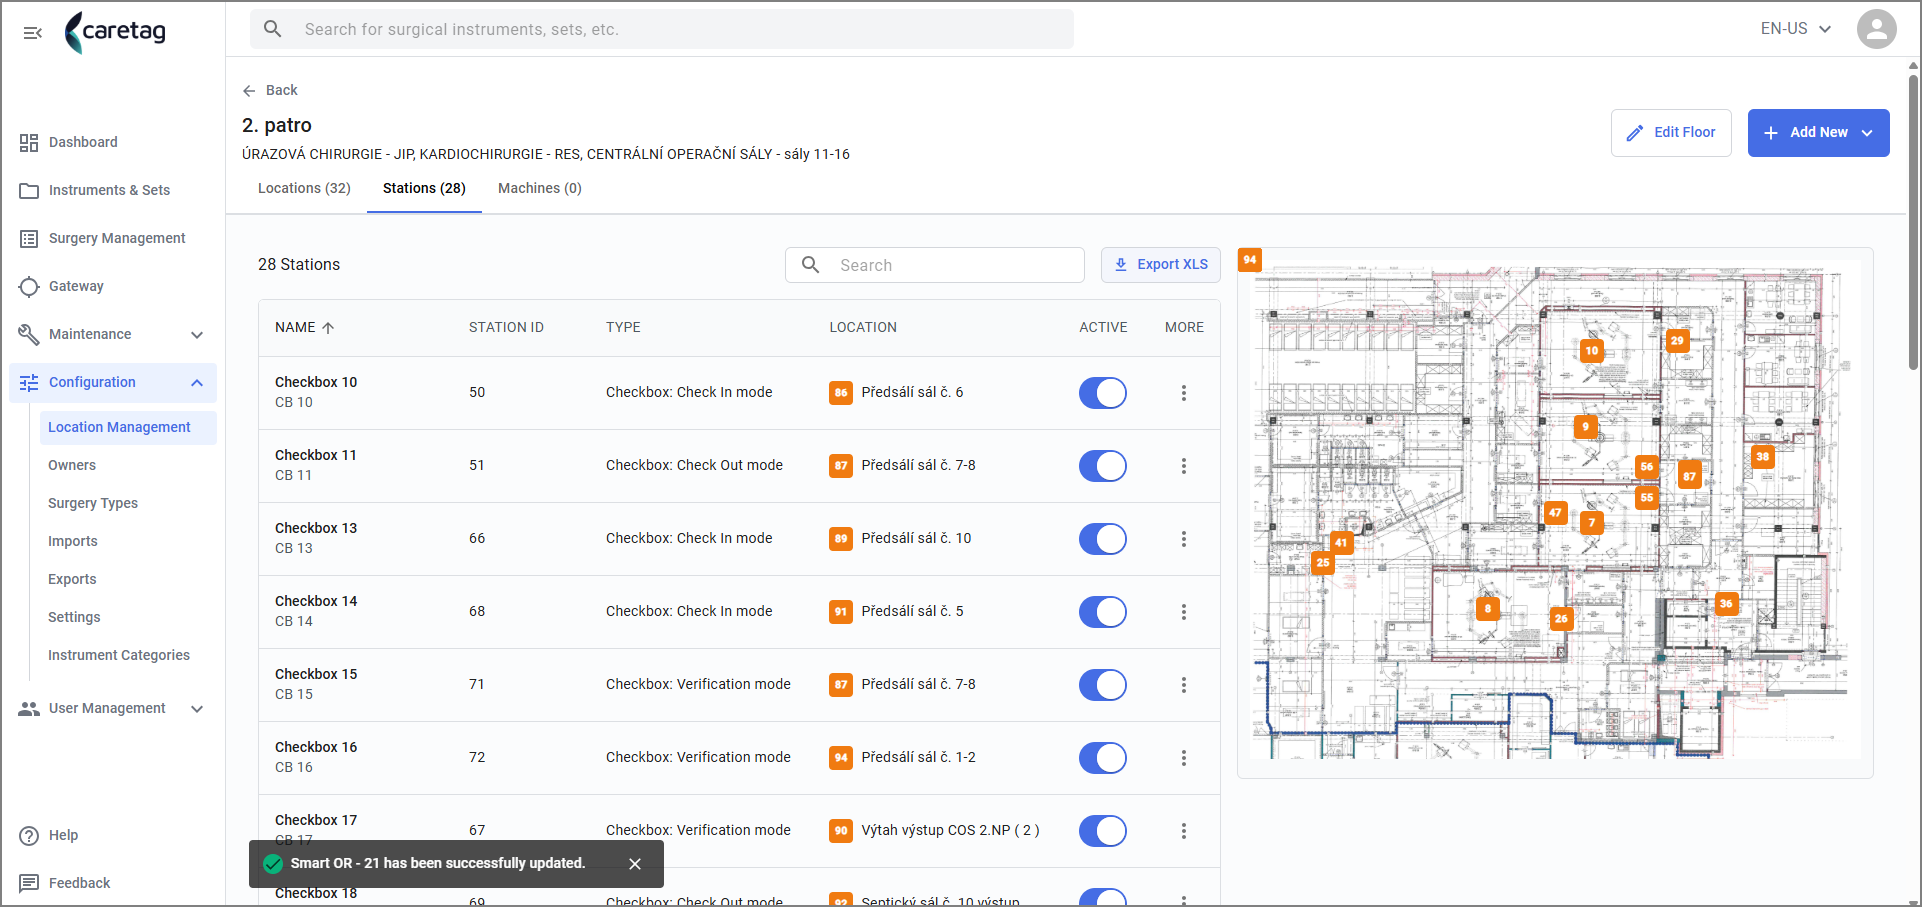
- Once the changes are saved, the station gets updated.
Add Machine
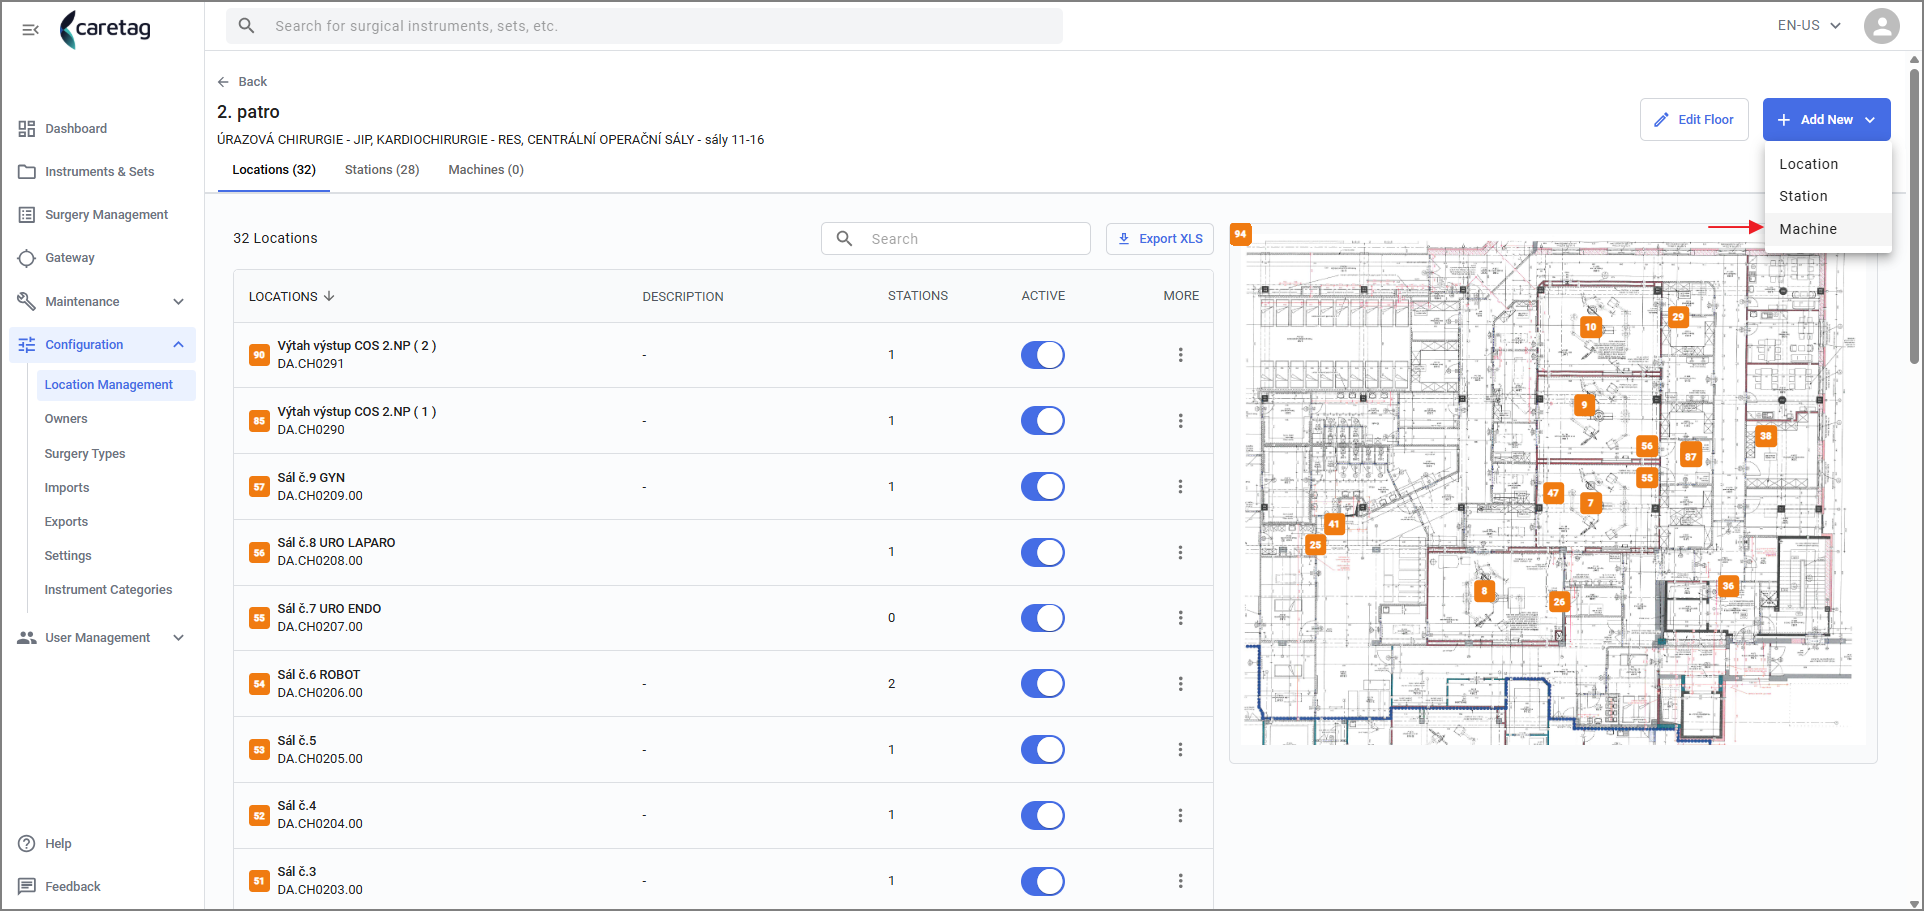
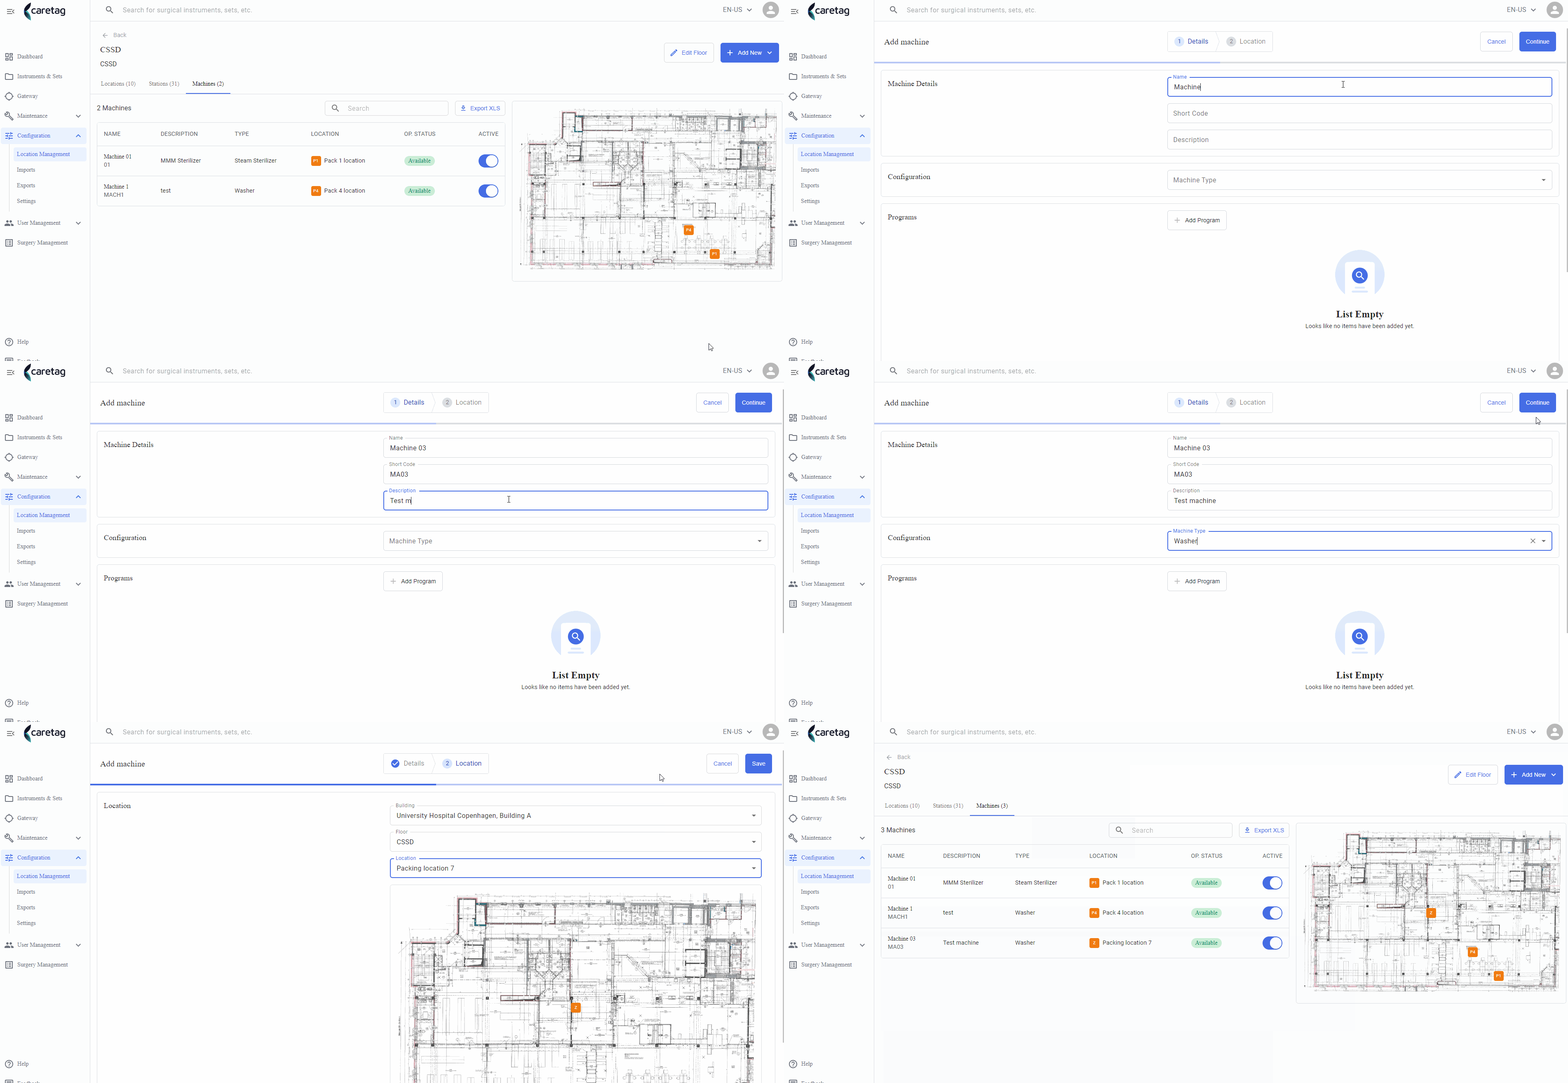
- Select Add New Machine option.
- Enter the details of the machine like Name, a short code, a description
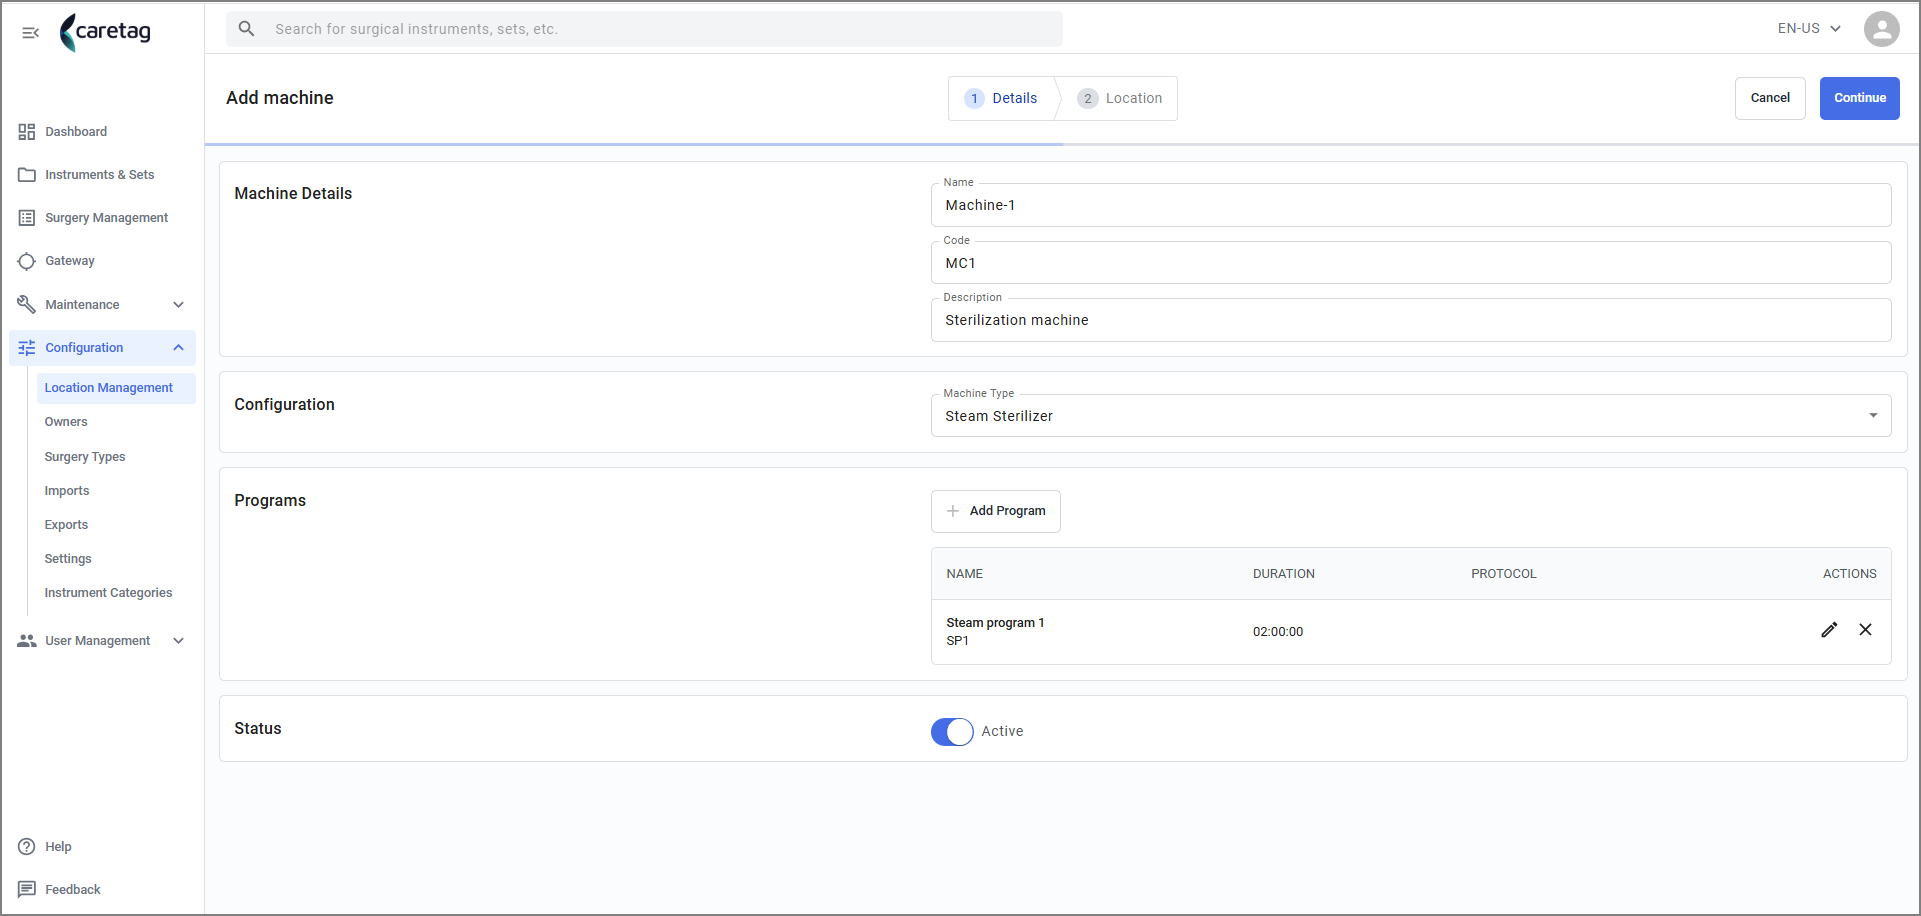
- Choose one of the configurations.

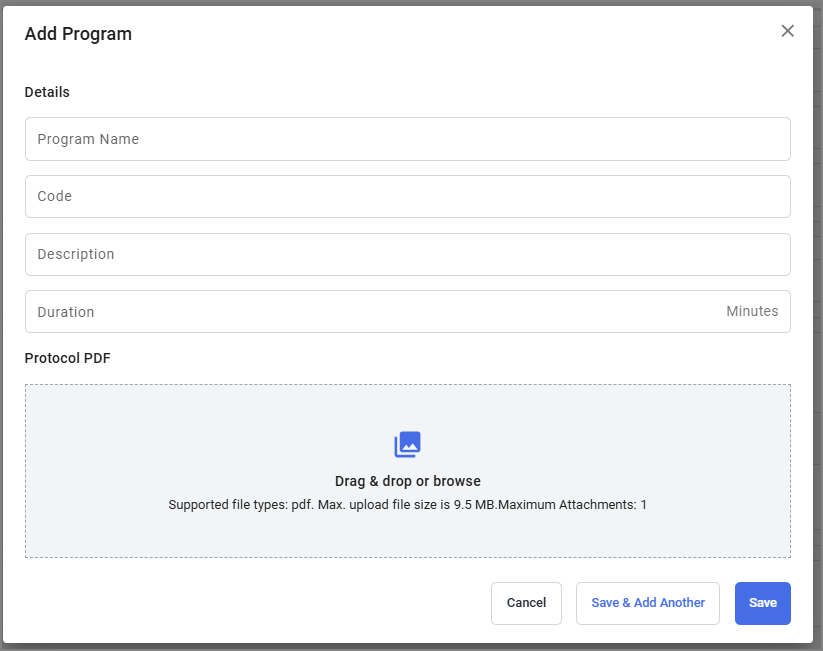
- Select the existing program or add a new program
- Enter the location details
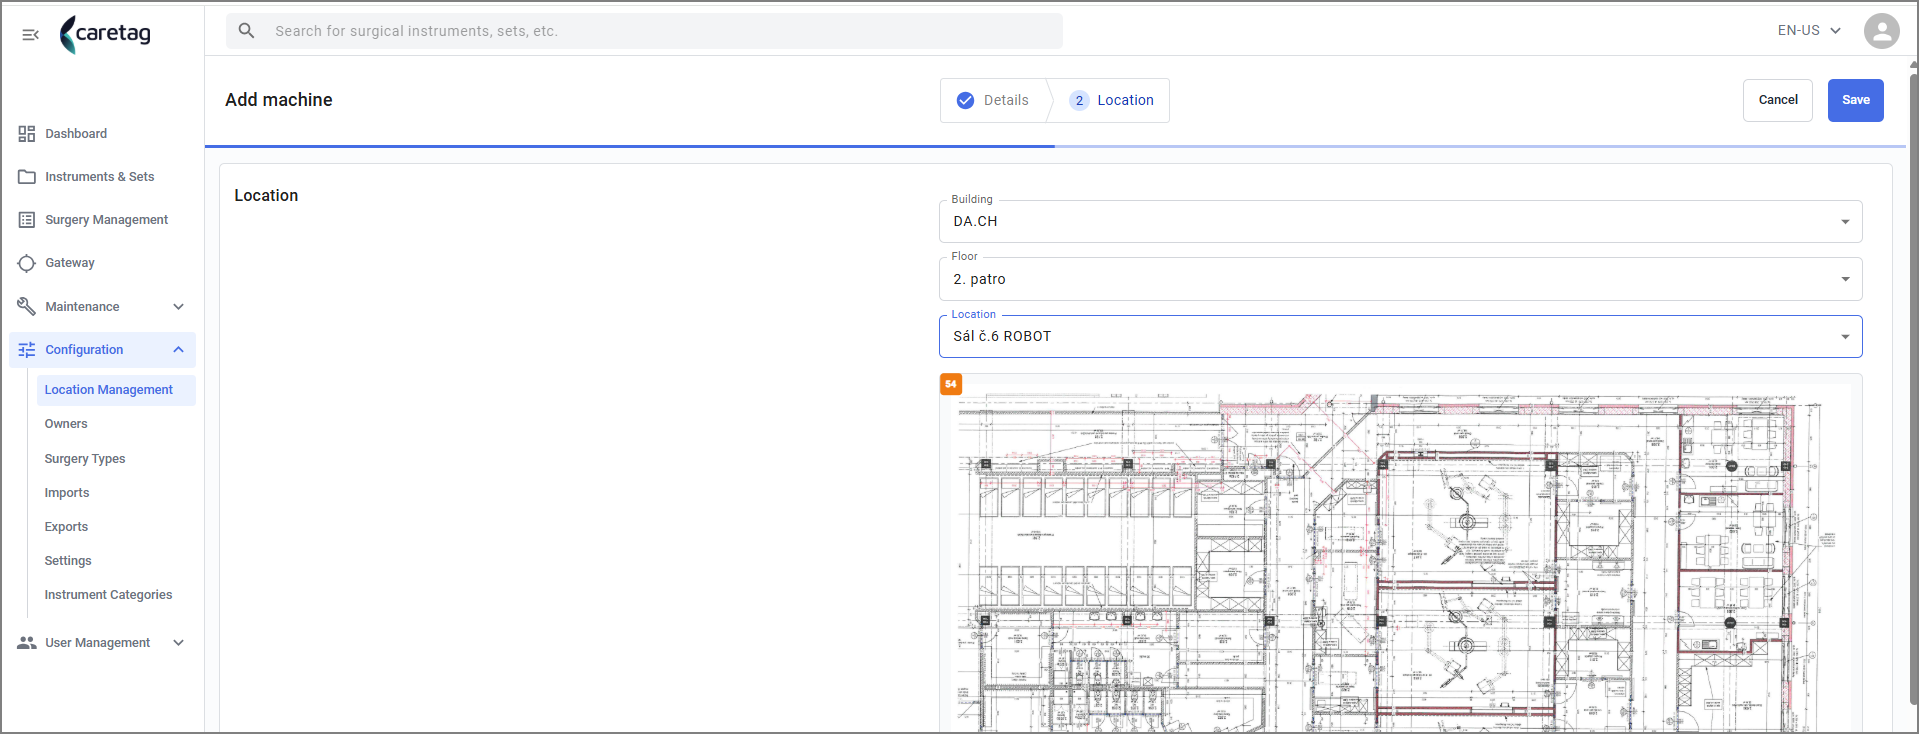
- New Machine is successfully created.
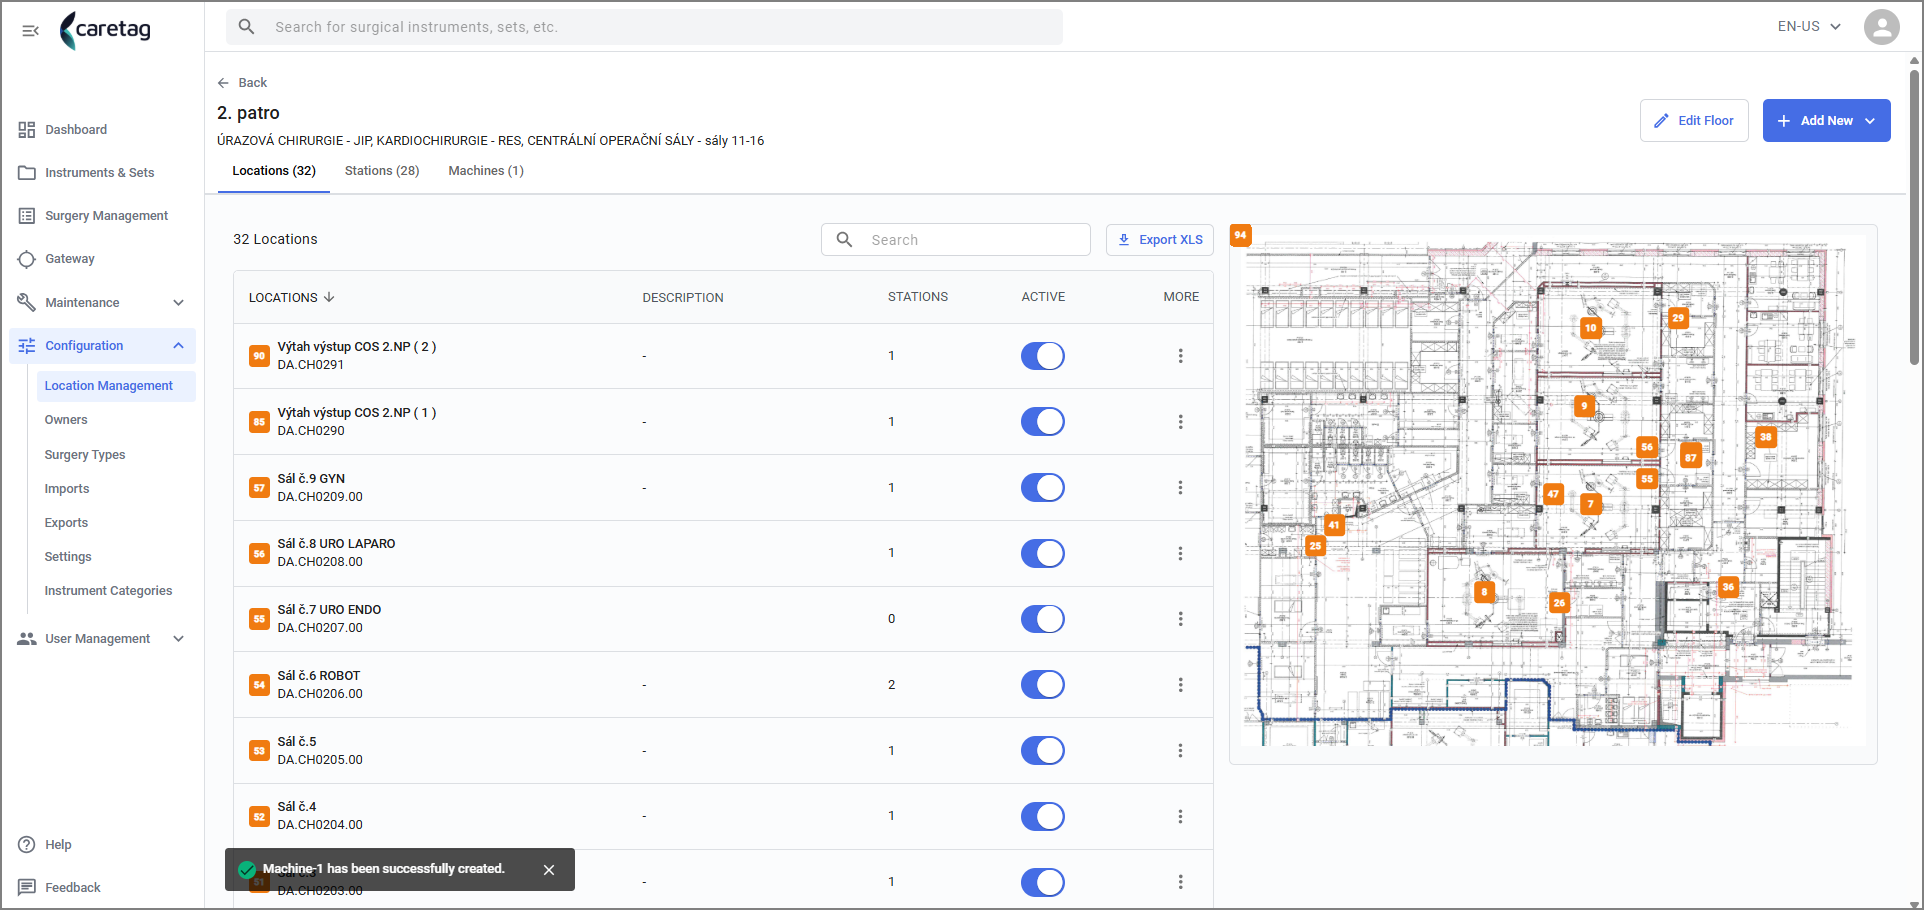
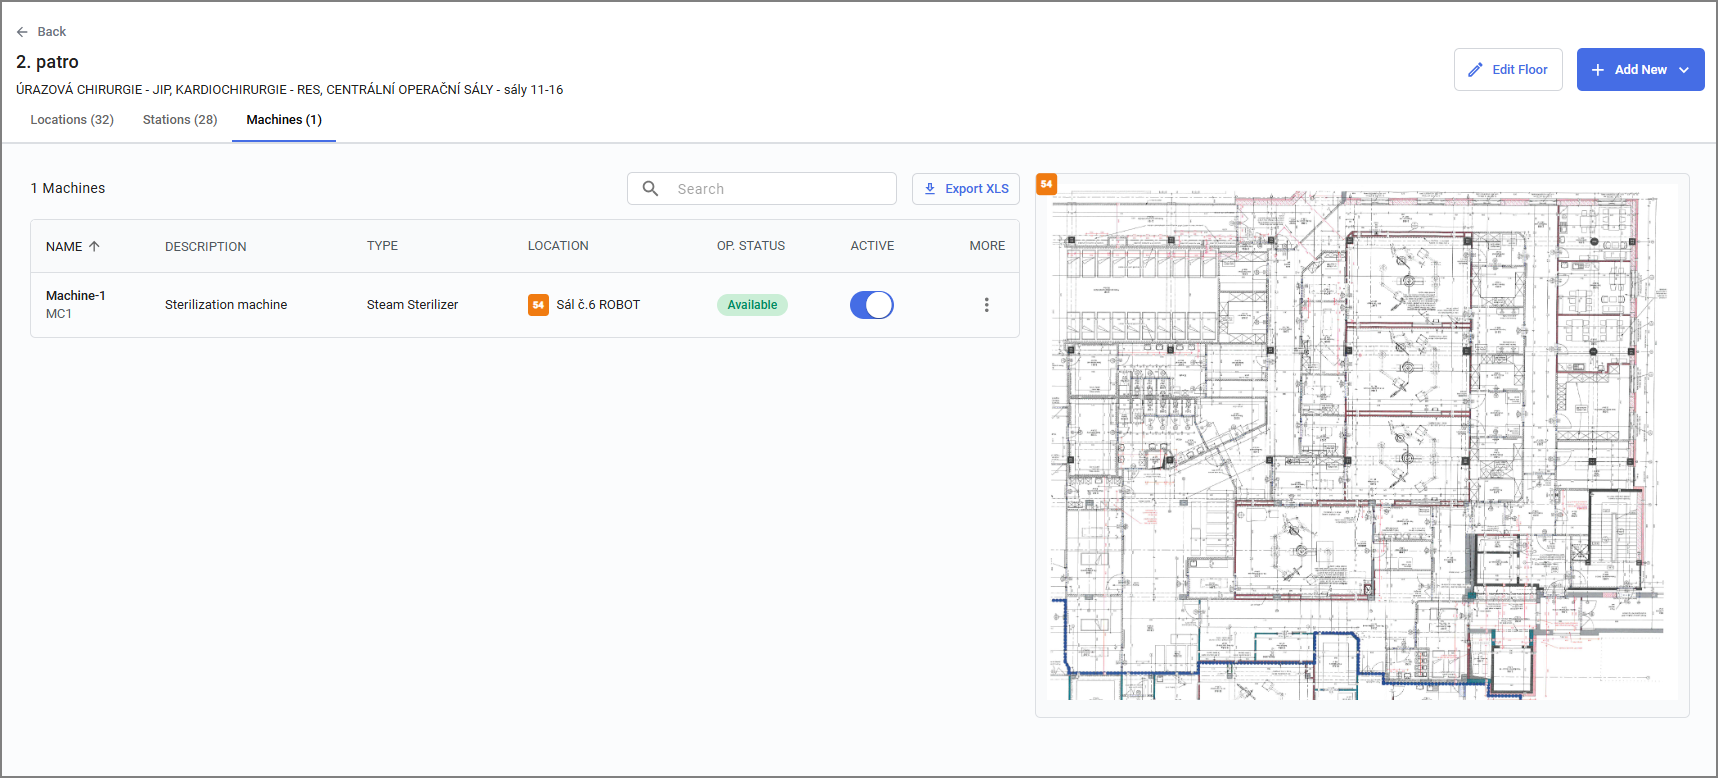
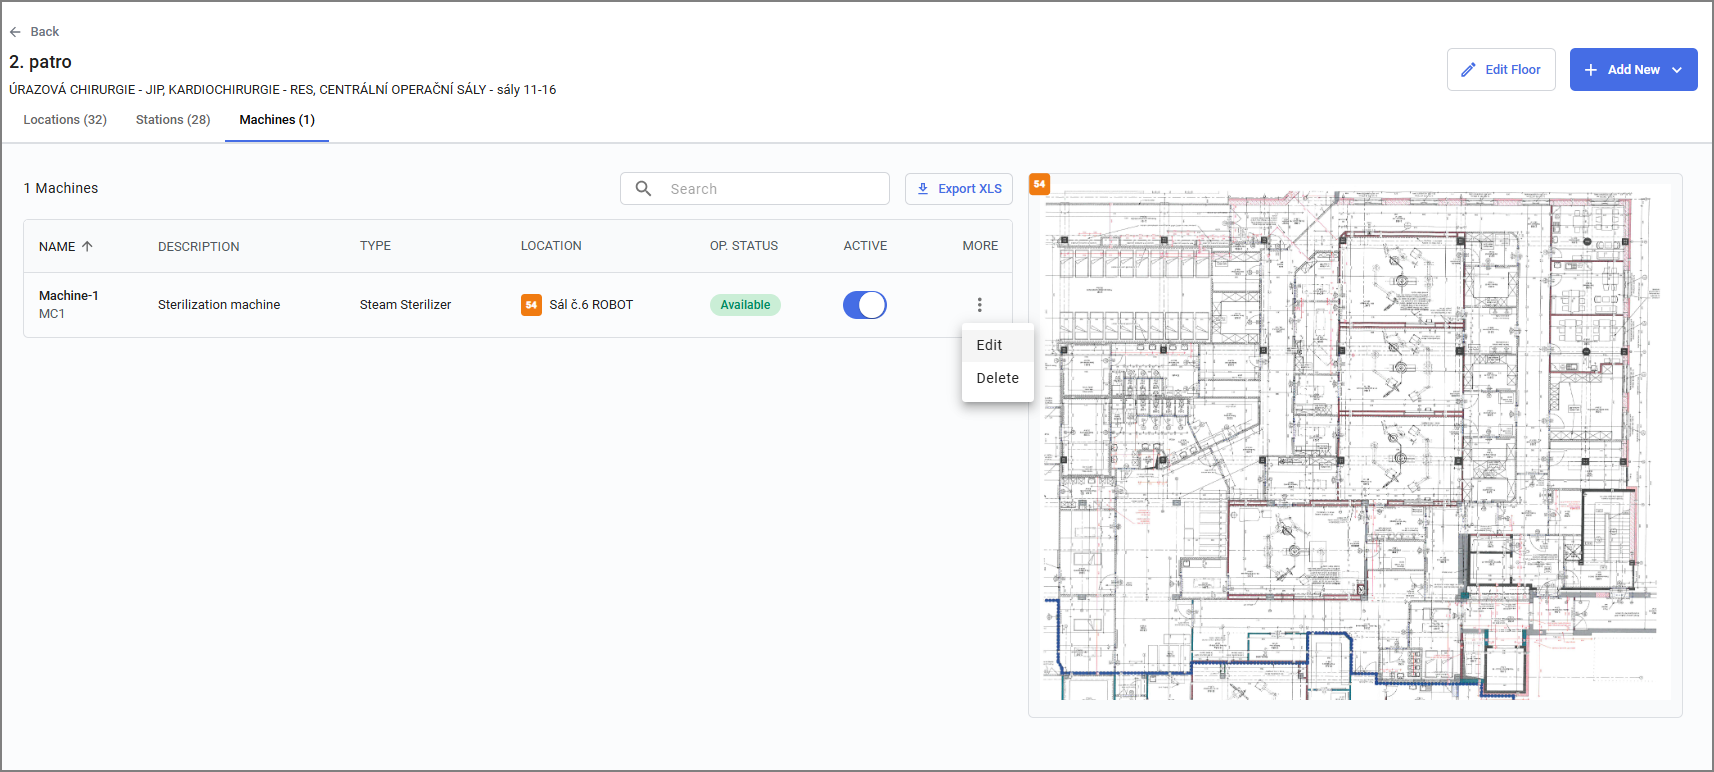
- To edit the Machine, click on the 3 dots and select the edit option.
- Once the fields are udpated, click save.
- Here we have provided a short video of adding a new machine in GIF format.
Settings
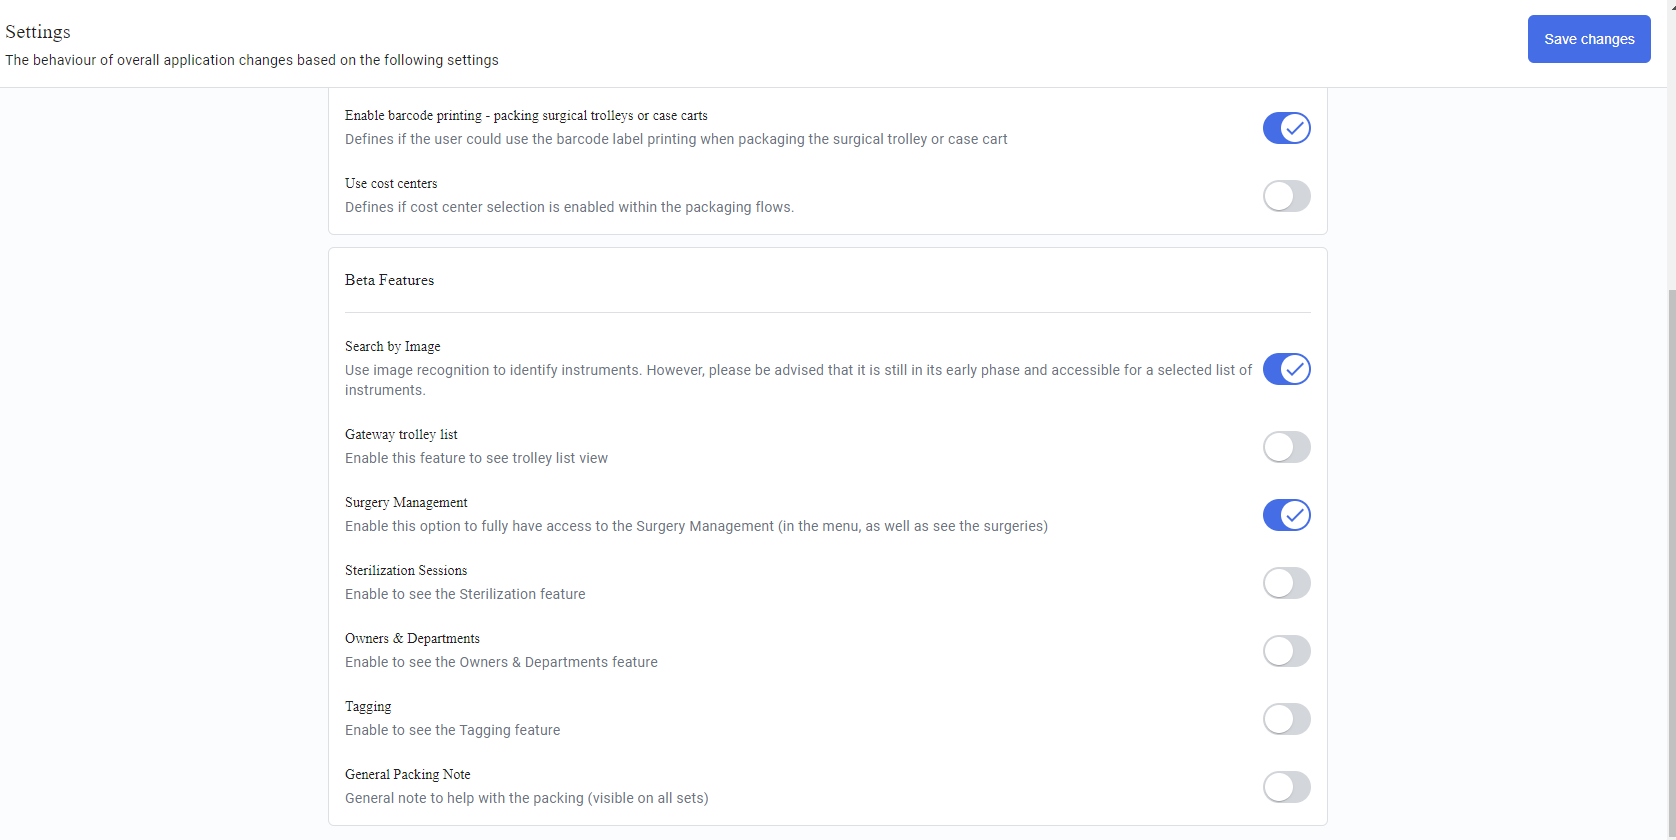
The user has the option to activate or deactivate packing settings through the settings menu located within the configuration section. After every changes, the user has to save them by clicking the save changes button.
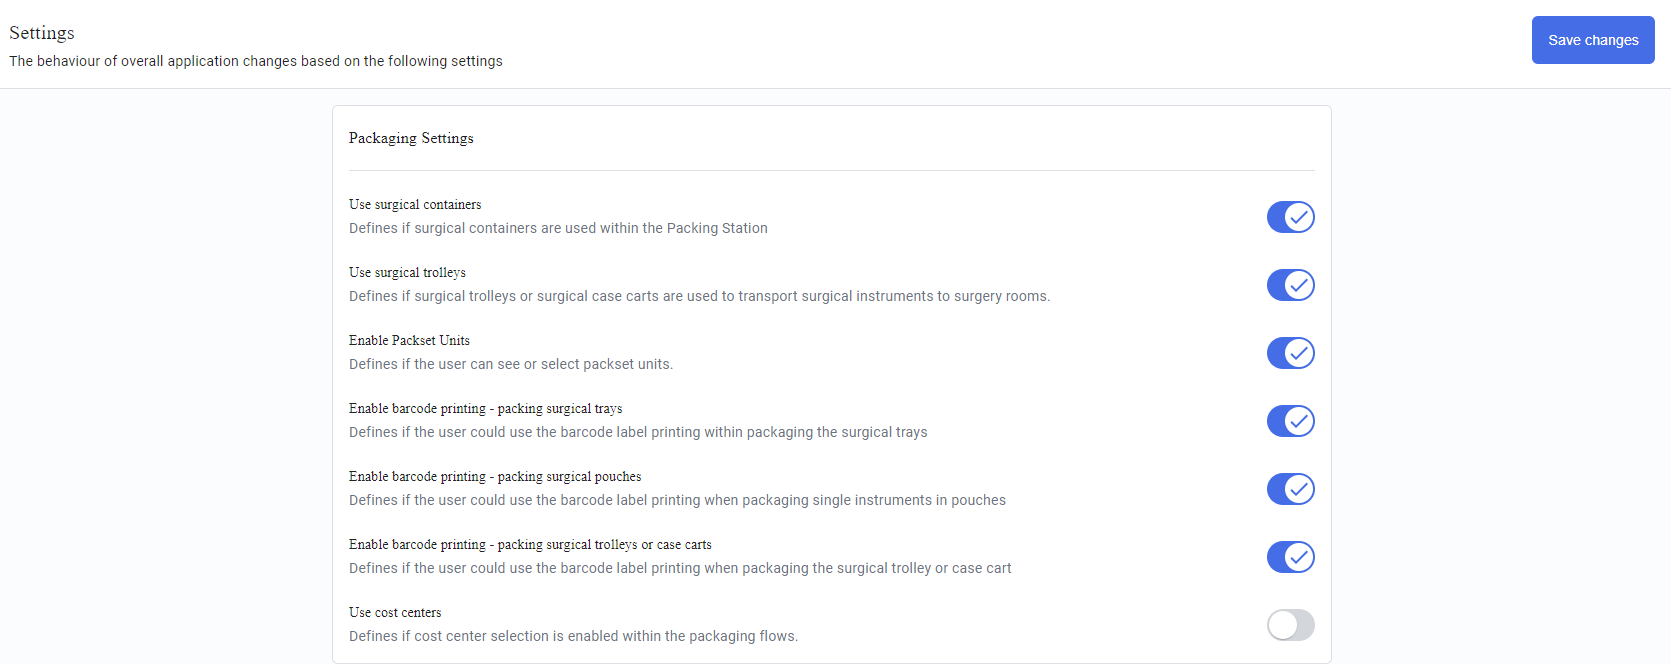
We have included Beta features in the settings, where user can able to activate them based on their reuqirements.