User Management
Thre are 2 sections in the User Management: Users and Roles
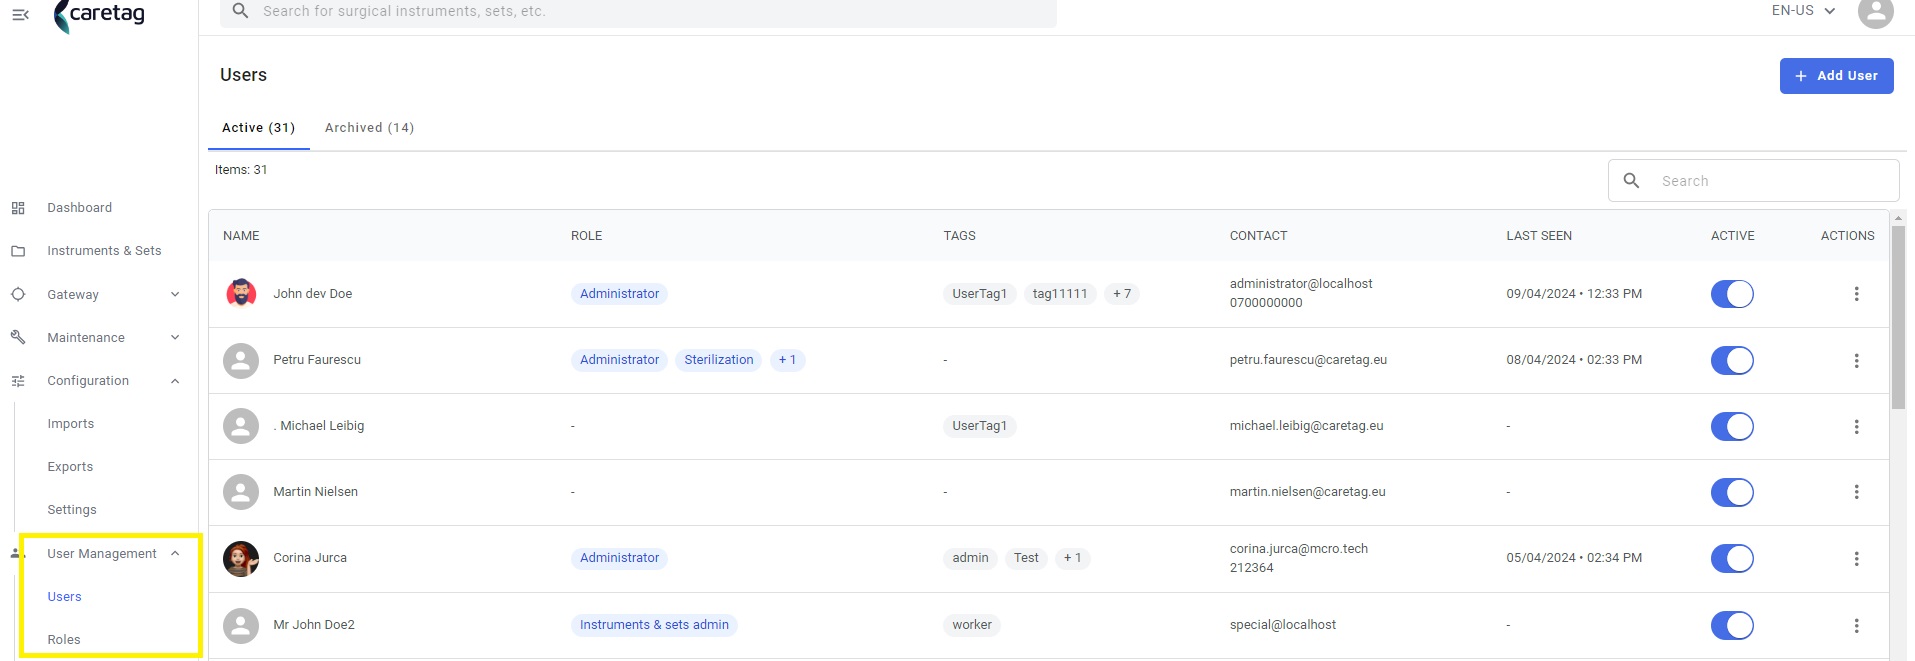
Before we dive into the user and roles sections, let’s first understand what user management involves.
What is User Management
User Management enables you to define roles based on customer’s specifications, assign users to these roles, and activate them.
Administrators have the flexibility to assign a single user to multiple roles and possess full authority to modify these assignments as needed.
Below diagram is an example of User management.
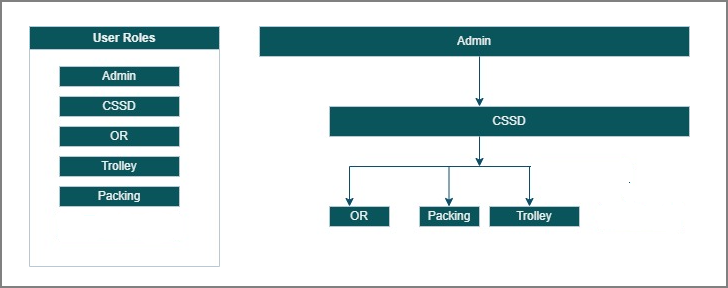
In the diagram depicted above, few distinct user roles are highlighted: Admin, CSSD, OR, Trolley, Packing . Positioned on the right side of the image are individual boxes representing each role, defining the access levels among them, showing who they can control.
For example, Admin controls all roles, while Packing only controls the Packing department. If Admin wants to change or remove packing, they can. This setup helps manage who can do what in the system.
Users
In the Users dashboard there are 2 tabs: Active and Archieved
Active tab
In the Active tab the user can able to view the details of the user, role, tags associated with the user, last seen, status and actions.
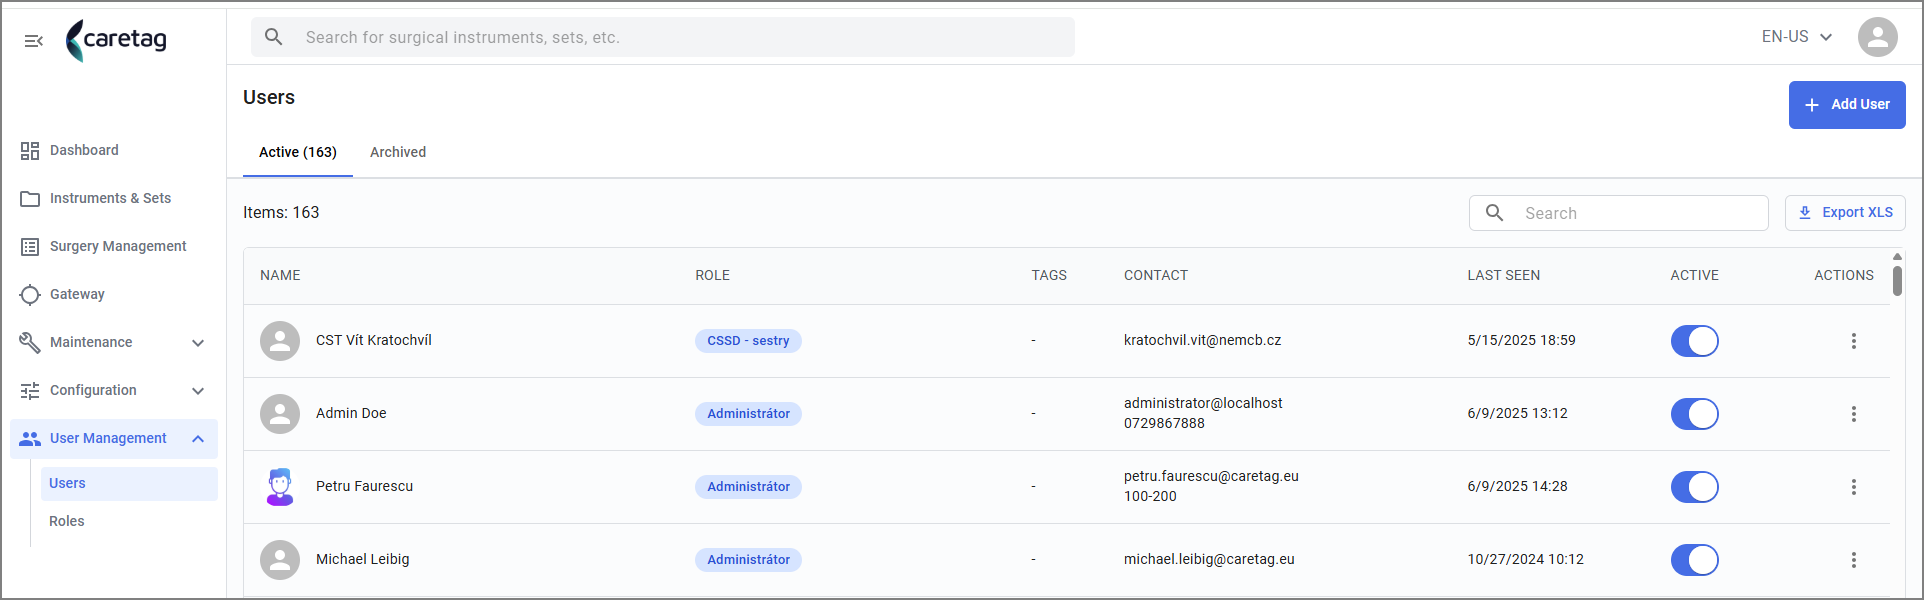
The description of each column is explained below:
| Details | Description |
|---|---|
Name | Name of the user |
Role | Role of the user, such as Admin, CSSED, Packing. |
Tags | To identify roles easily |
Contact | Email and contact number of the user |
Last seen | Last seen time and date of the user |
Active | Status of the User. By simply toggling the button you can deactive an user temporarily |
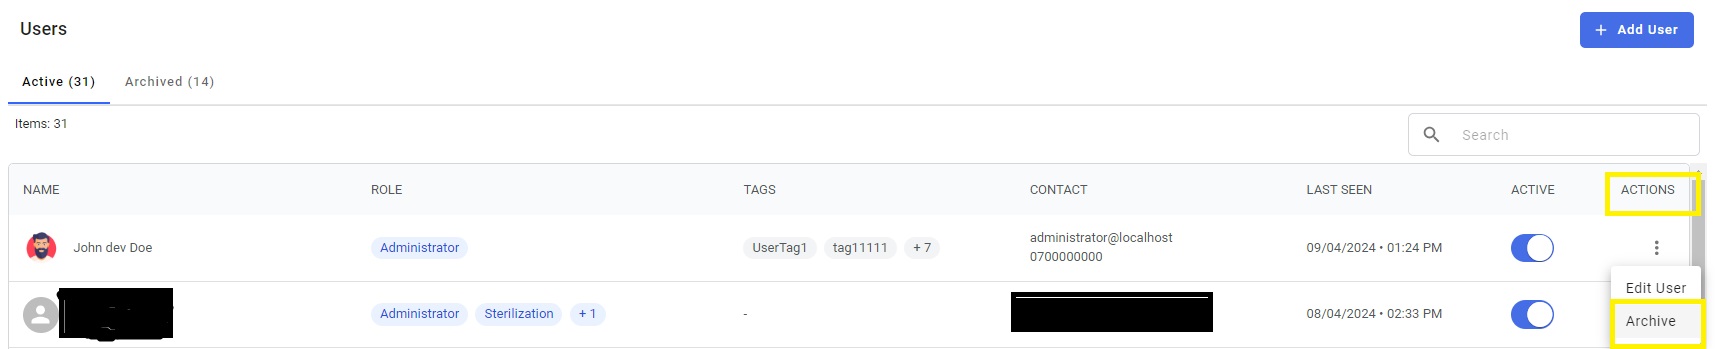
Actions | Click on the 3 dots to edit the user or Archive the user |
Upon selecting an user , it shows the details of the user and their activity logs
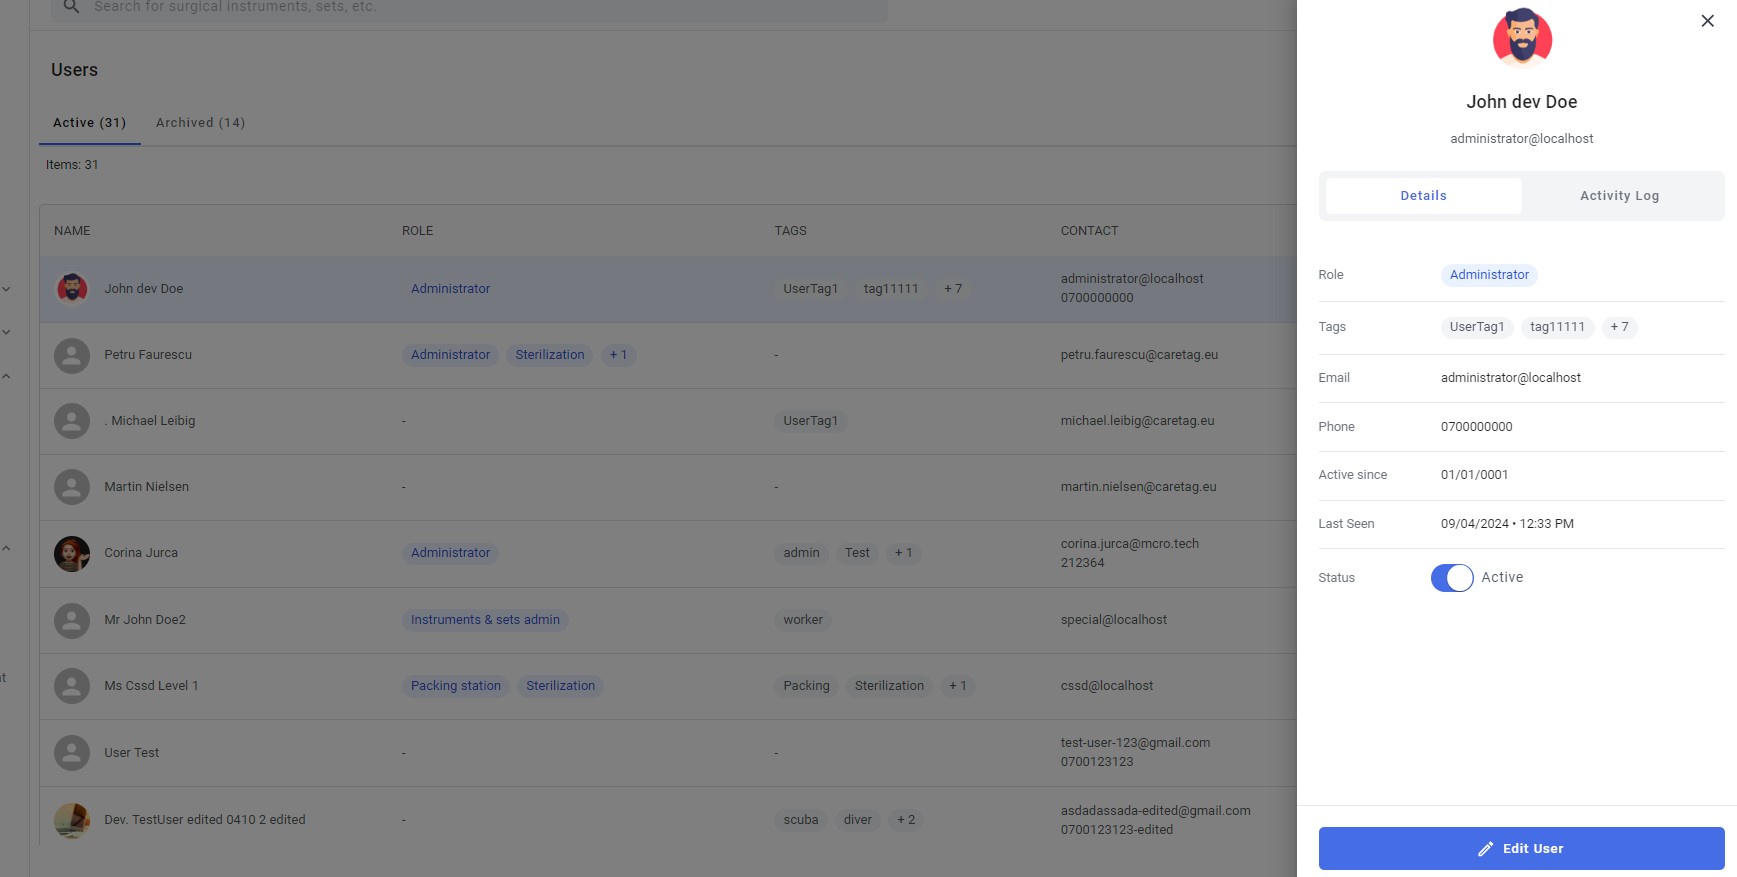
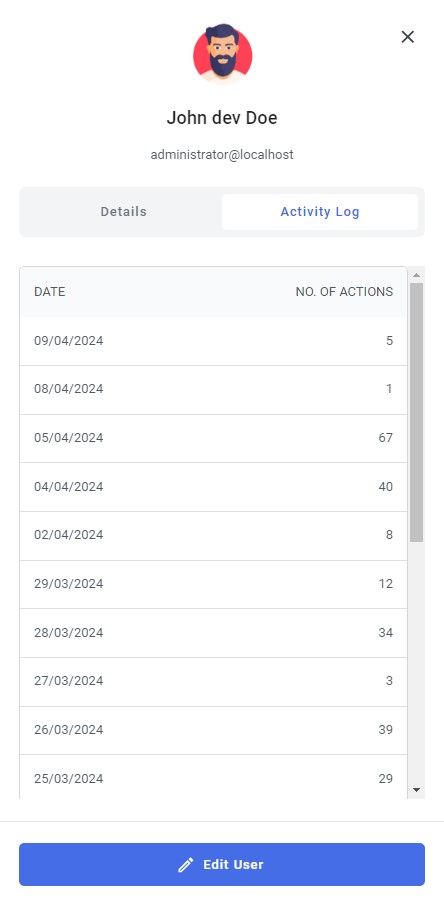
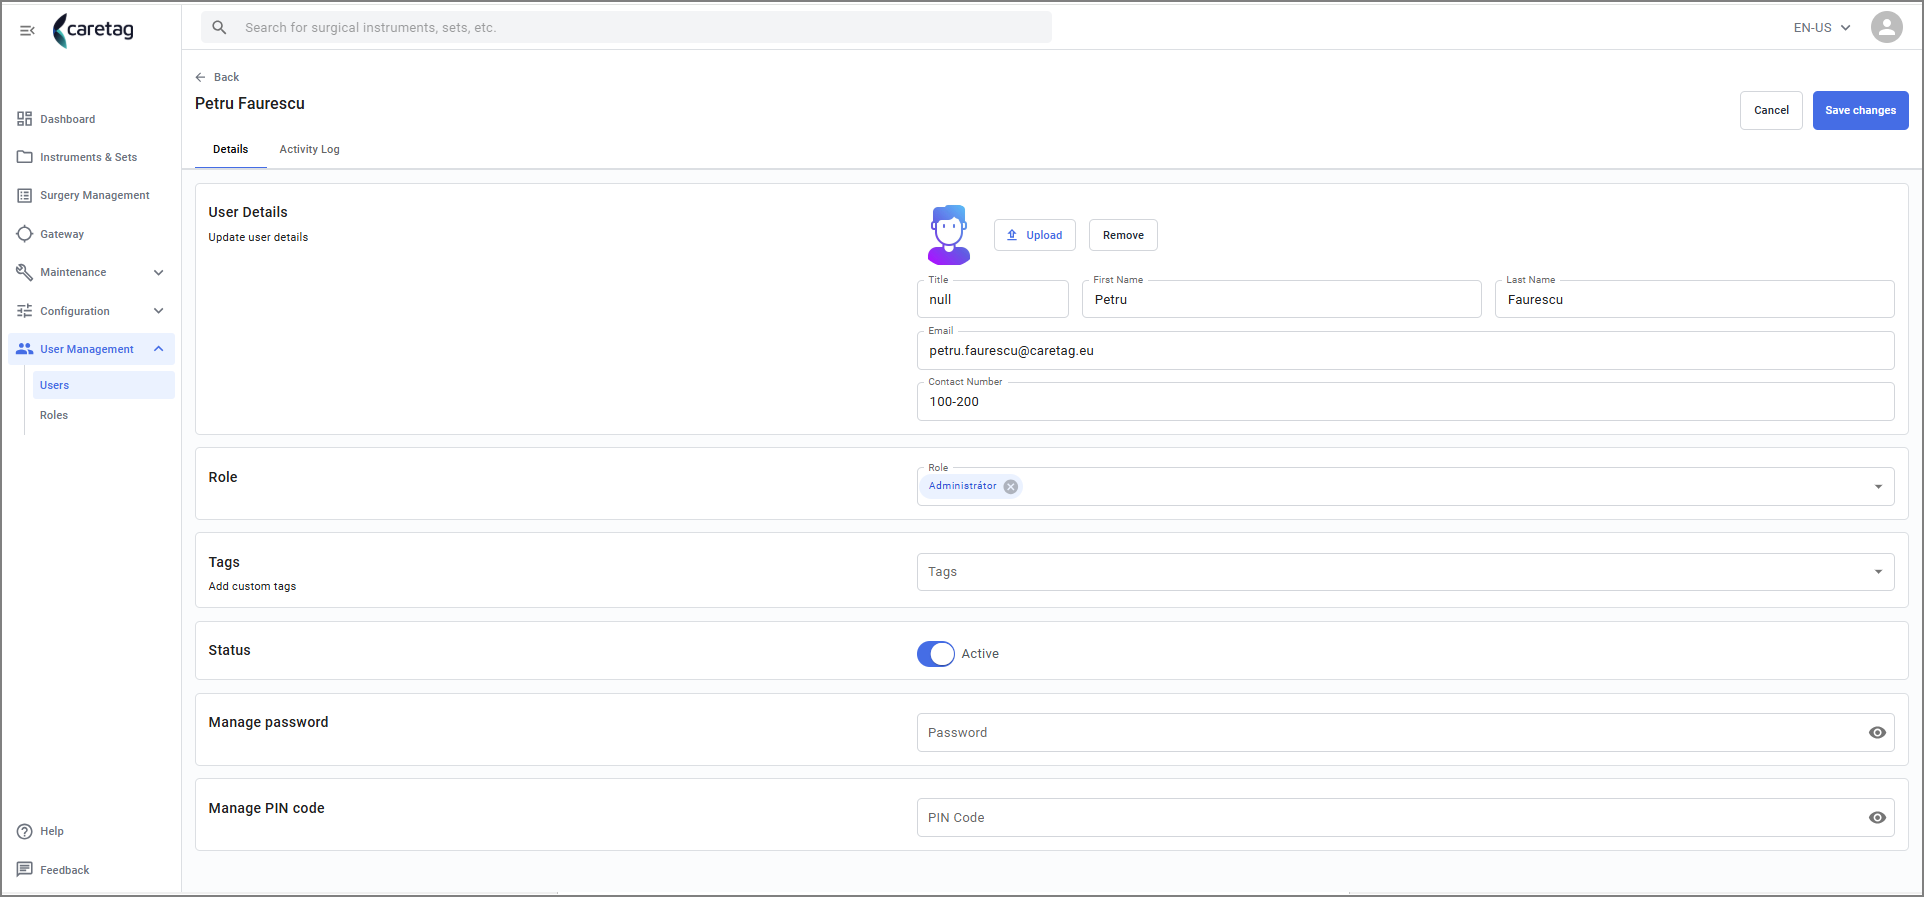
An User can be edited by clicking on the Edit user button
Add New User
Click on the Add user button
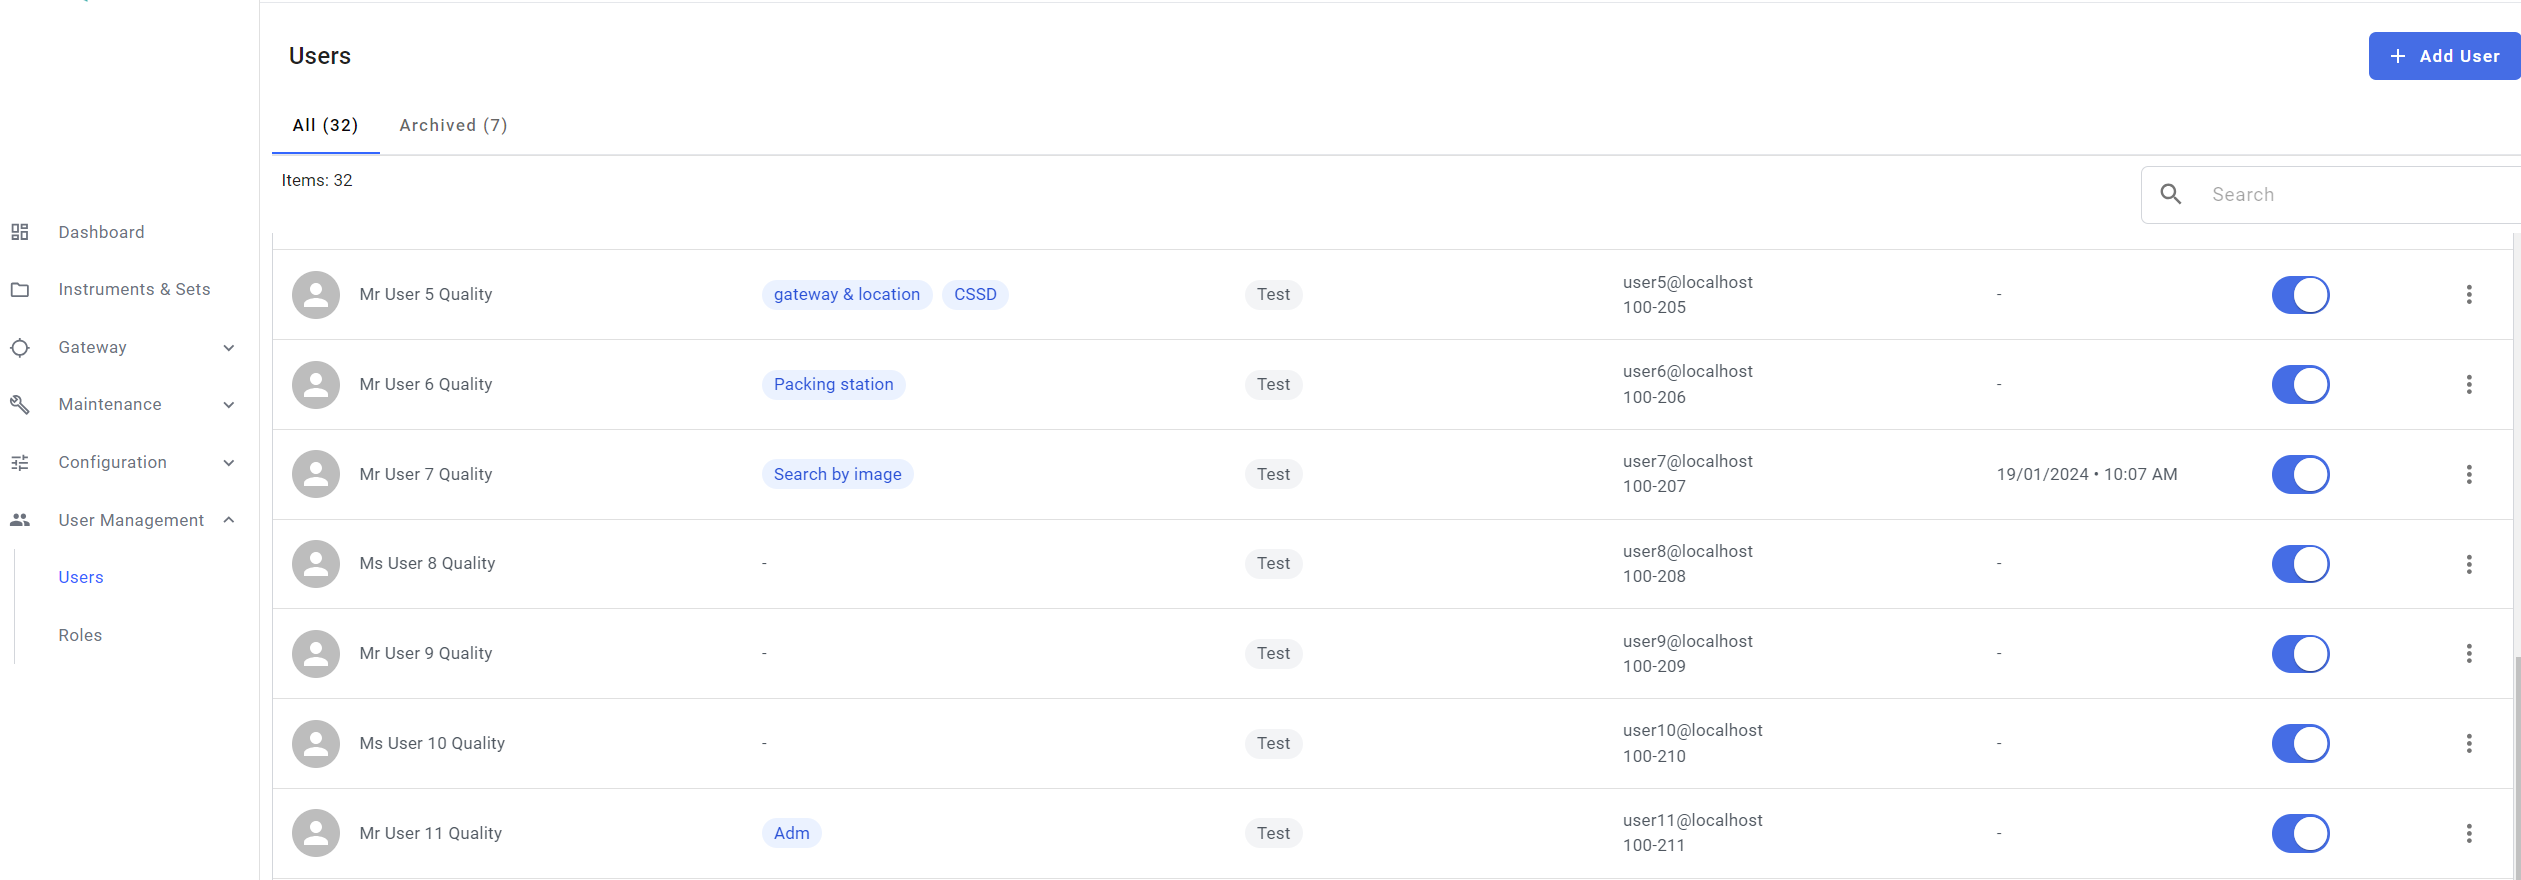
Fill the required details of the user
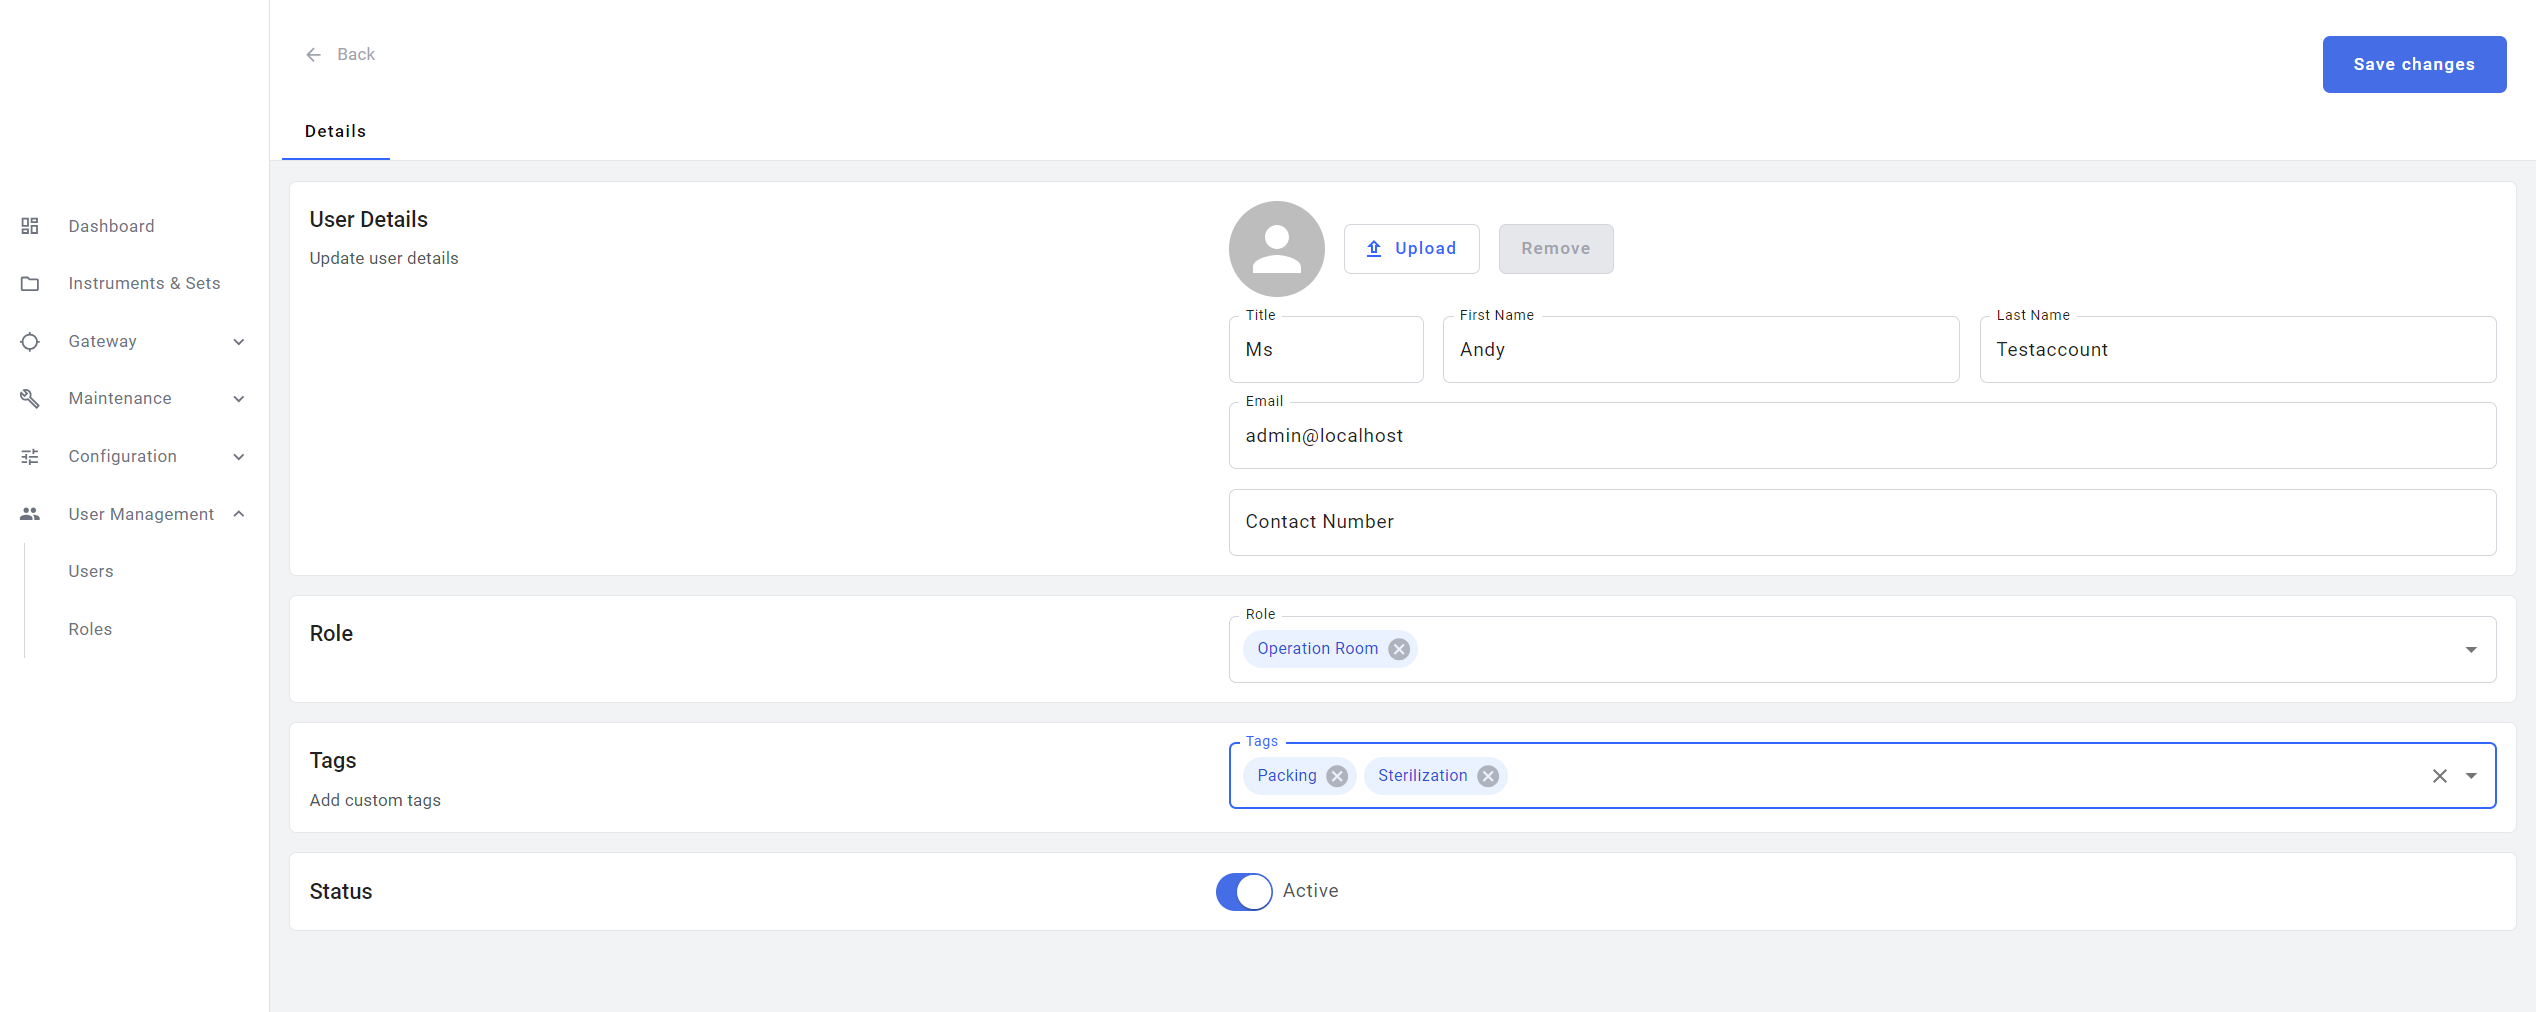
Admin can add a new user and keep their status inactive by clicking the status toggle button or can deactivate the user at any point of time based on their need.
An user can be assigned to more than one role and can have more than one tag. The roles and tags can be added or removed or modified by the admin as required.

Reset user password or Pin code
The User can reset their password or pin code
Navigate to the User Management tab, choose Users, and search for the username for which you want to reset the password or Pin code.
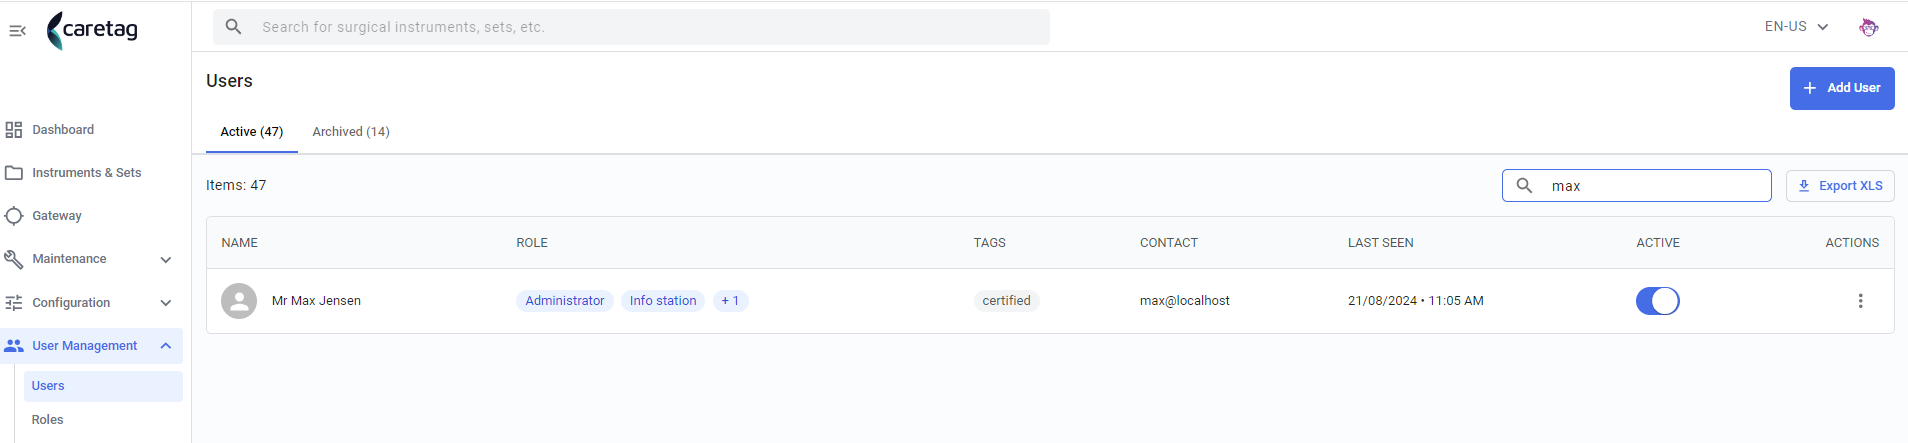
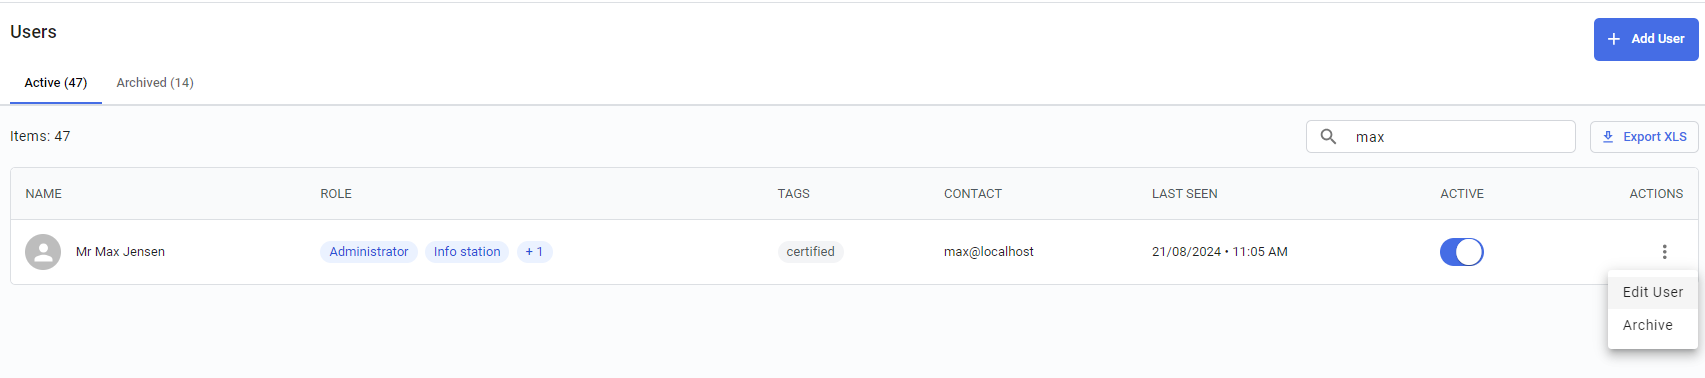
Click on the 3 dots and select Edit option
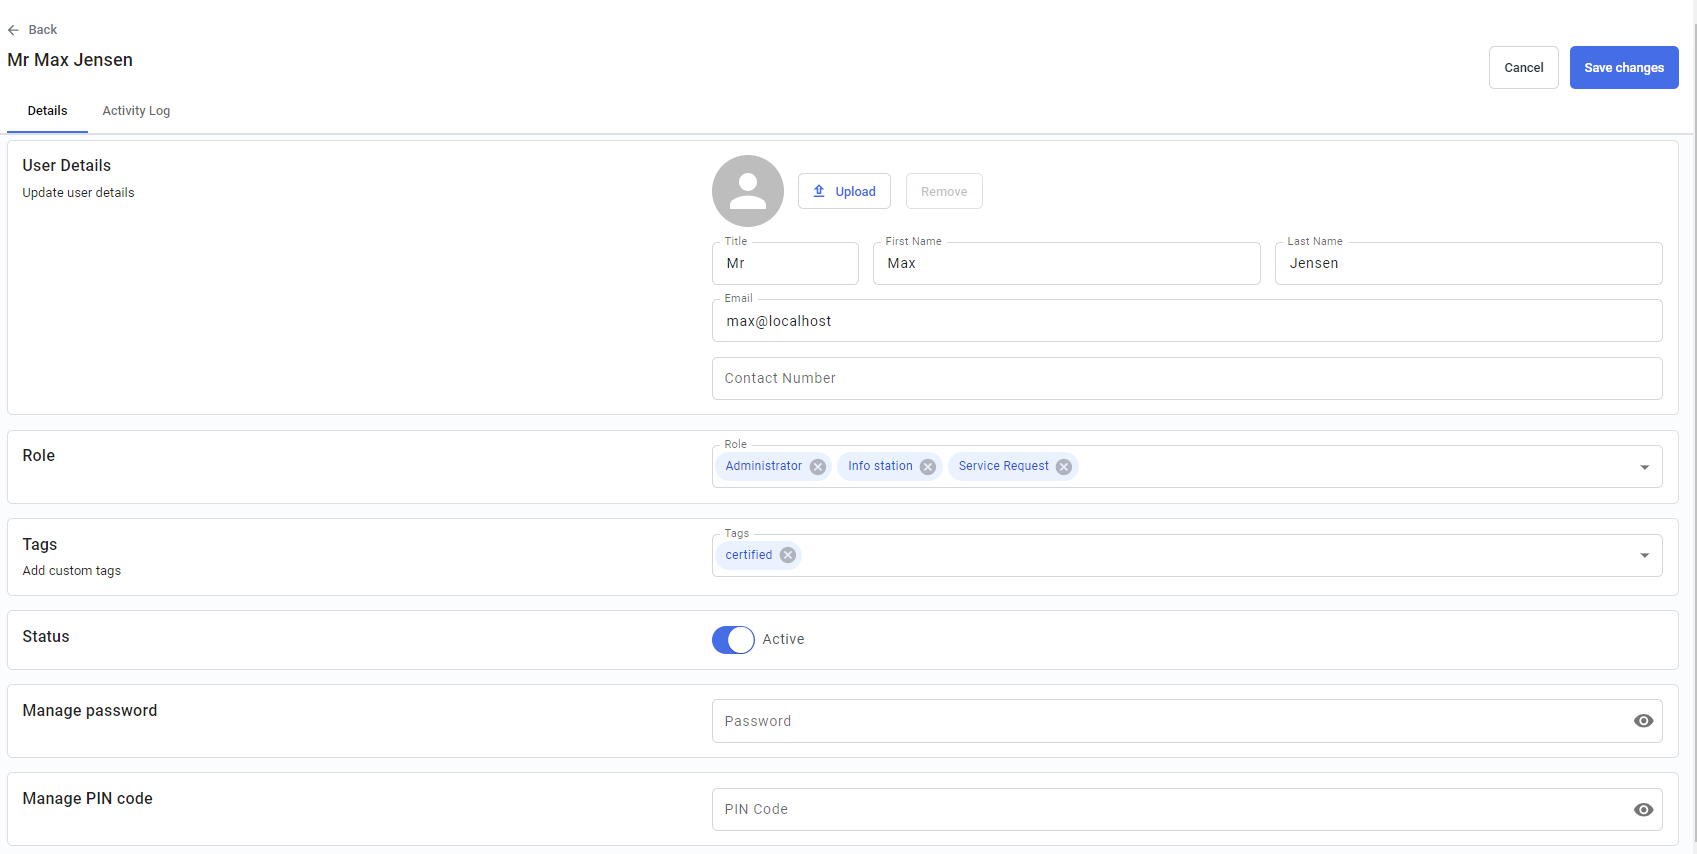
Reset the password or Pin code and save the changes
Note
Please do not include + and = symbols in your password as special symbols.
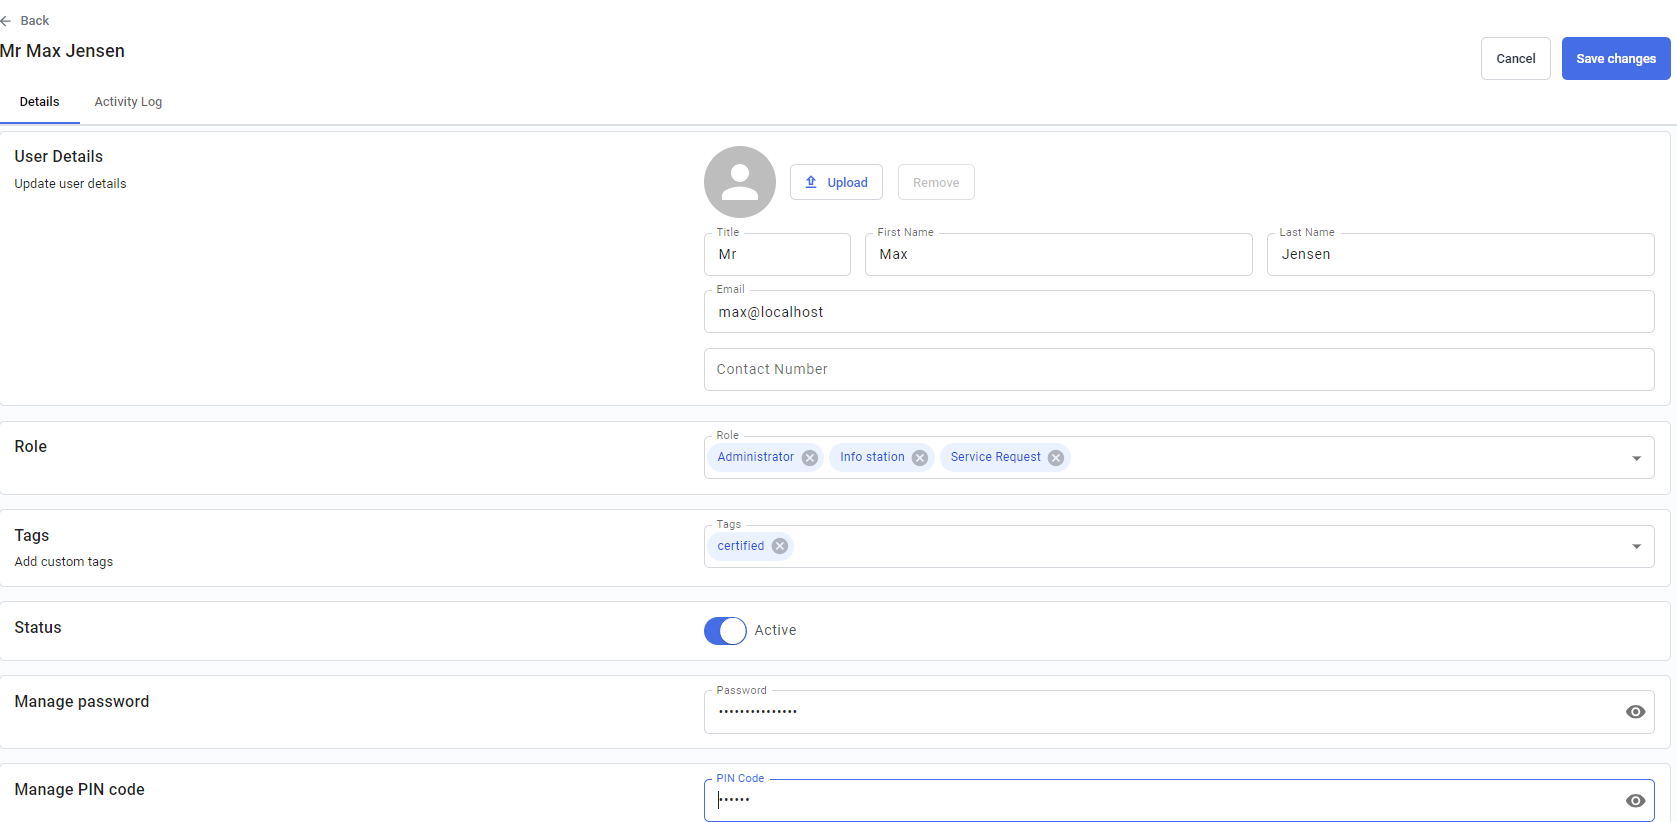
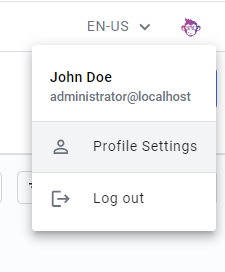
Manage Admin Password or Pin code
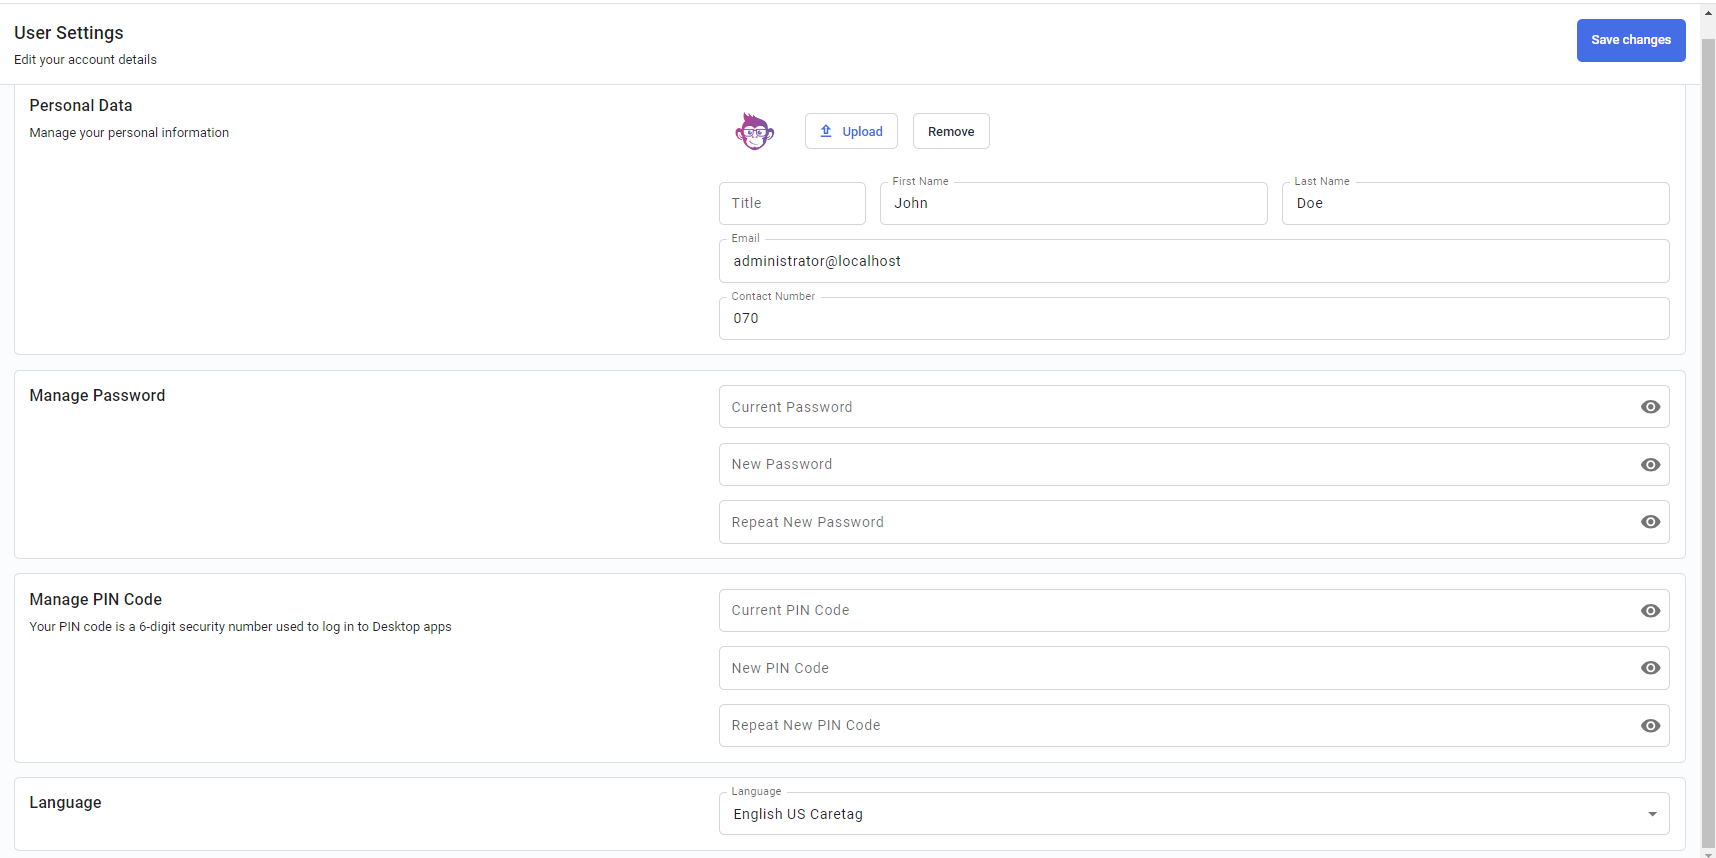
The admins can manage their own password or pincode through the profile settings.
Change the password or pin code and save the changes.
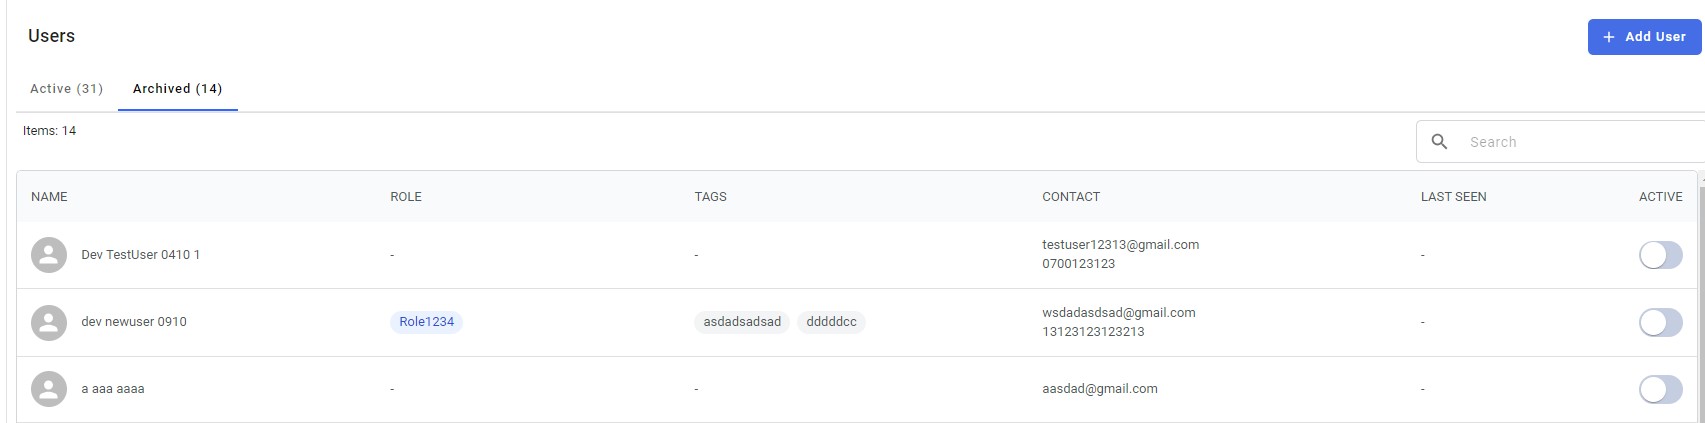
Archieved tab
All the archieved users list can be seen in the archieved tab. Once an user is archieved, it can be undone.
To Archieve an user, click on the action and select Archieve
Roles
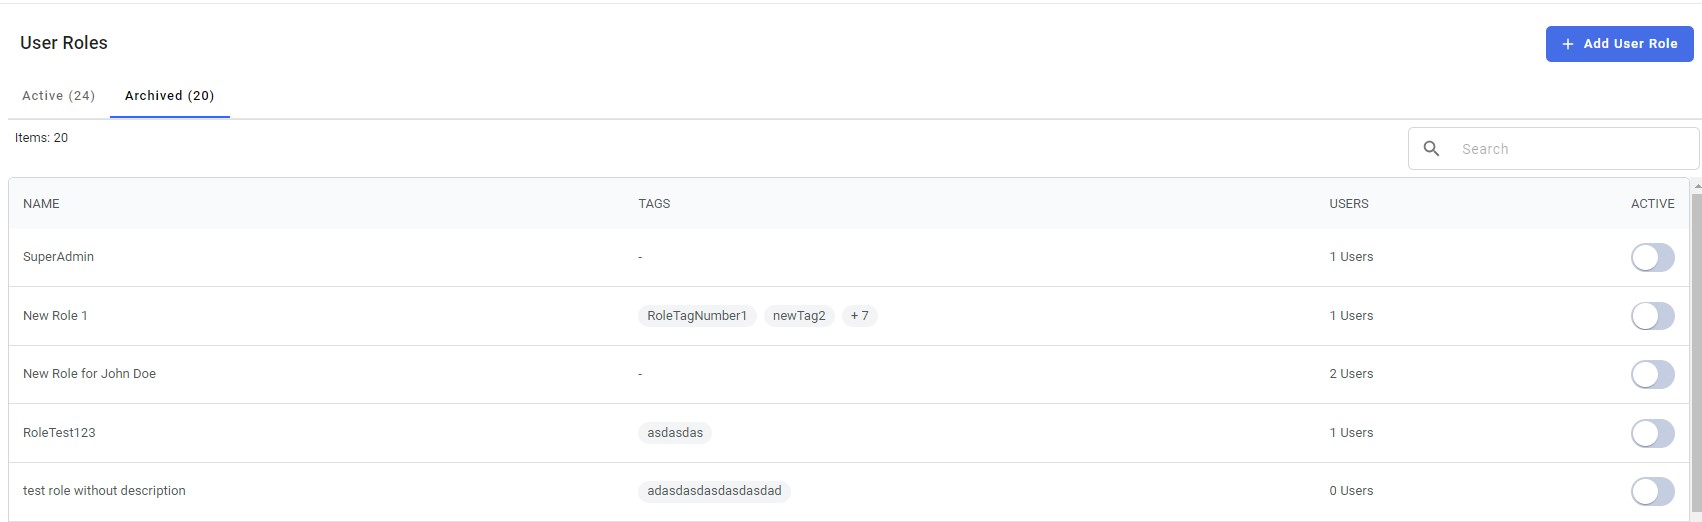
In the User roles dashboard there are 2 tabs: Active and Archieved
Active tab
In the Active tab the user can able to view the details of the user role, tags, users, assign, status and actions.
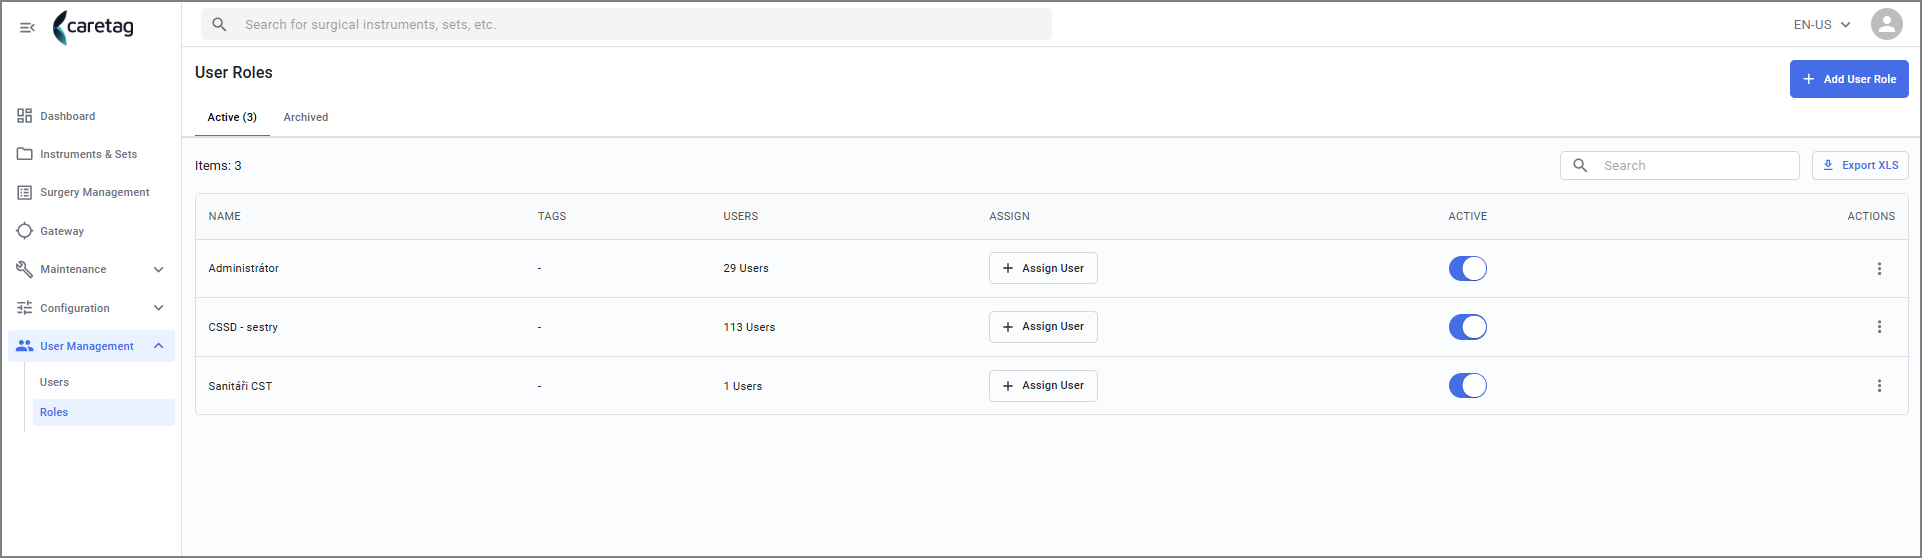
The description of each column is explained below:
| Details | Description |
|---|---|
Name | Name of the Role |
Tags | To identify roles easily |
Users | Number of users assigned to that specific role. |
Assign | By clicking on the Assign button, the administrator can assign new users to that specific role |
Active | Status of the Role. By simply toggling the button you can deactive a Role temporarily |
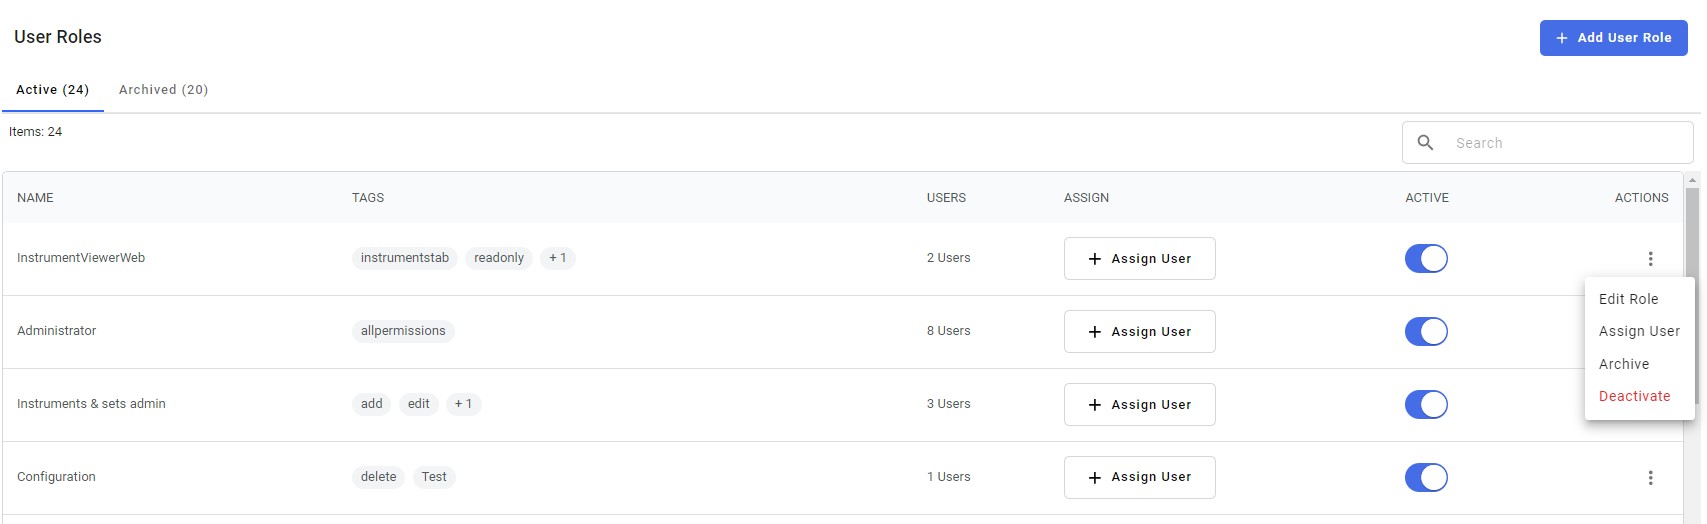
Actions | Click on the 3 dots to edit the role, assing user or Archive the role or to deactive the role |
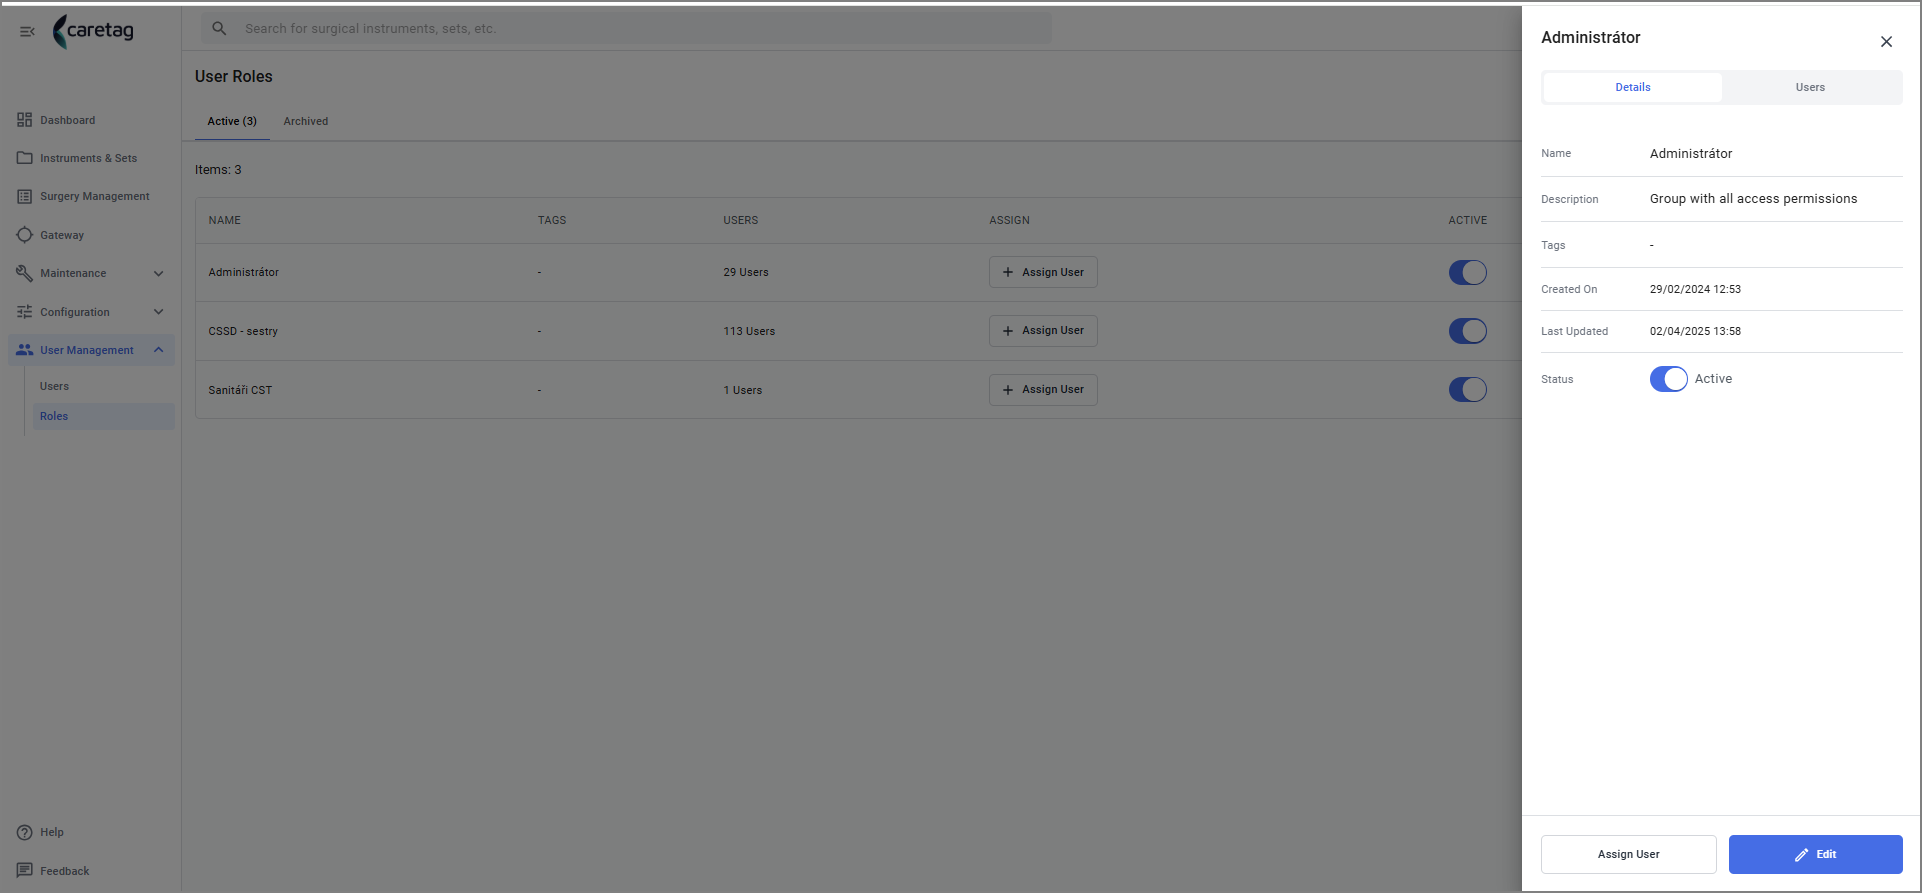
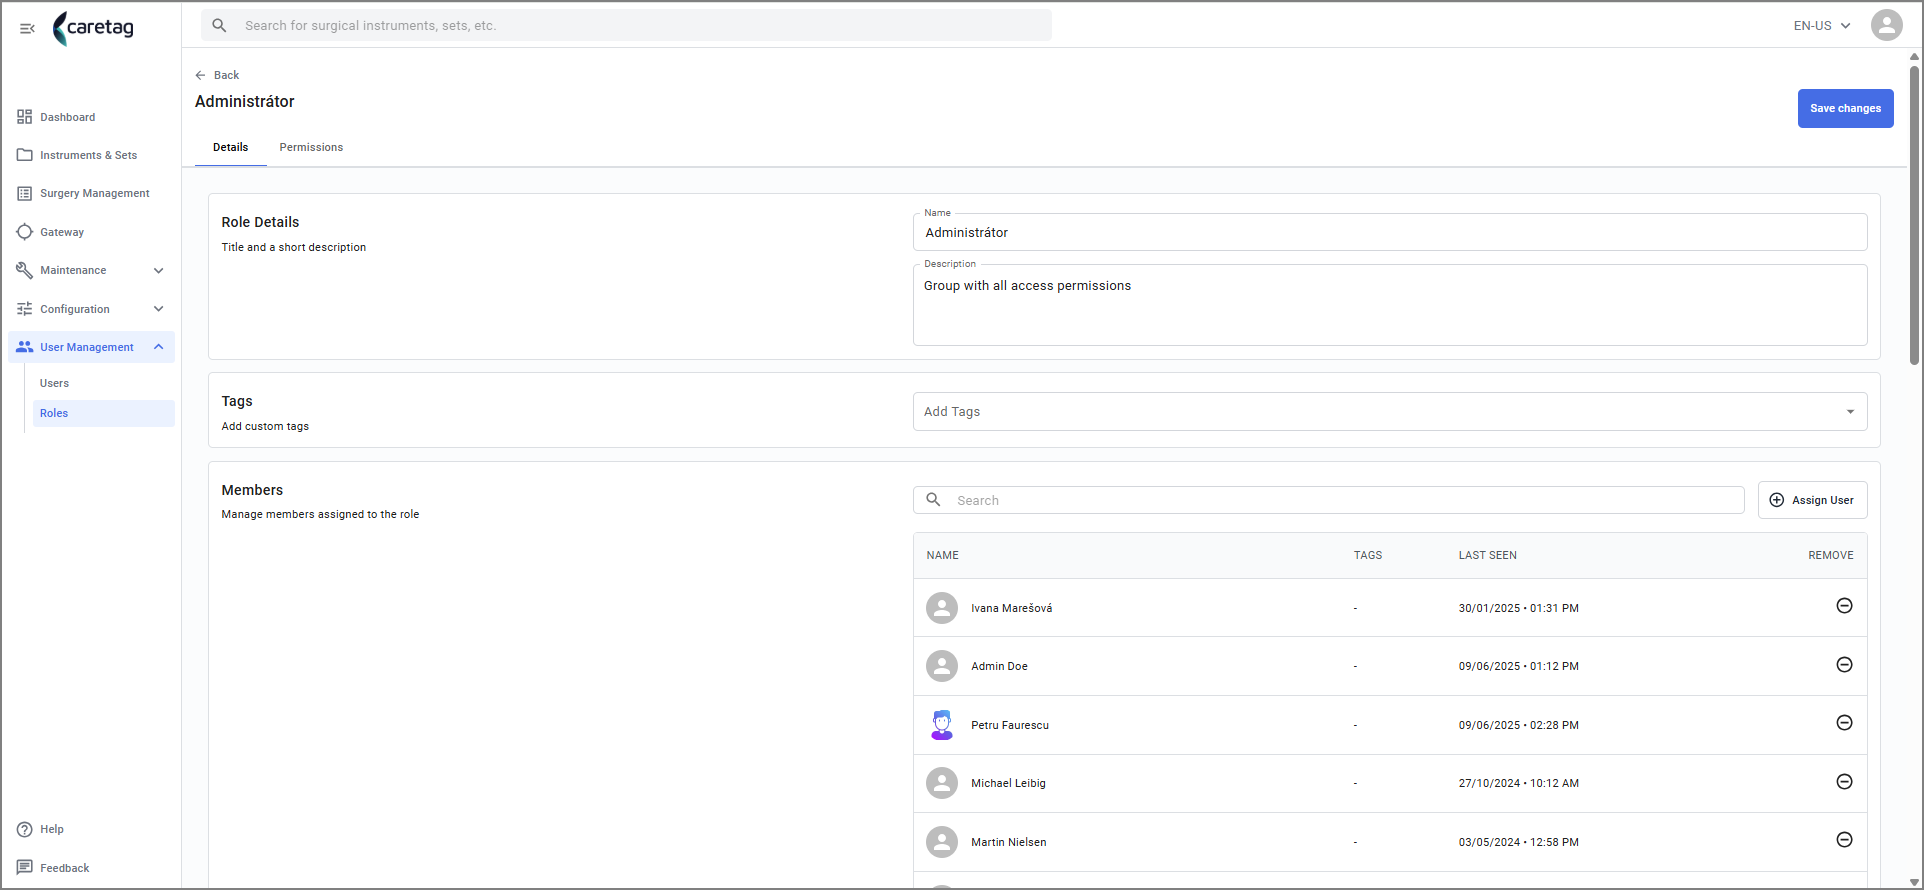
when an User role is selected, it dispalys the role details and the users associated with the role.
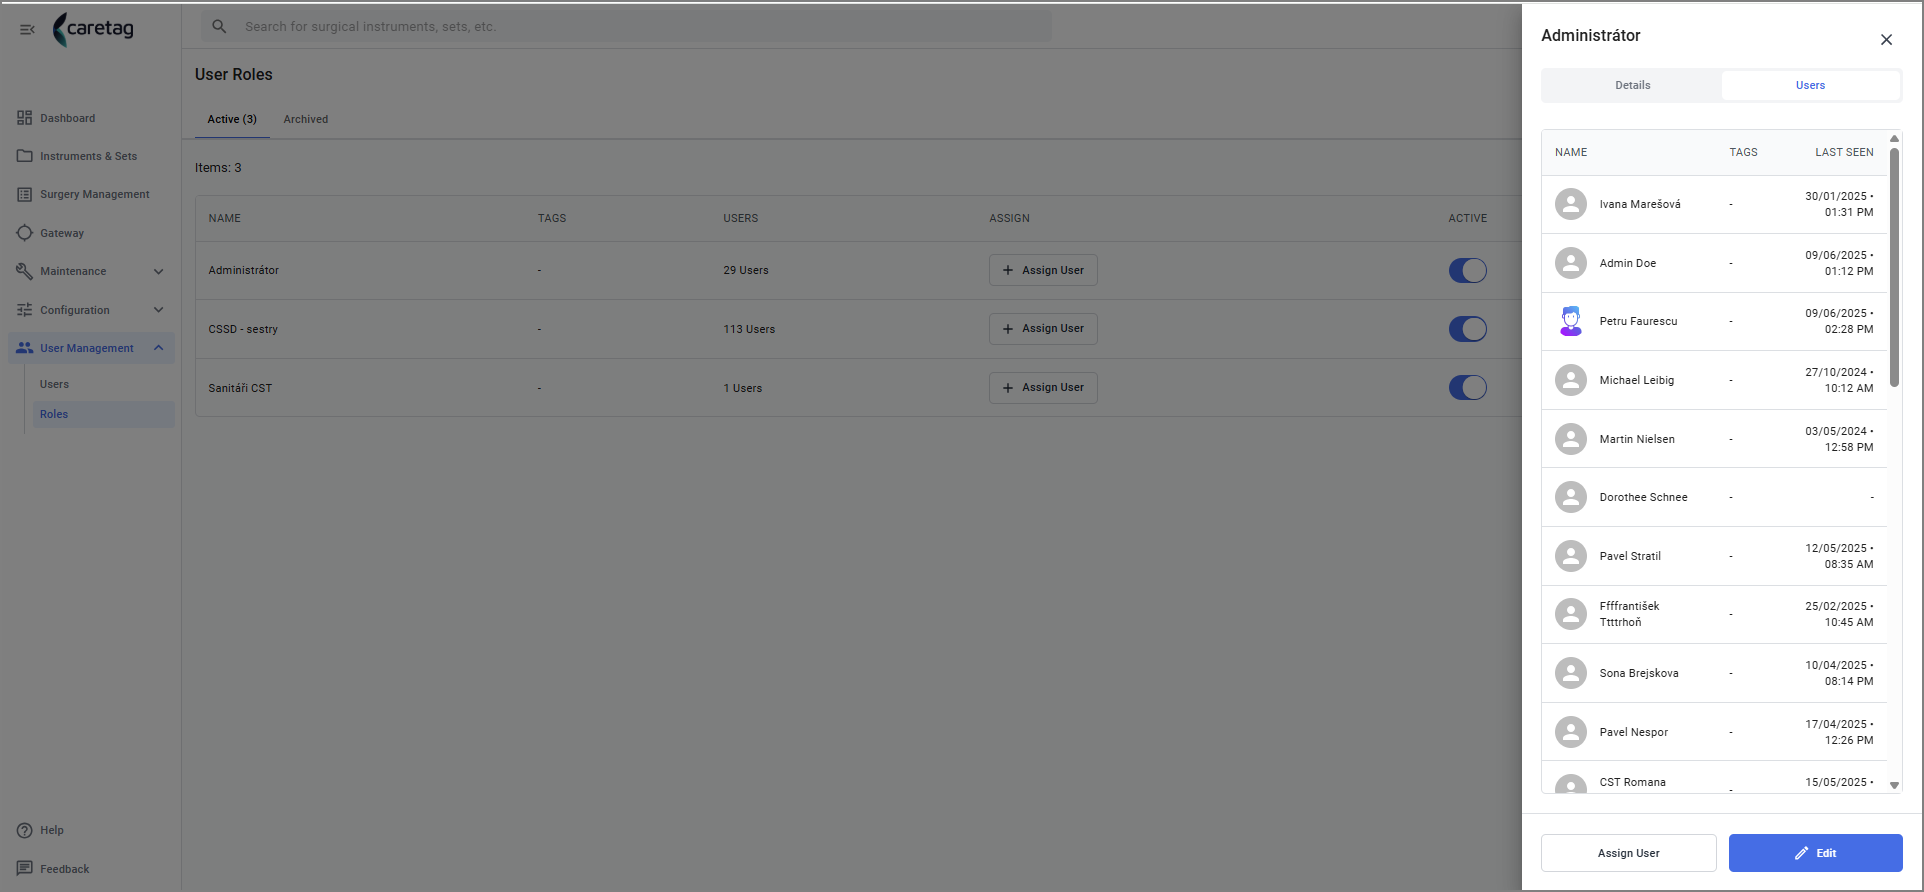
More users can be added by clicking the Assign user button.
Edit Role - The user role can be edited
- The Admin can edit the role, assign the user, deactivate user and archieve it through the Actions feature.
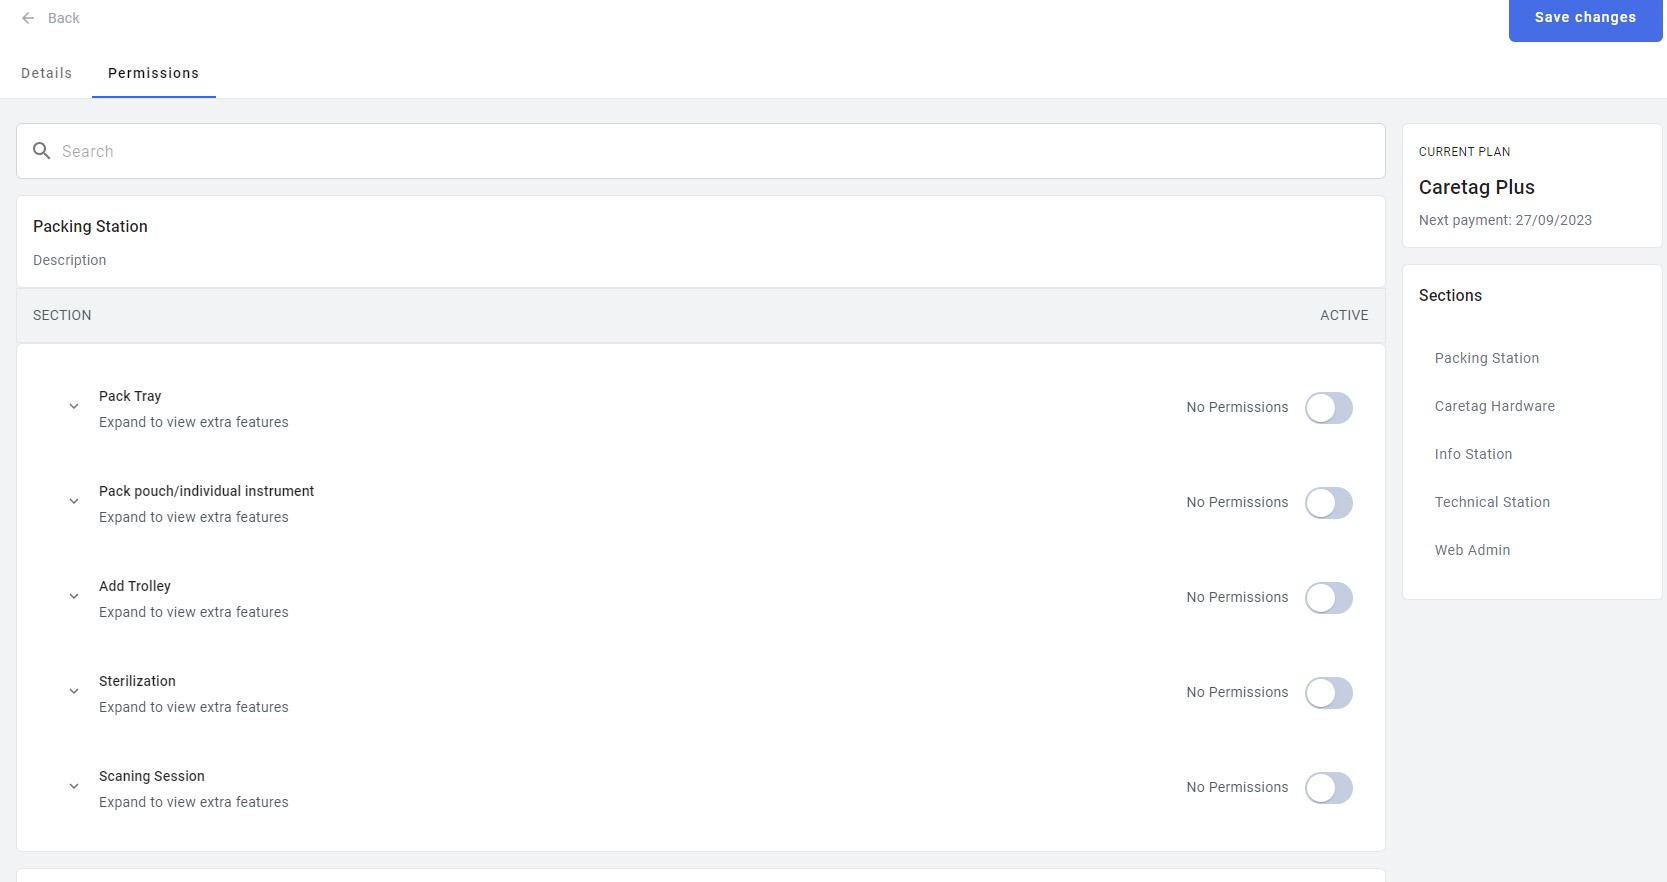
- While on edit mode, go to Permissions tab and toggle on the desired rights. Permissions are grouped by sections, each section belonging to a desktop app or web admin.
Add New User Role
- The Administrator adds roles based on the permissions he intends to give.
-
There can be read-only roles, create/edit/remove roles, web roles or desktop app related roles.
-
Click the Add user role button

Fill in the Role details and add tags and click in save changes button
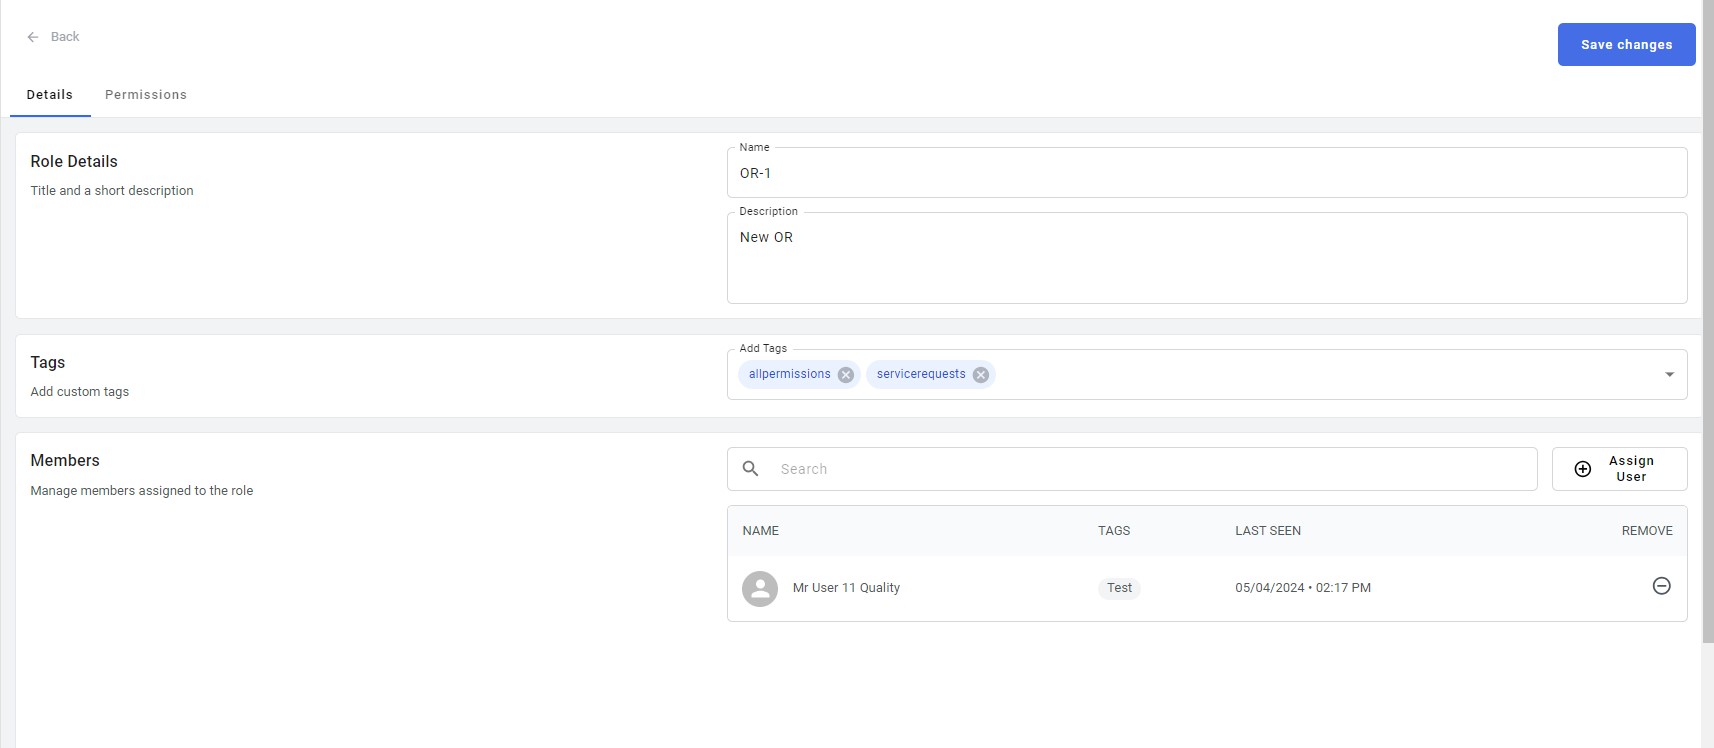
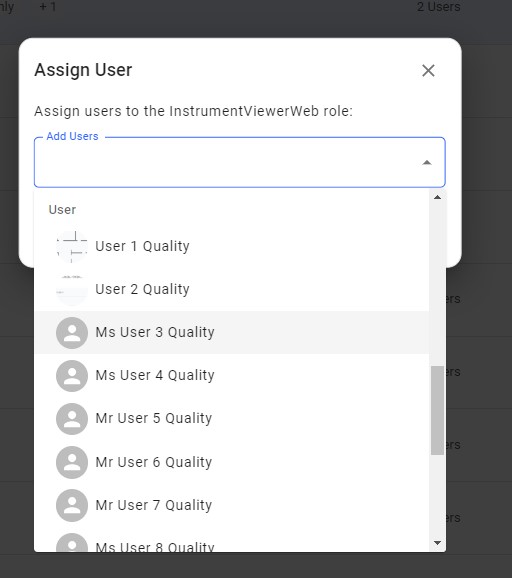
Assign User to this role- Click the Assign user button and select an user from the list.
Once the user is selected from the list, click the Assign User button

The Admin can activate the permissions for this specific role by clicking the permission button and activating the permissions of each sections.
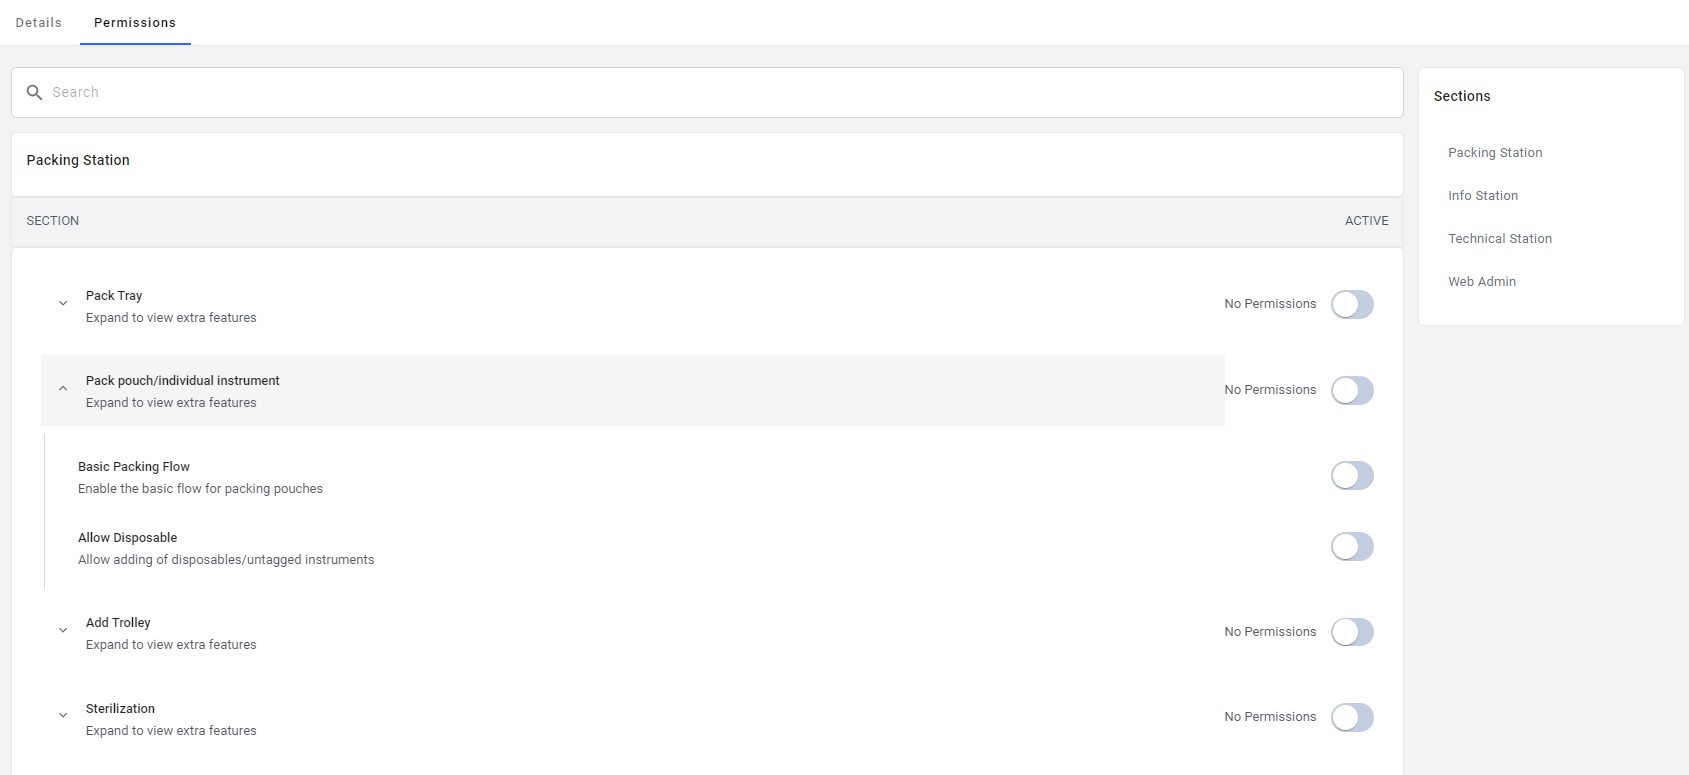
- An important tip to keep in mind is that simply clicking on the active toggle button at the right end by the user or admin will only activate the basic flow, as demonstrated in the image above.
- To activate all features or specific features within that section, users must expand each section and then activate the necessary ones. This ensures that the desired functionalities are fully activated and accessible.
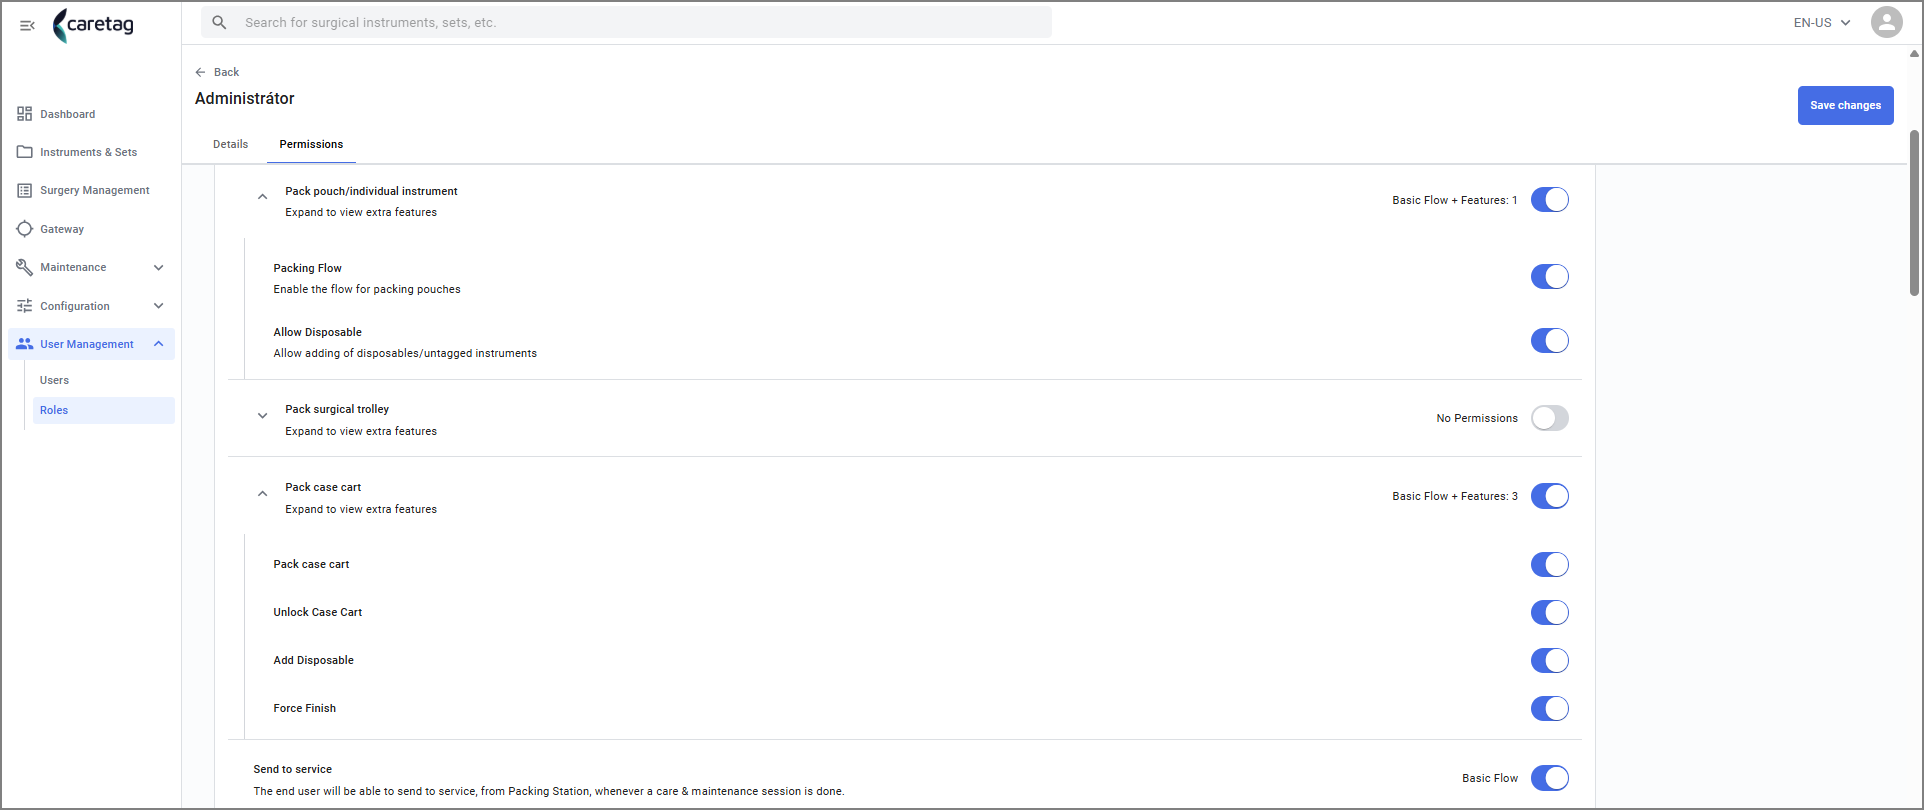
Now save the changes and the new role created is ready for use.

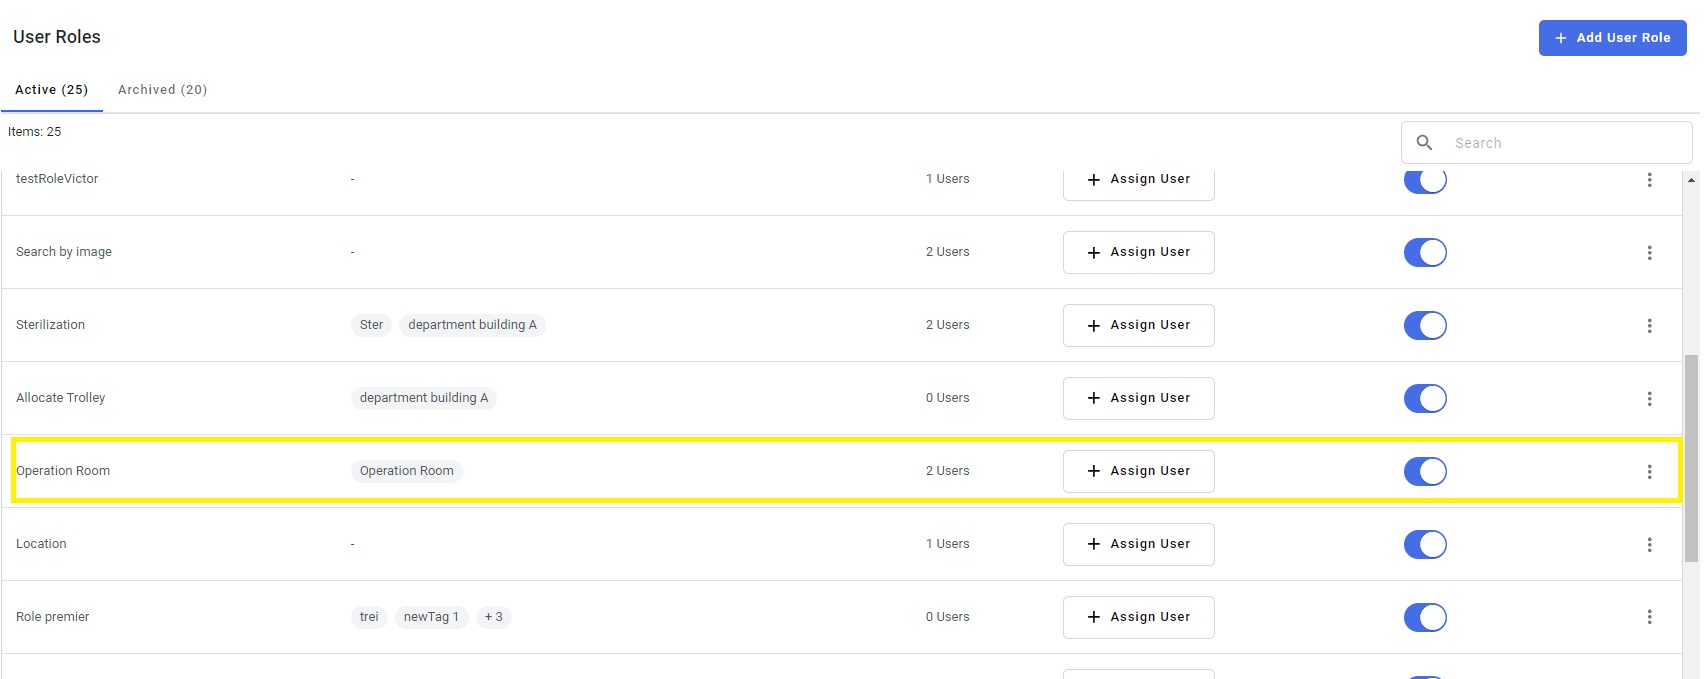
You can find the new role created in the User Roles list
Archieved
All the Archeived user roles are displayed in the archieved tab. Once archieved it cannot be undone.