Packing Station - User Manual
Login
Please ensure that you have installed the Packing station desktop application on your system.
Launch the application and login with the provided pin code or email and password.
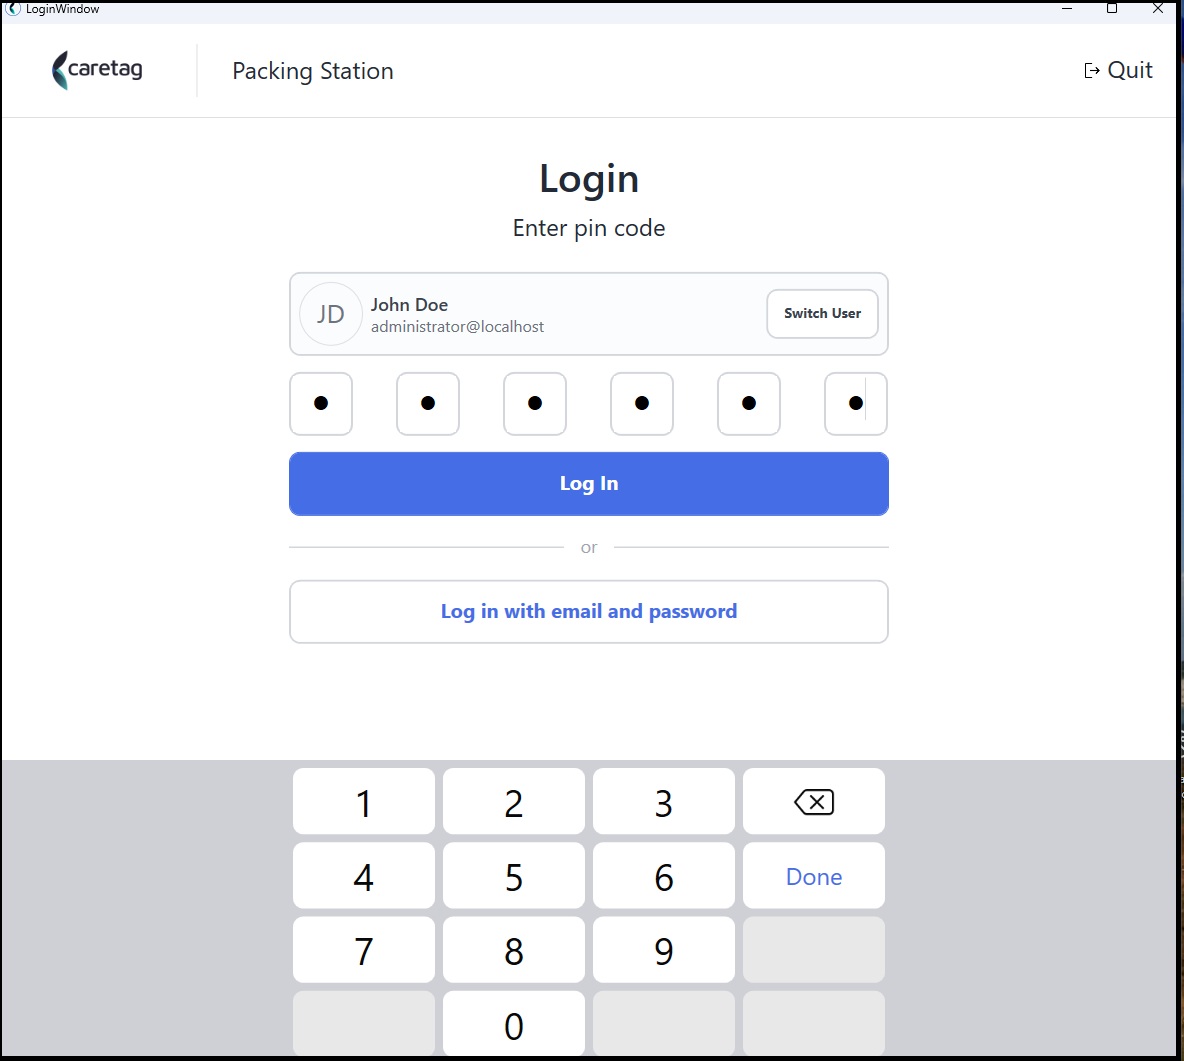
Login Failures:
We advise the users to contact their administrators in the event of any login failures.
Modules / Options
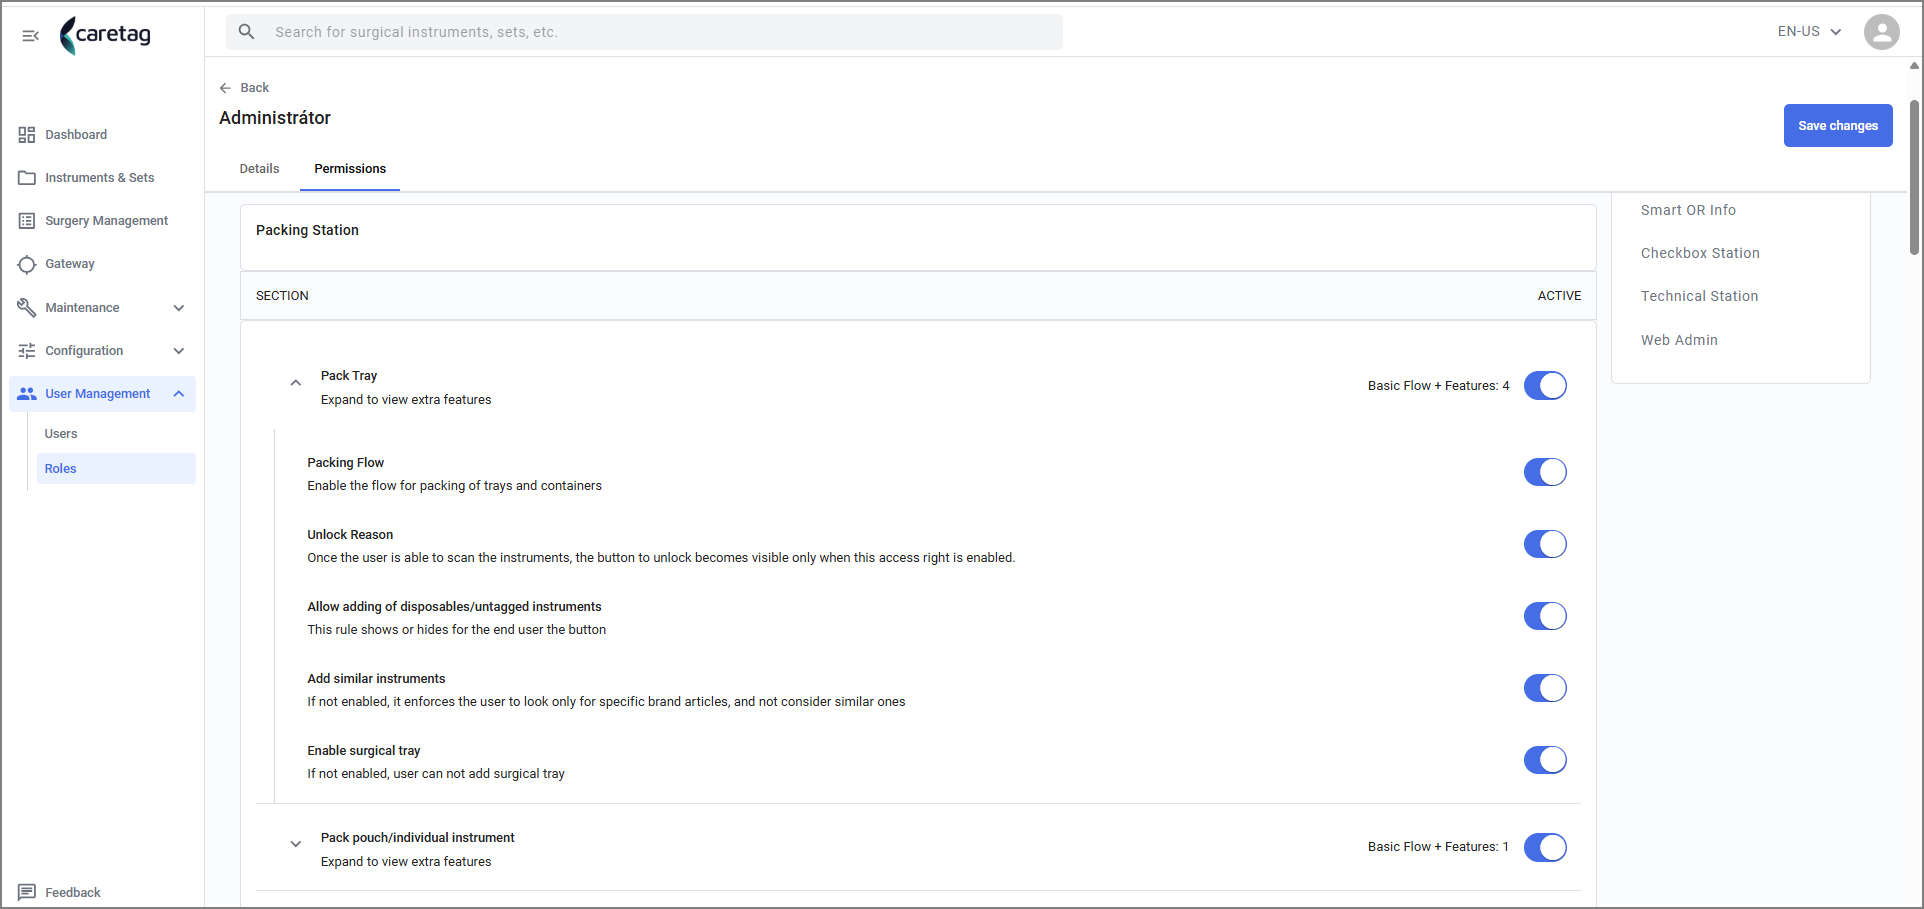
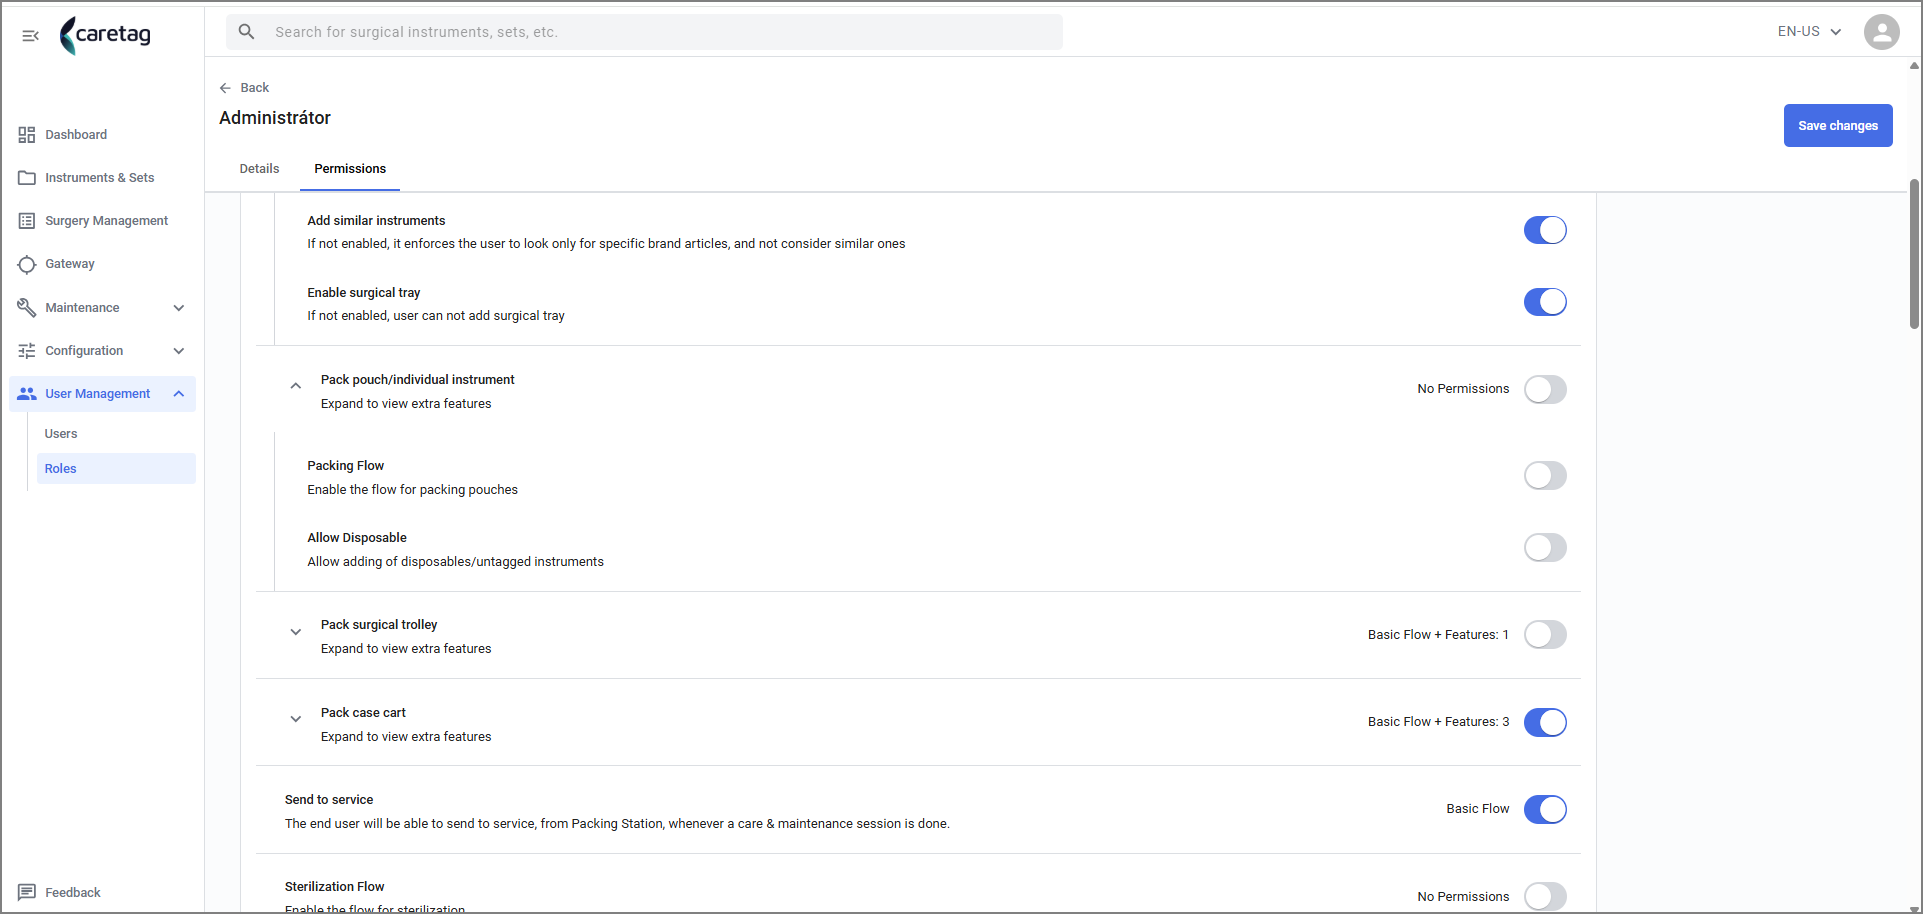
- These modules/options are configurable and each user will only see what’s available for their role.
- Some user roles will have only Packing a tray option and not pouch and some may have only to pack a case cart.
- It depends on the Administrator who manages the user roles.
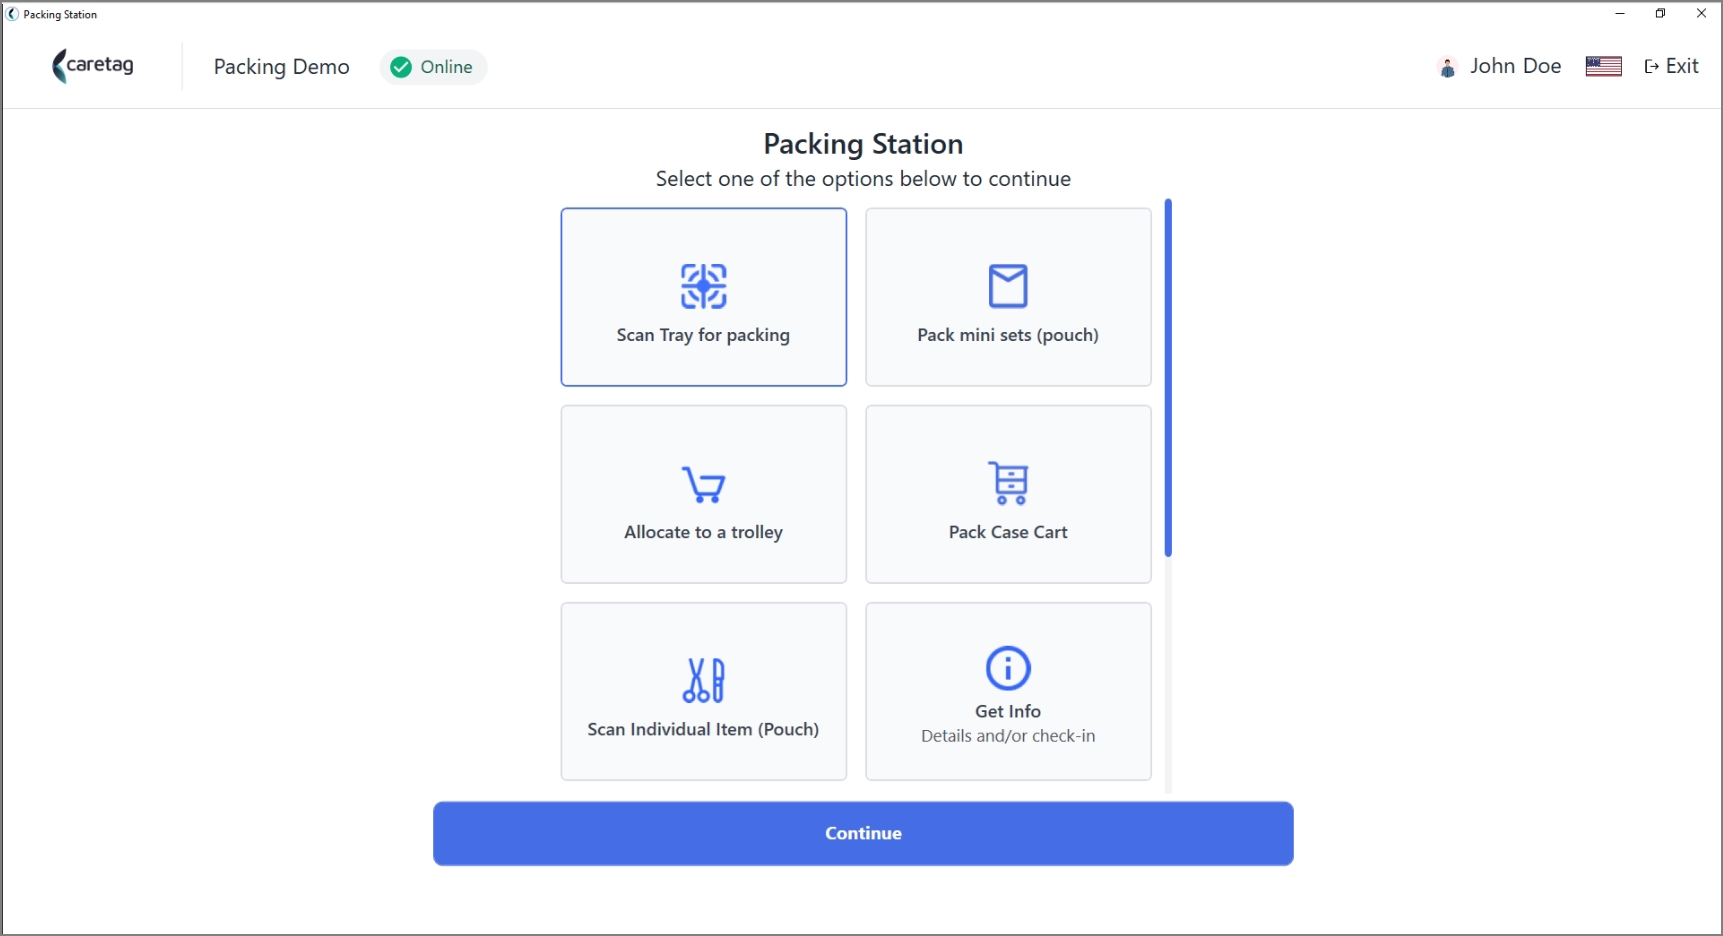
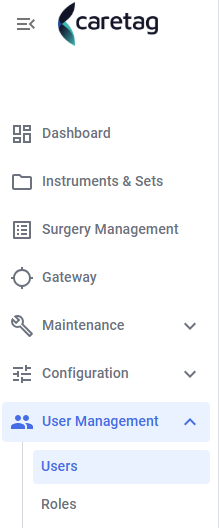
- For example, in the web Admin- User roles, pack a pouch is disabled for this role, then the users with this role will not be able to see the option Pack a pouch.
Connectivity Check
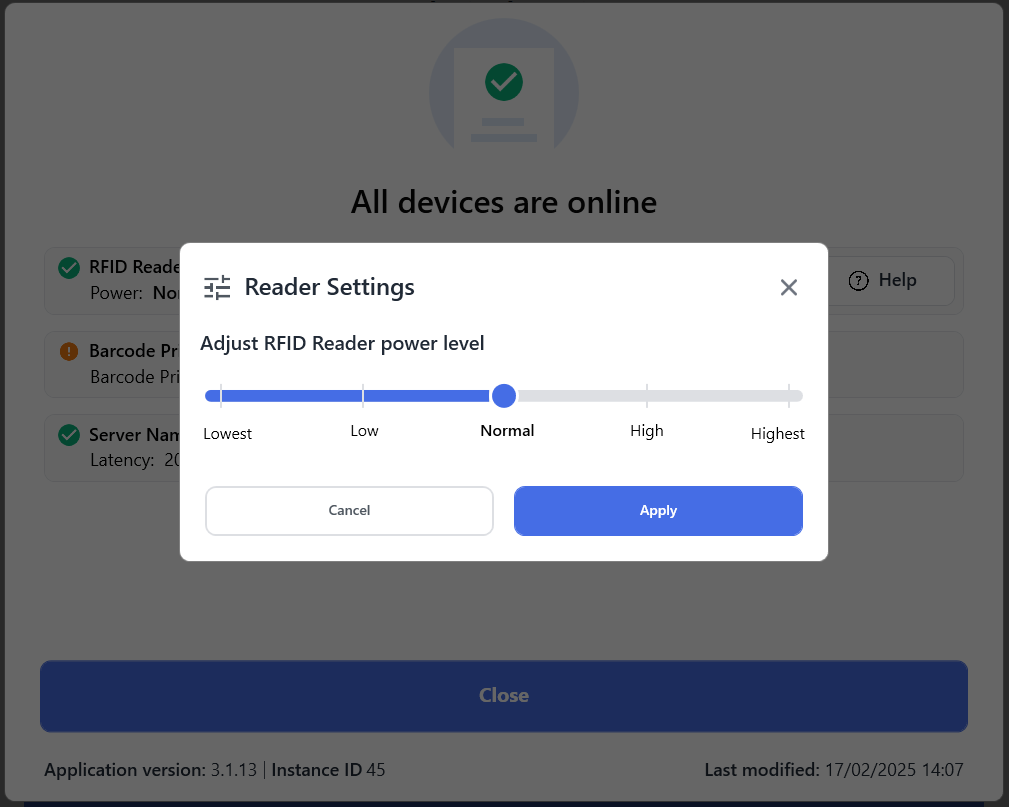
- To check the connectivity of the reader, server and the printer click on the Online/Active issues icon on the top.
- It displays the details of the reader, server and printer details.
- There is an option to adjust the power levels of the reader.
- At the bottom you can see the current version of the application and the app instance ID.
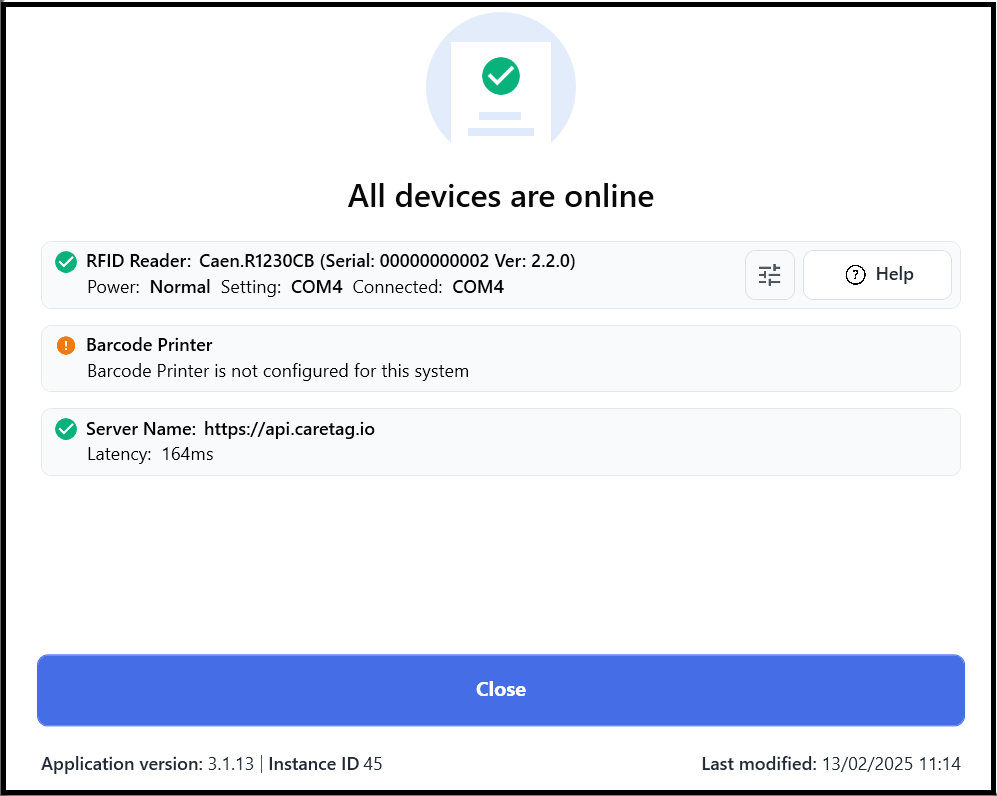
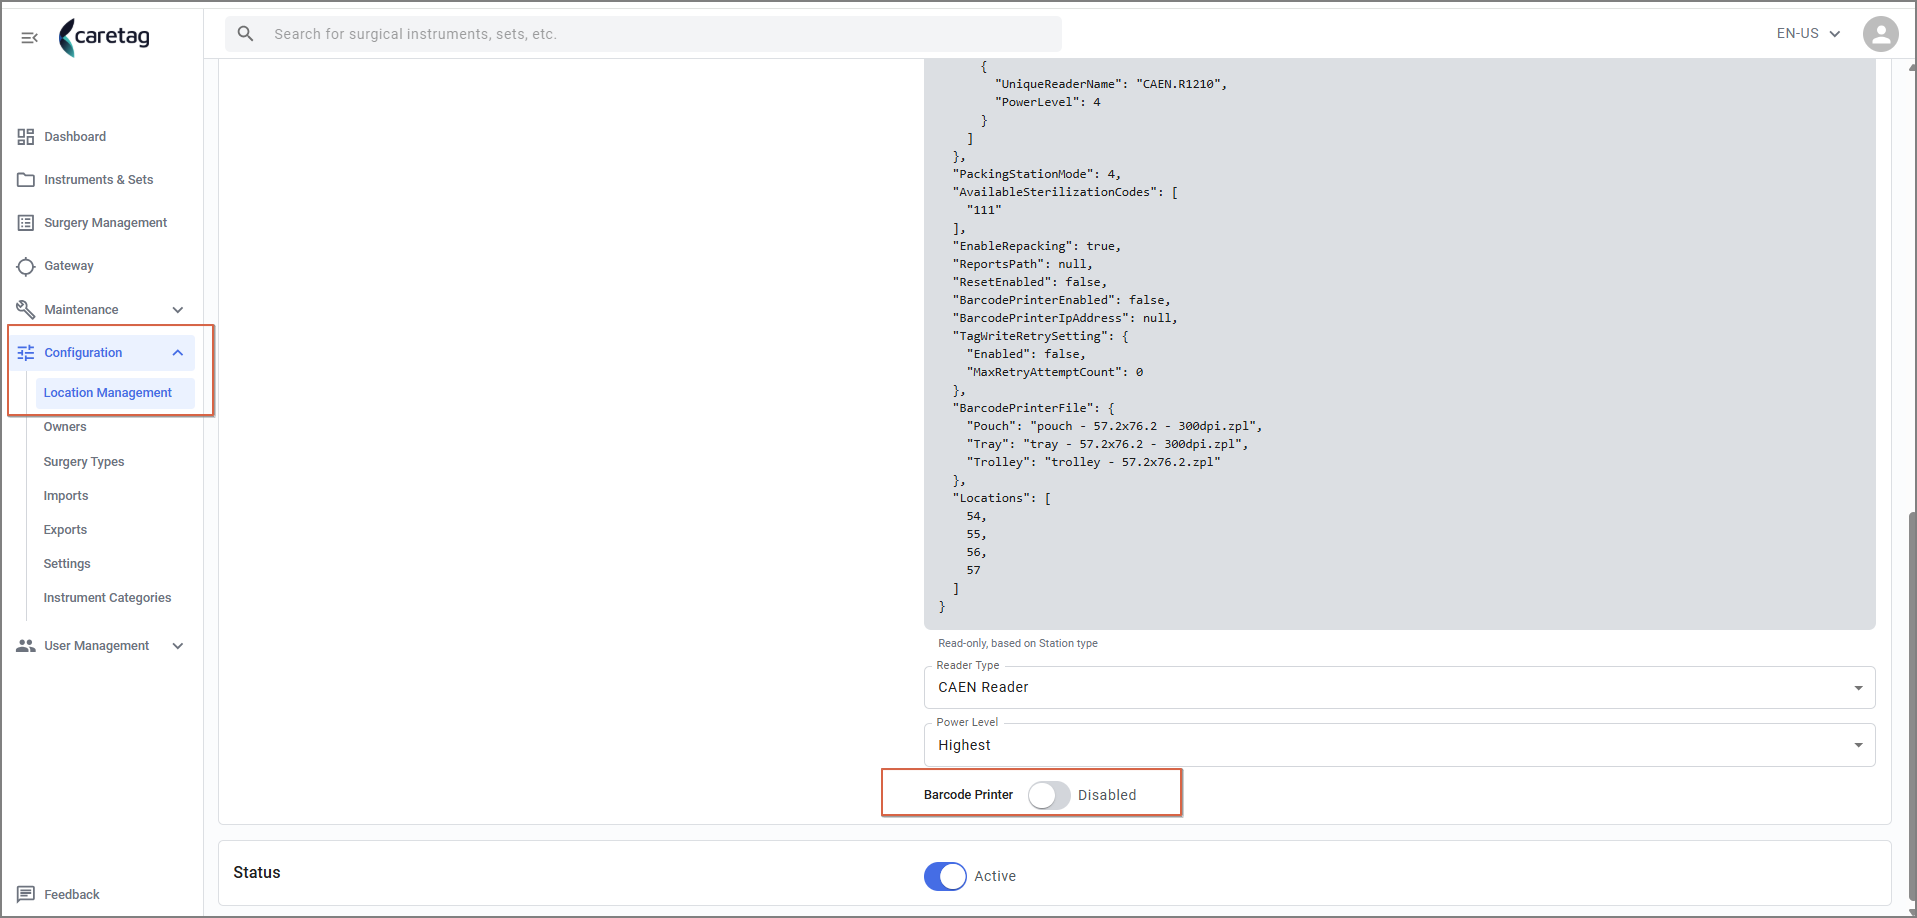
- Here the barcode printer is not configured for this app instance.
- It can be configured from the Admin station- Location management
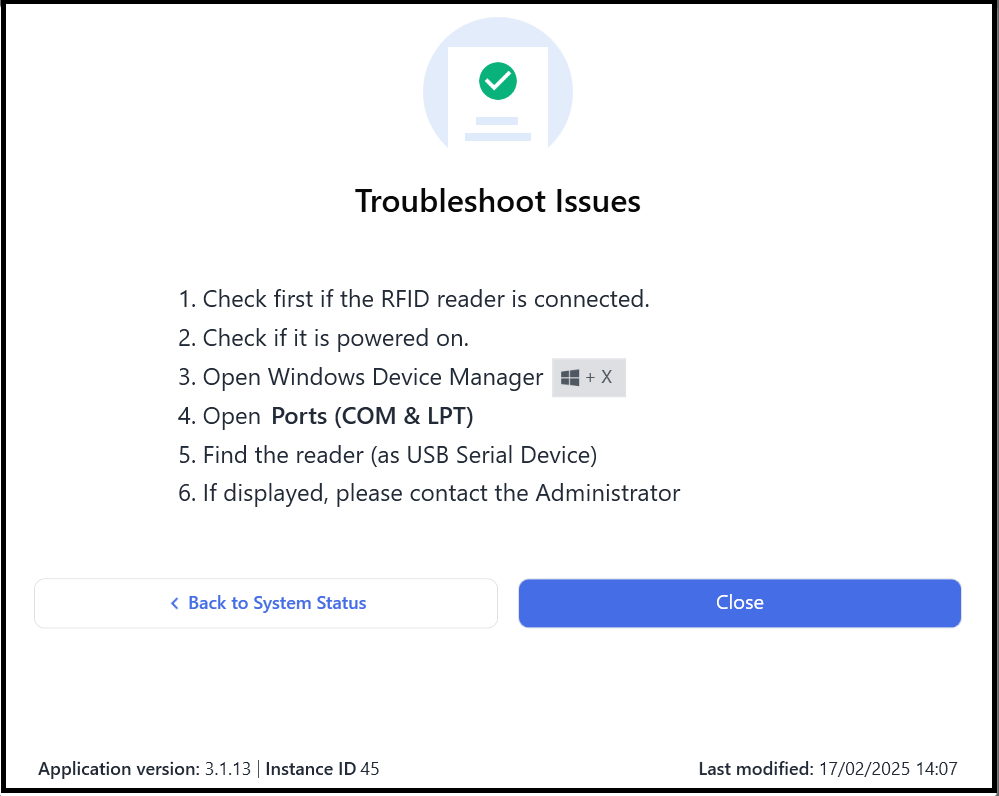
- The help button provides the basic troubleshooting steps to trobleshoot the reader connections.
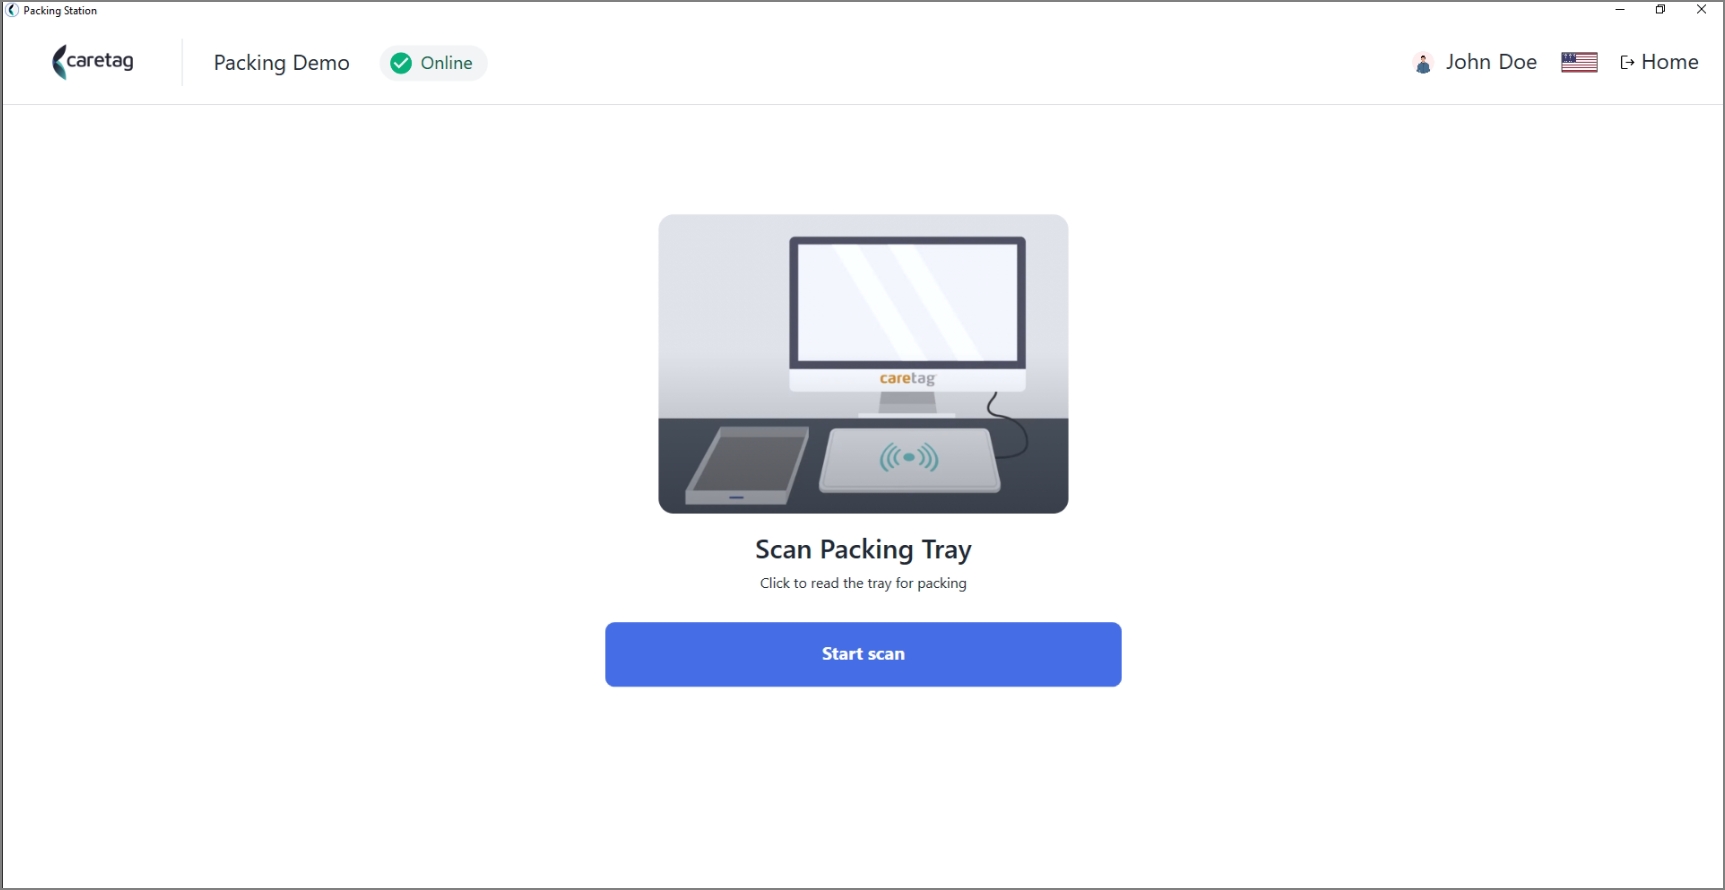
Scan tray for packing
- Select Scan tray option
- Scan the tray tag
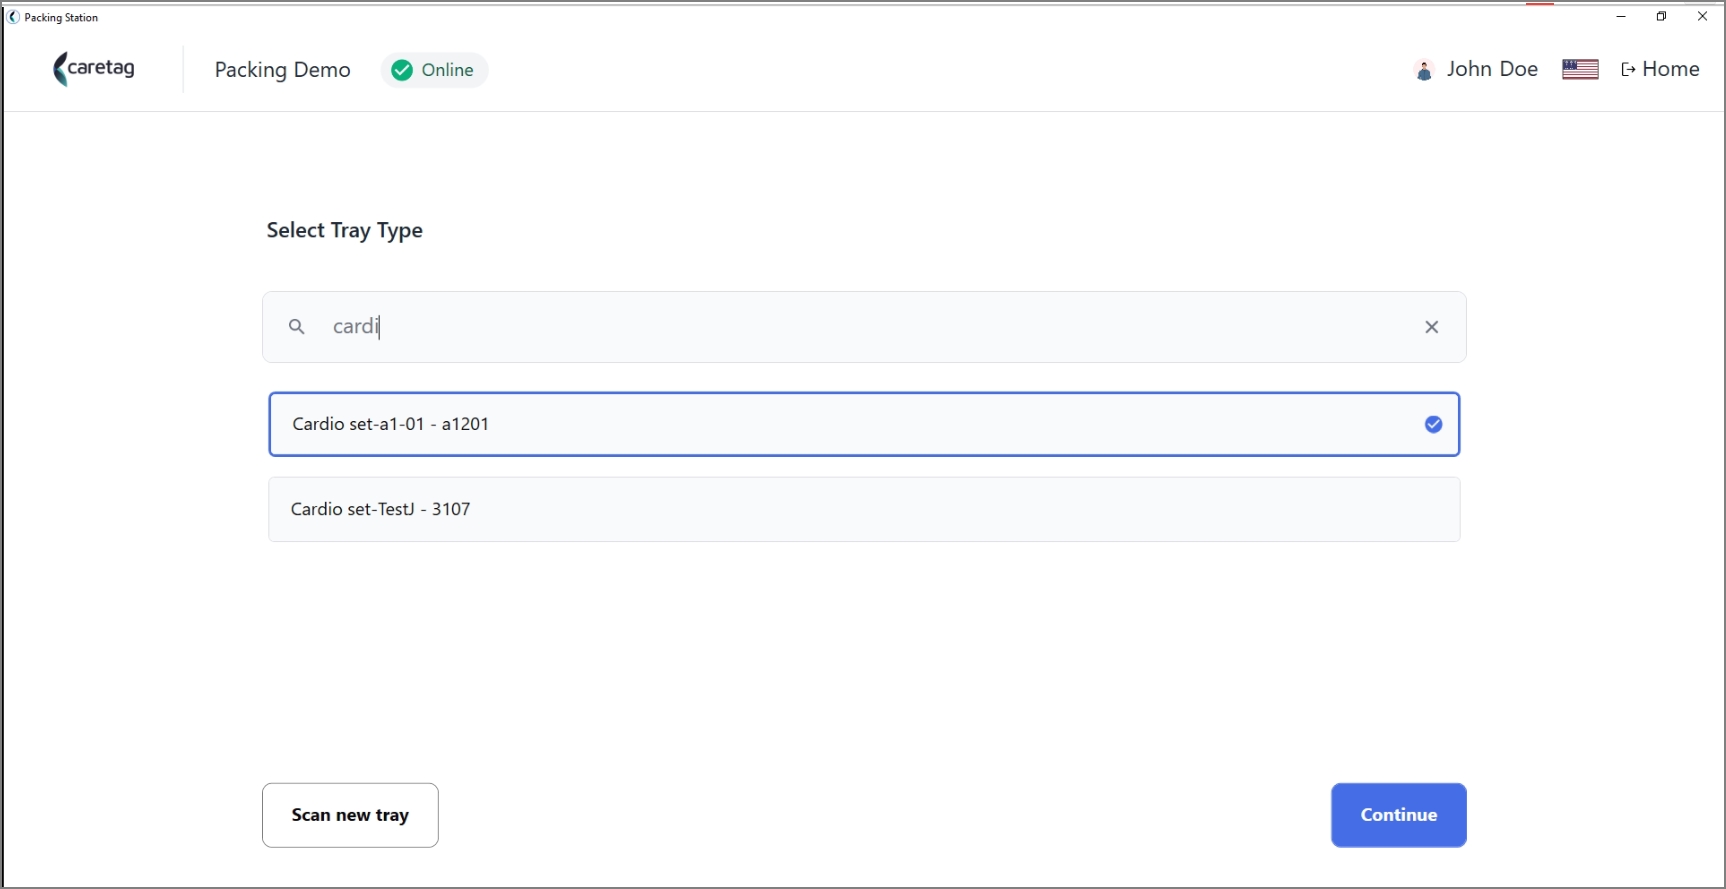
- Select tray type by typing the tray name, select the tray and click the continue button.
- Select the unit. If the tray has only one unit , it will automatically go to the instrument lists screen.
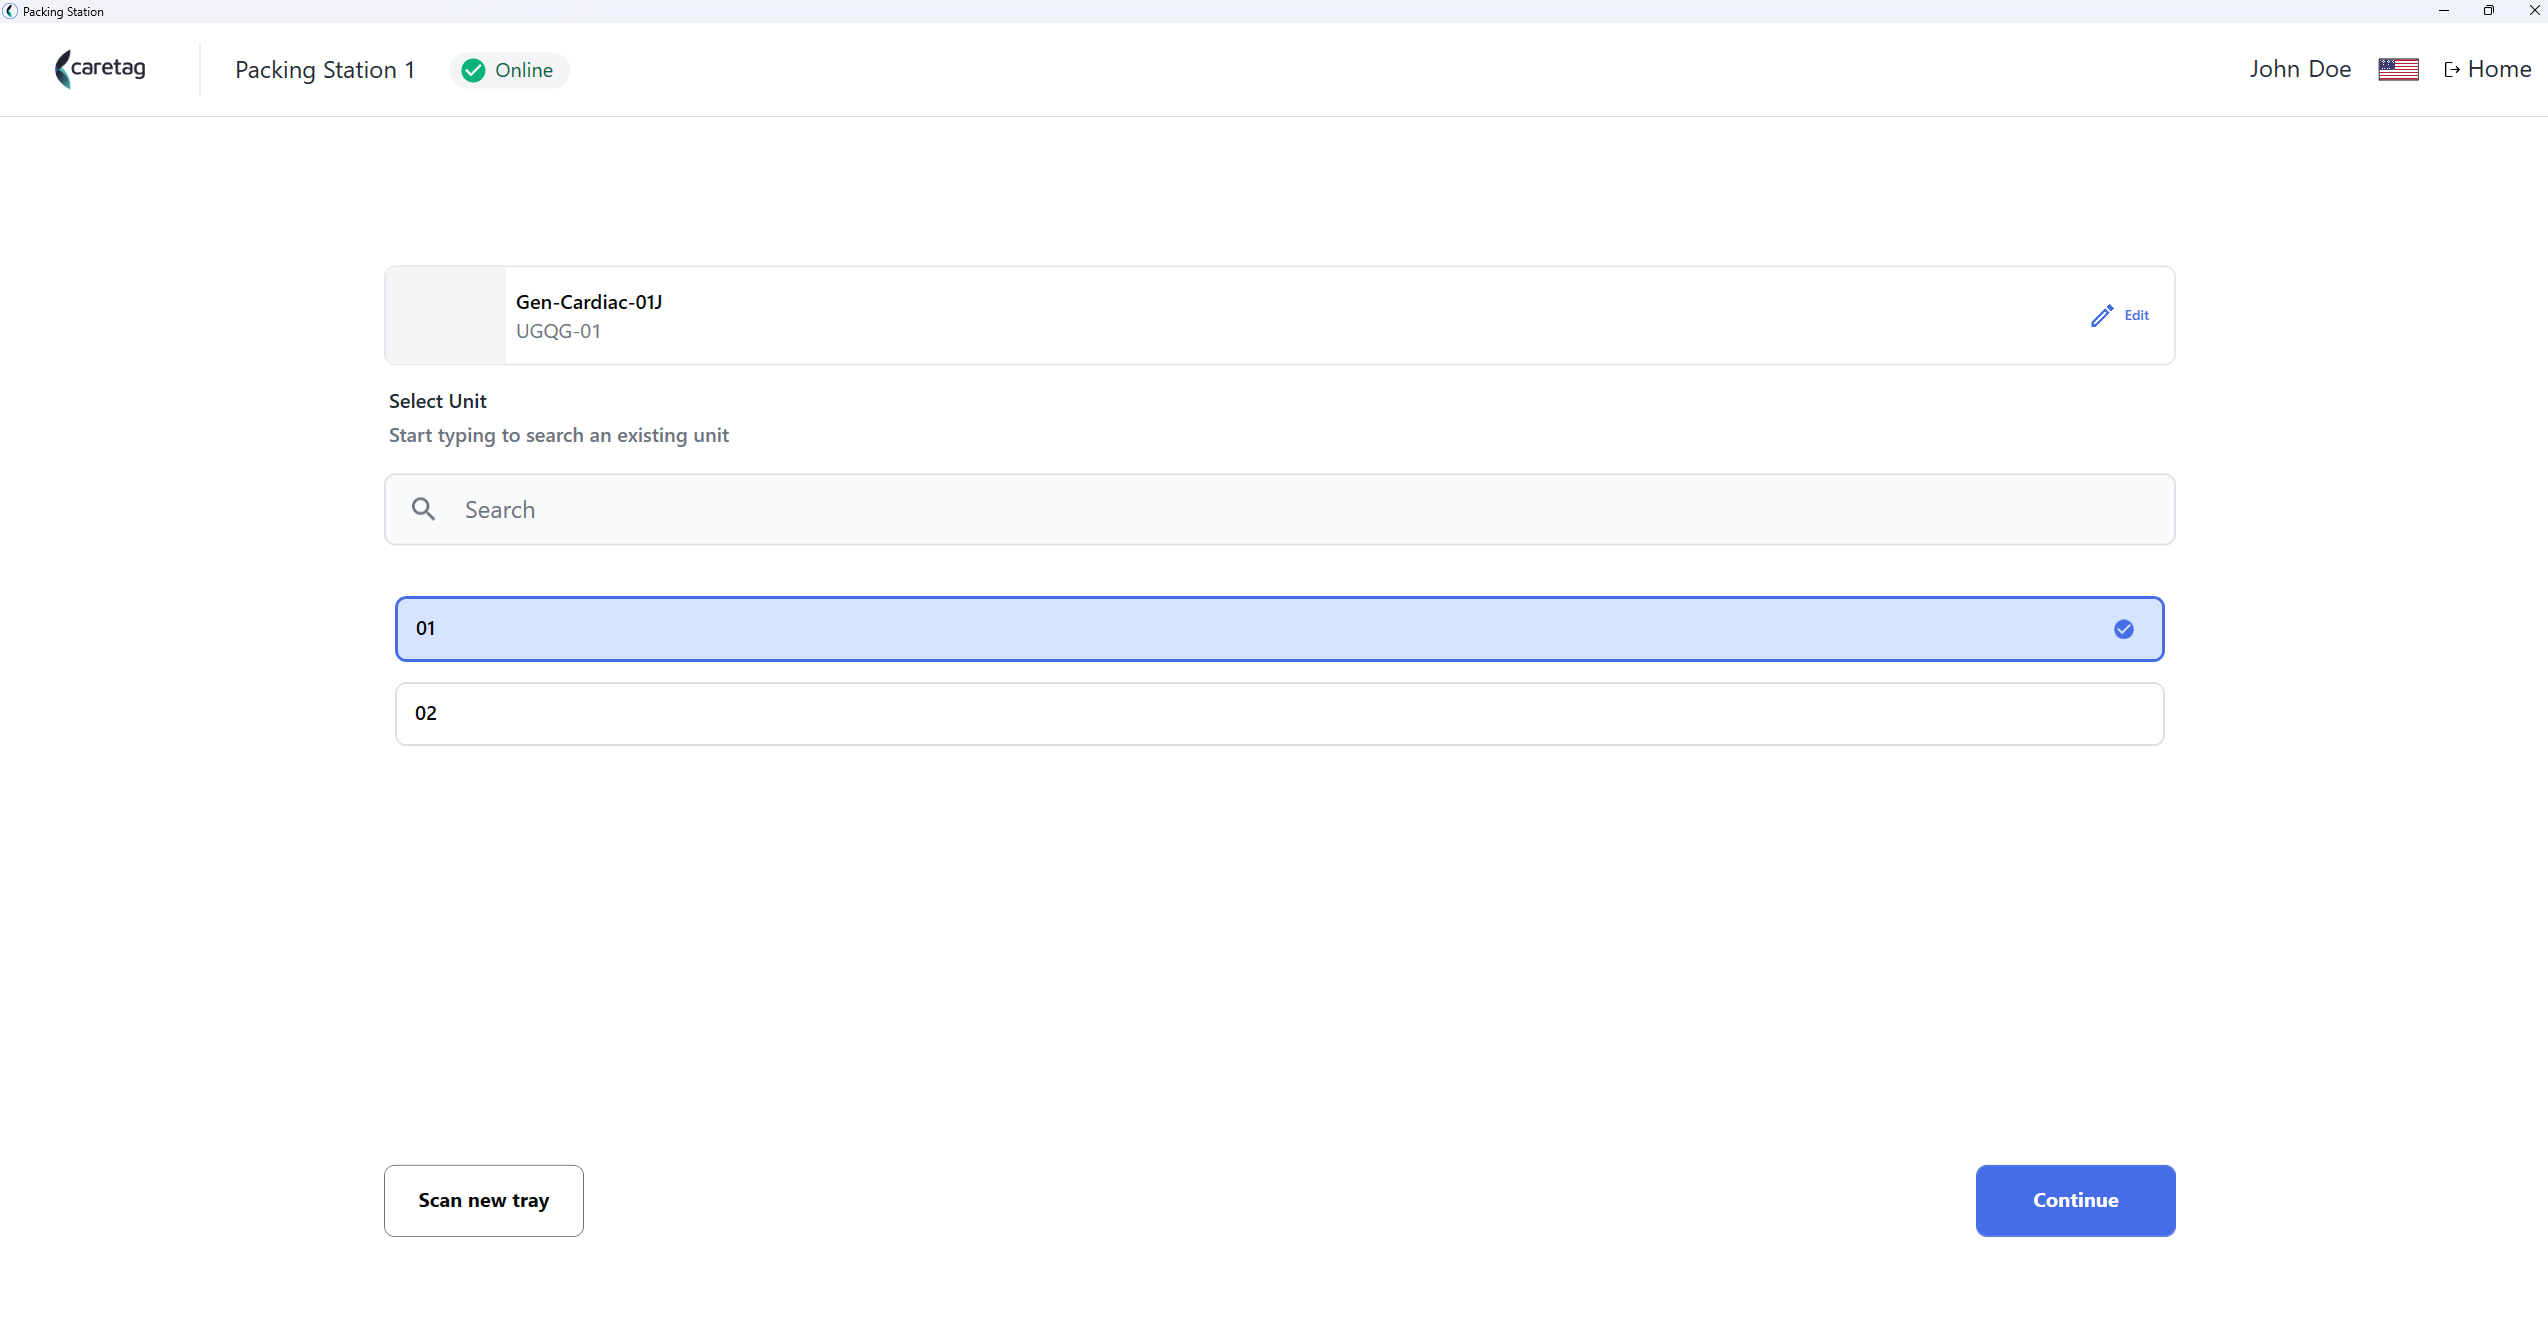
- There are 2 tabs: Scanned items and Difference team.
| Details | Description |
|---|---|
Full Name | Name of the asset |
Type | Type of the asset, such as instrument |
SKU and Brand | Article number and brand of the instrument |
Status | Scanned, Pending |
- It displays all the instruments in the packing set and their details, like name, SKU, quantity.
- On the right side you can see the picture of the instruments and tray.
- Once you start scanning the instrument, you can see the blue bar on the top is progressing and the scanned instruments will change and will be highlighted in green and yellow when there are items yet to be packed.
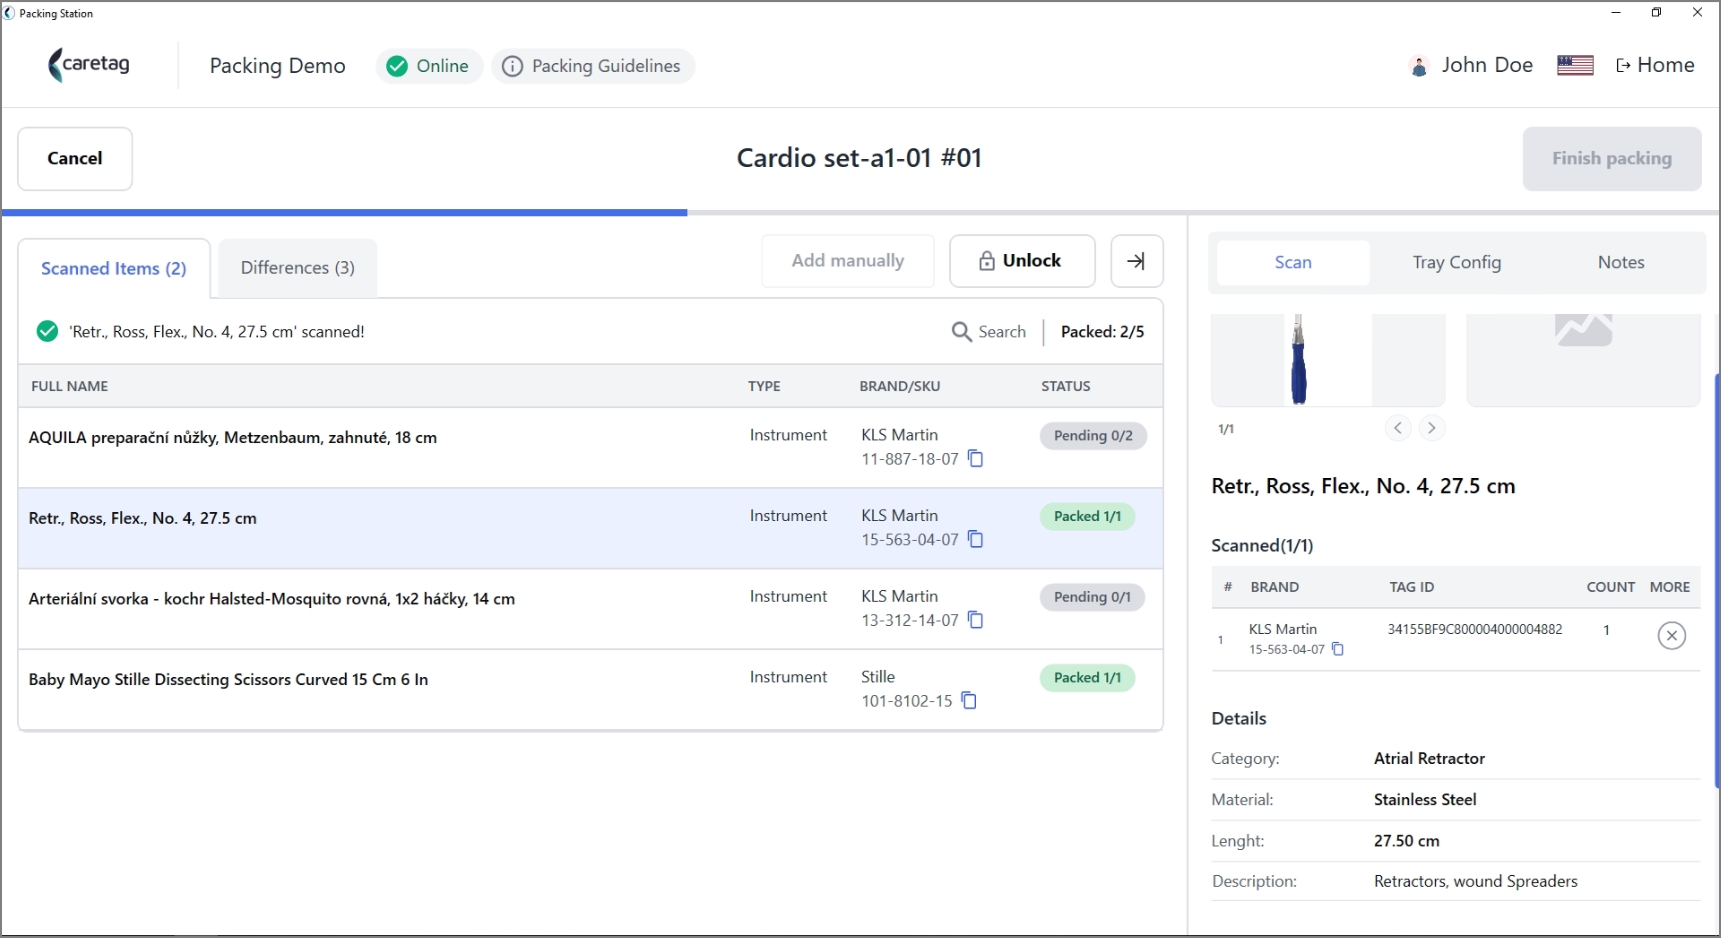
- On the top we have provided an information button with the packing Guidelines to pack a tray.
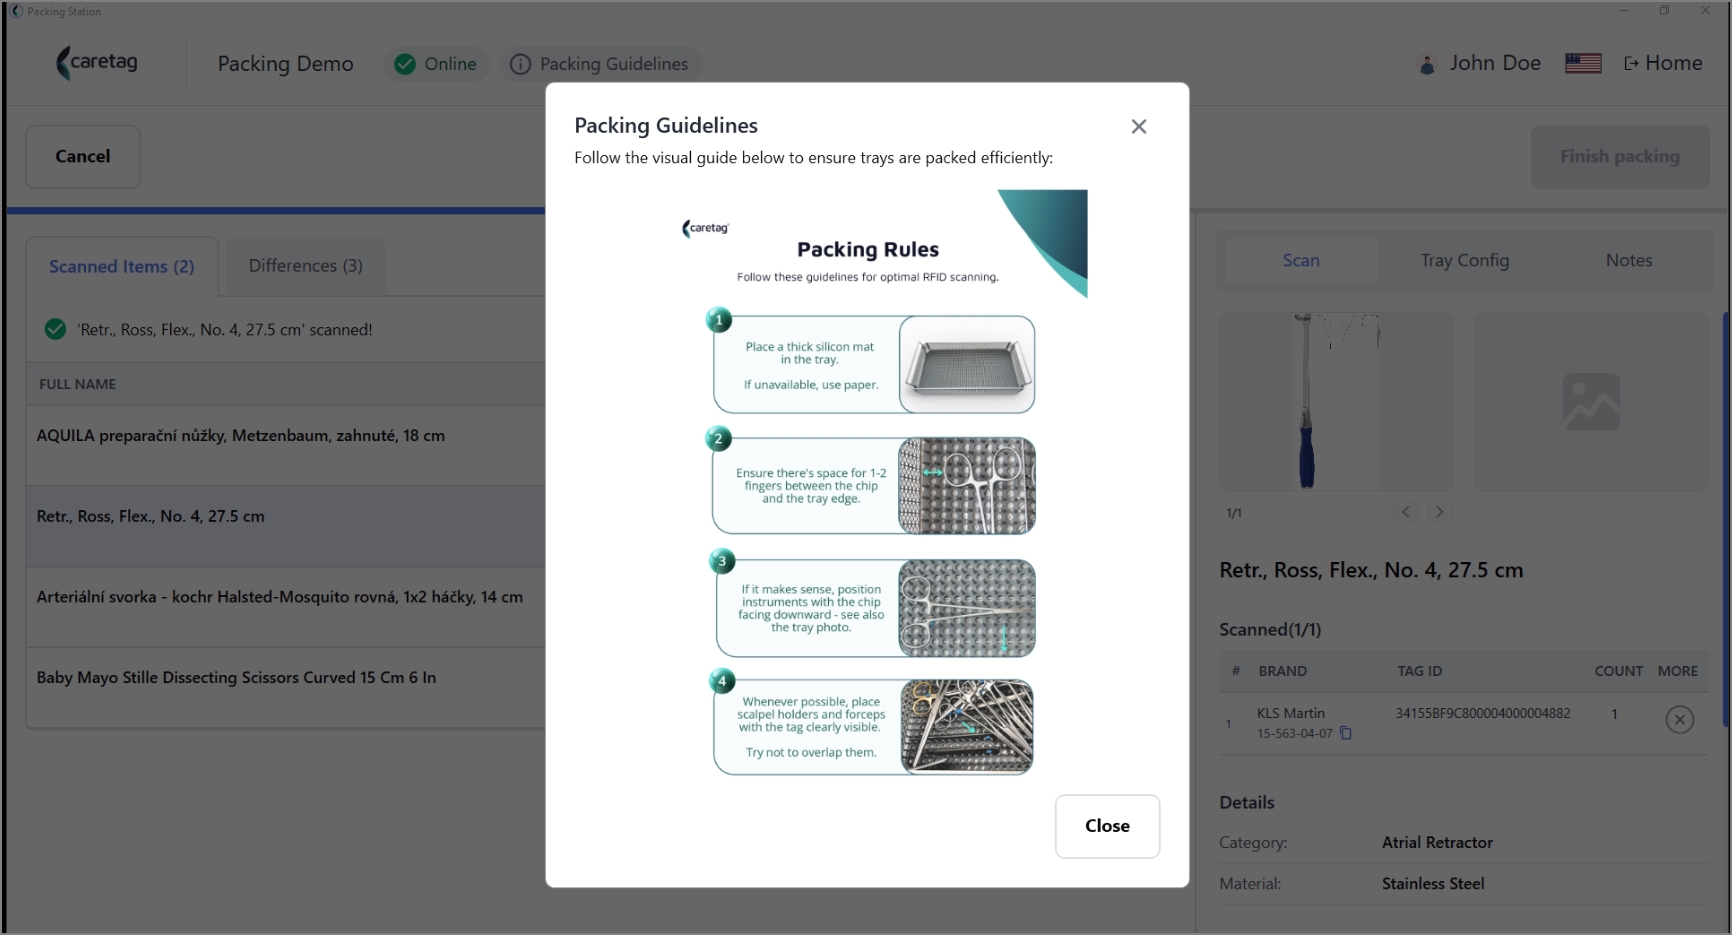
- If the current tray has been unlocked in the earlier cycles, it will display the earlier cycles’ unlock notes.
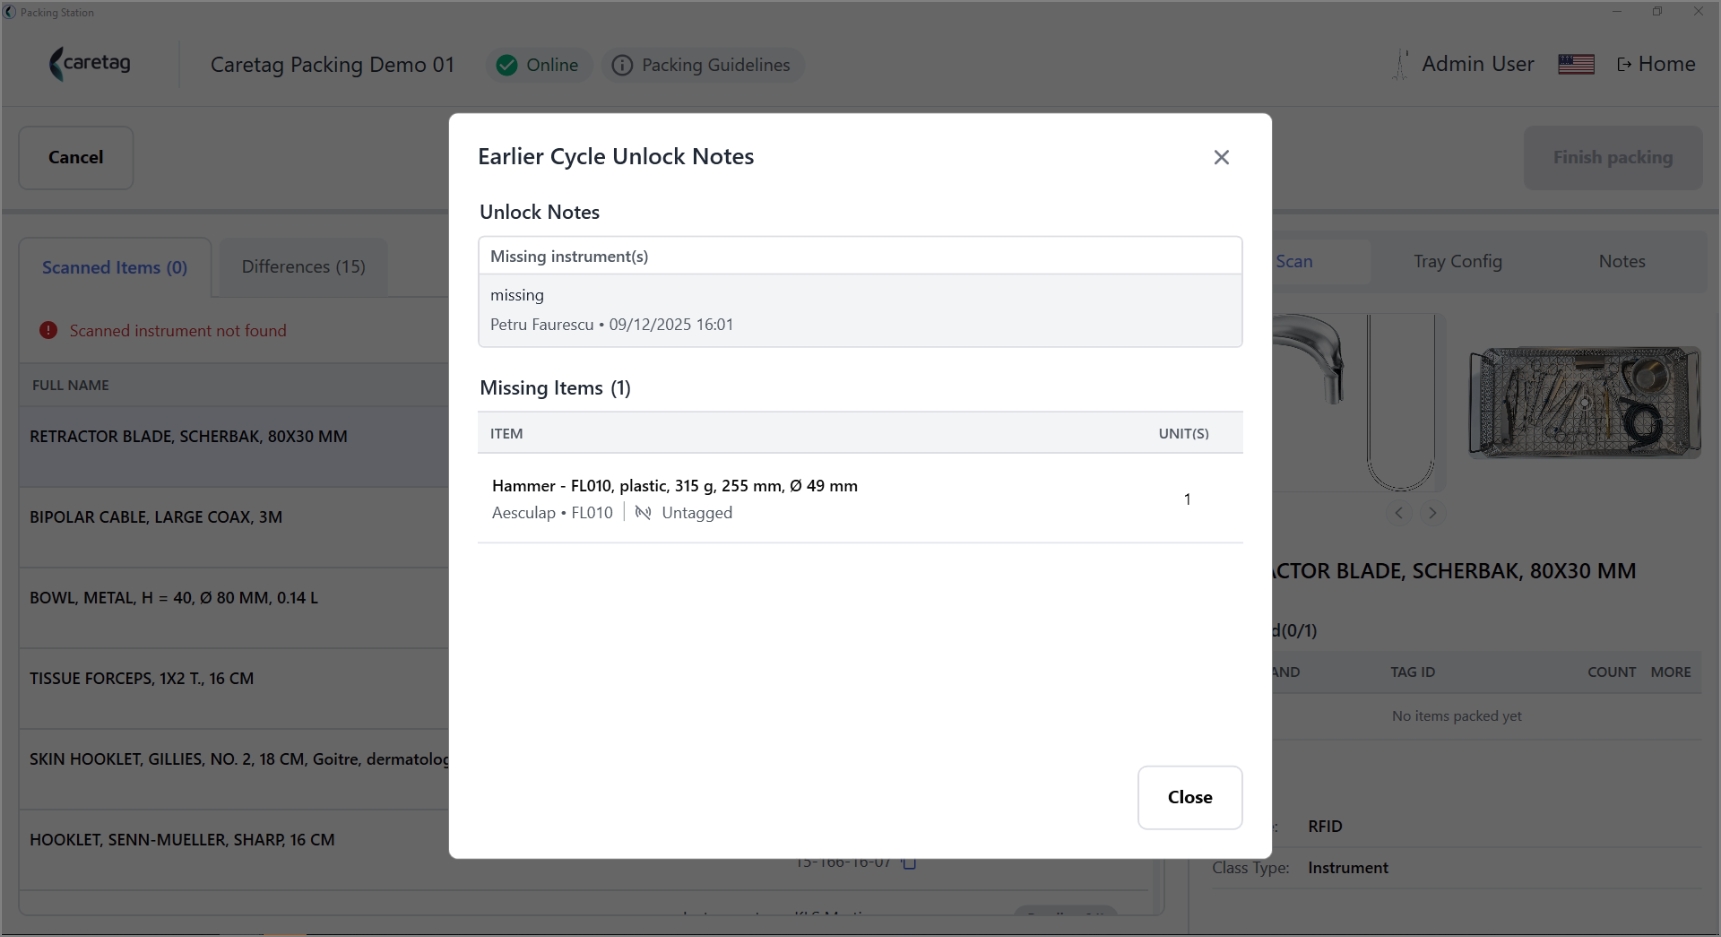
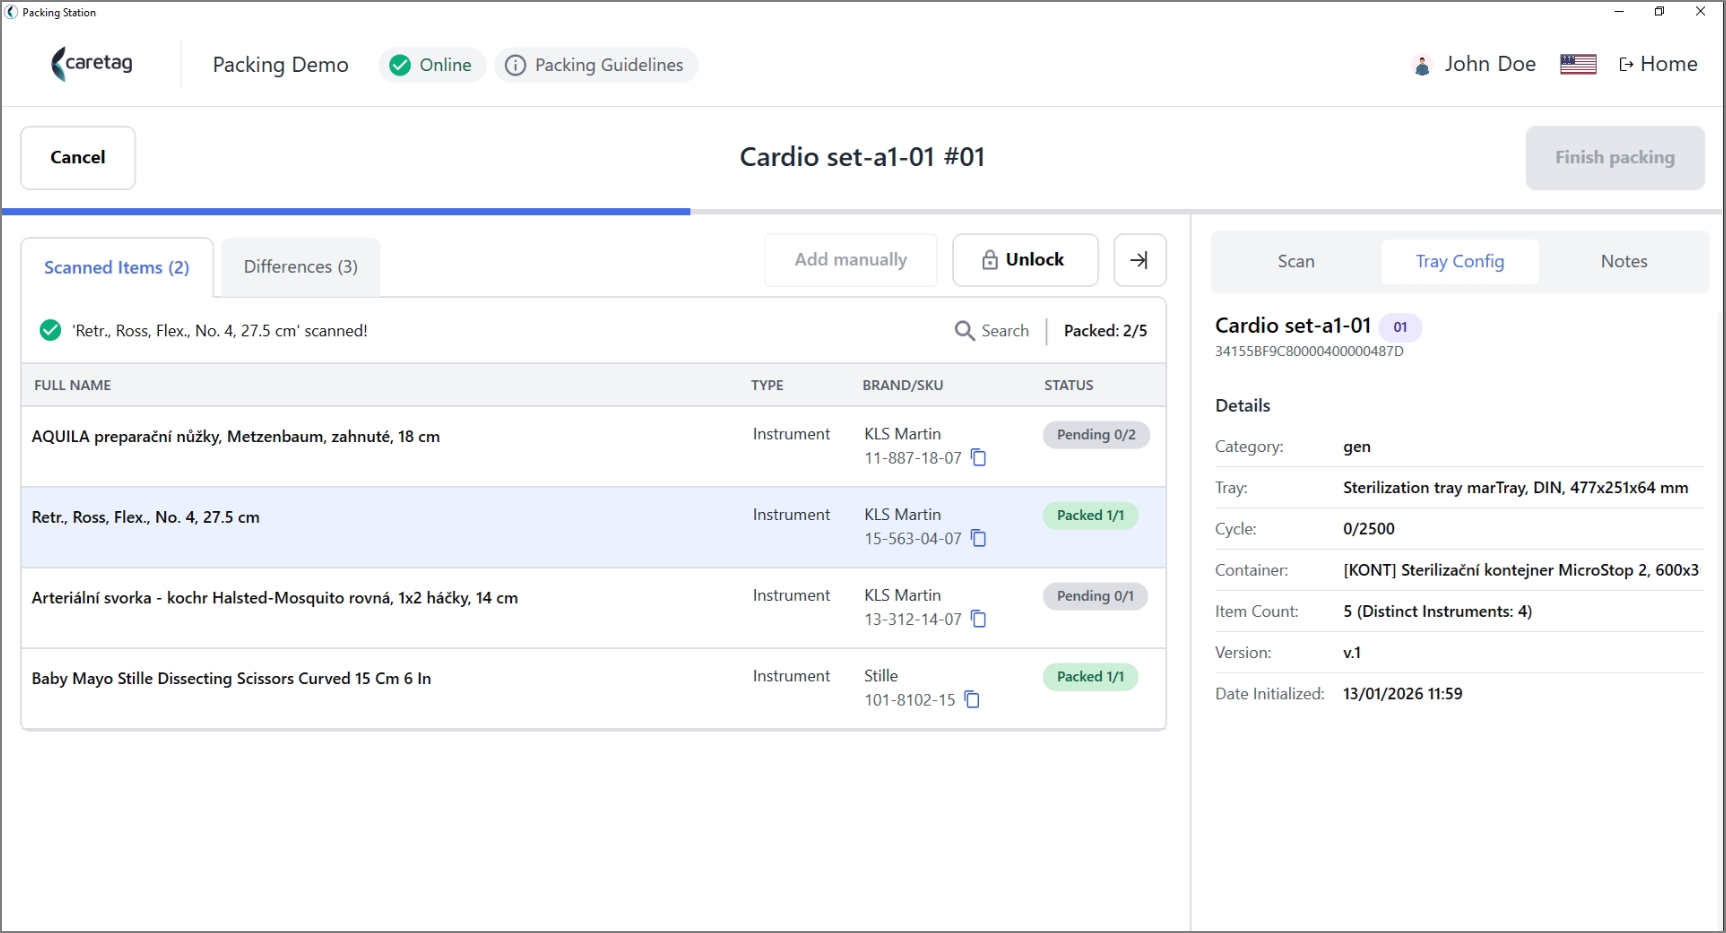
- On the right side panel, the user can view the Tray configuration.
- Tray config provides the details of th packing set name, type of tray/container used, count of the items, version, etc.
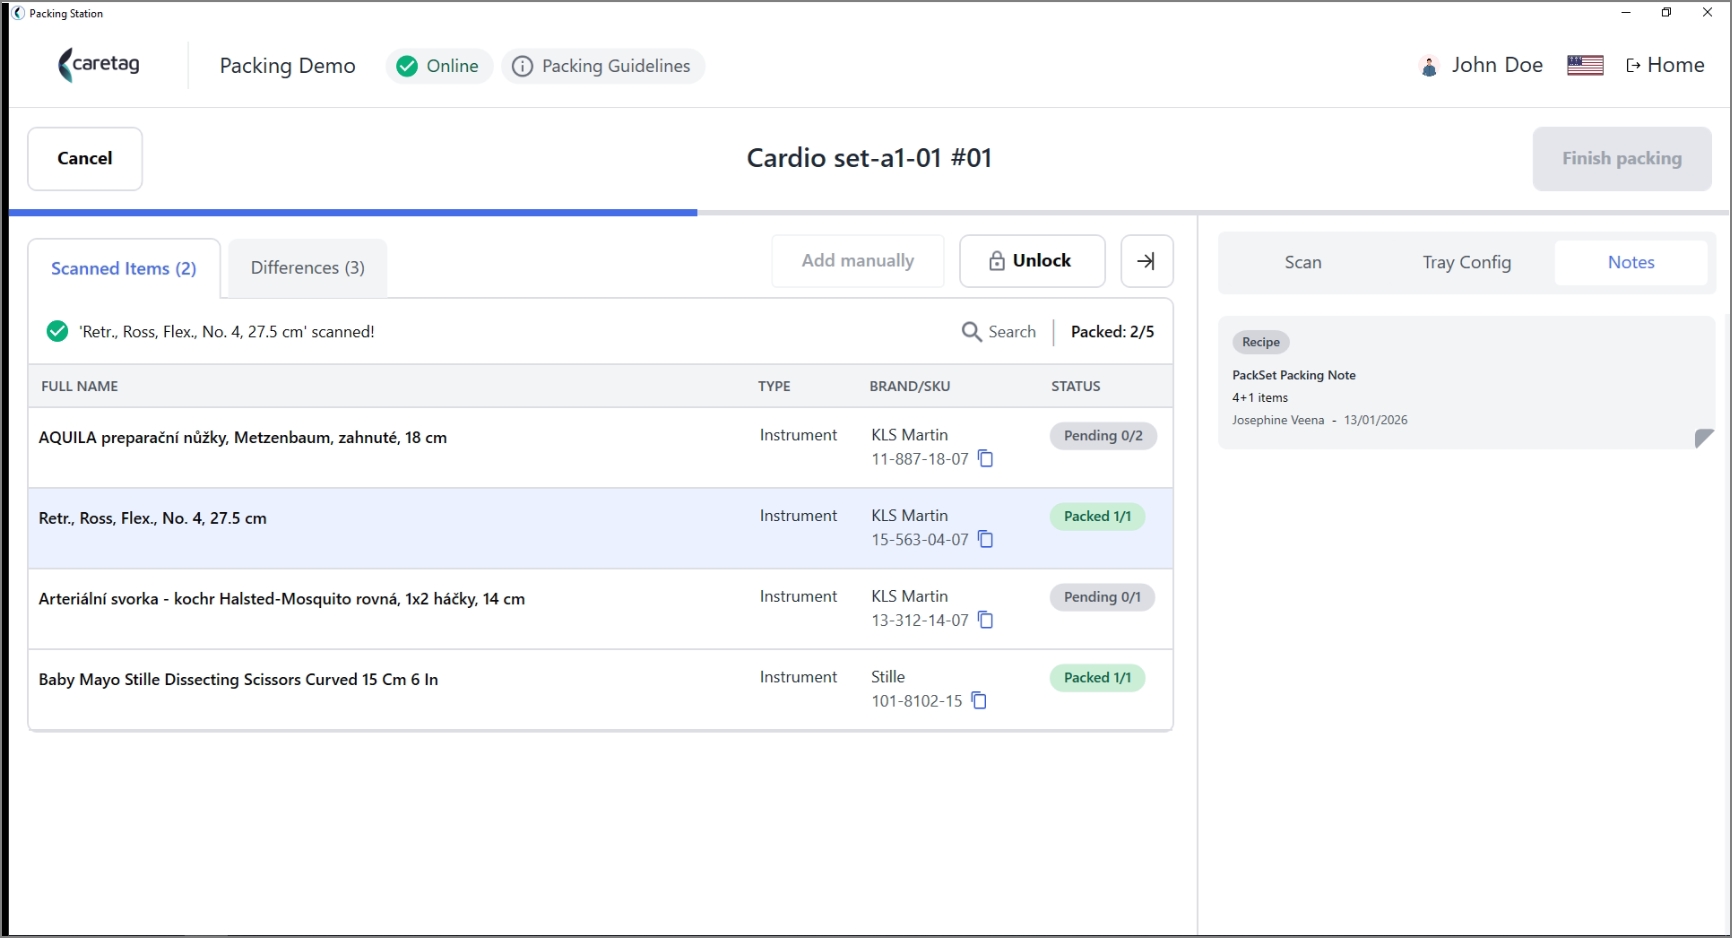
- If there are any specific notes for this packing set, it can be viewed under Notes.
Difference tab
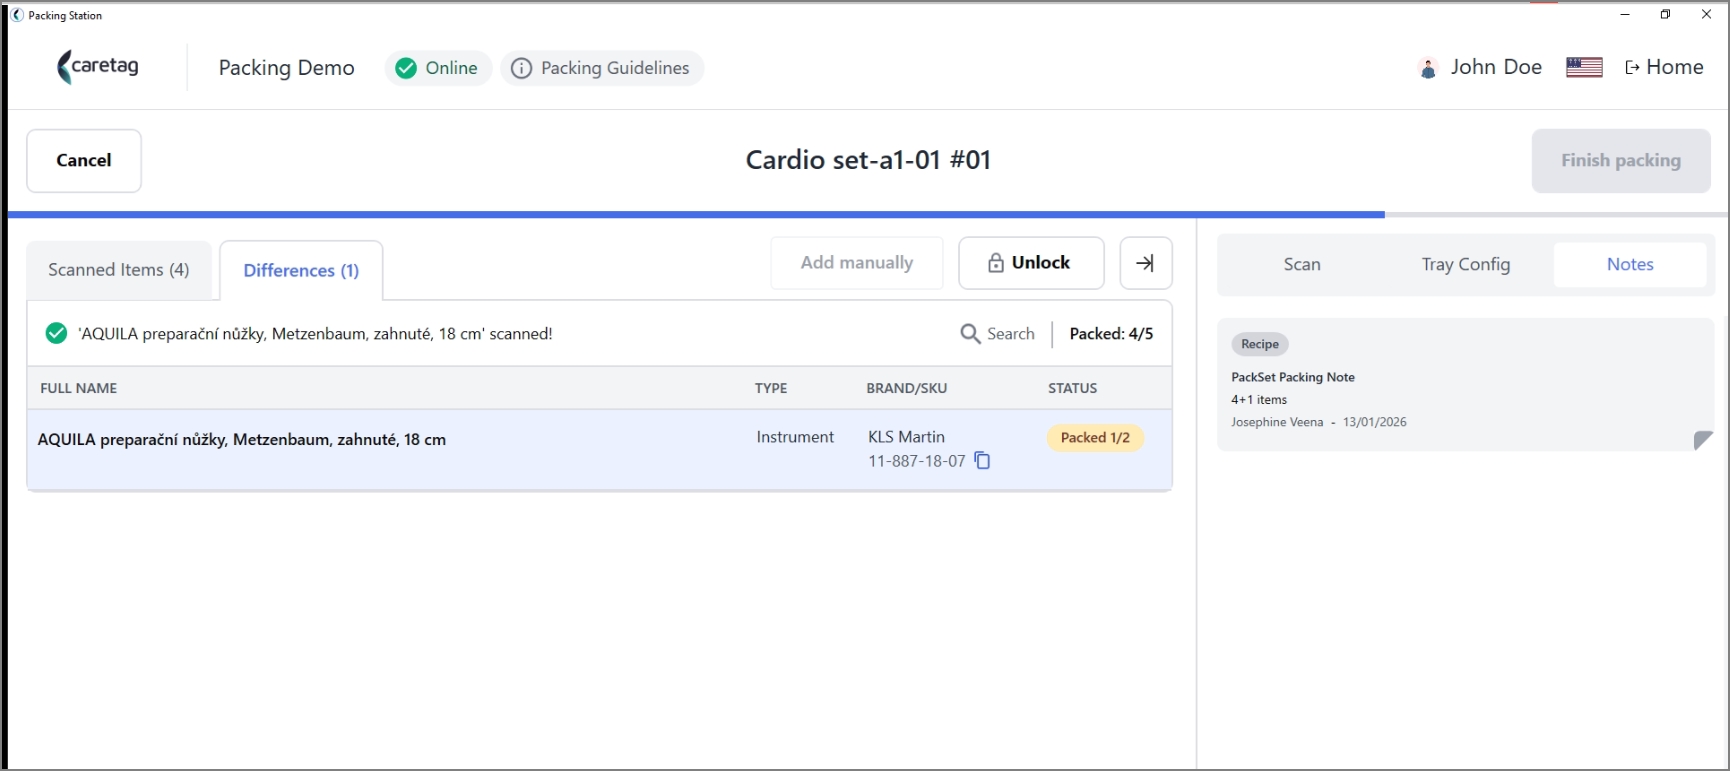
- In the Difference tab, you can view the pending items that need to be scanned. As the instrument scanning progresses, the number of pending items decreases. Once all the items in the tray have been scanned, the Difference tab will be empty.
- If any instruments are missing, the count of unscanned items will be displayed in the Difference tab.
-
The packing gets completed once all the instruments are scanned successfully.
-
Select the expiration period
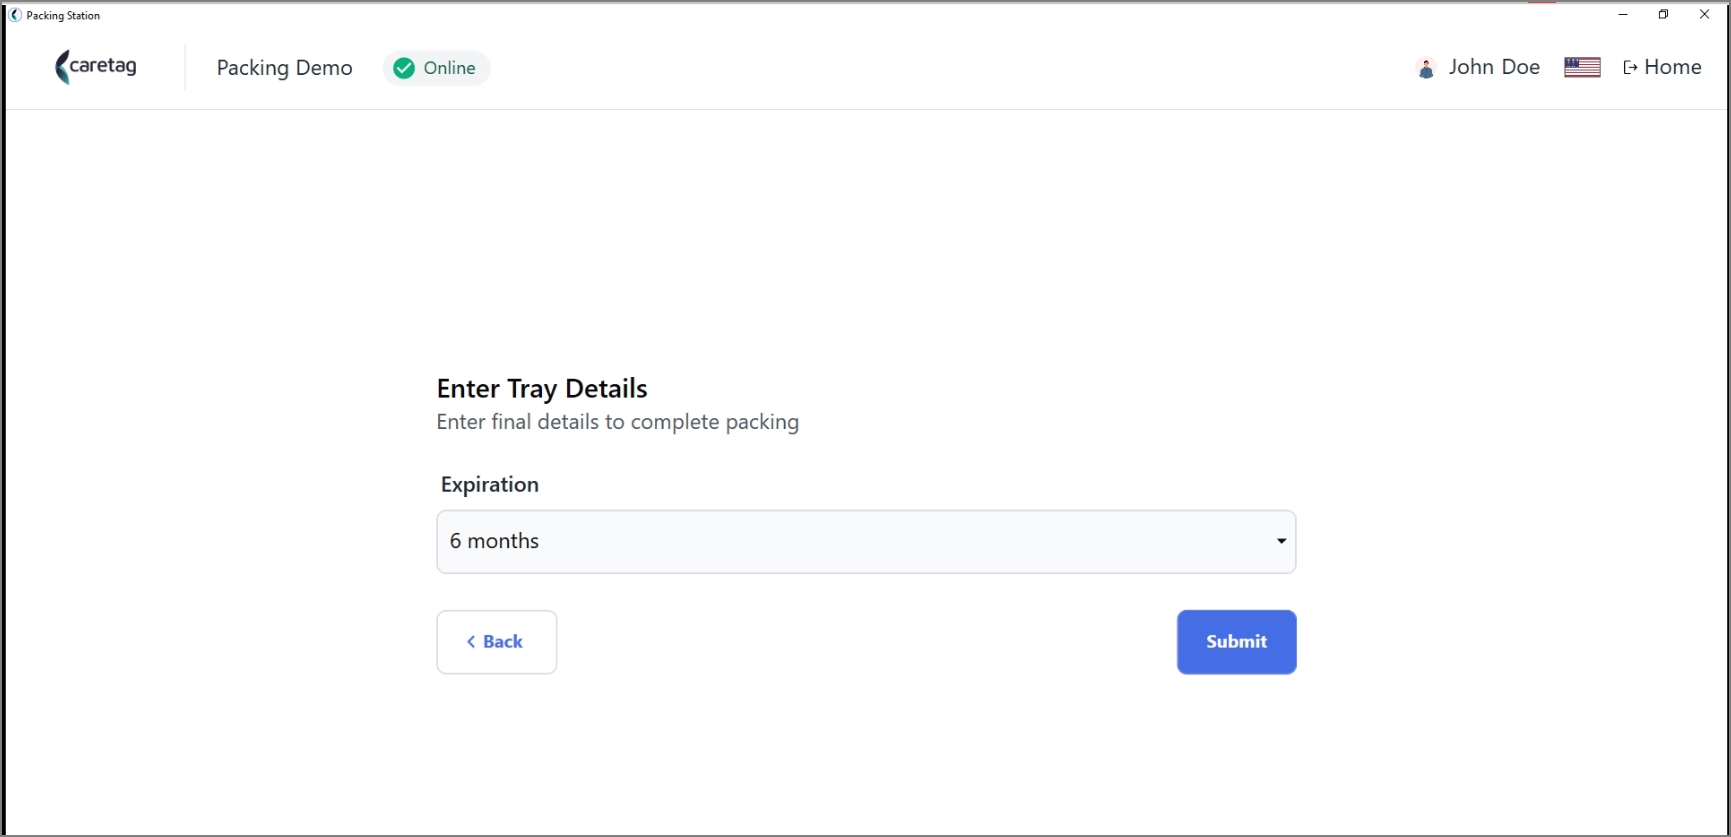
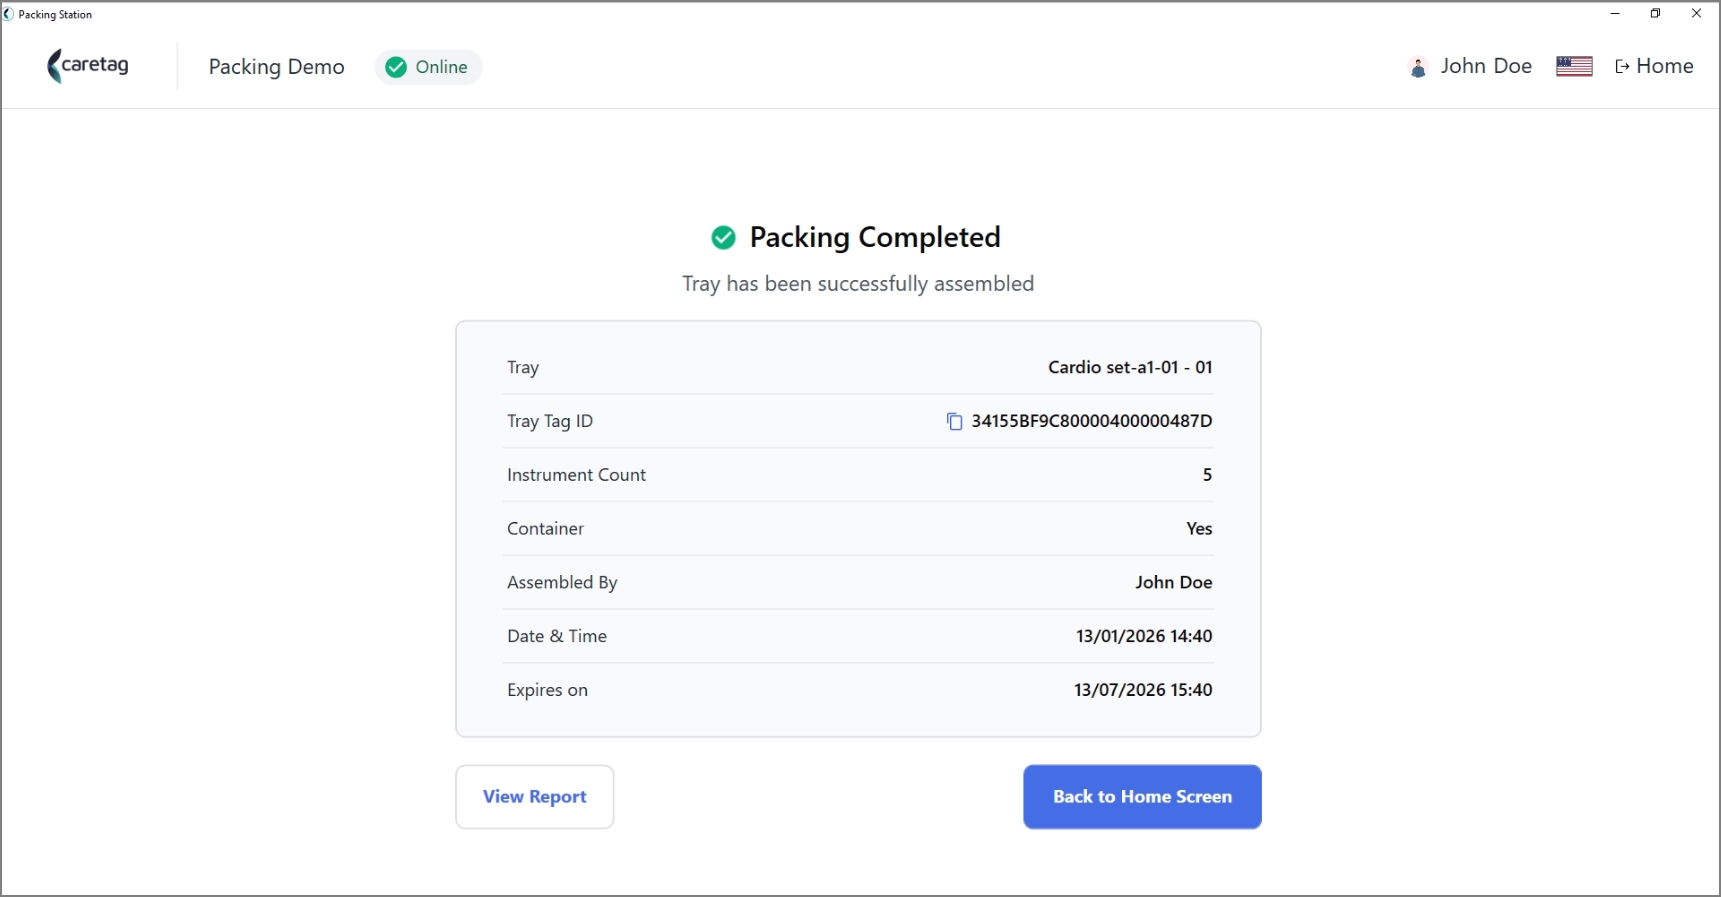
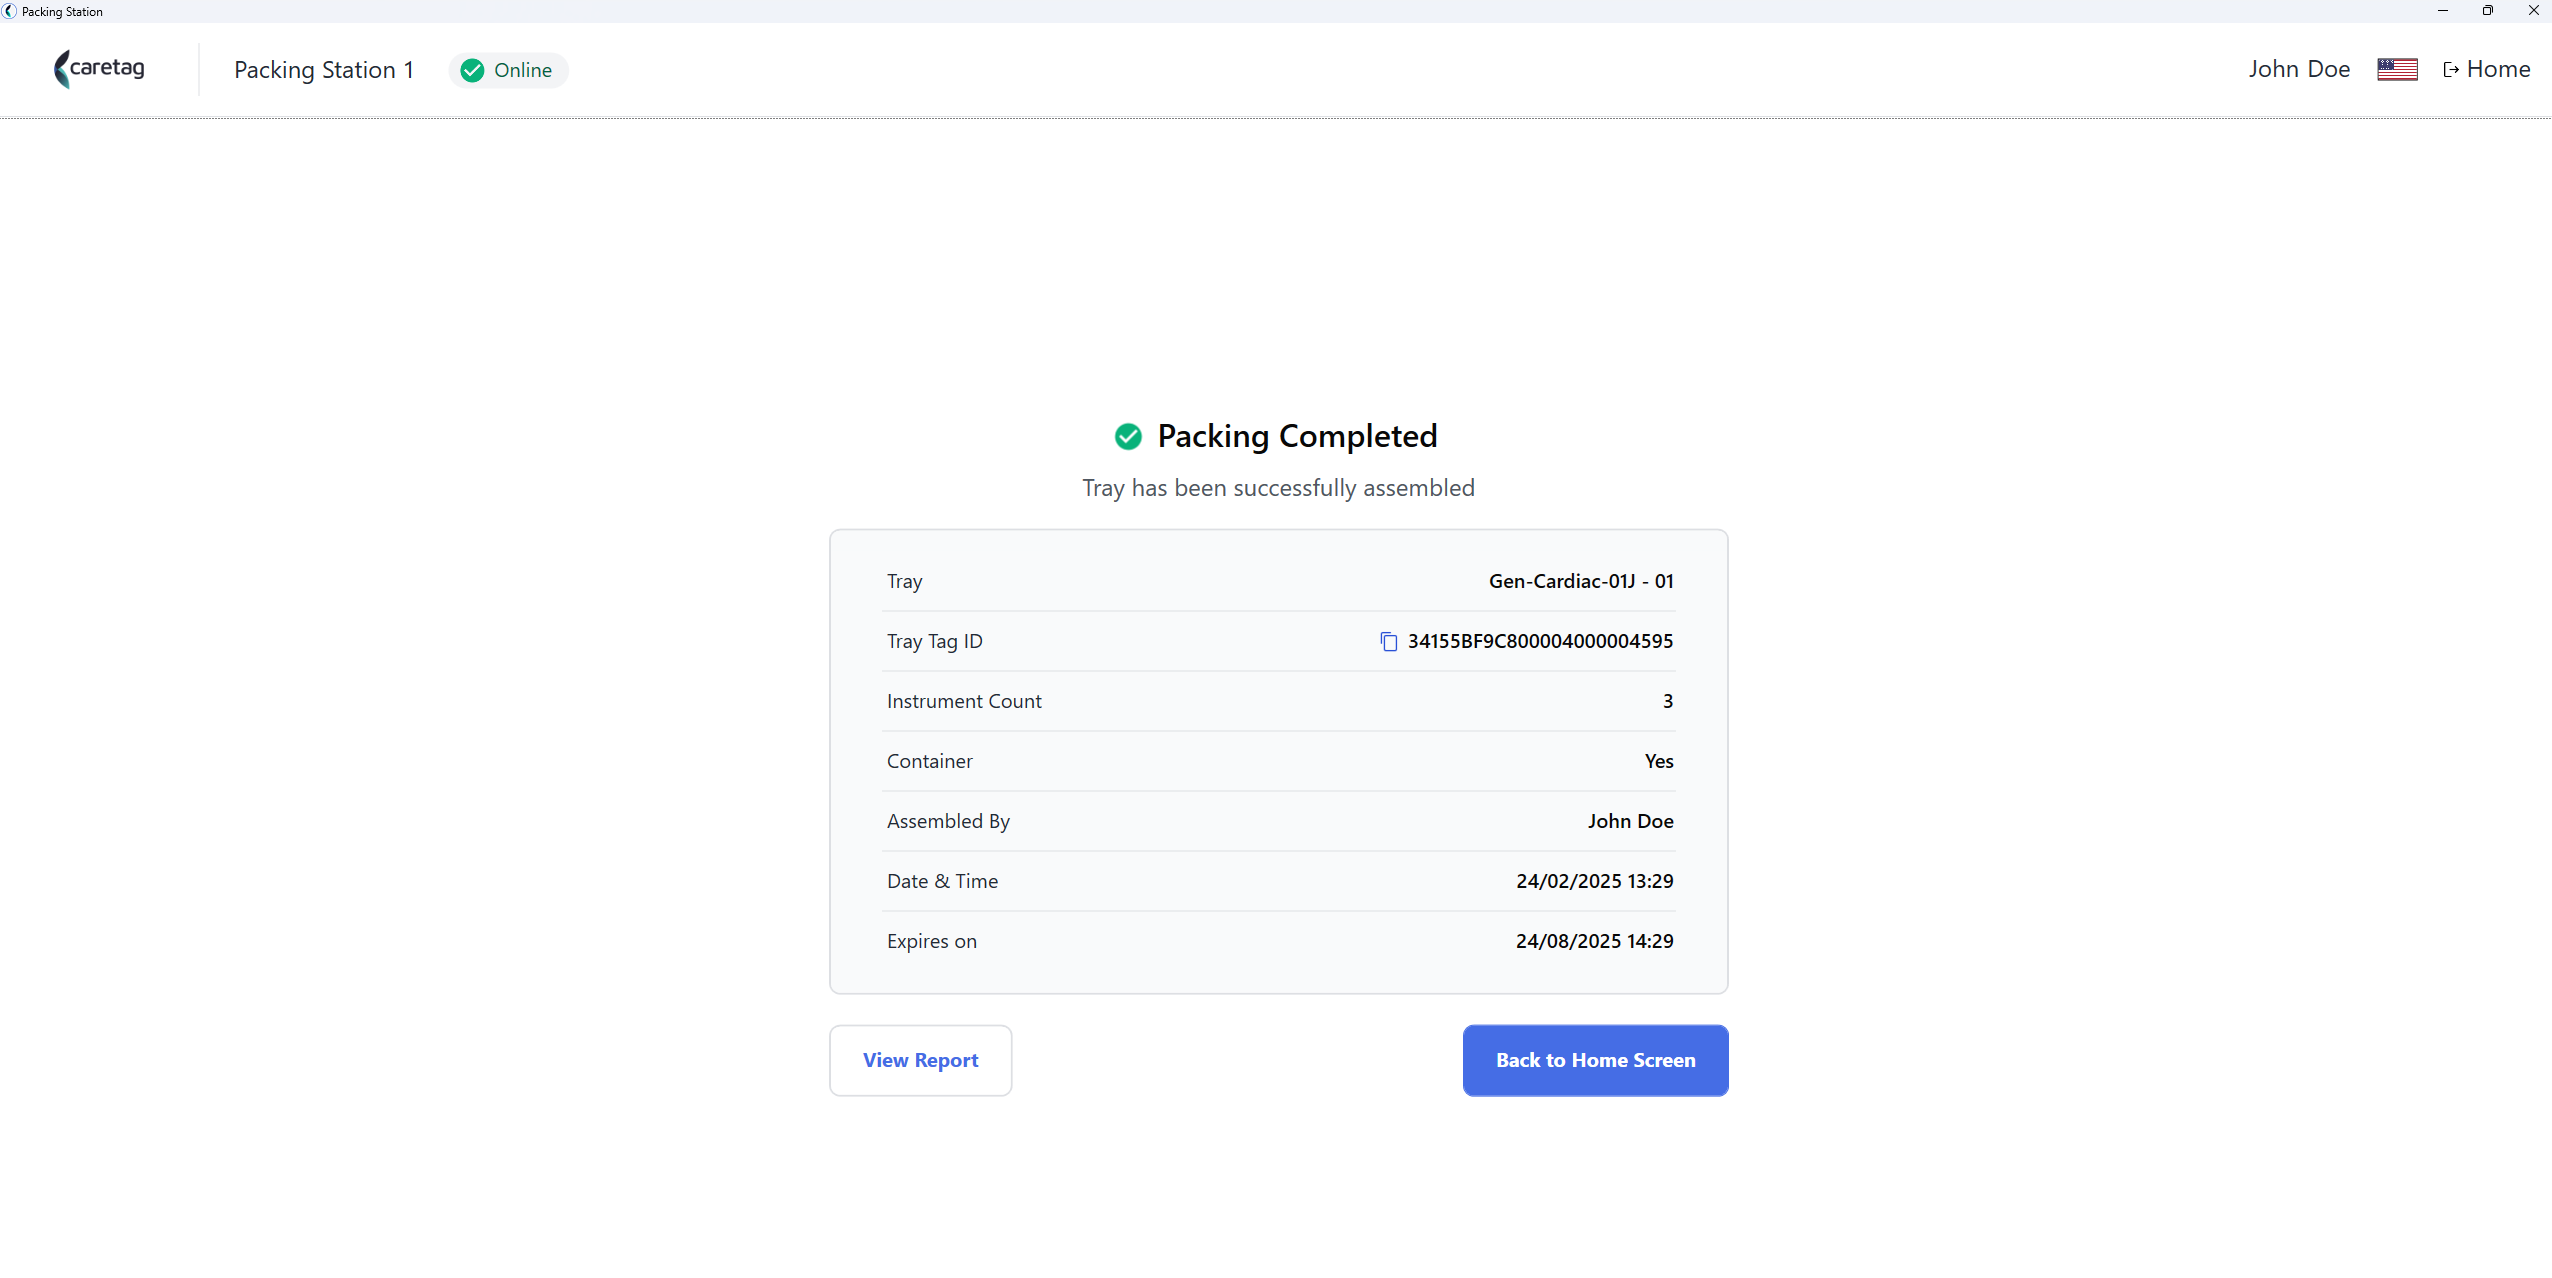
- In the summary page, it will display the tray details with Tray UDI, user name, time of packing and expiry date.
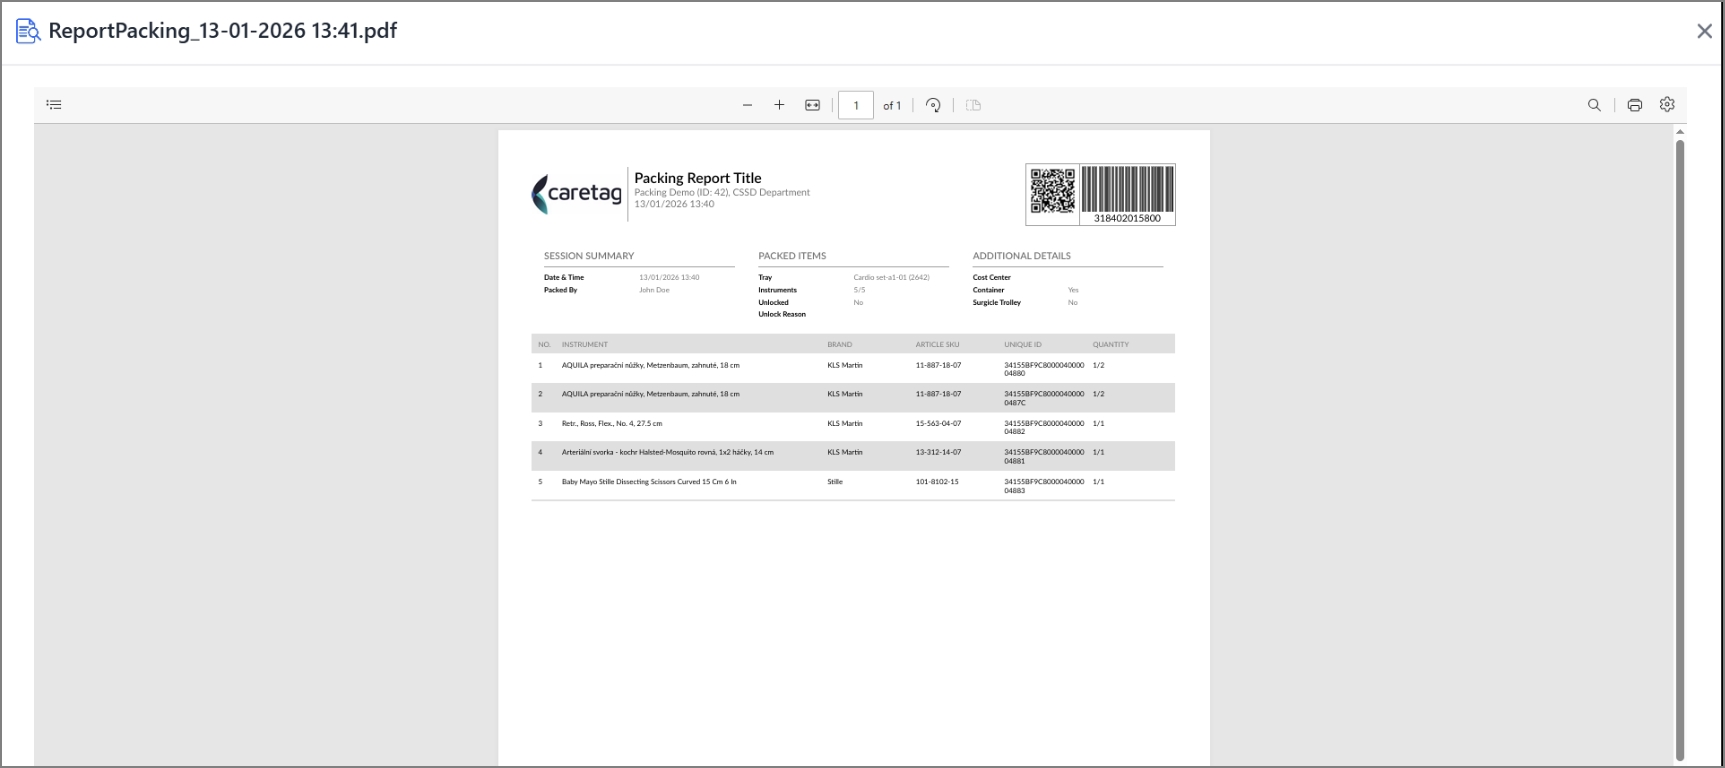
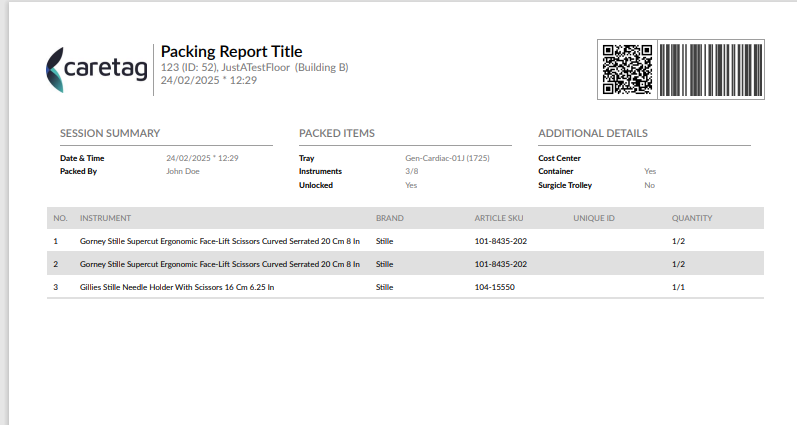
- The packing report can be viewed and downloaded.
Adding Scanned tray to a Container
Furthermore, alongside packing trays, containers can also be included. To add a scanned tray a container, users must enable a specific setting within their admin station accessible through the web application.
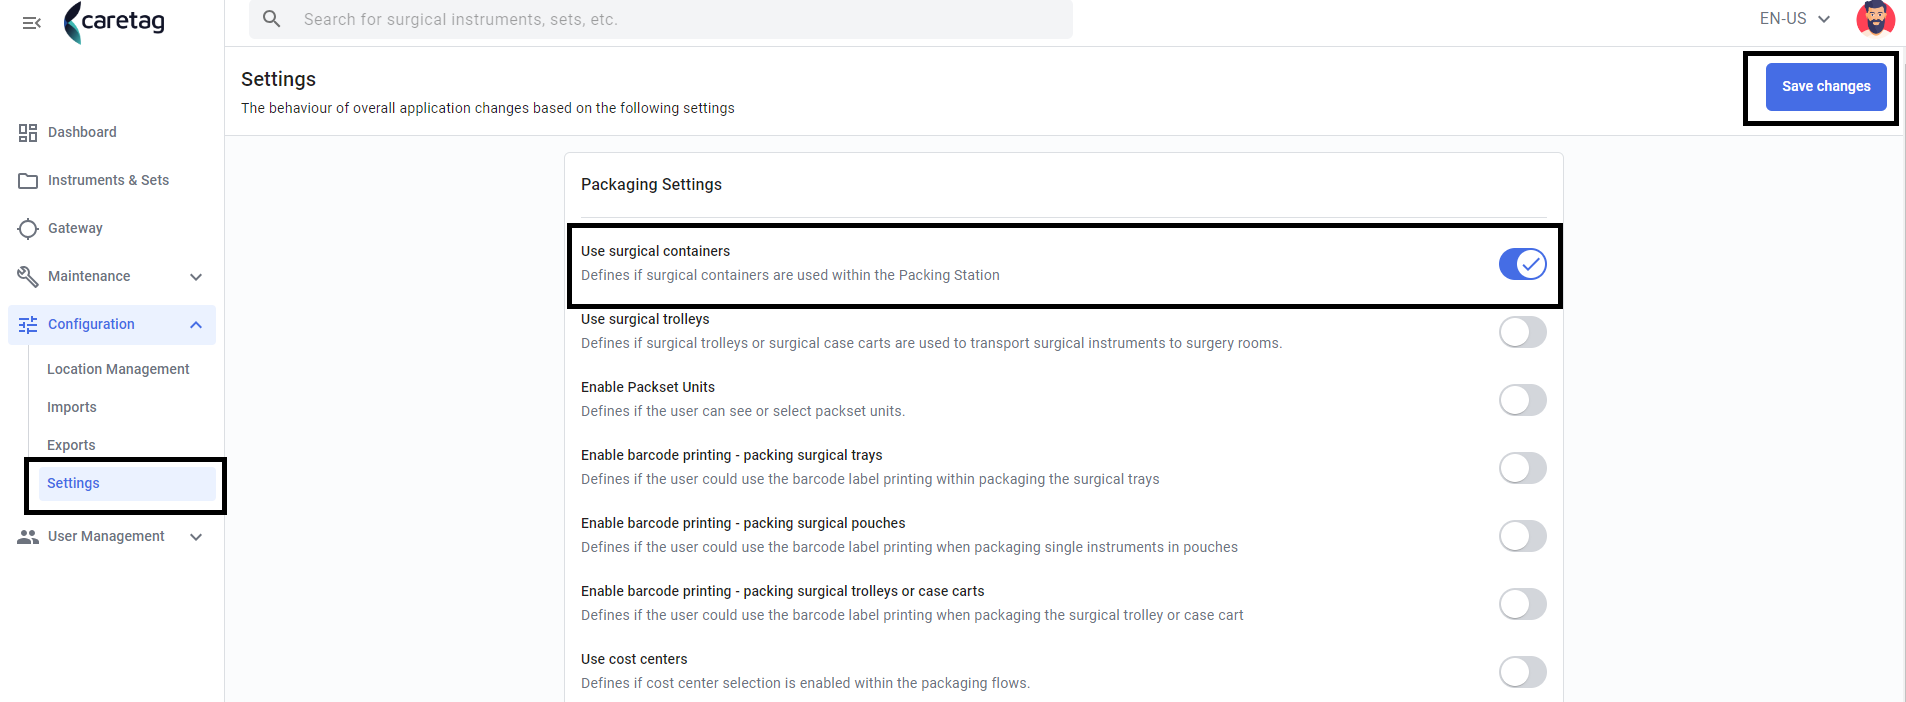
Login to the Web application, expand the configuration tab in the left side and select settings, now enable the use surgical container option and save the changes
Now the user will be able to see add container option in the Packing station application. The option will appear once all the instruments in the pack set are packed.
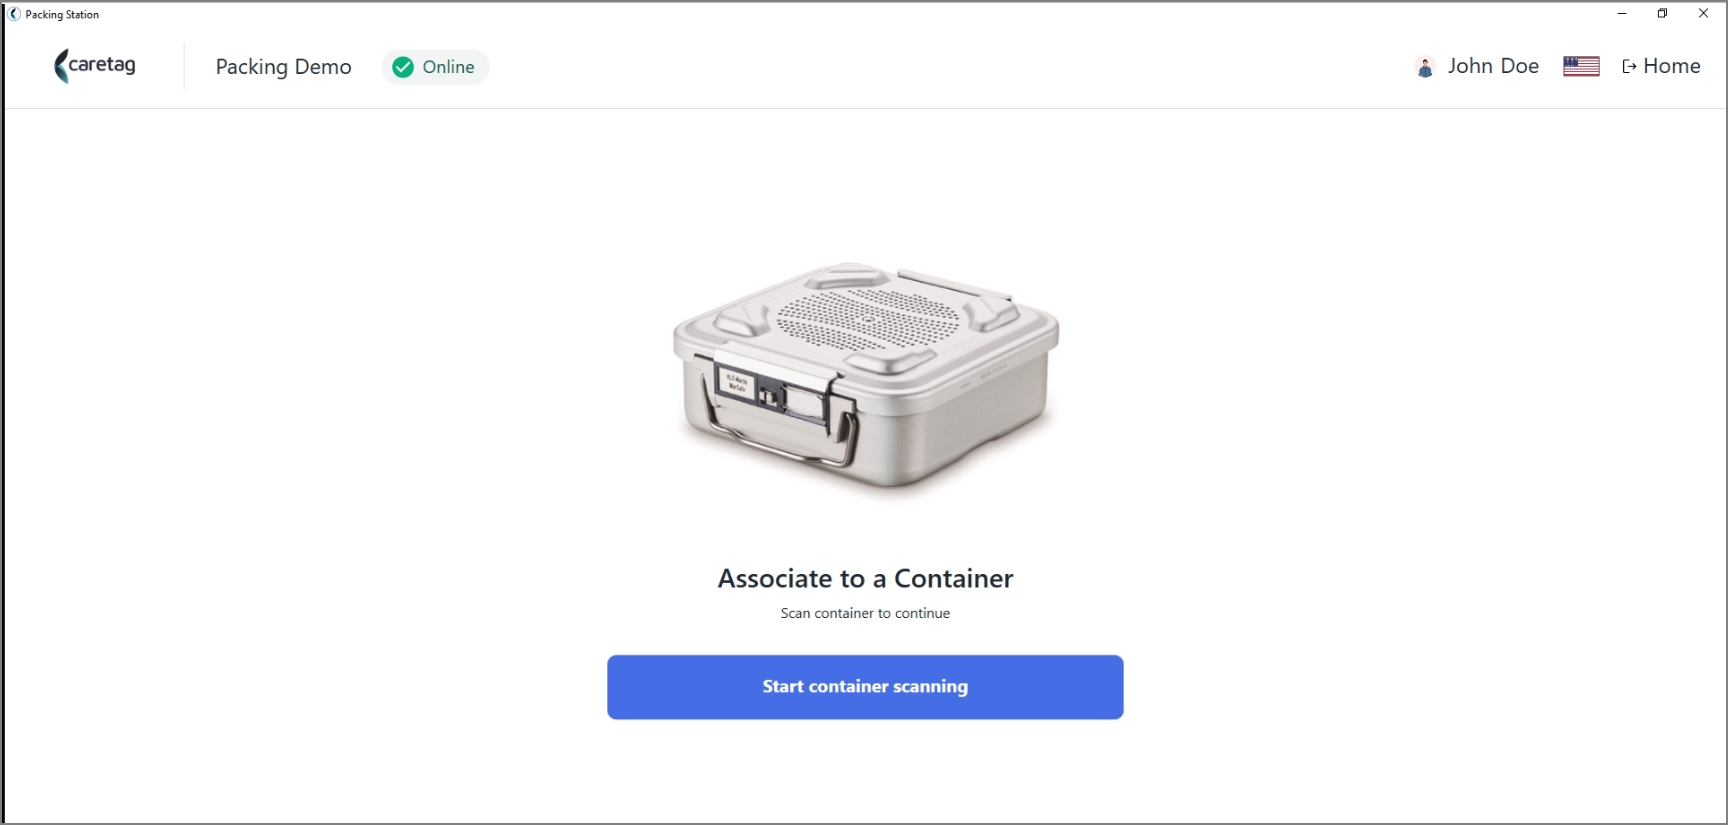
Once the container is scanned the packing session will be completed.
Unlock the Tray to finish packing
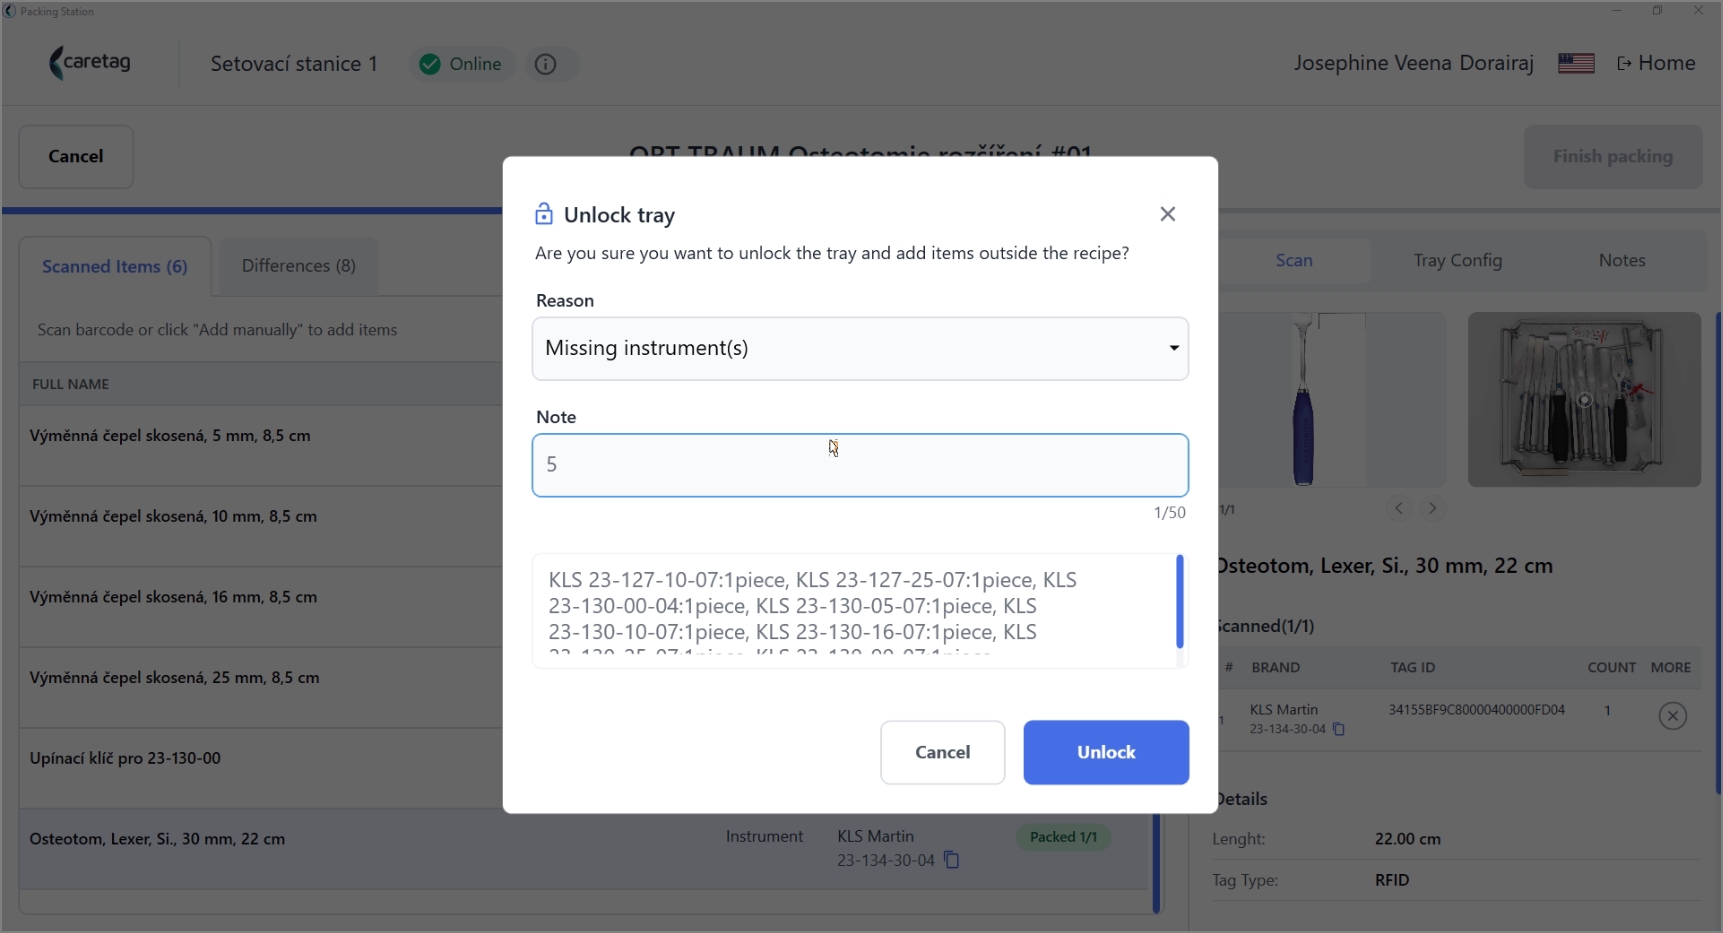
- The tray can be unlocked if there are any missing instruments or additional instruments need to be added to the tray.
- Click the unlock button and select the reason for tray unlocking and add your notes.
- Below to the notes, a box contians the article SKUs and quantity of the items that are missing or added extra
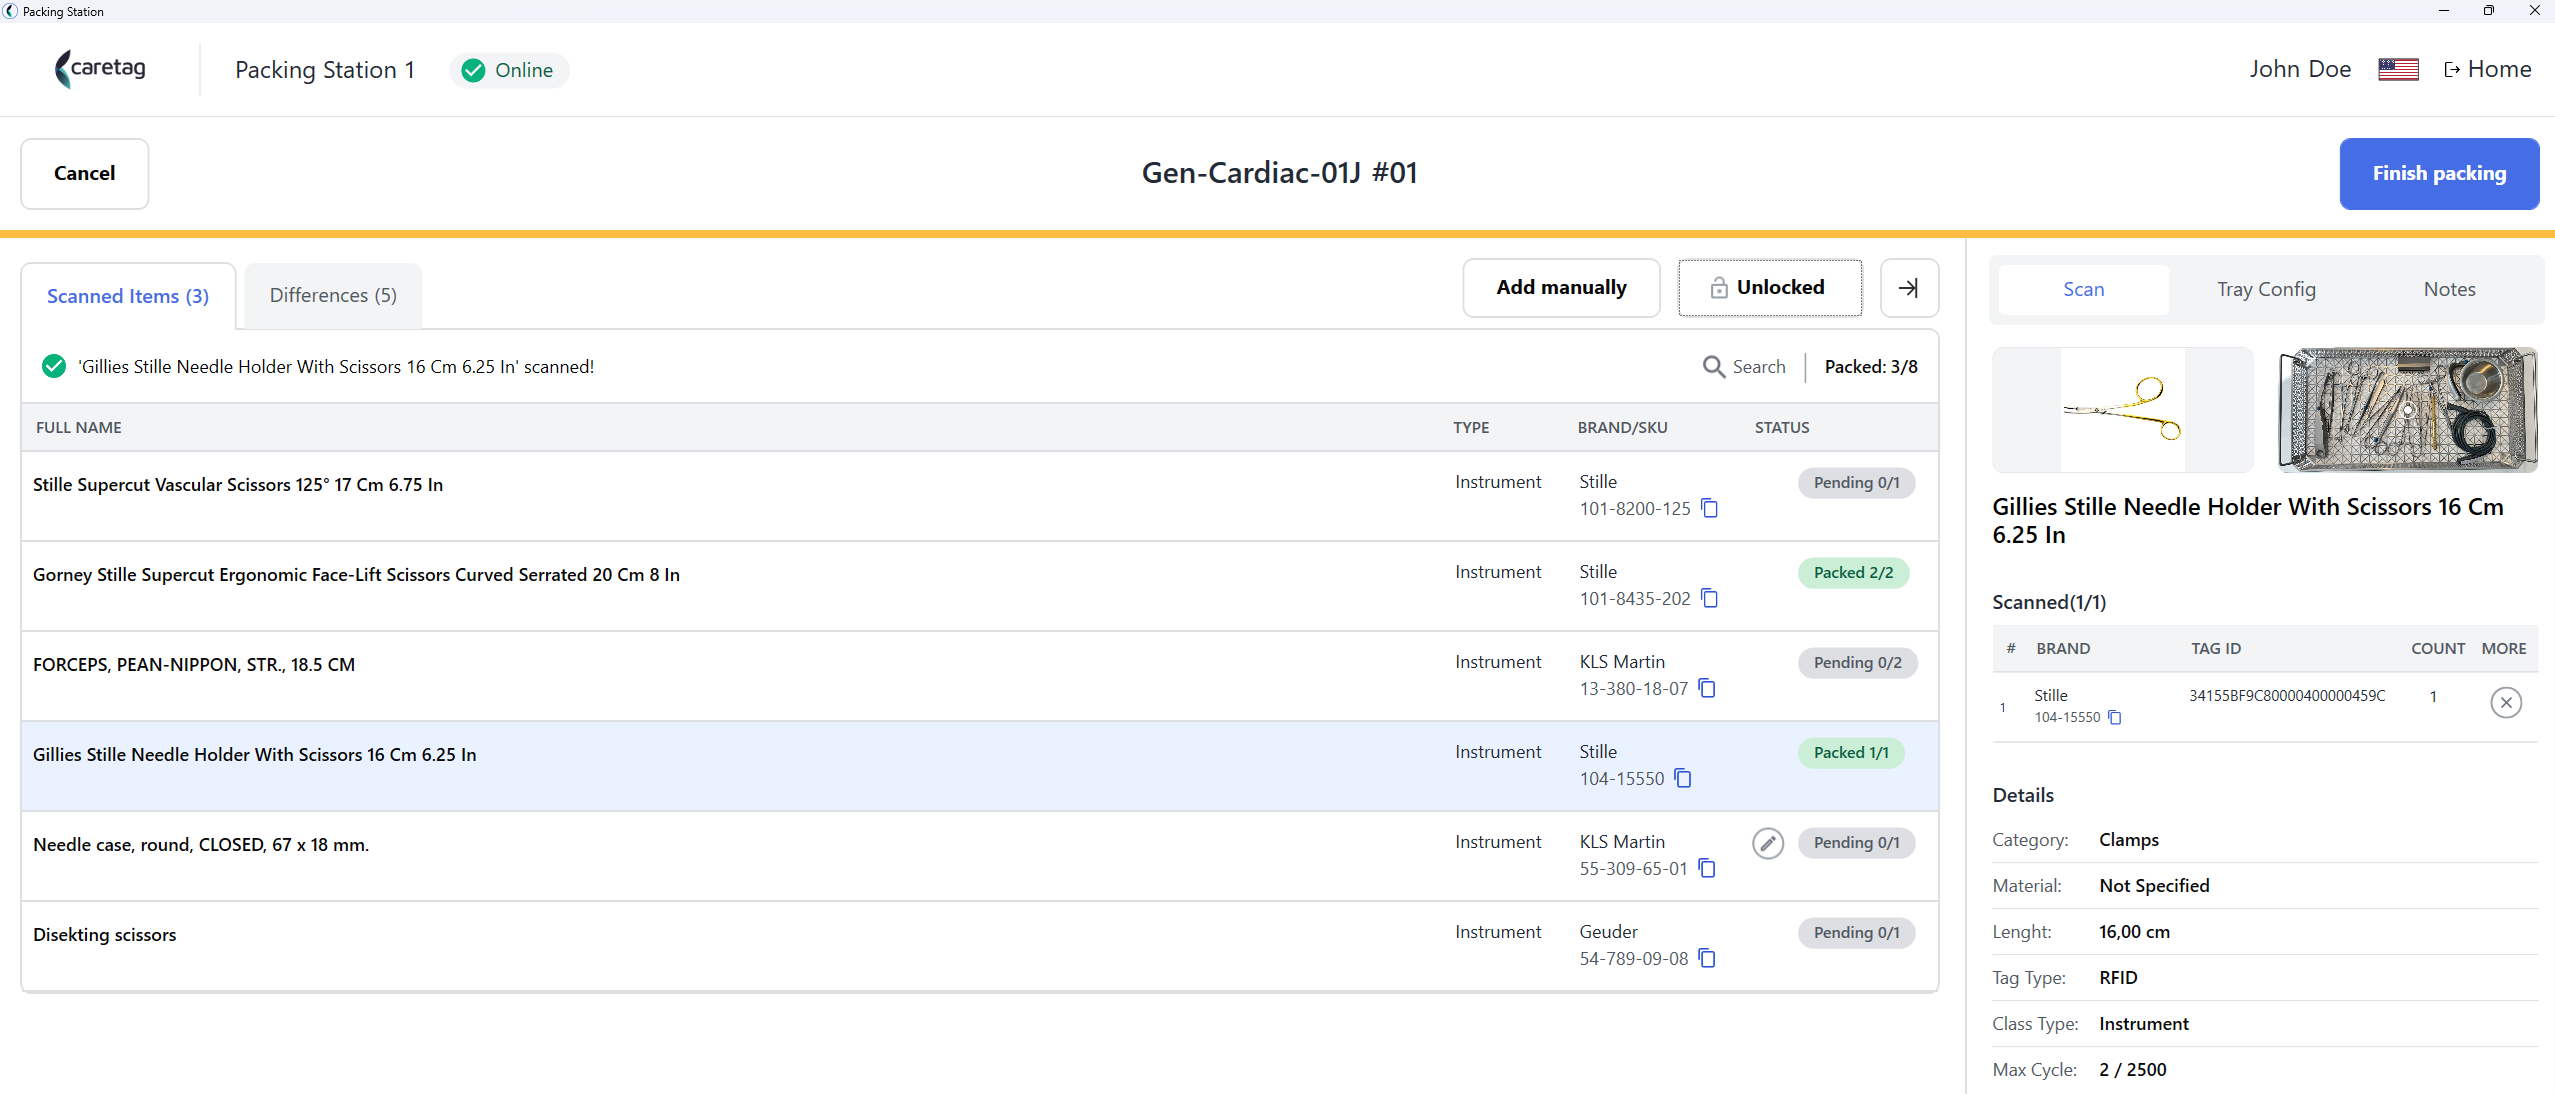
- Click the finish packing button, you can see that the scan progress bar is in yellow because the tray is unlocked.
- Packing Summary
-You can download the packing report
Pack Mini set(Pouch)
Mini-sets are predefined pouches with small number of instruments.
- Select Pack mini sets(Pouch) option from the Packing station
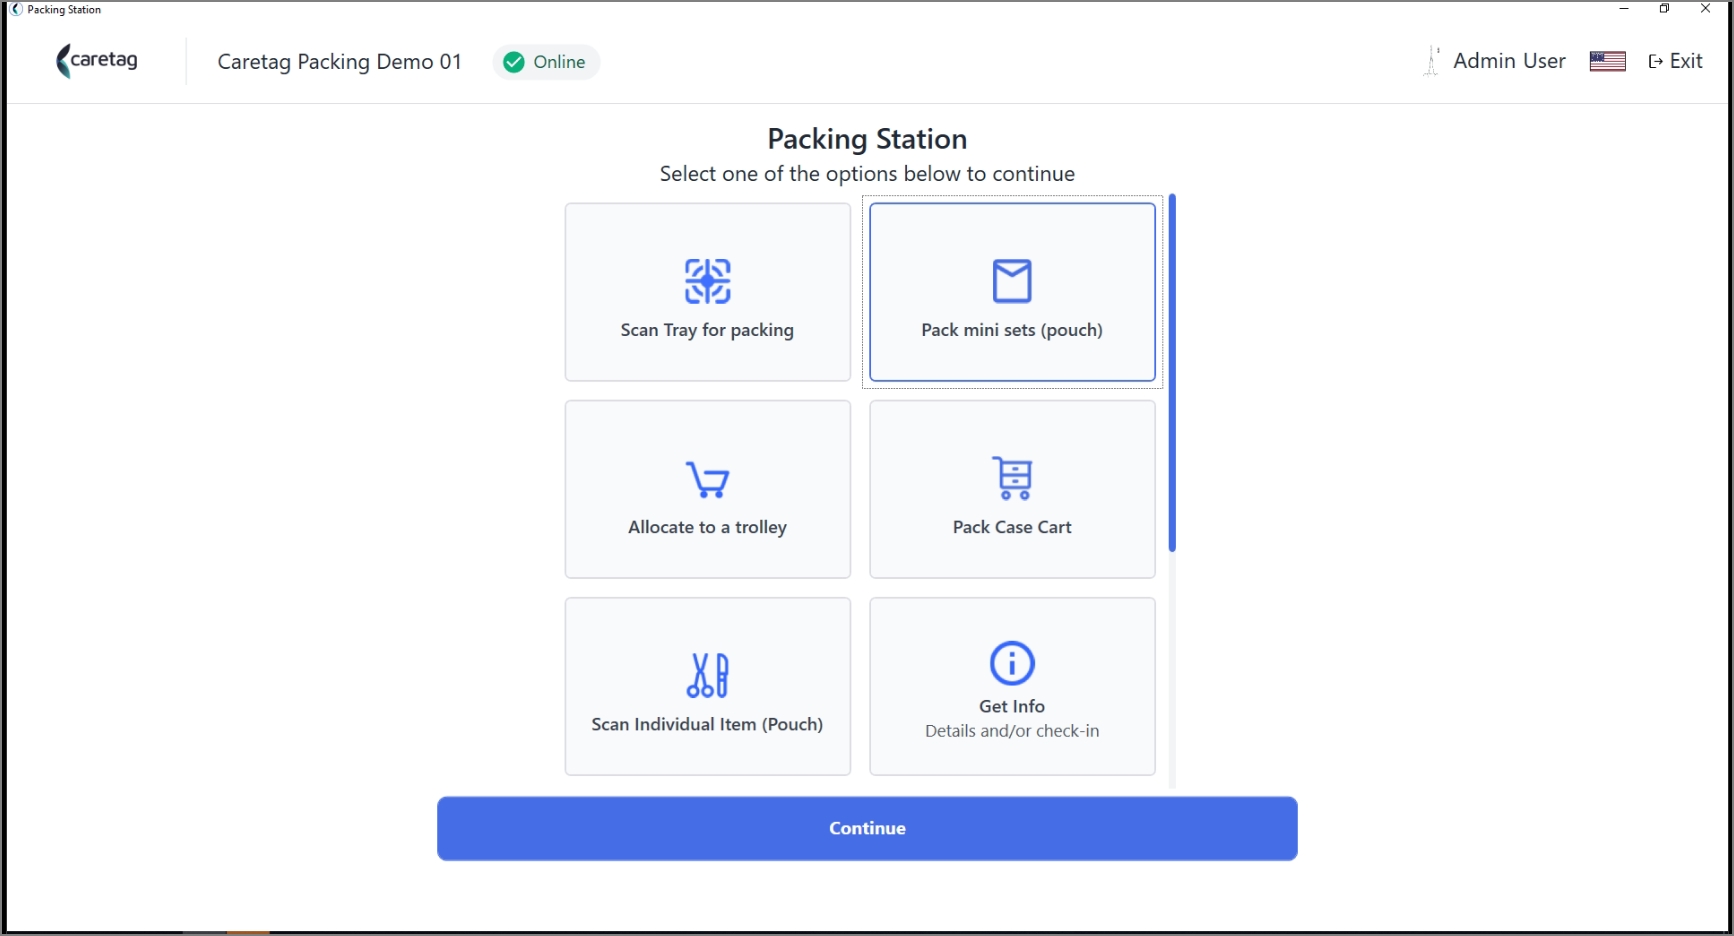
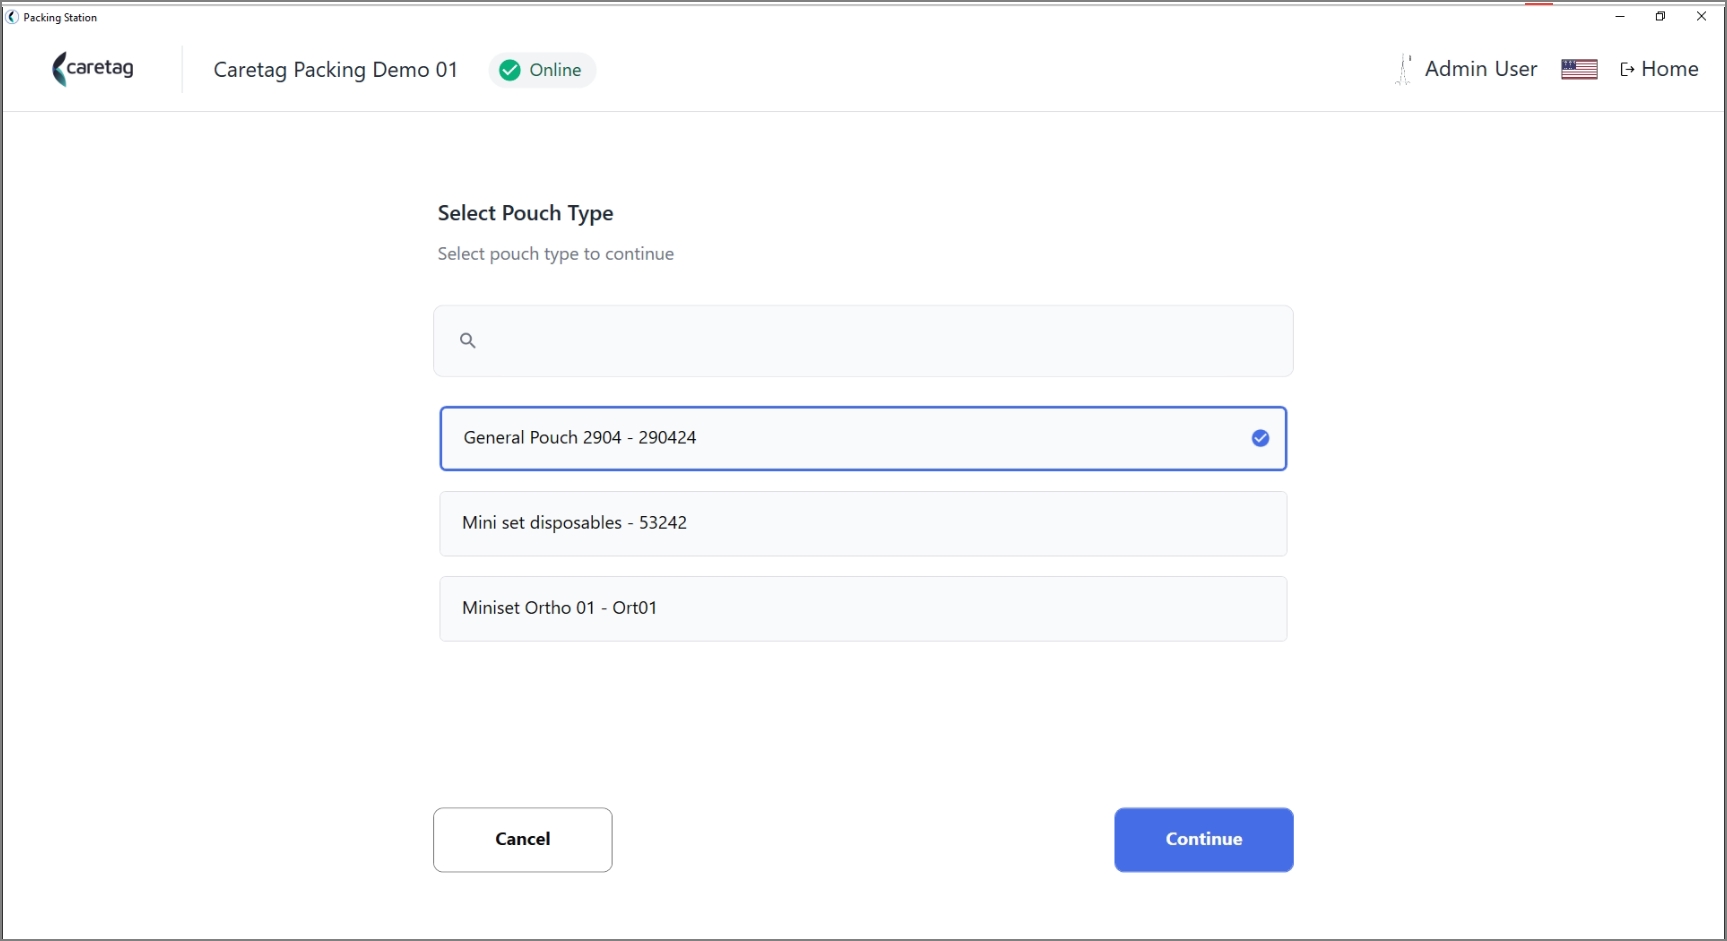
- Select the pouch type from the list, scroll down or simply type in the search bar to select the mini set.
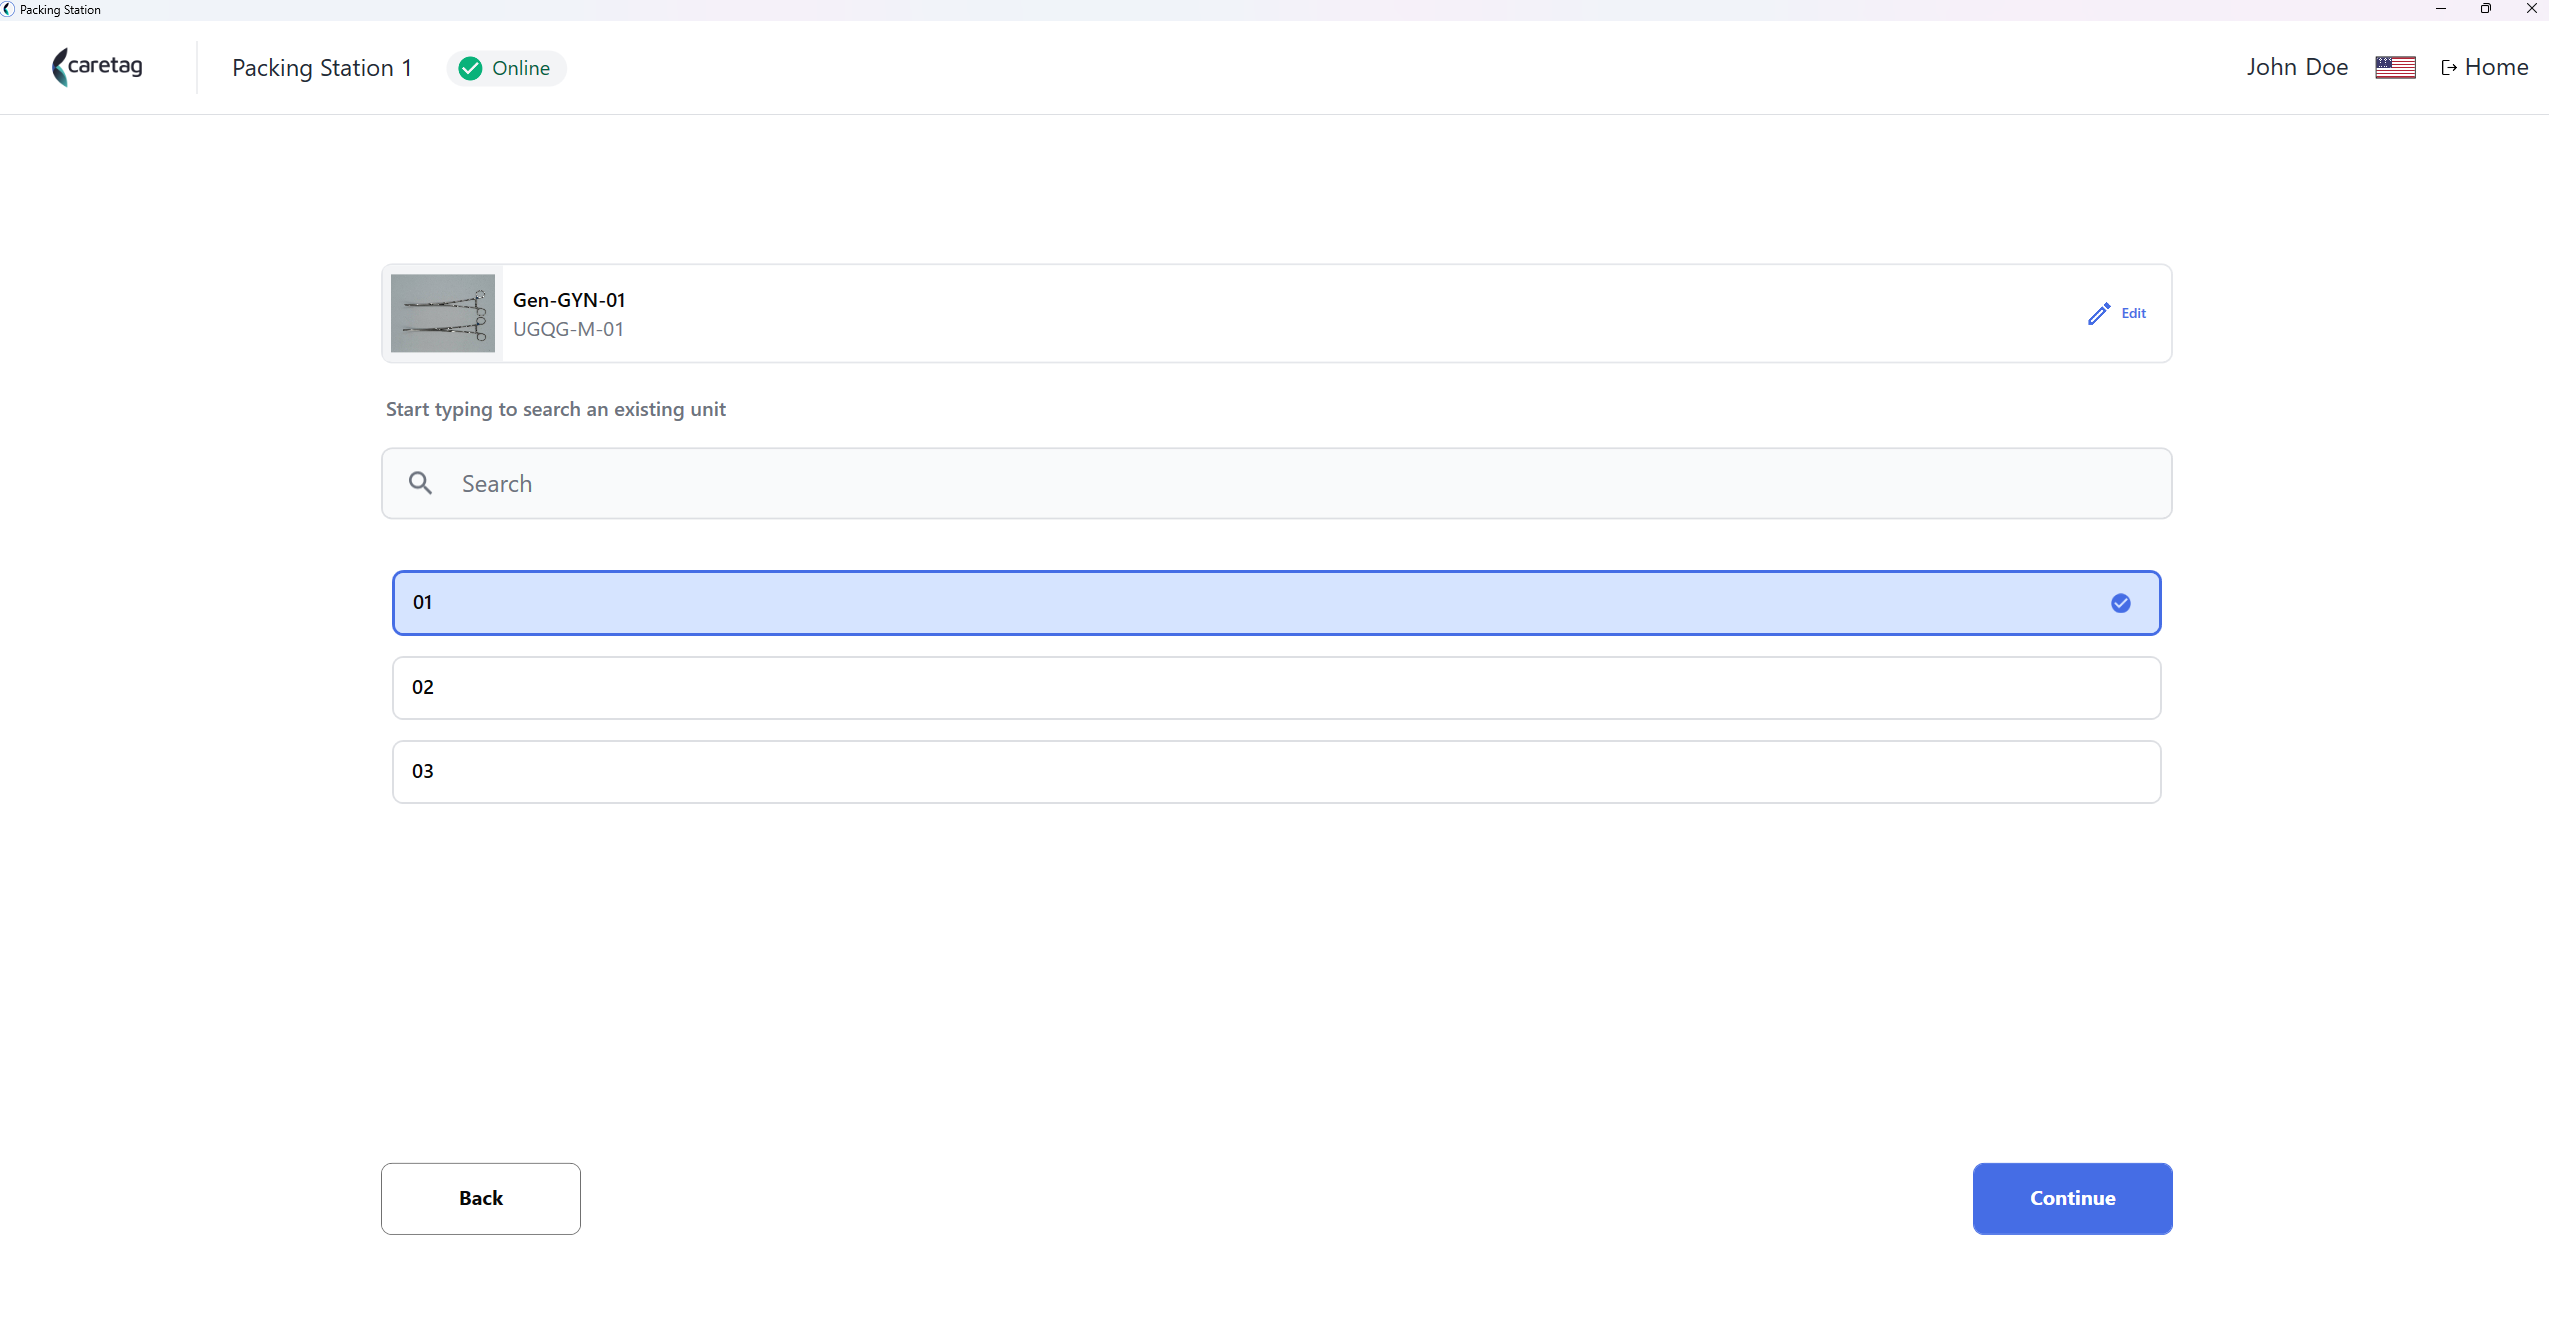
- Select the unit
- Here you can the see the instruments belong to this mini set
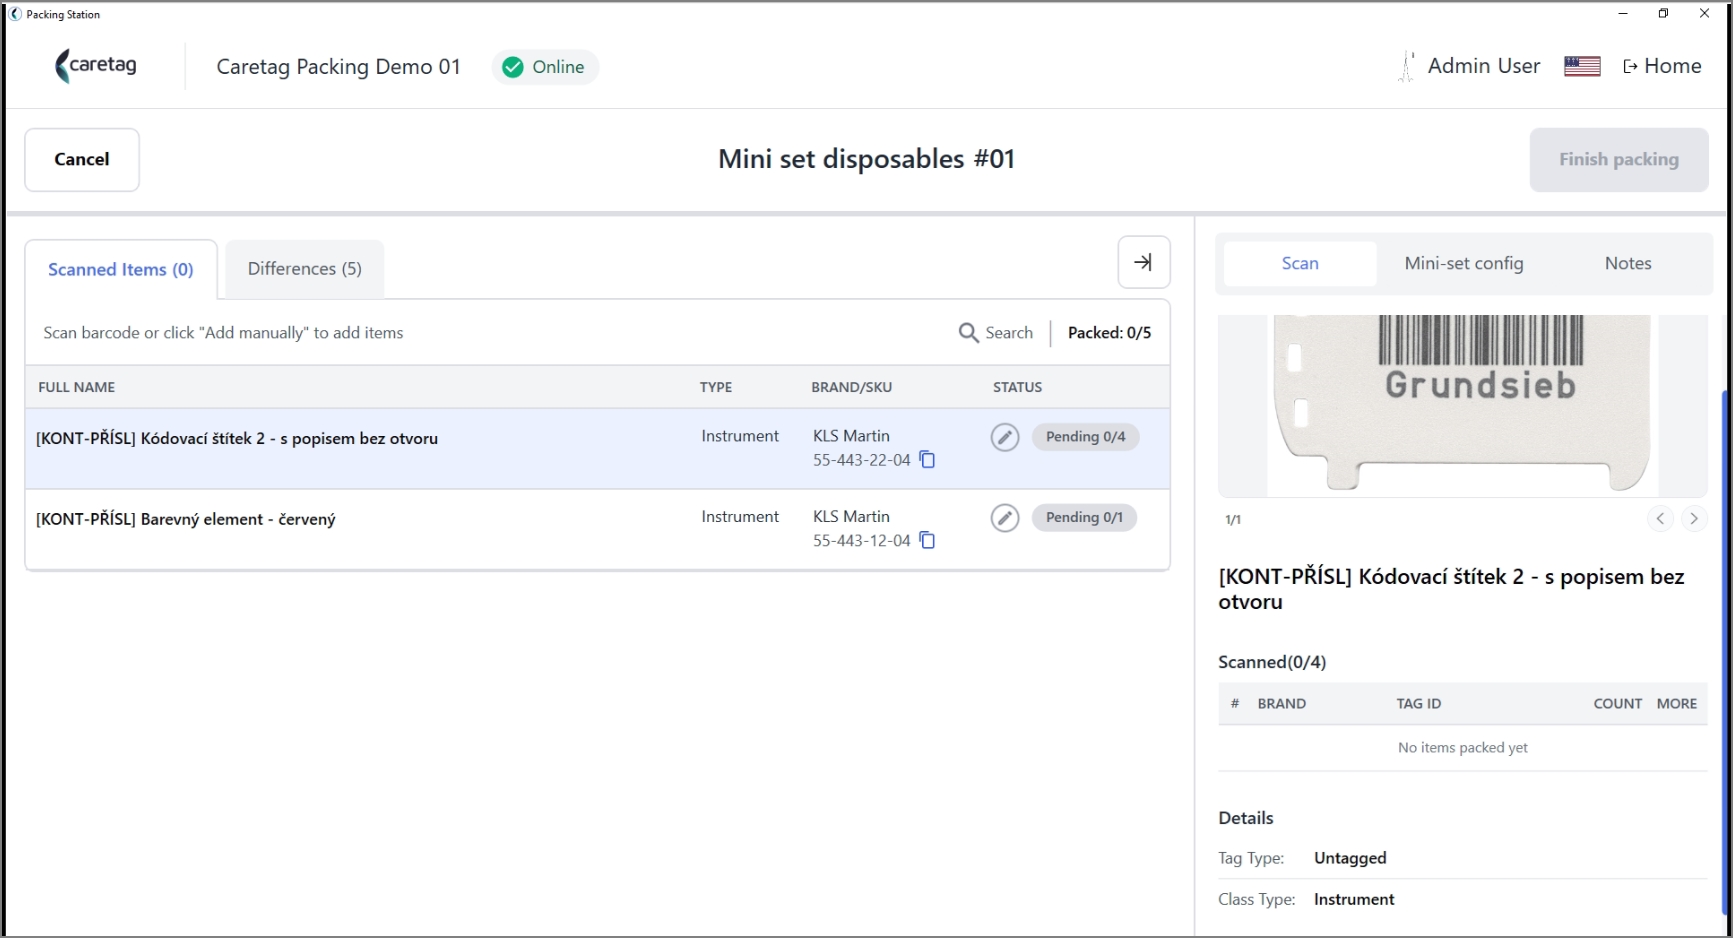
- Place the instruments on the RFID Reader or add the untagged items manually . Once the tags are read, the status is changed.
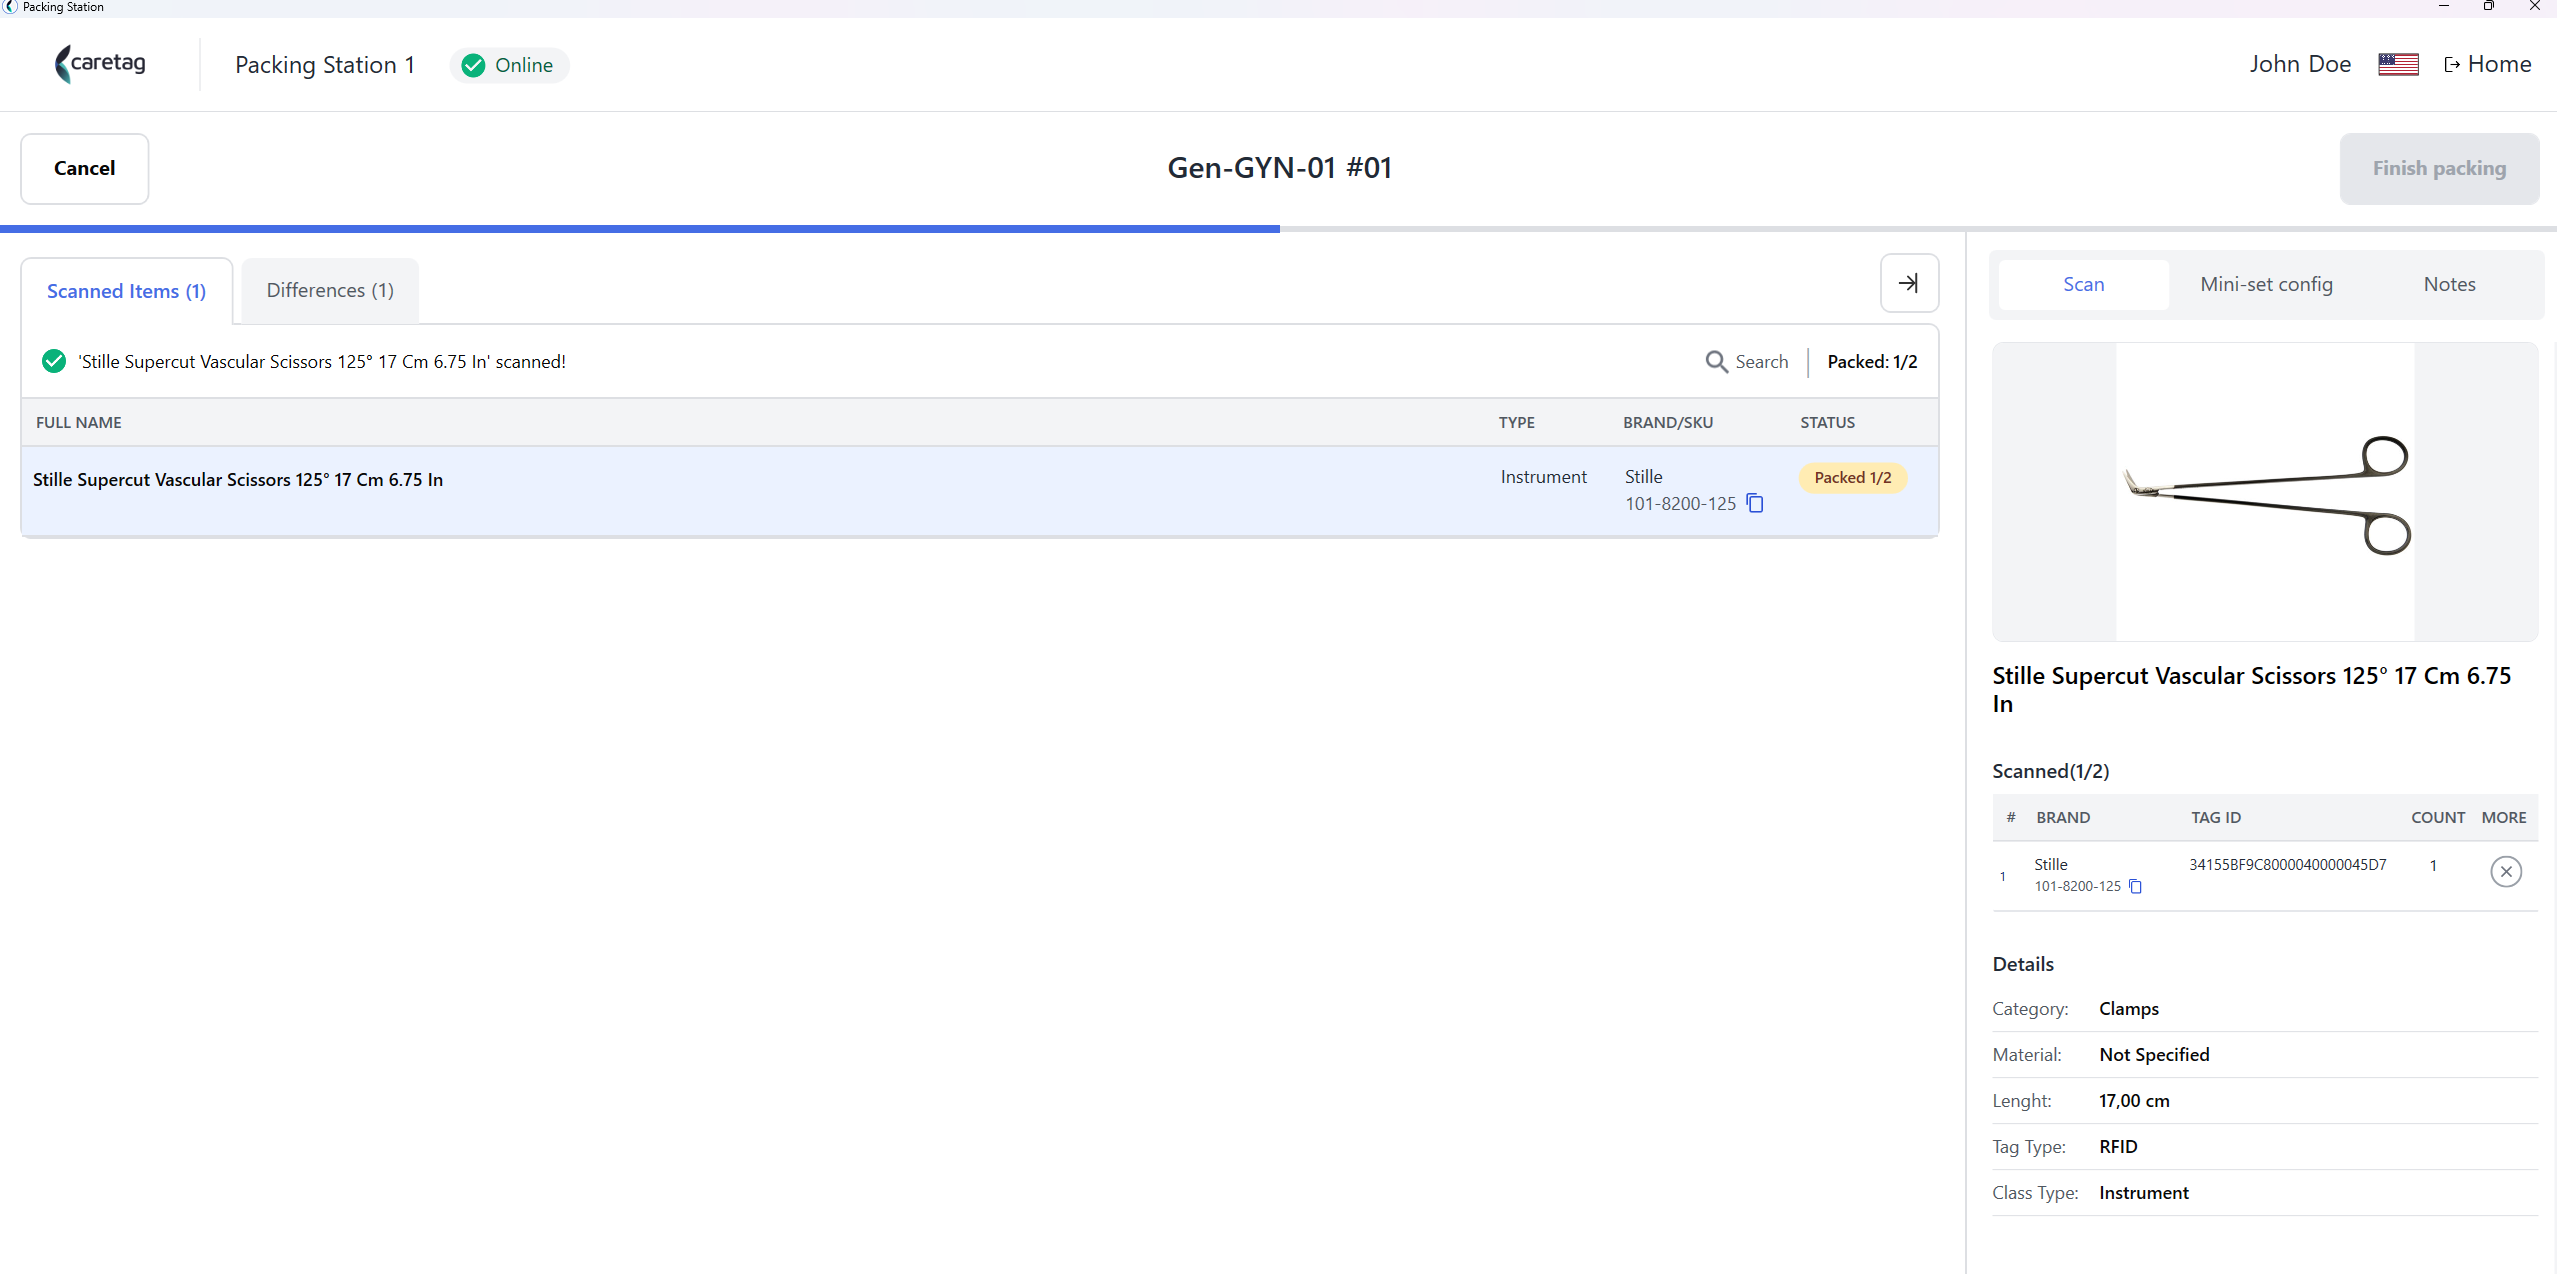
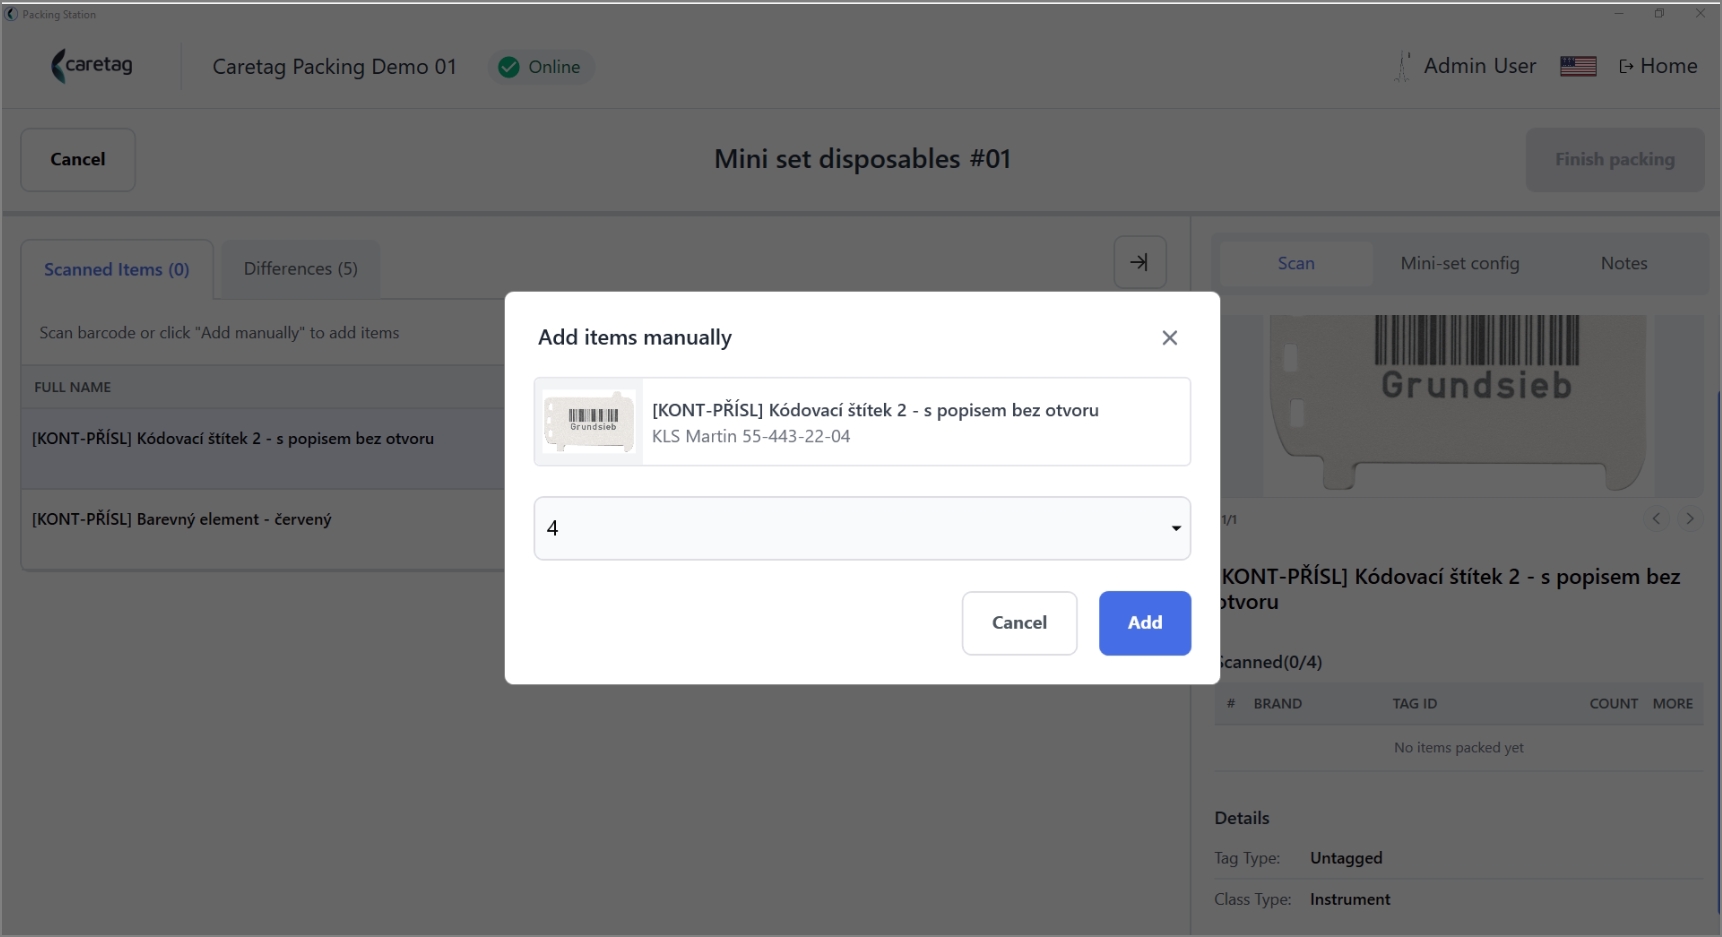
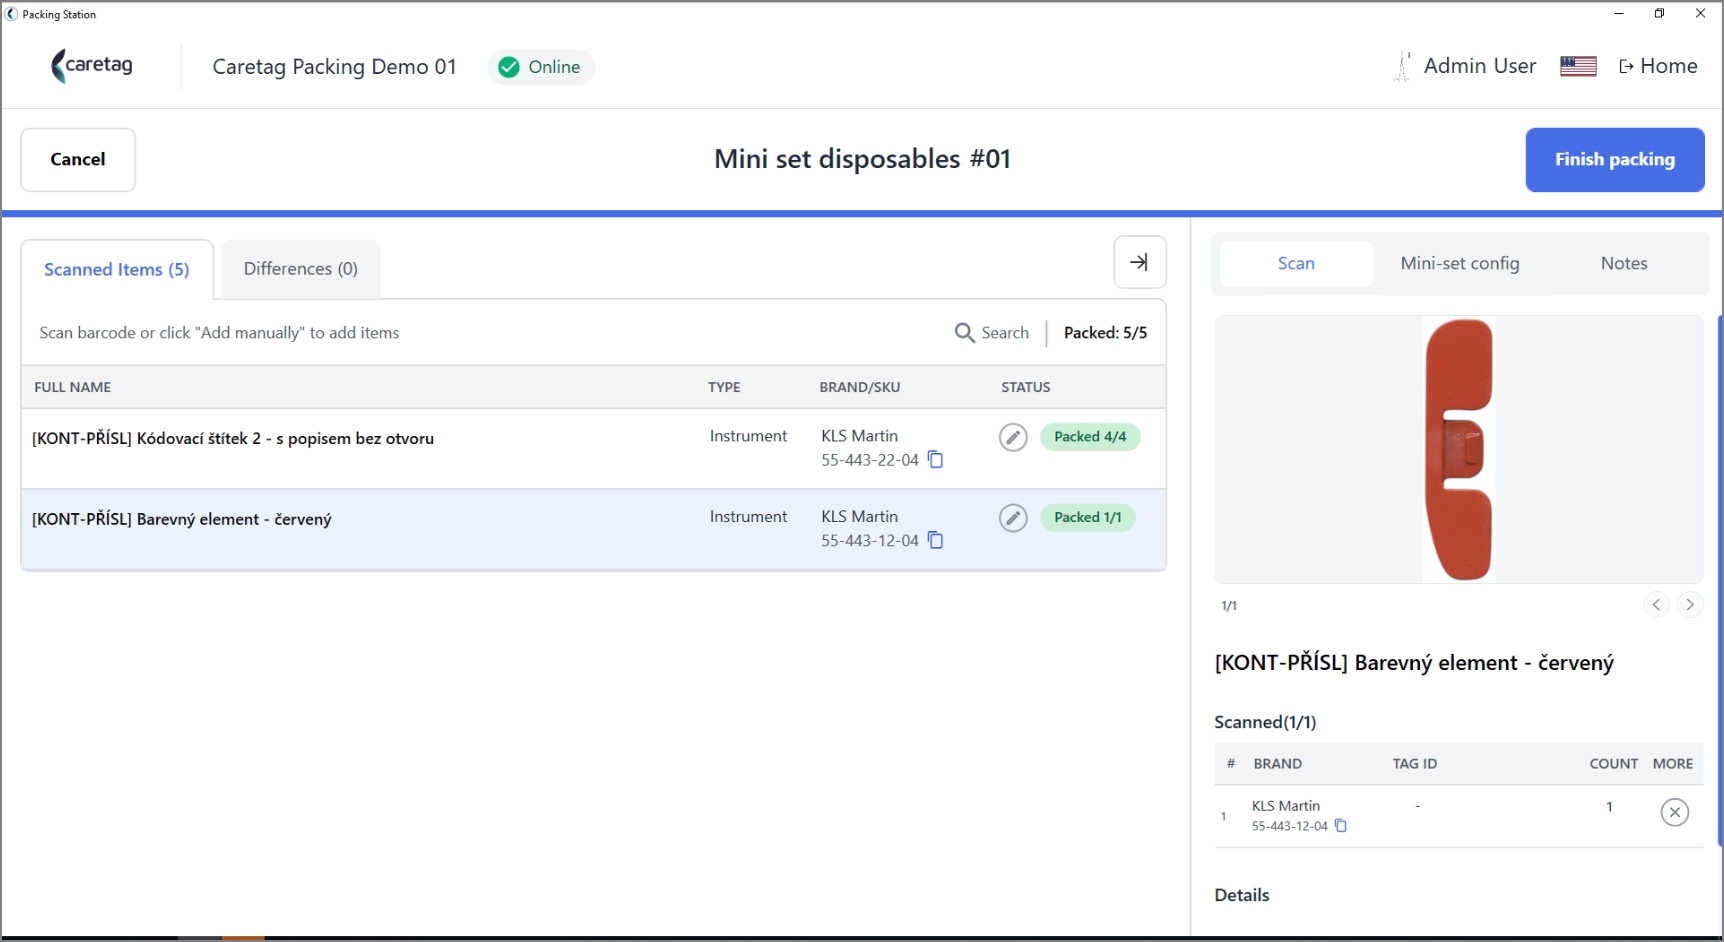
- The scanned items details are displayed on the right side panel
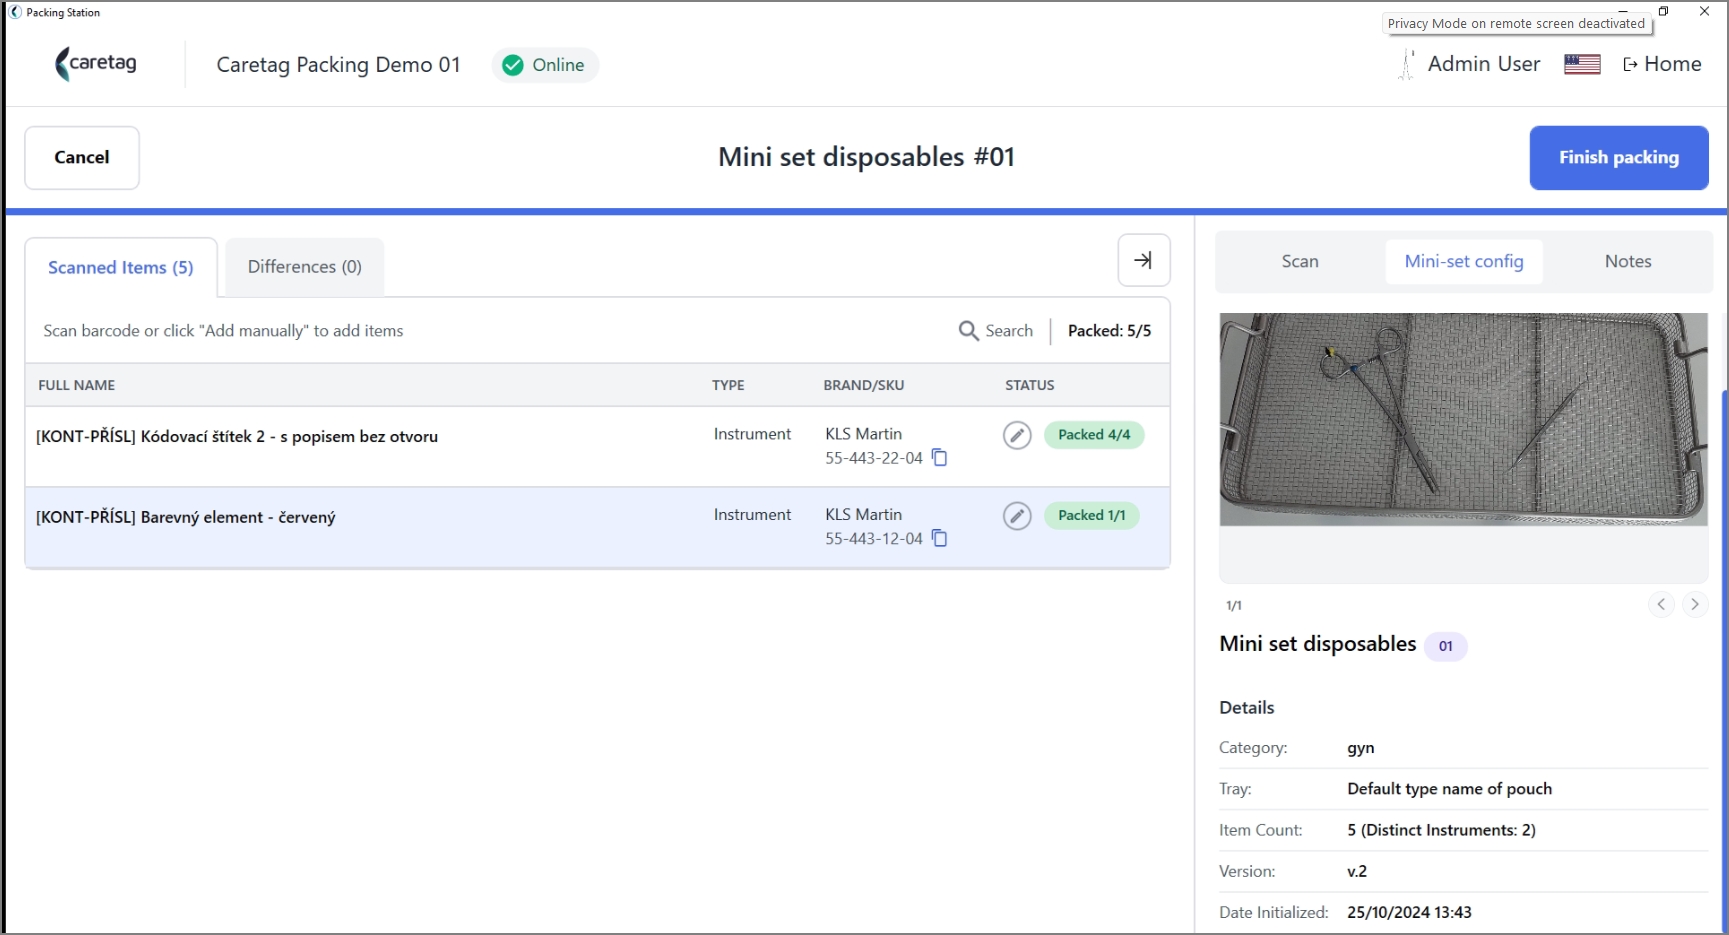
- Mini set configuration is shown on the right side panel.
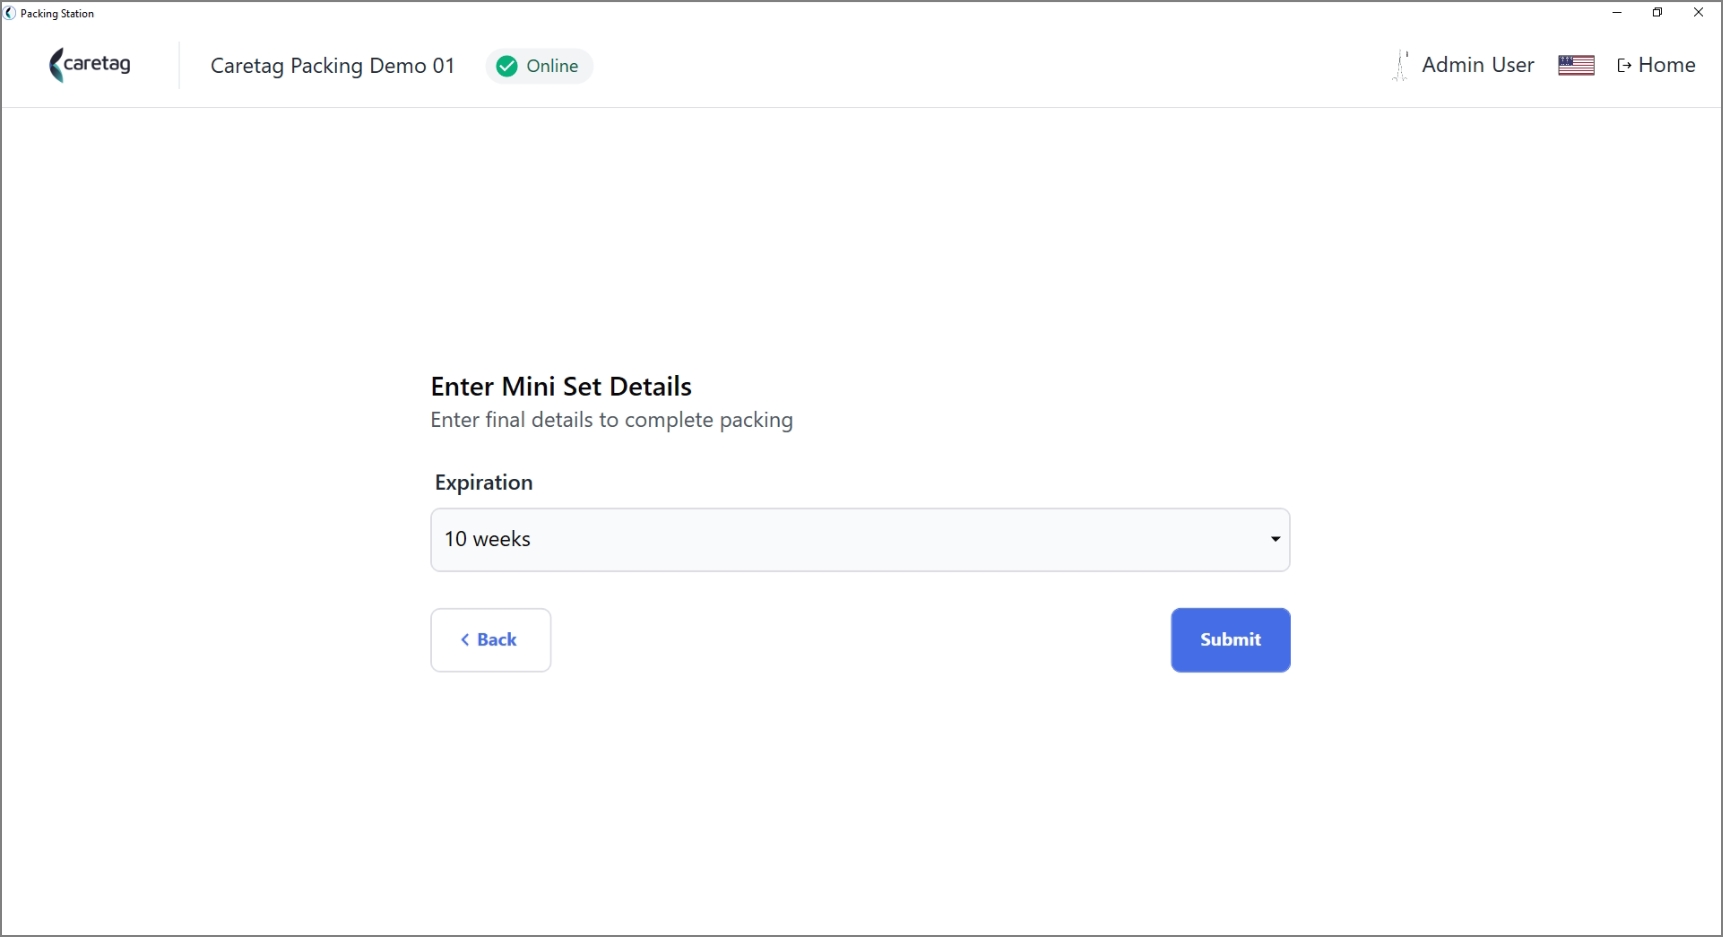
- Select the expiration period
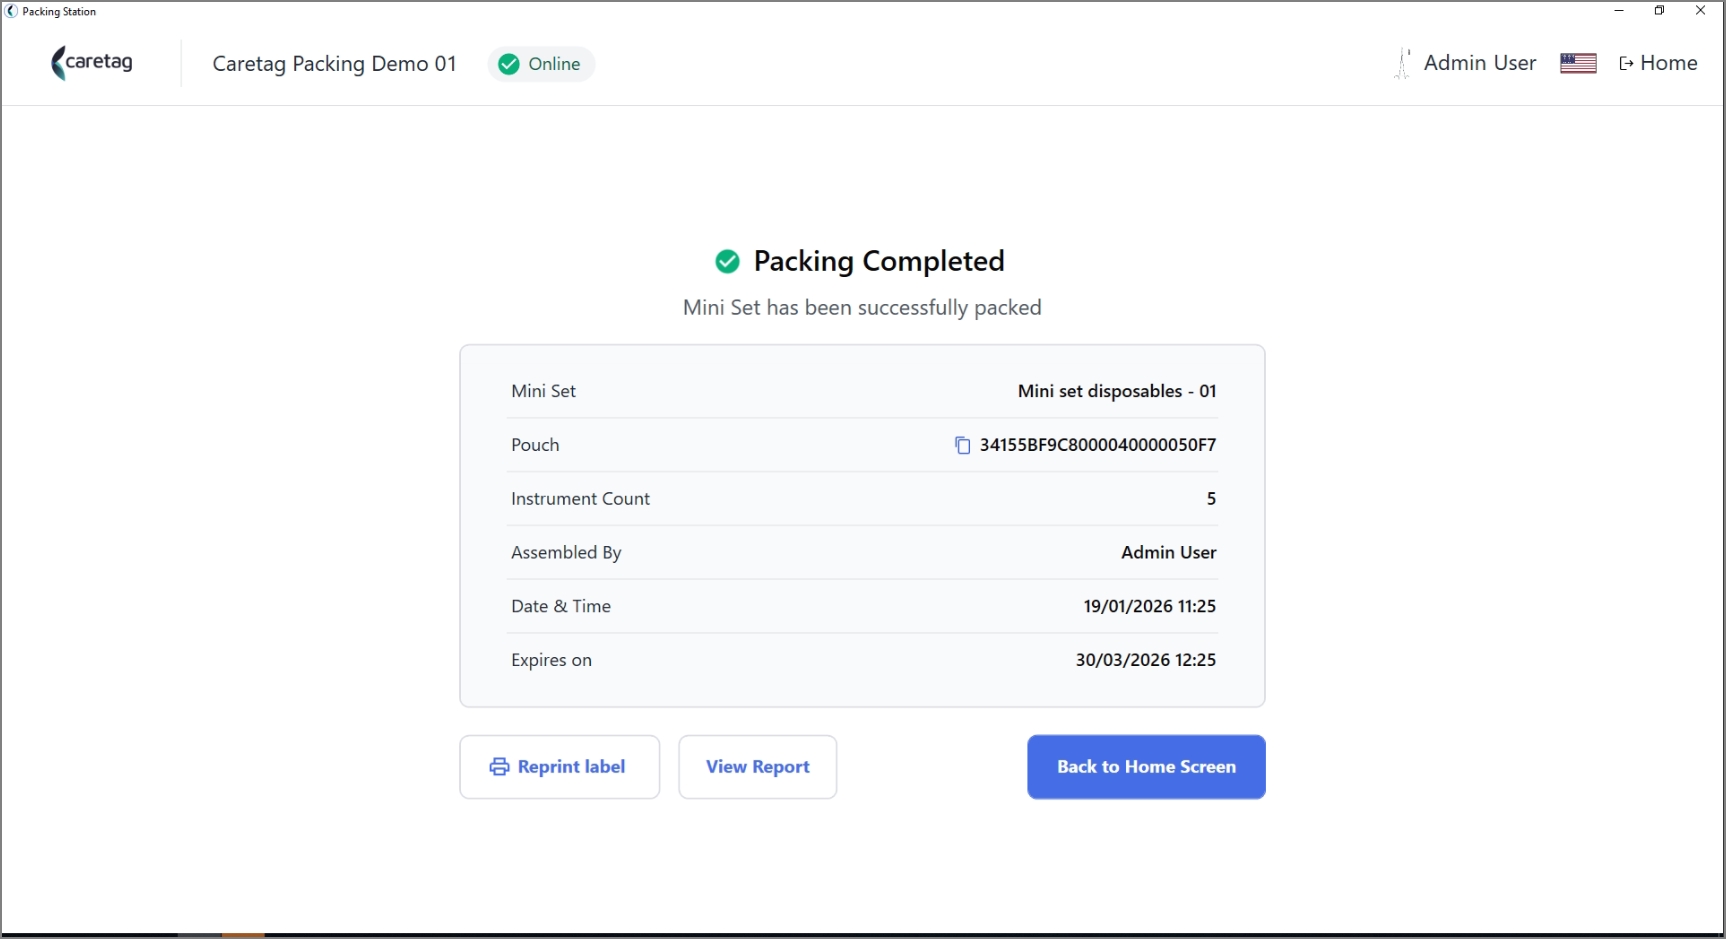
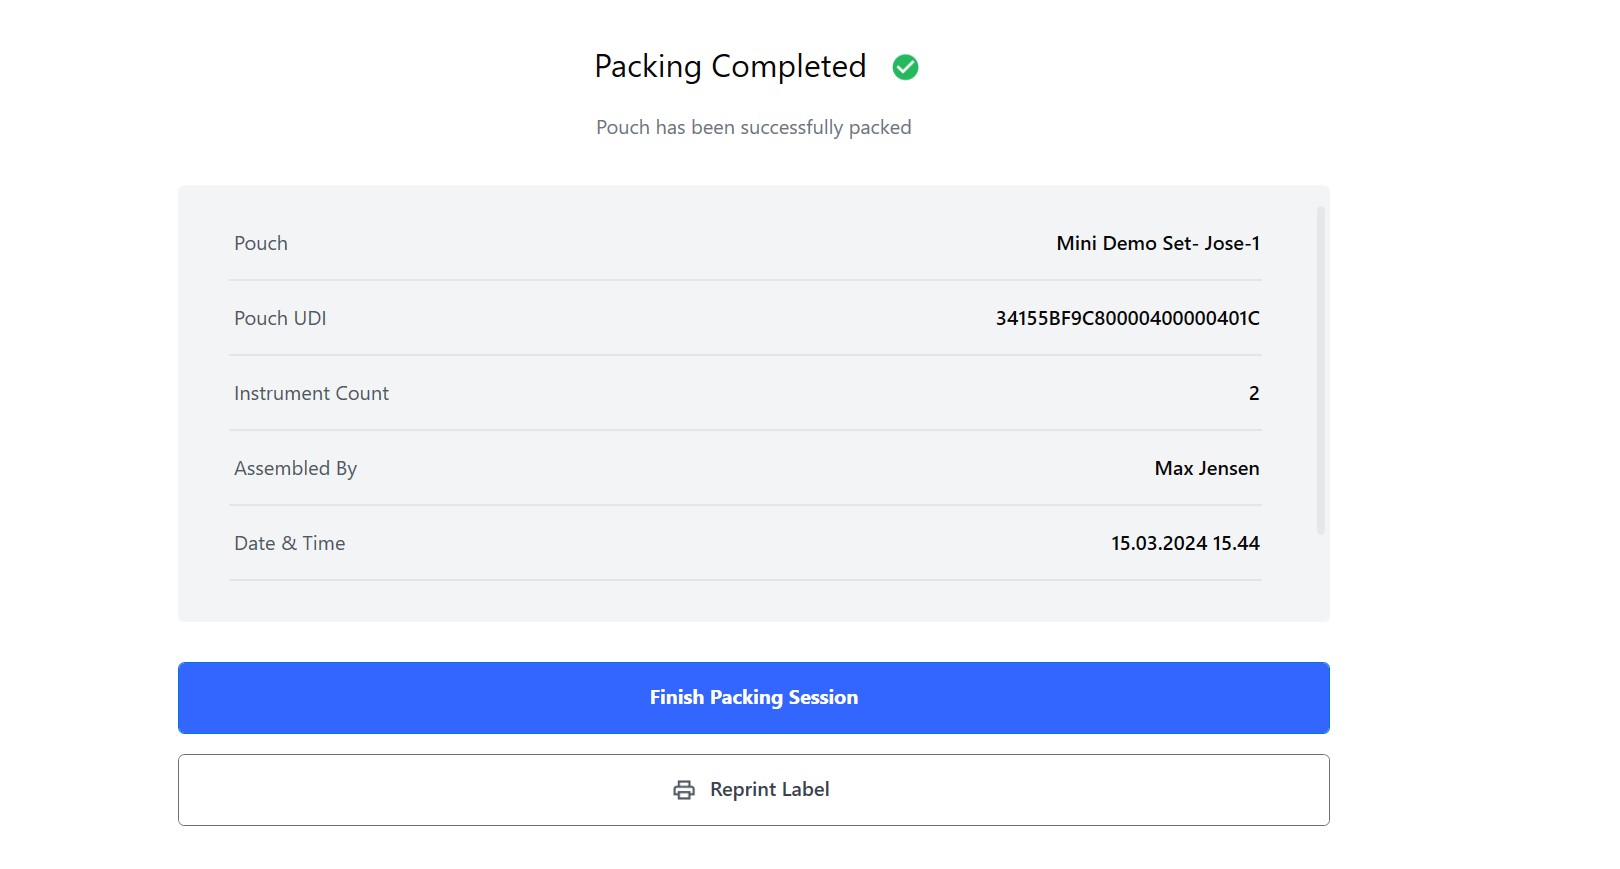
- Packing summary
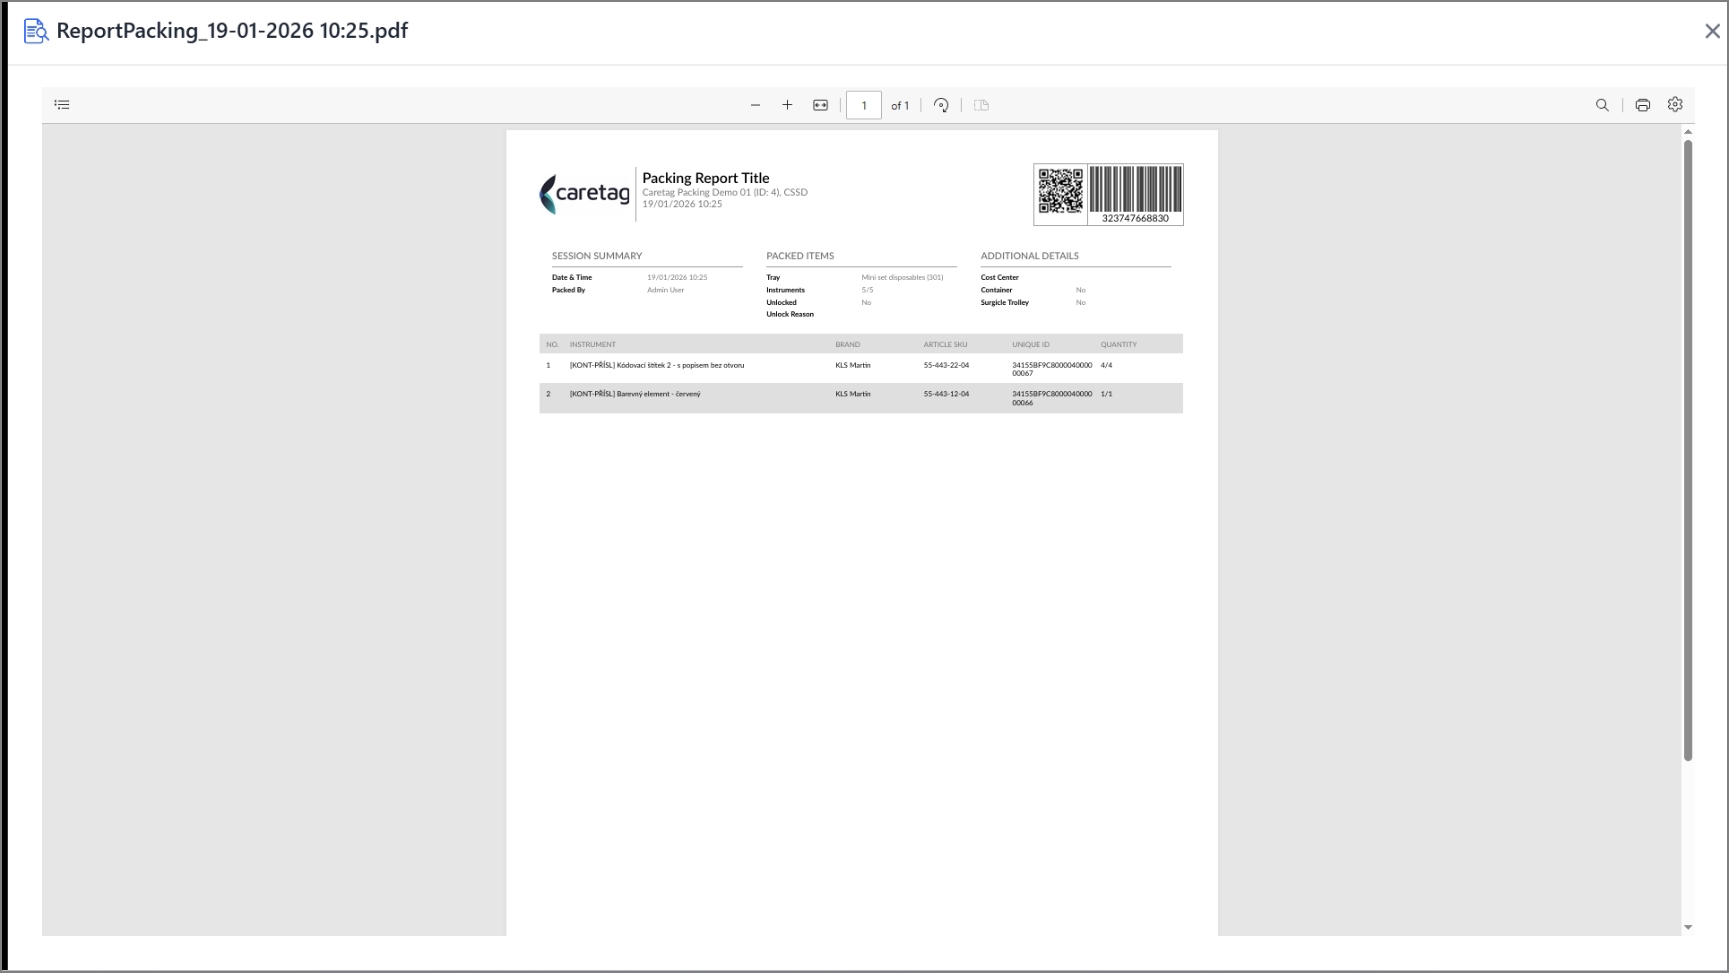
- Packing report of the mini set
- Scan the instruments that are listed in the mini set
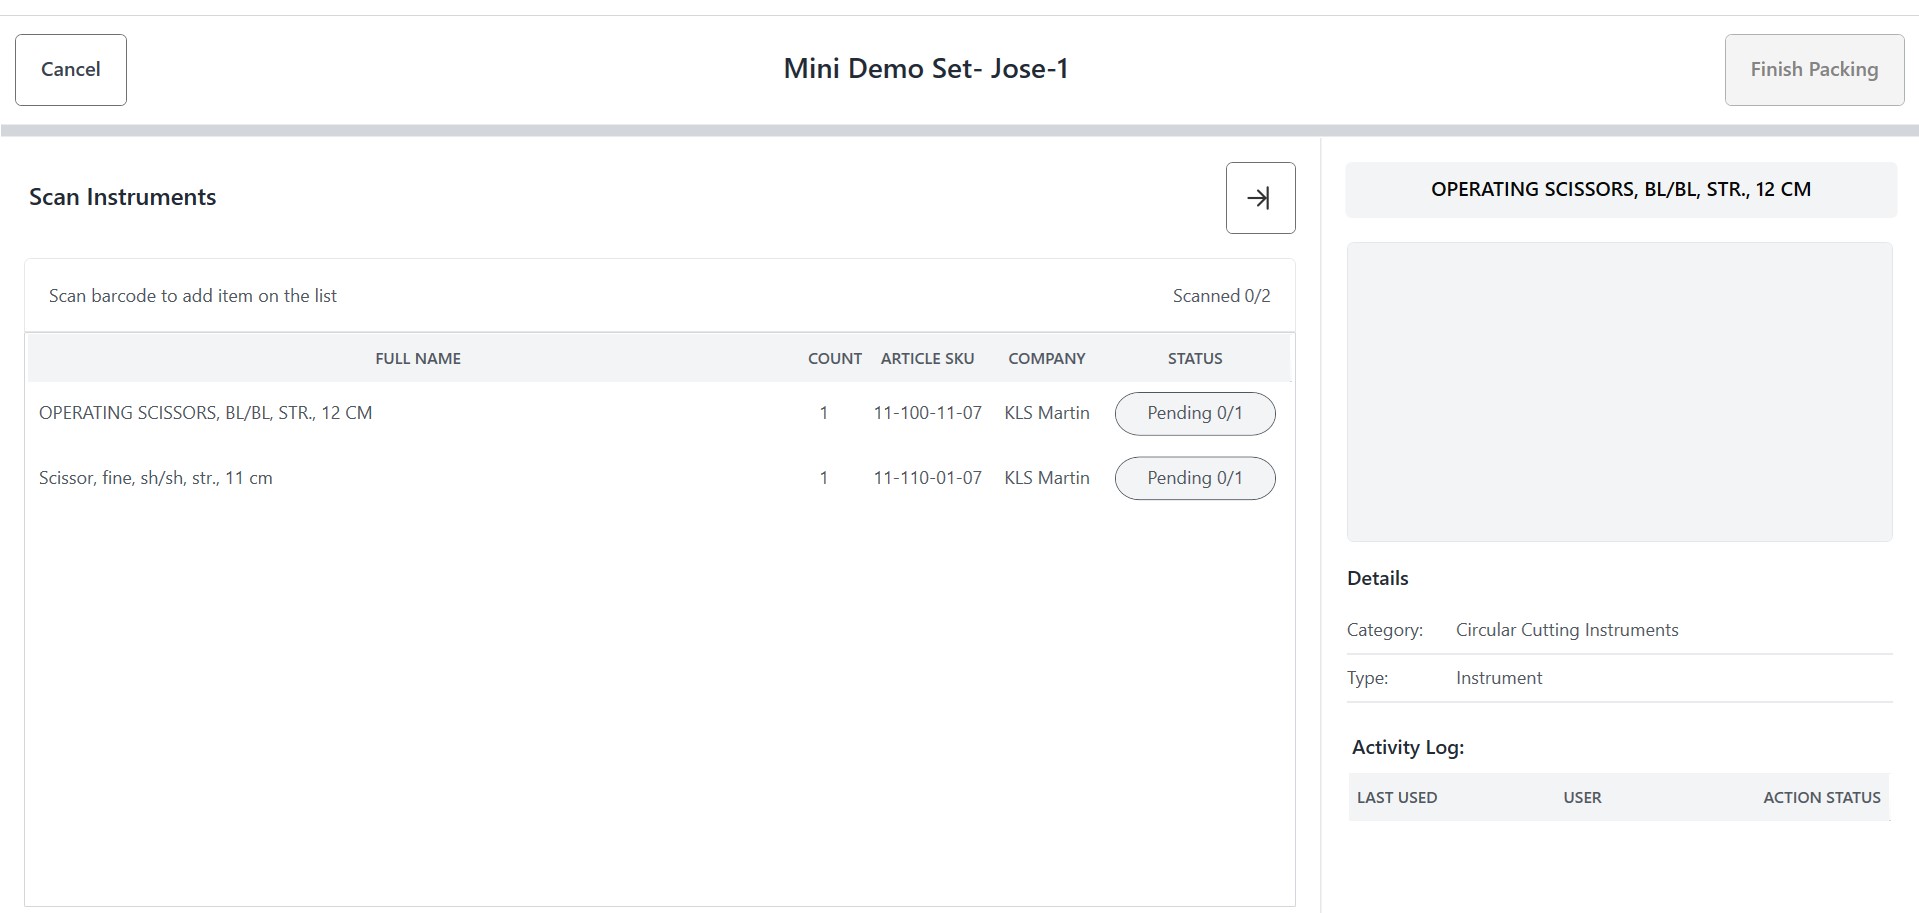
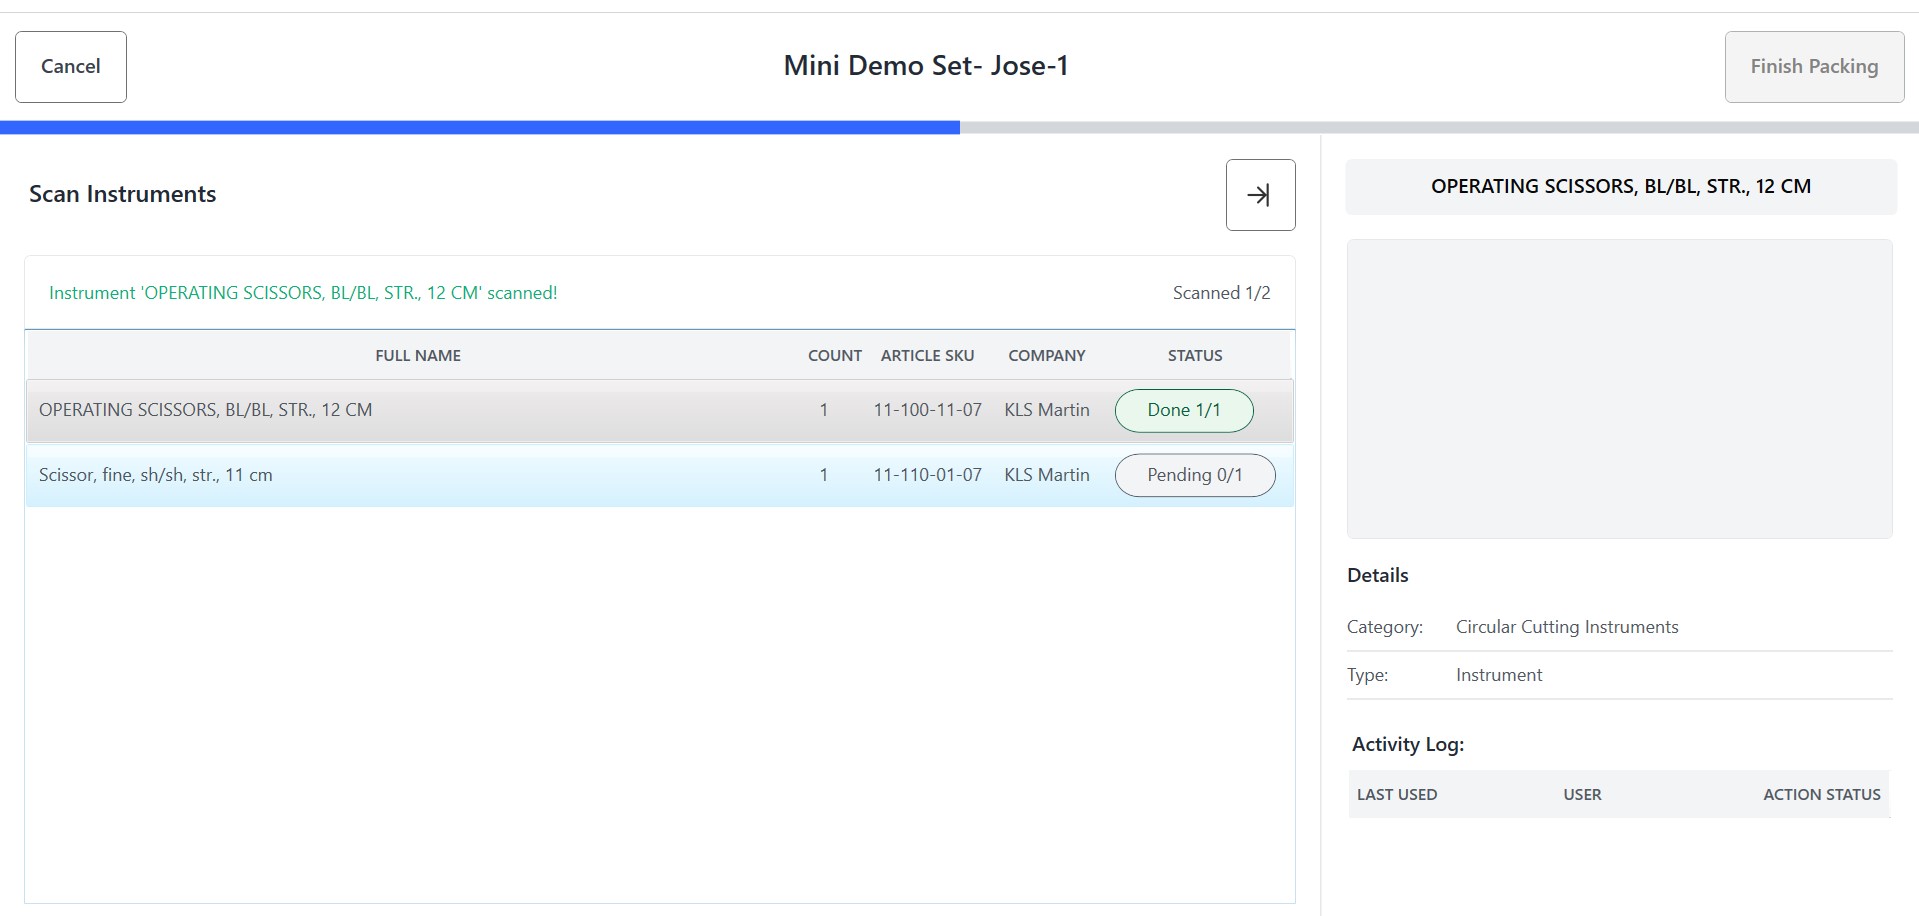
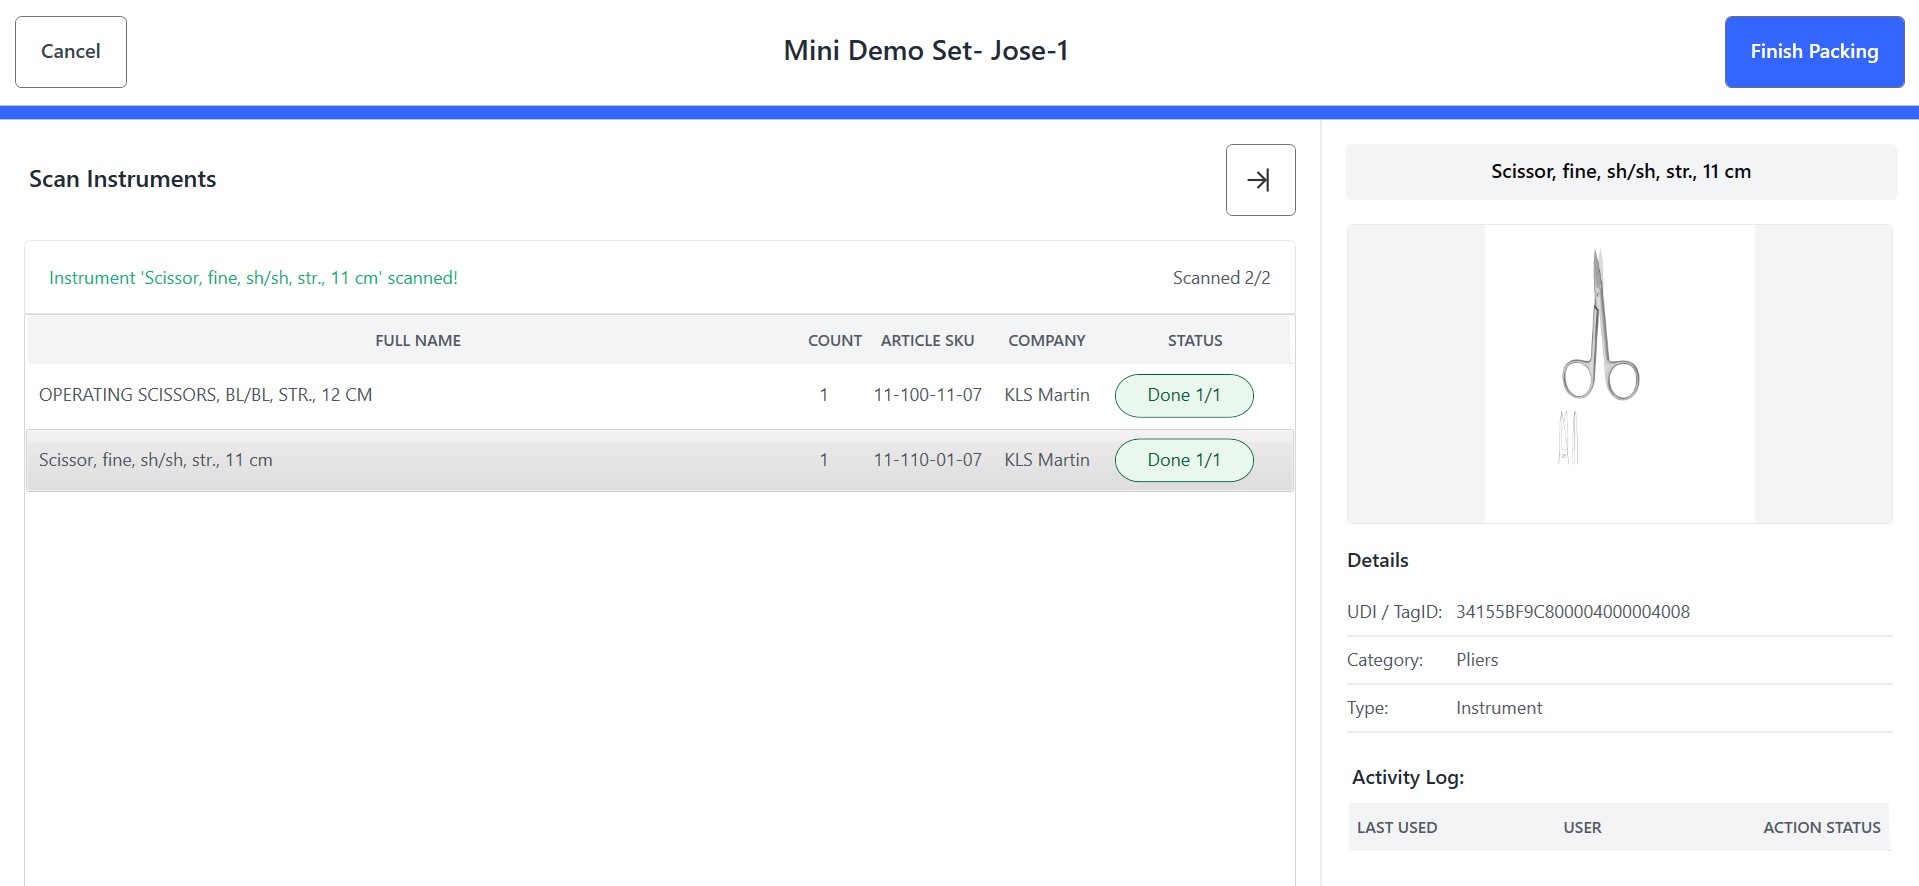
- Once the scanning is done, click on the finish packing button
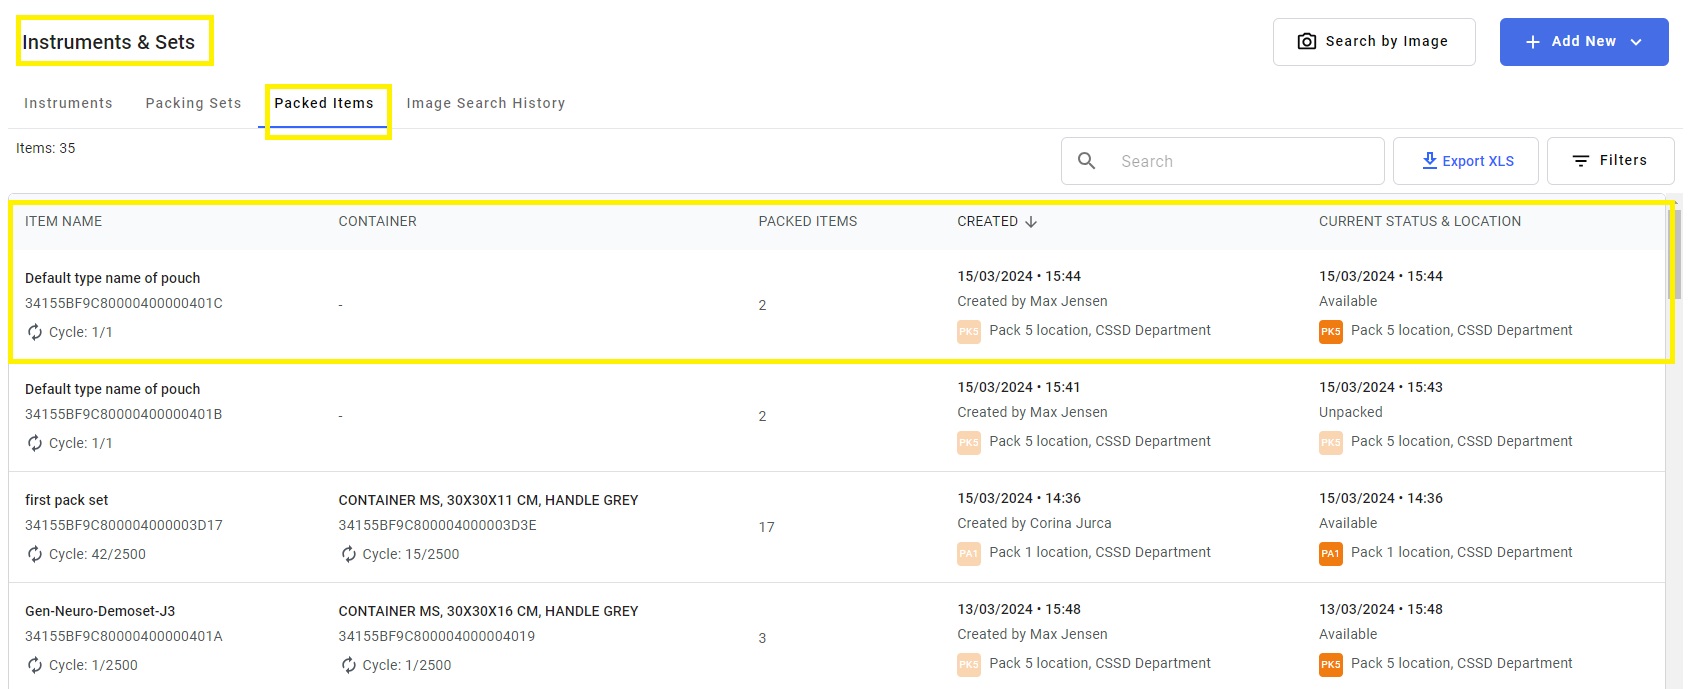
- The packed miniset now appears under the packed items in the web application
Pack Case Cart
- Select Pack Case Cart Option and click the continue button.
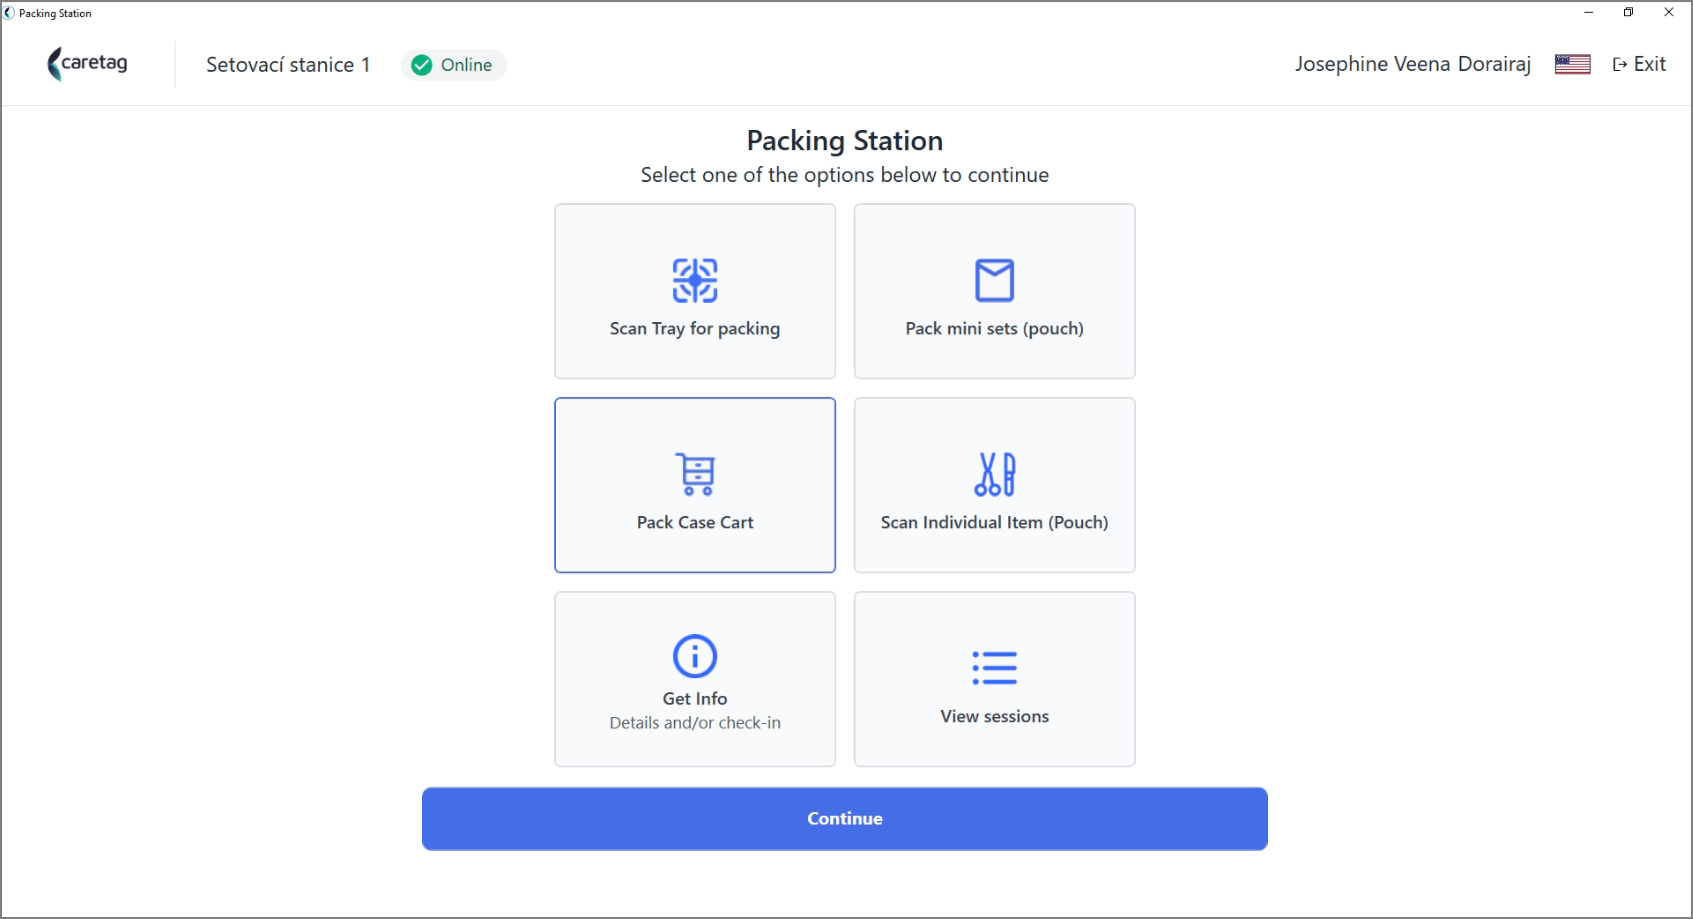
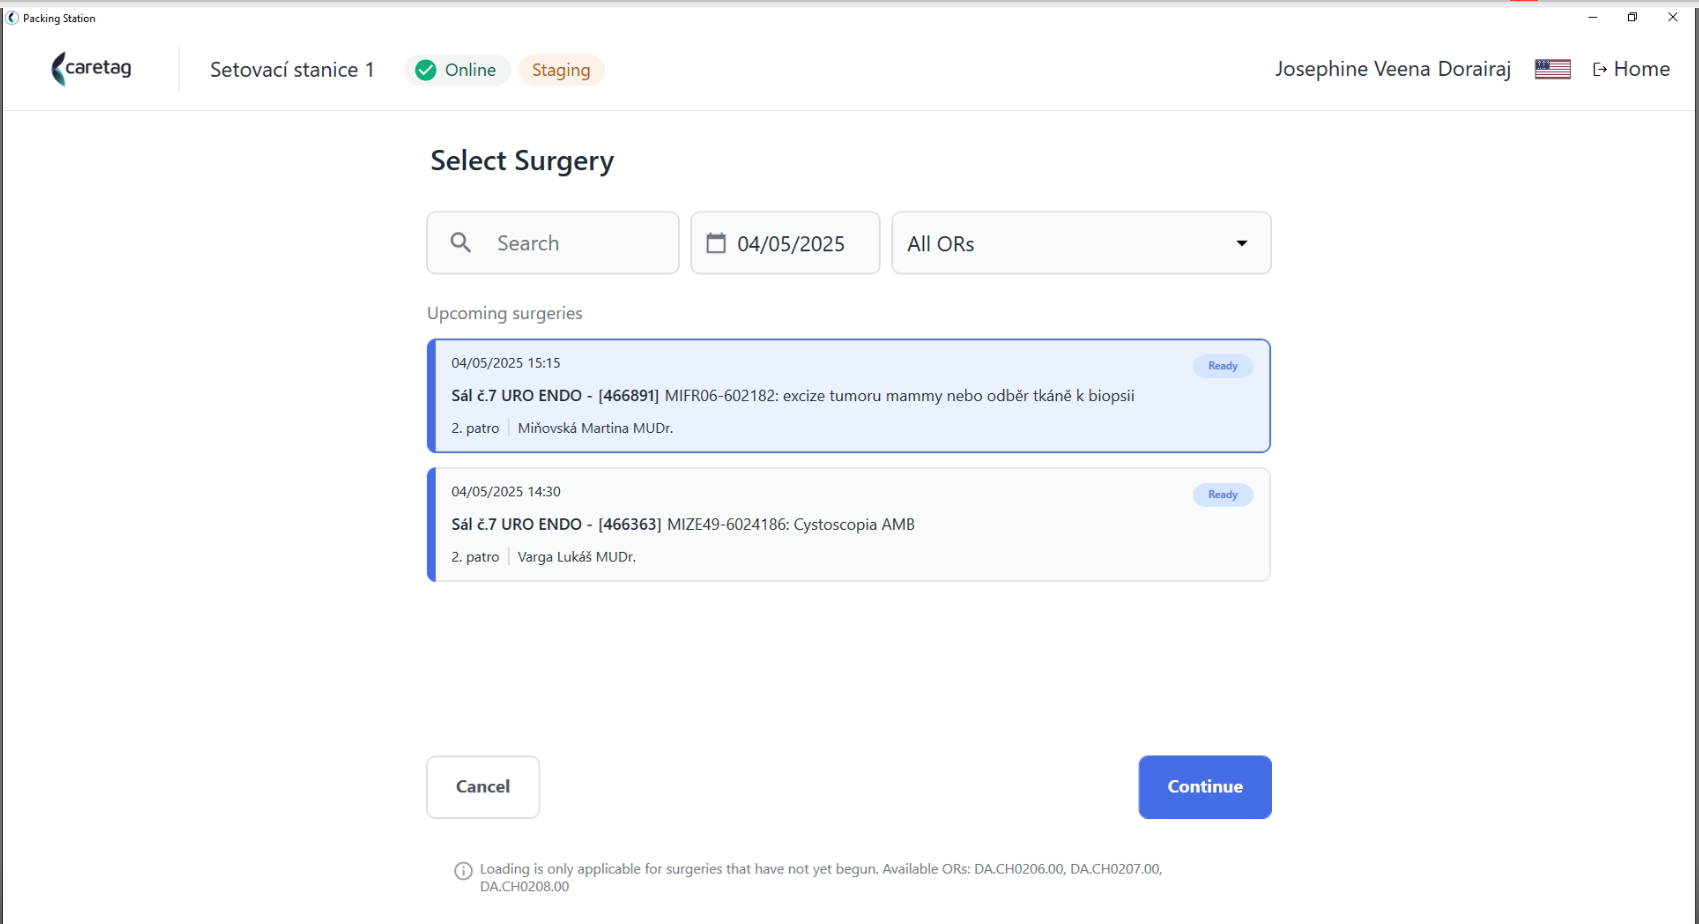
- Select Surgery and click on continue.
- The user can directly type the surgery ID in the search bar or select a date and choose from the list. Here there is also an option to select a specific OR and see the surgery list.
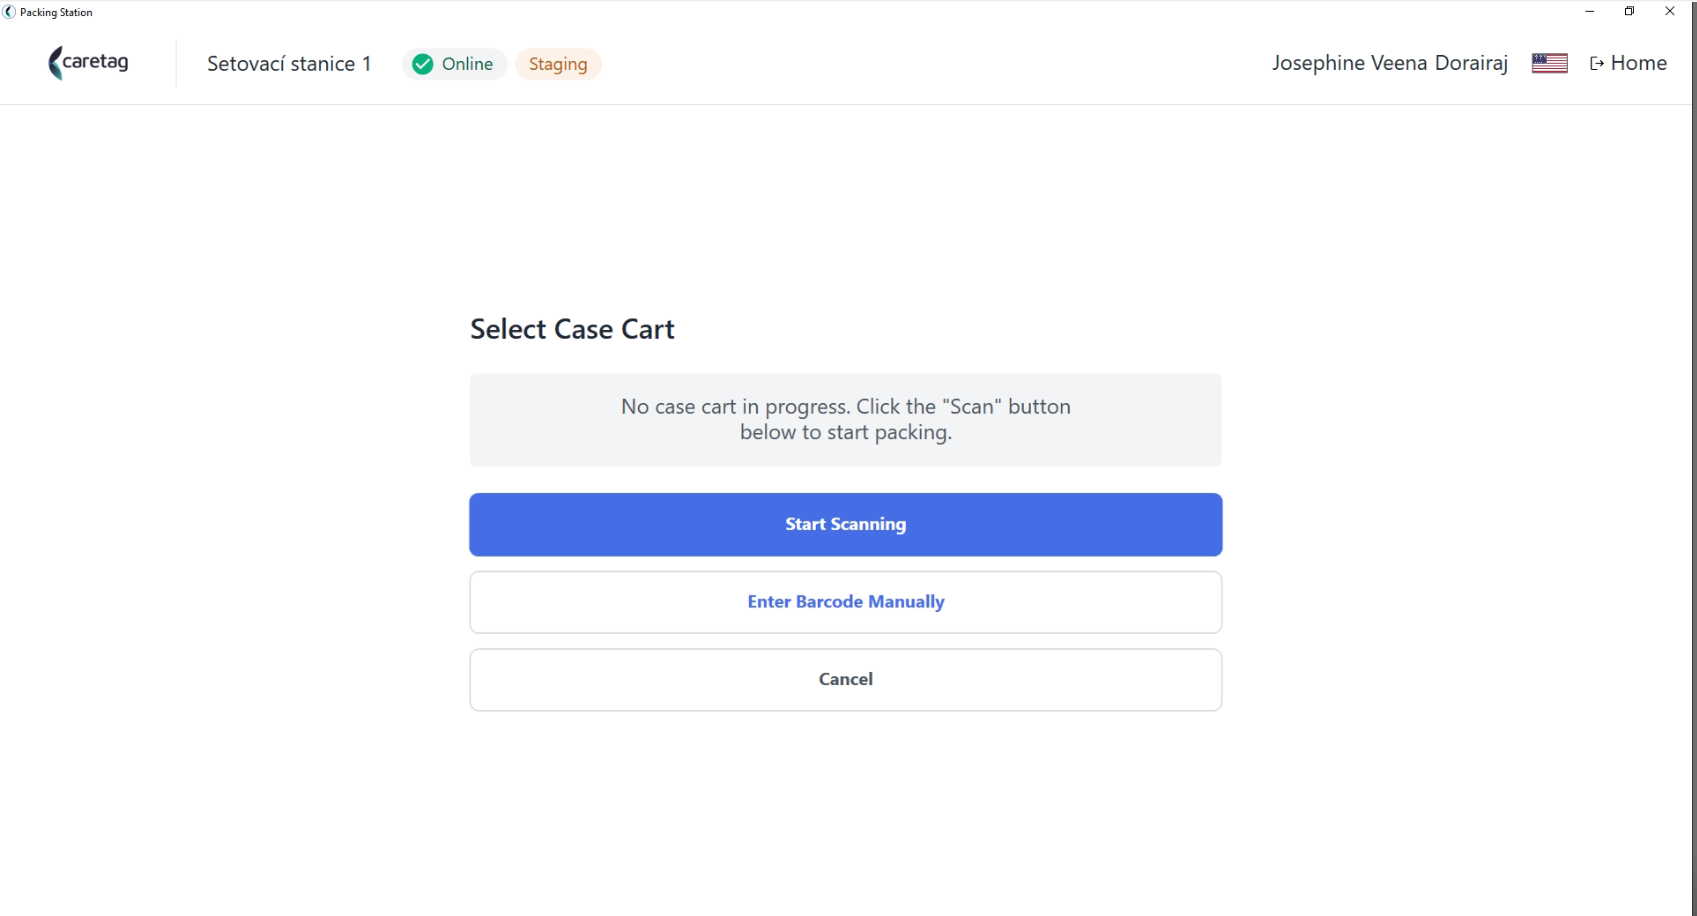
- Select Case Cart, scan the case cart tag
- It displays the surgery details and picking list.
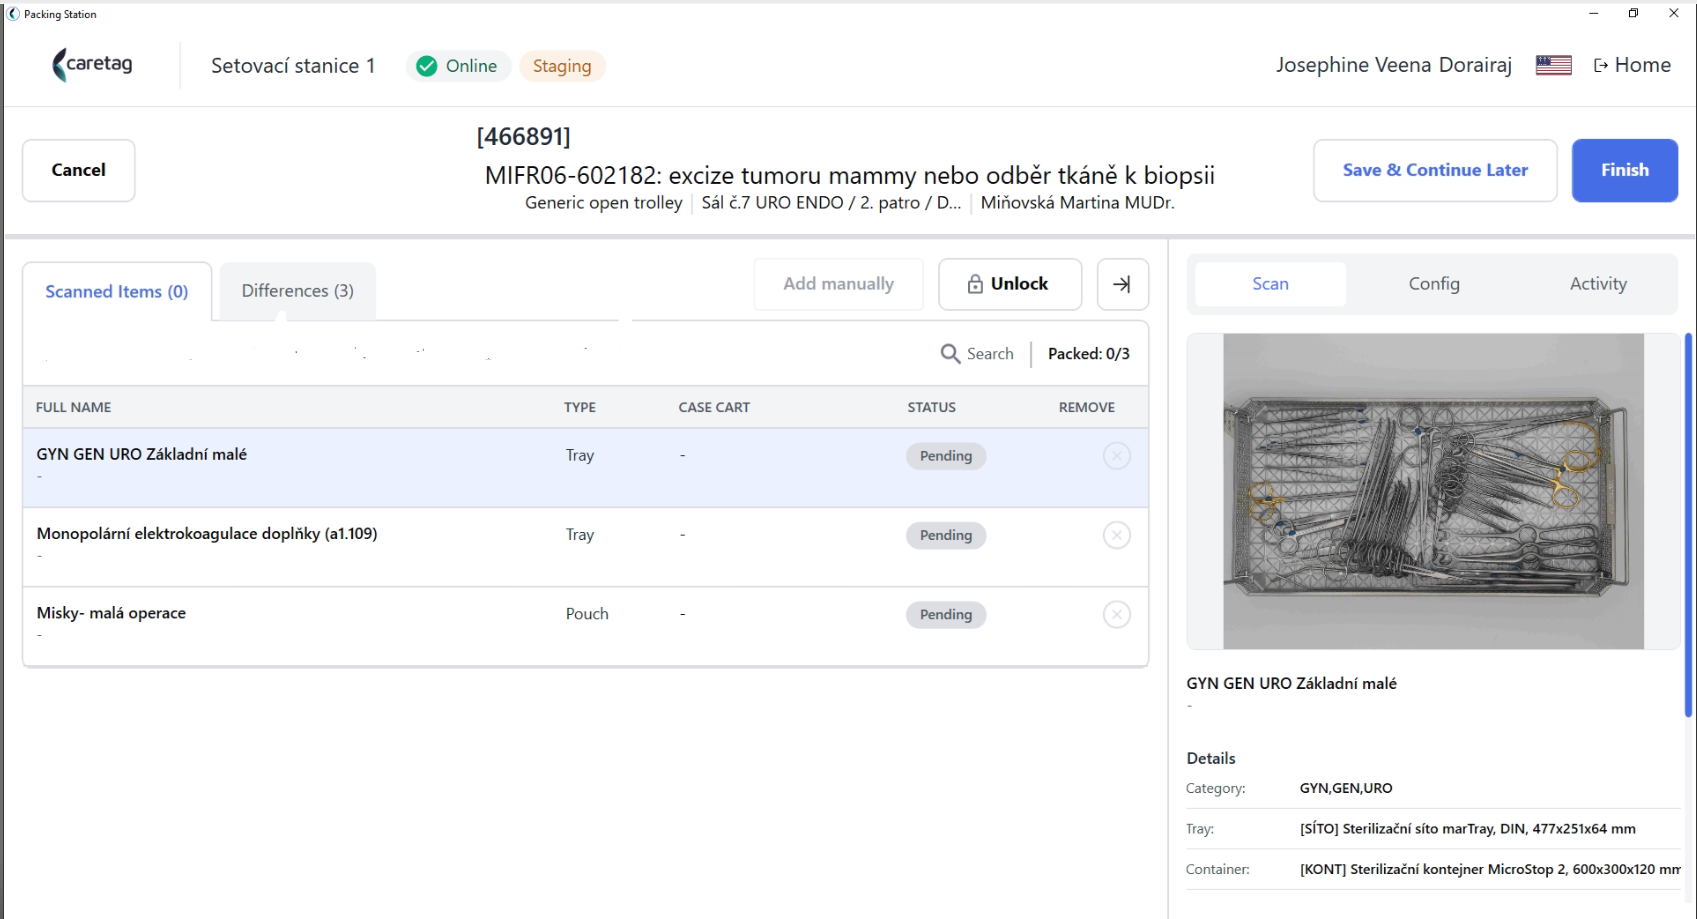
- Each Surgeries have their own dedicated packing sets(trays/minisets/pouches).
- In this page, you can see the Surgery ID name, Trolley details, Operating room and floor are shown in the center.
- The details of the trays are displayed in the right side window.
-
If the user has all the items (containers/pouches) packed according to the picking list, they can directly scan, otherwise the user can unlock the case cart and start to scan the containers/pouches that are not in the picking list.
-
Start to scan the container/tray tag/pouch.
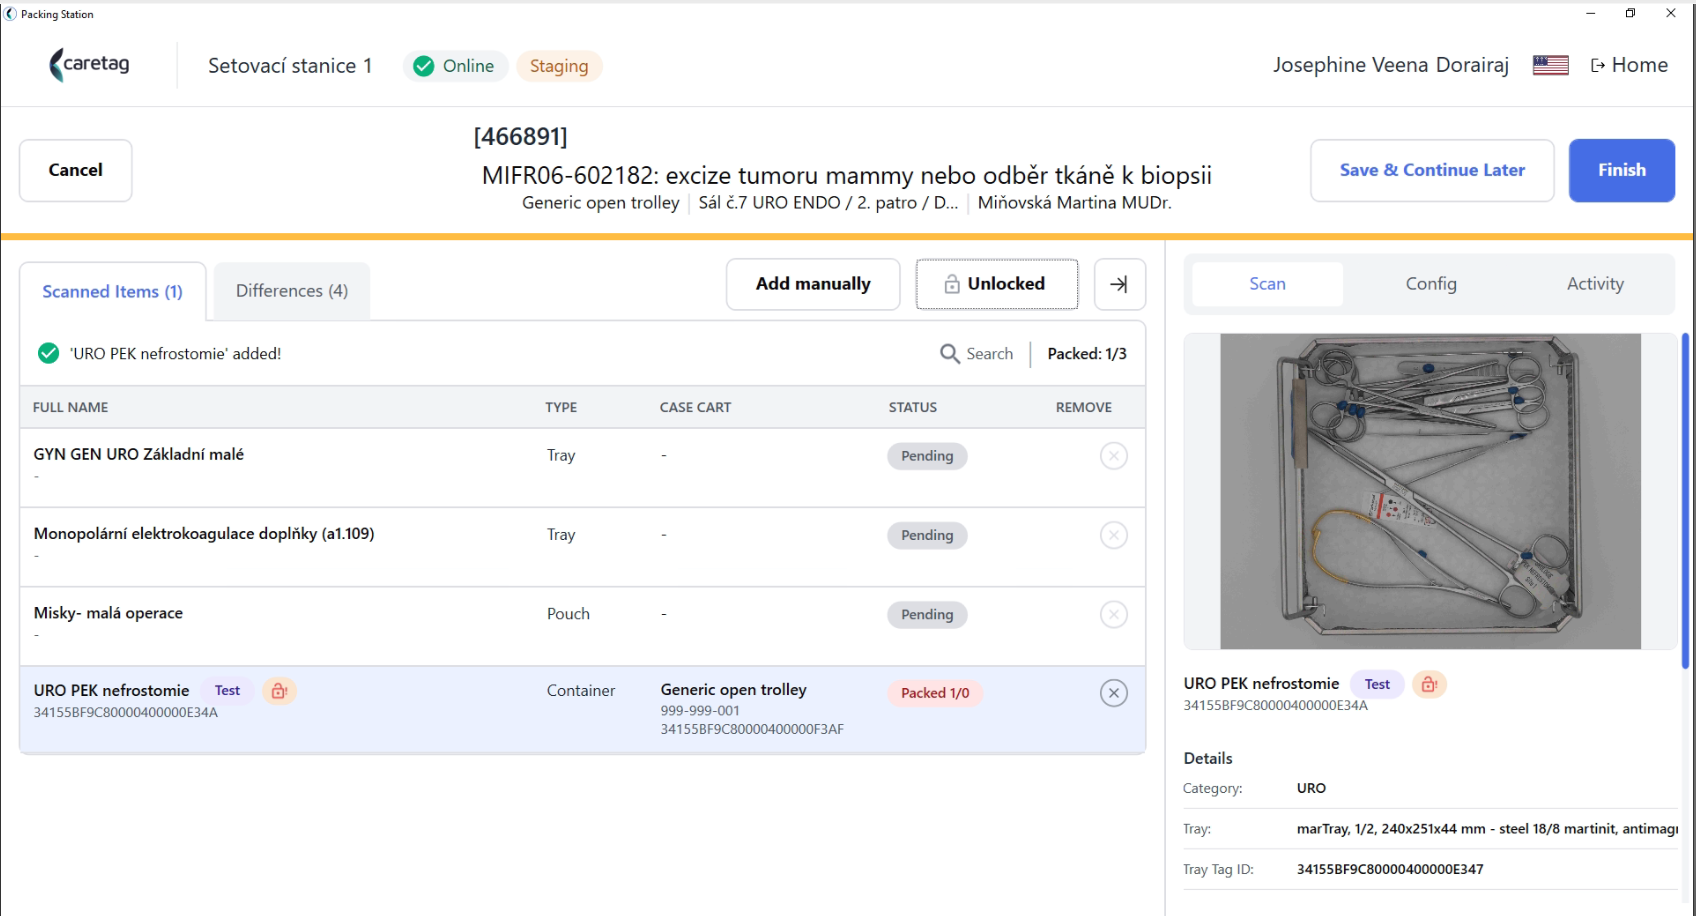
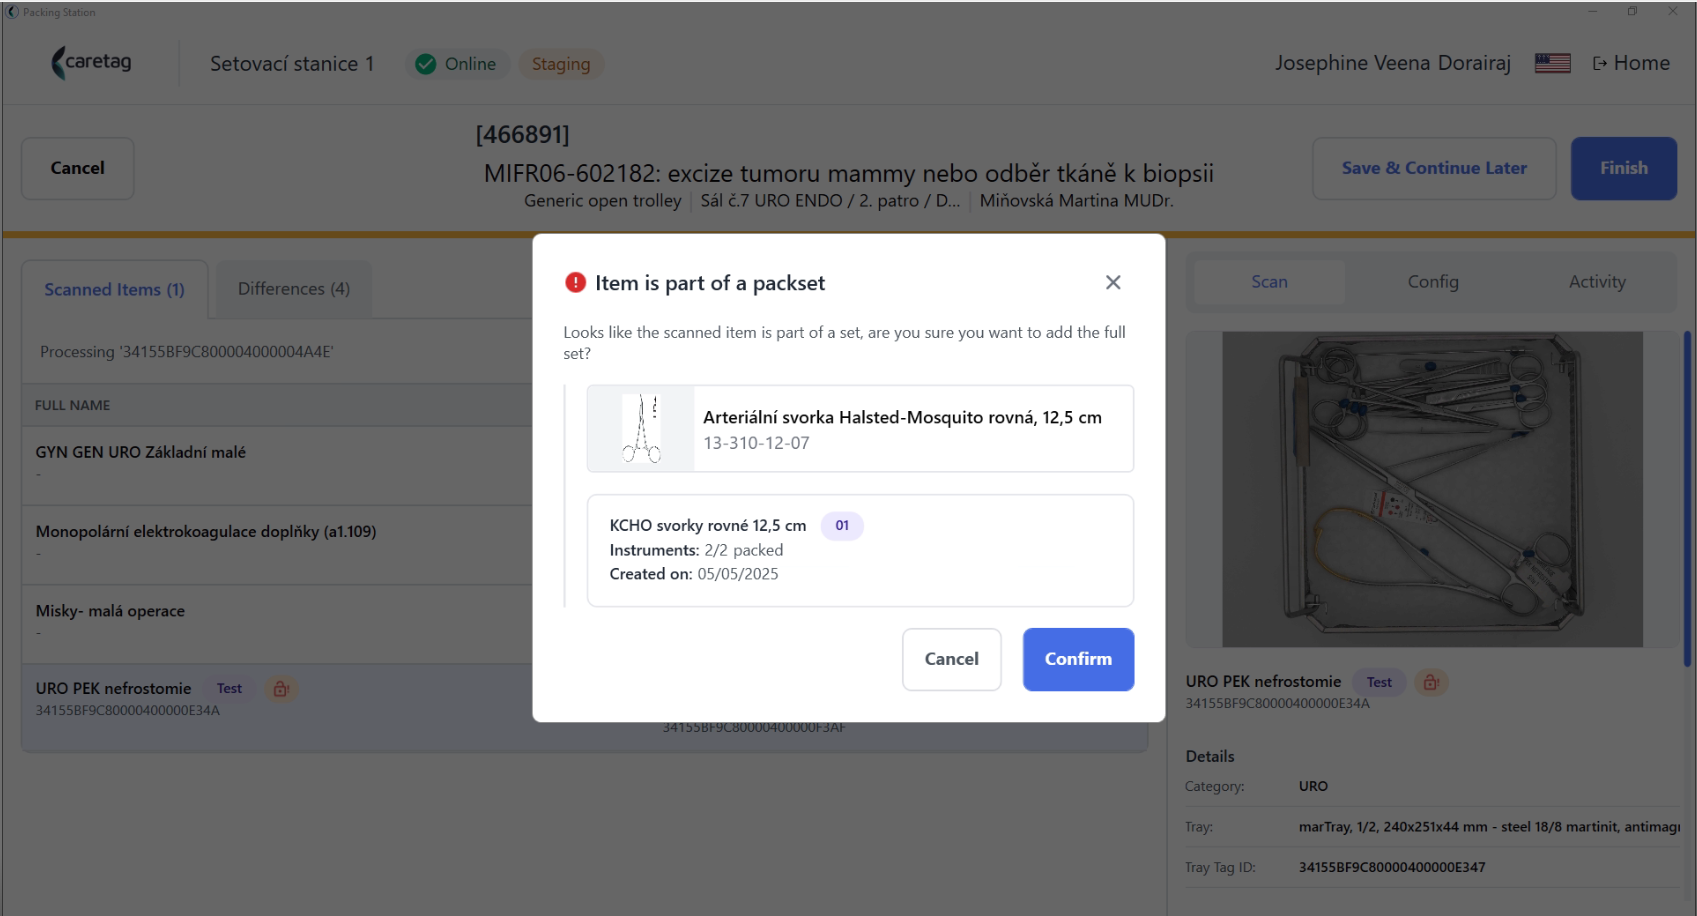
- Scan miniset/pouch.
- When a miniset is scanned it will ask the user if they want to add the full set.
- The picking can be either finished or saved and continue later.
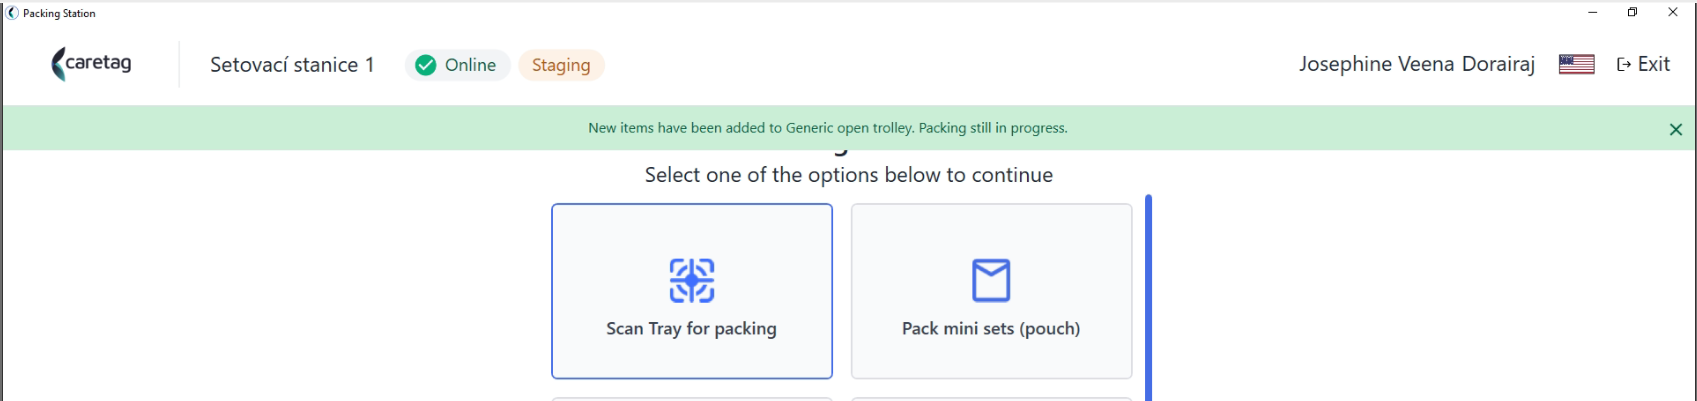
- We can allocate the different containers/pouches to different case carts for the same surgery.
- Select the Pack Case Cart option again.
- Select the same surgery, the status is in progress.
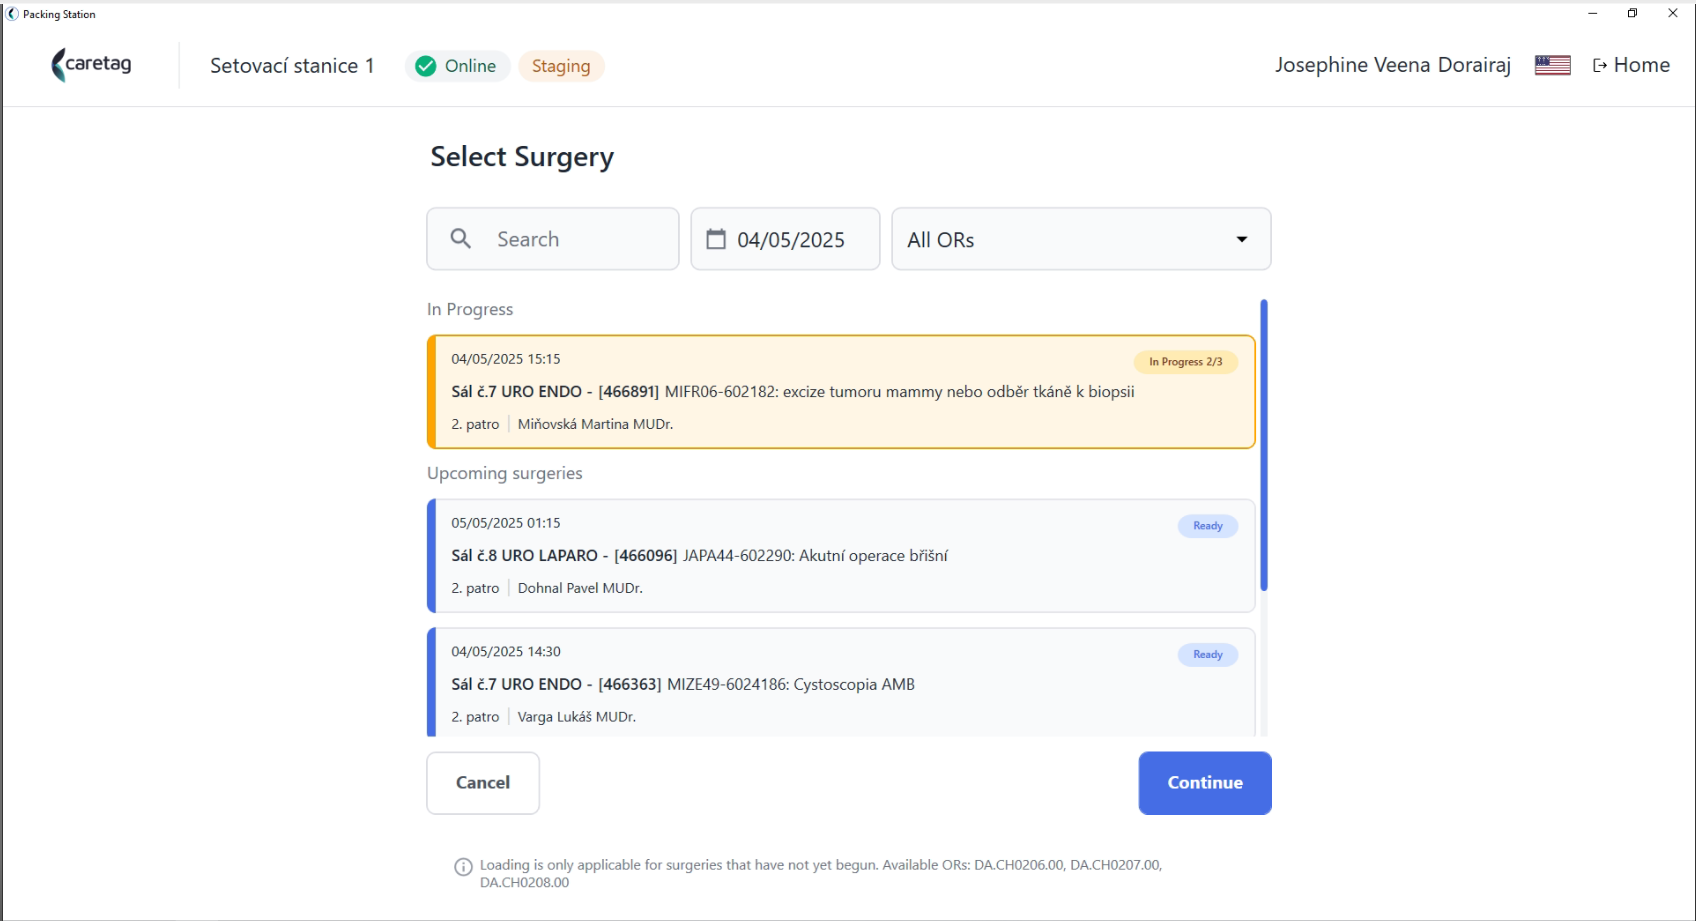
- It displays the details of the trolley that has already picked some items for the surgery.
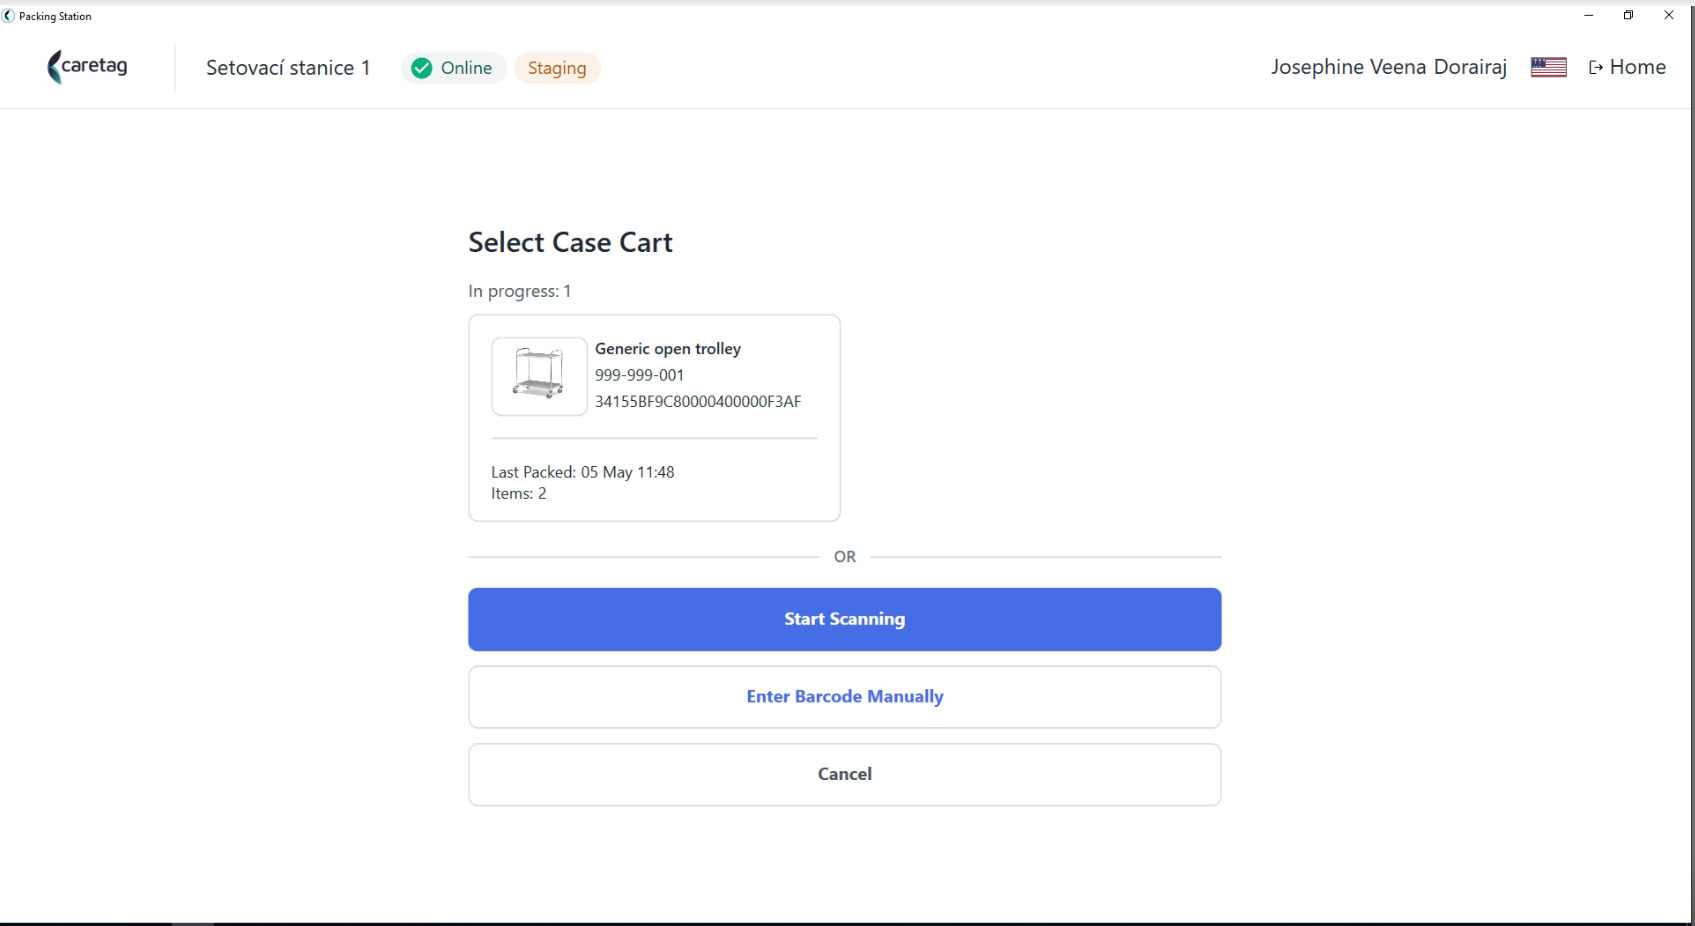
- To add more items to the same case cart, click on the case cart and continue scanning the items.
- If you want to use a different trolley, scan the new trolley and begin picking the required items for the surgery from it.
- Here we have scanned a new trolley tag to add another tray for the surgery.
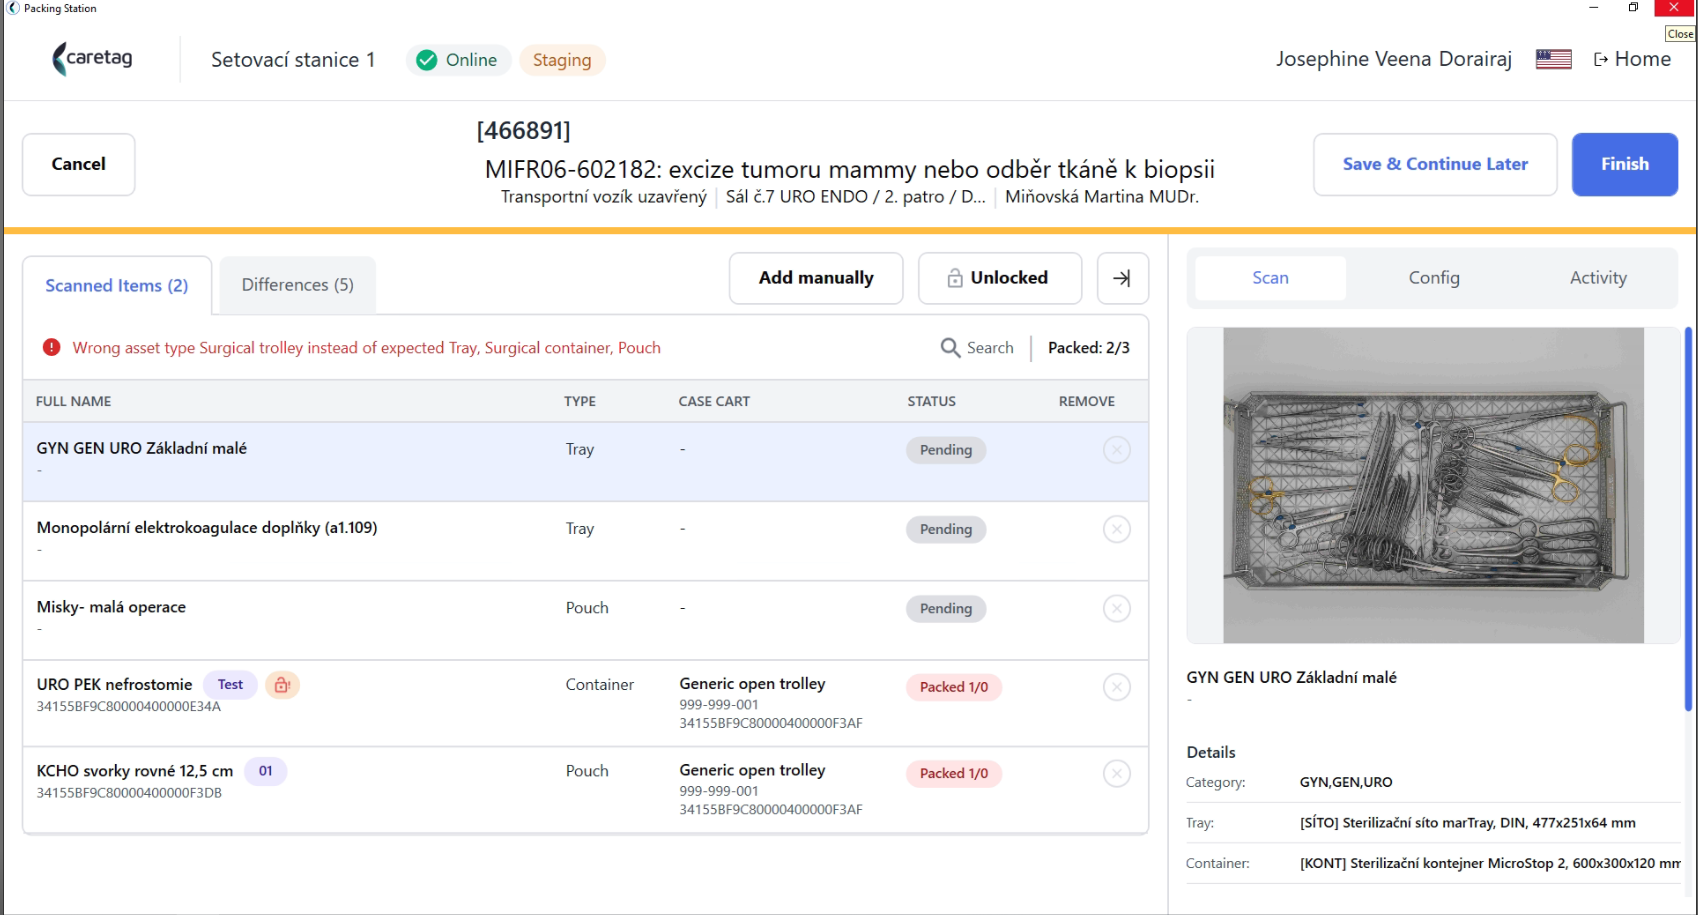
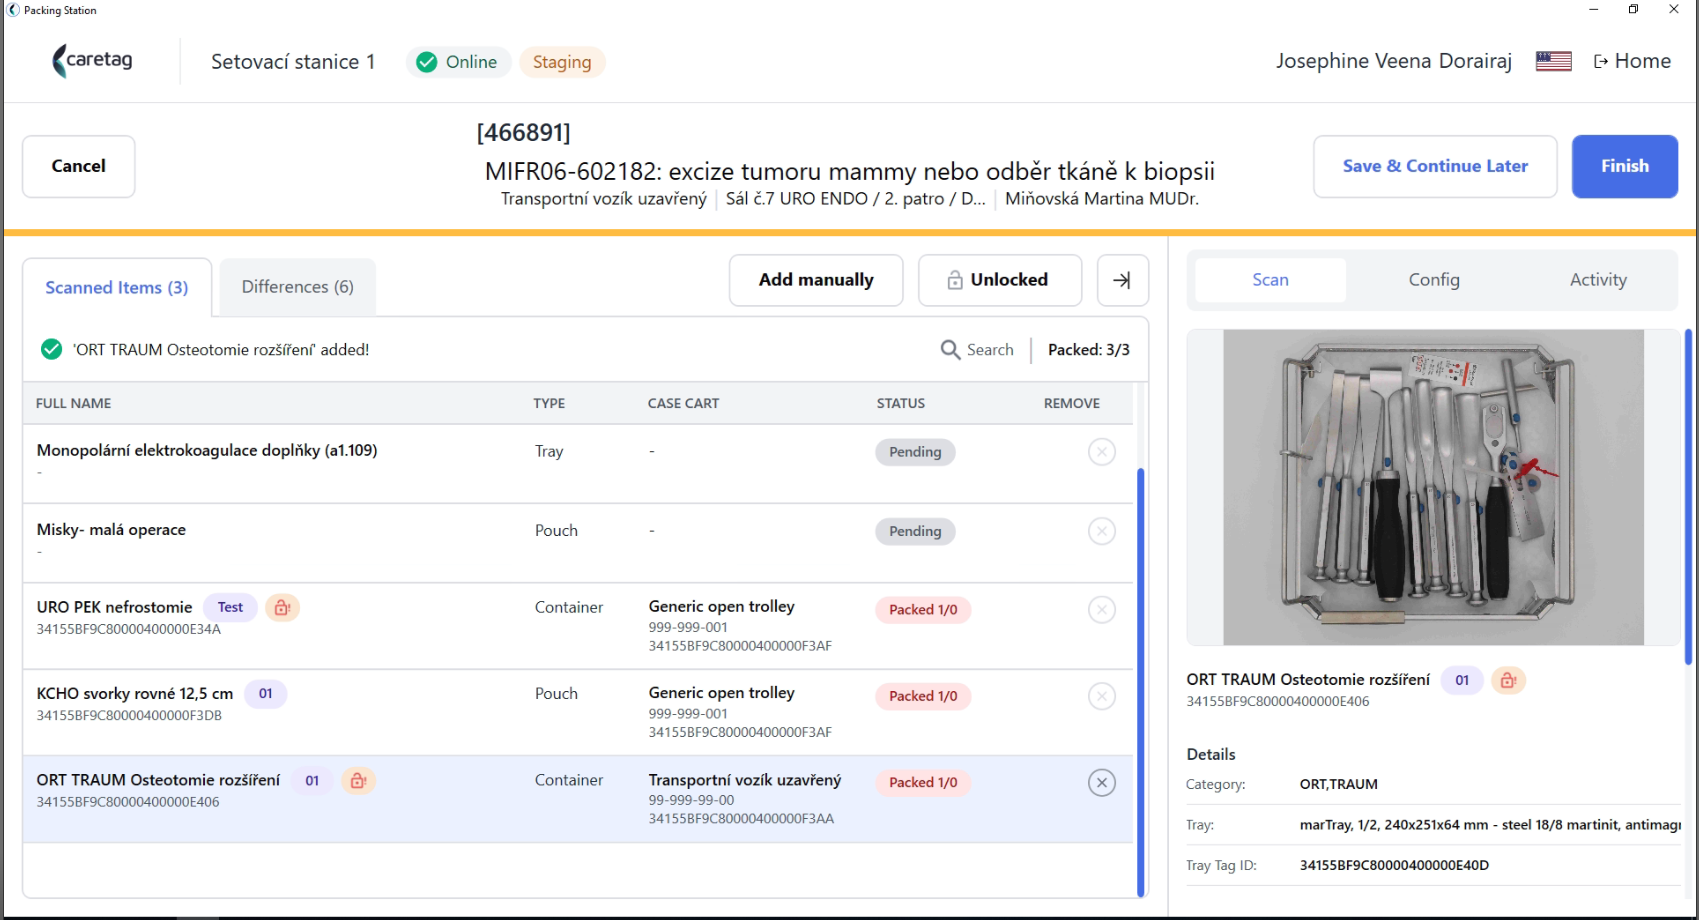
- Scanned container/pouch added to the picked list.
- Here, you can see that one container and pouch are picked in Generic Open trolley and the third container is picked in Tranpotni vozik trolley.
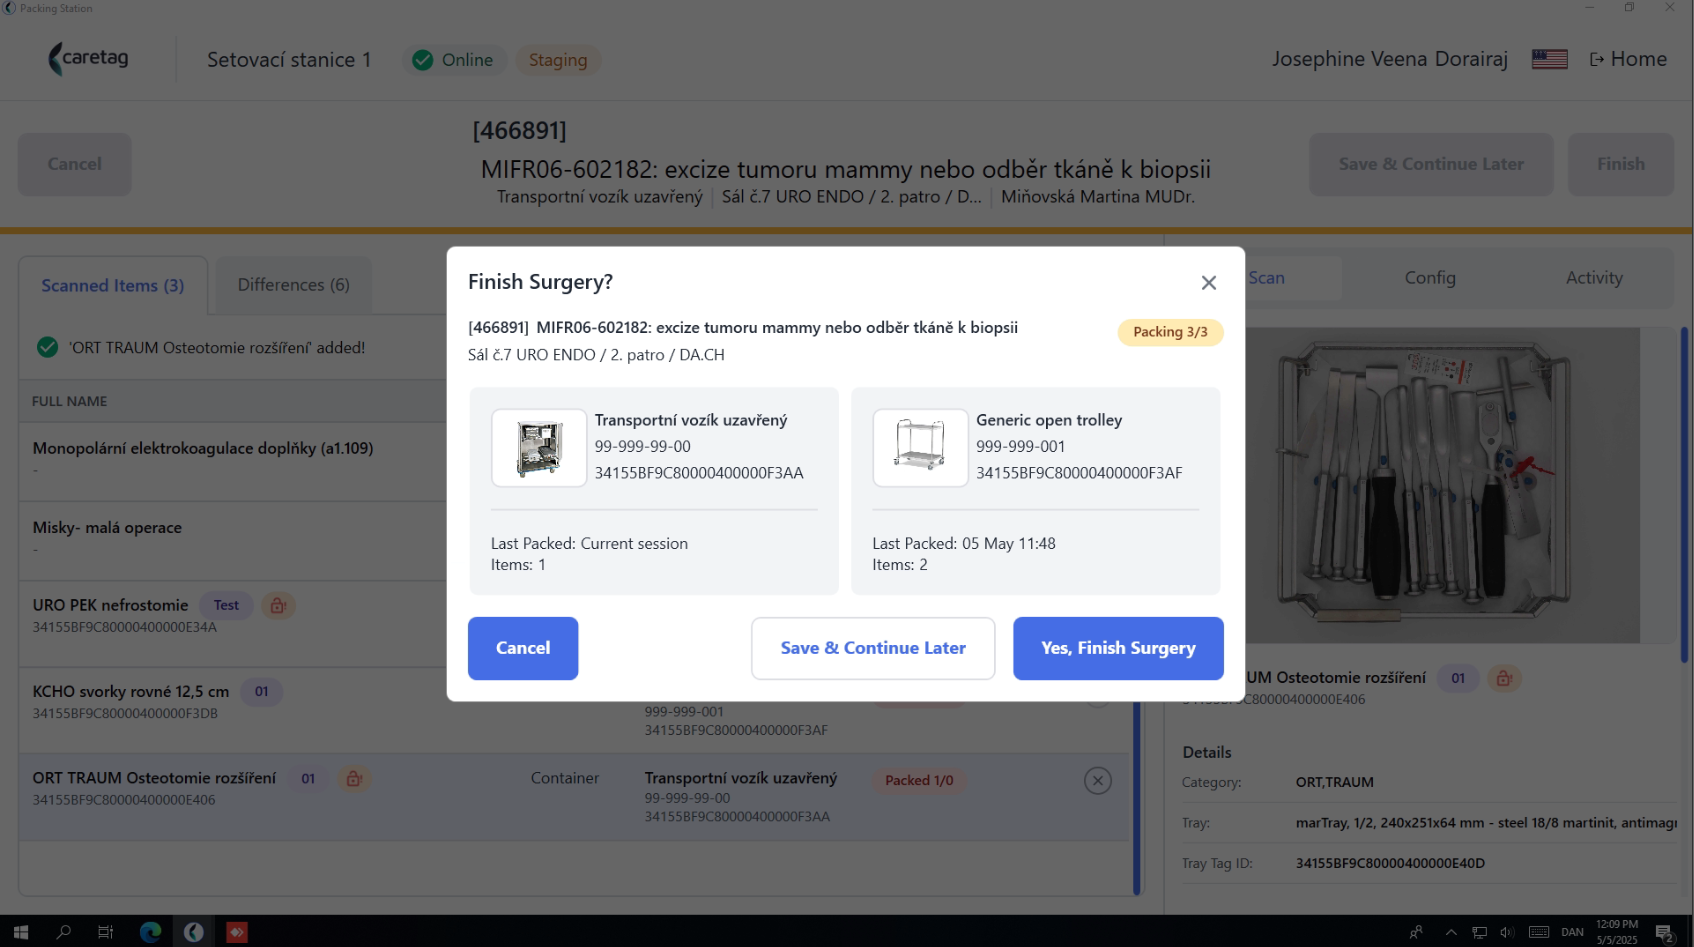
- Click on Finish surgery.
- It will display the details of 2 trolleys and the quantity of sets packed in each of them.
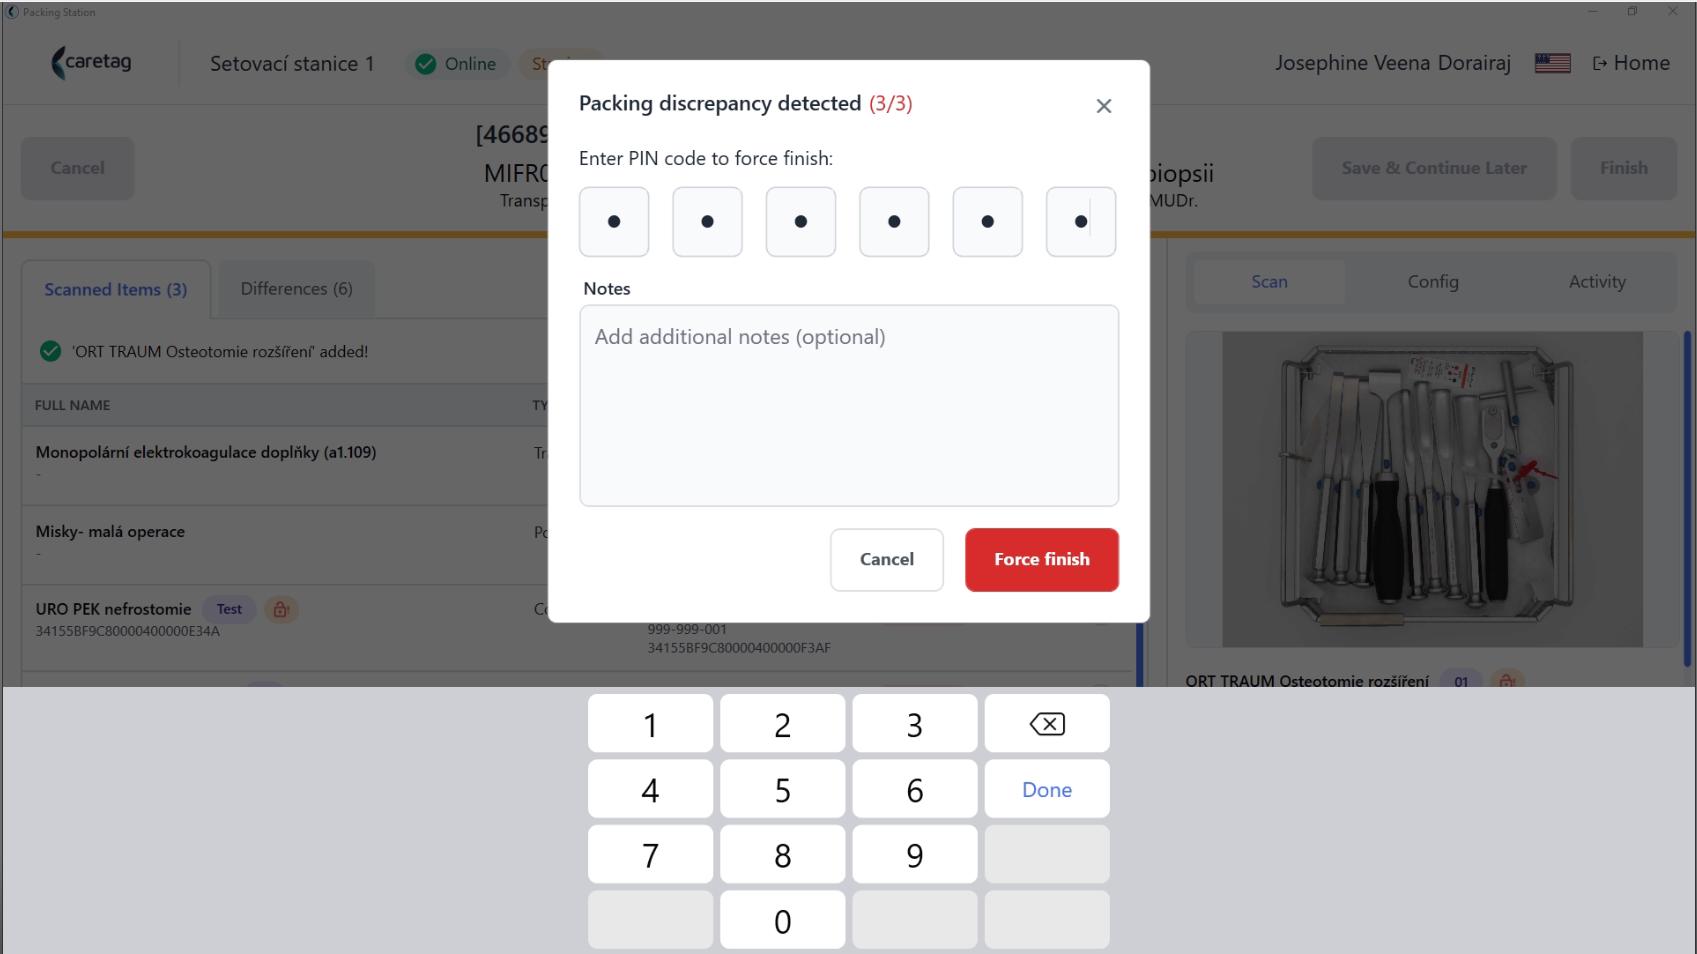
- When the surgery is unlocked during the case cart packing, the application will ask the user to enter their pincode to force finish the surgery preparation.
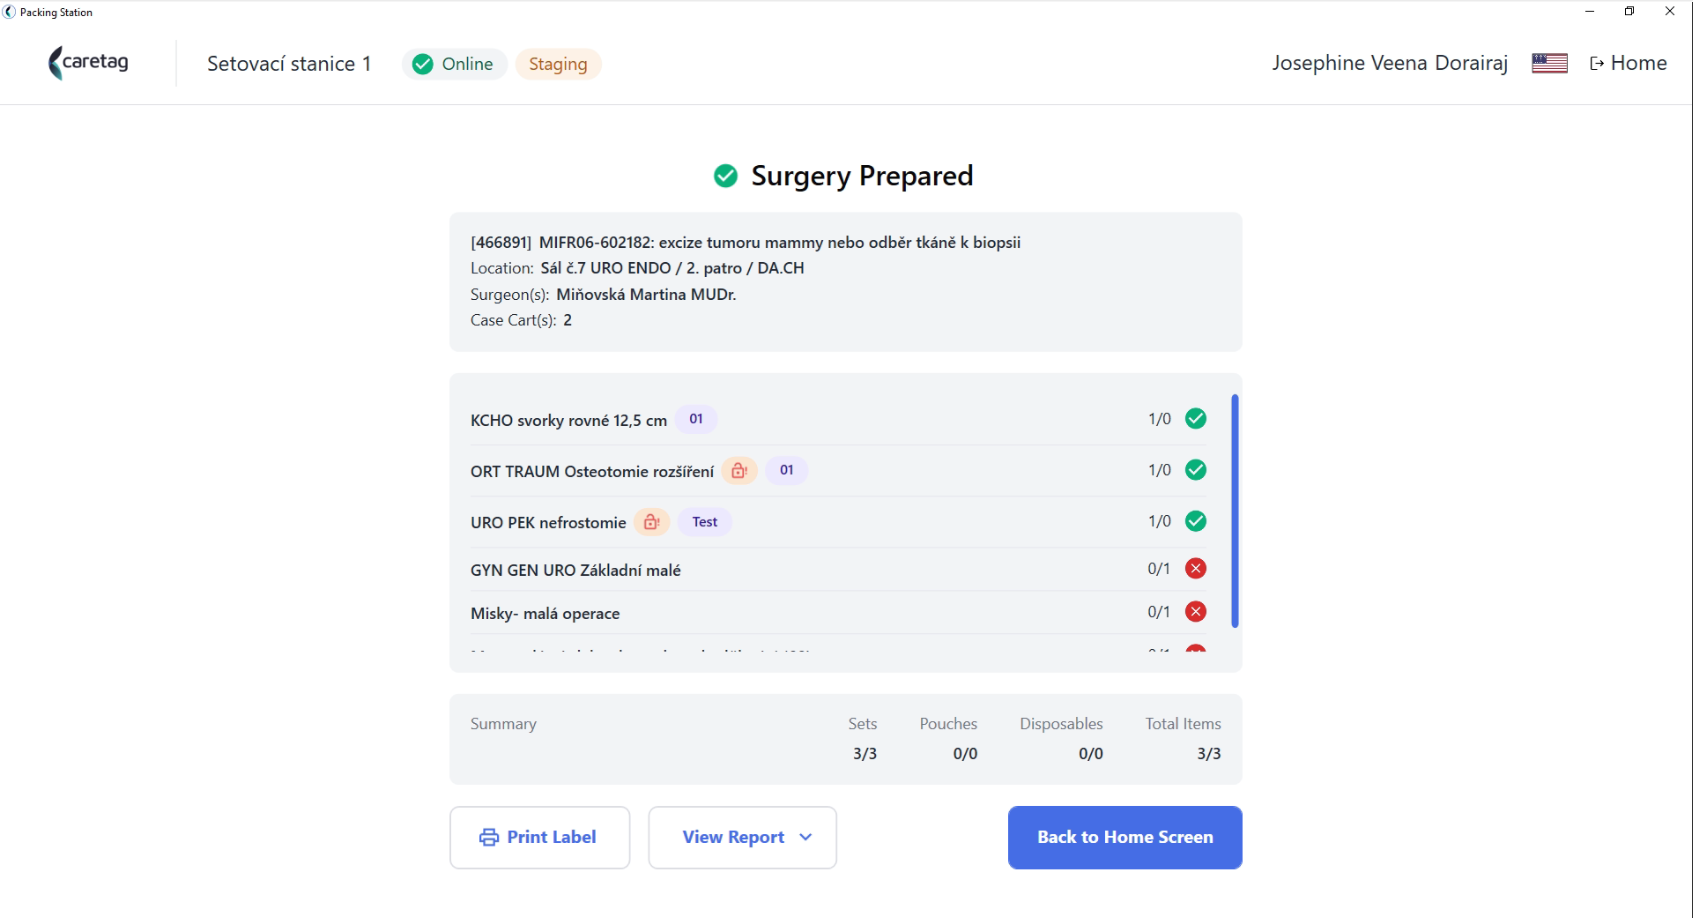
- Surgery prepared summary
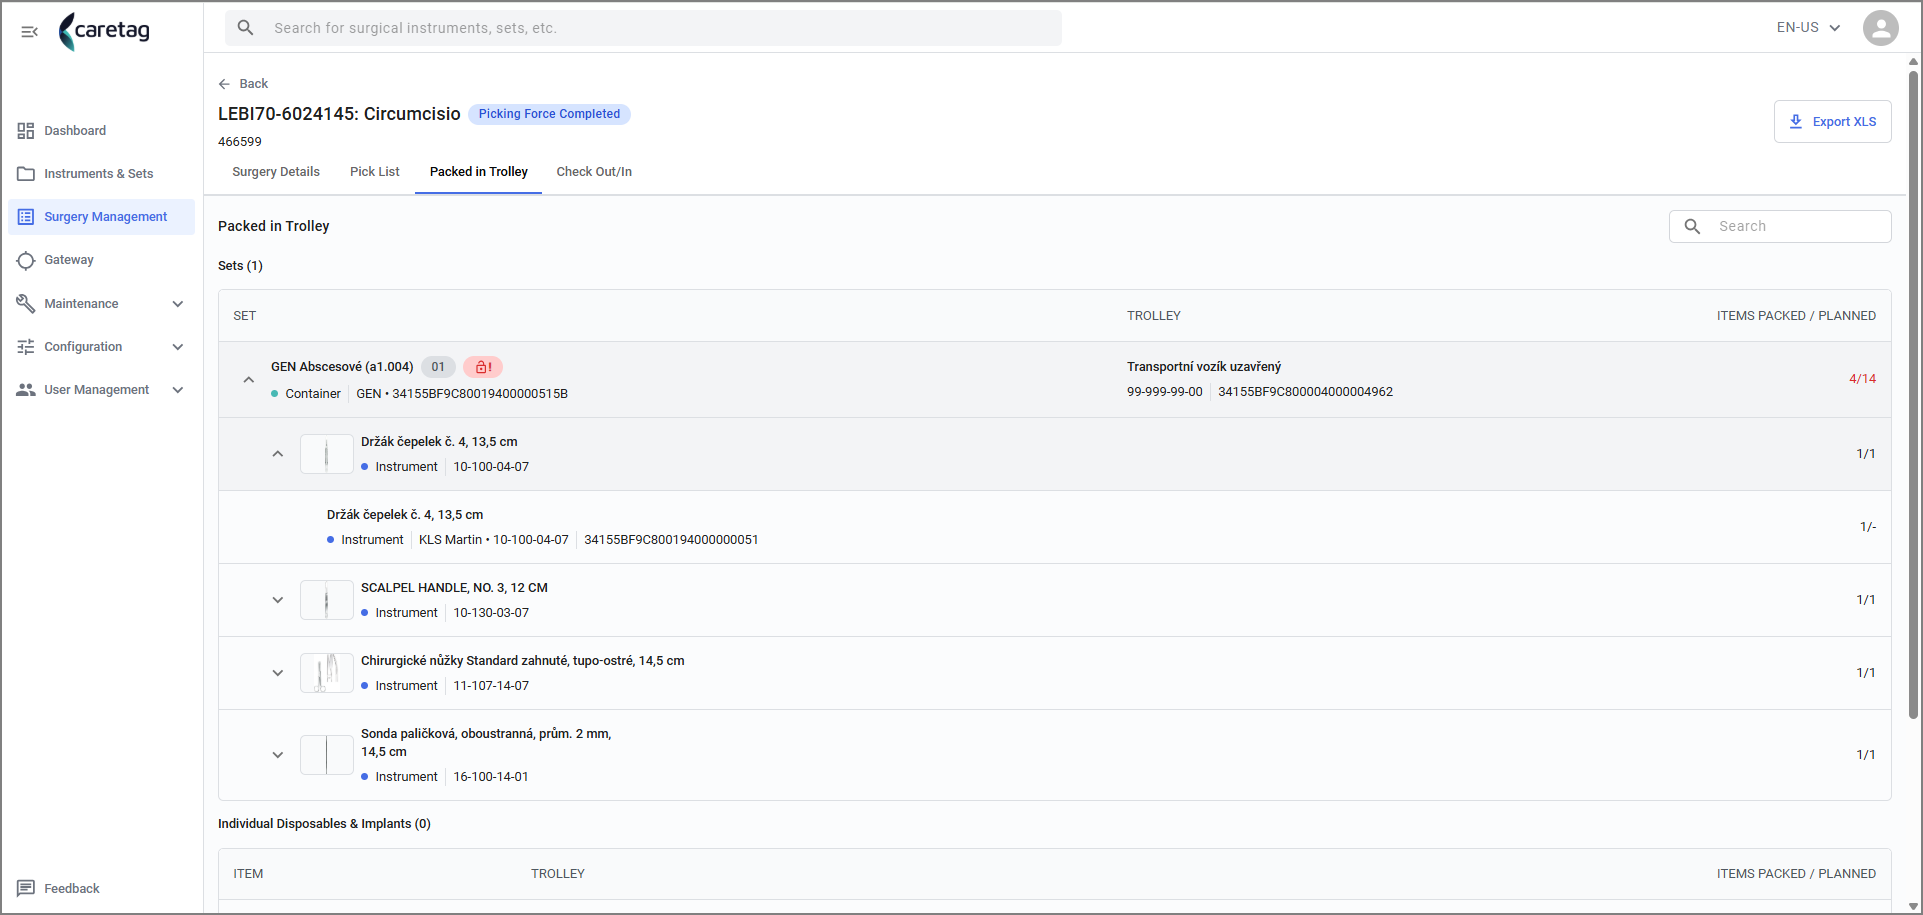
- In the web-surgery Management, the picked items details can be seen
!!! note
The screenshots used might not follow the same container flow. The iamges are only for reference.
Scan an individual item
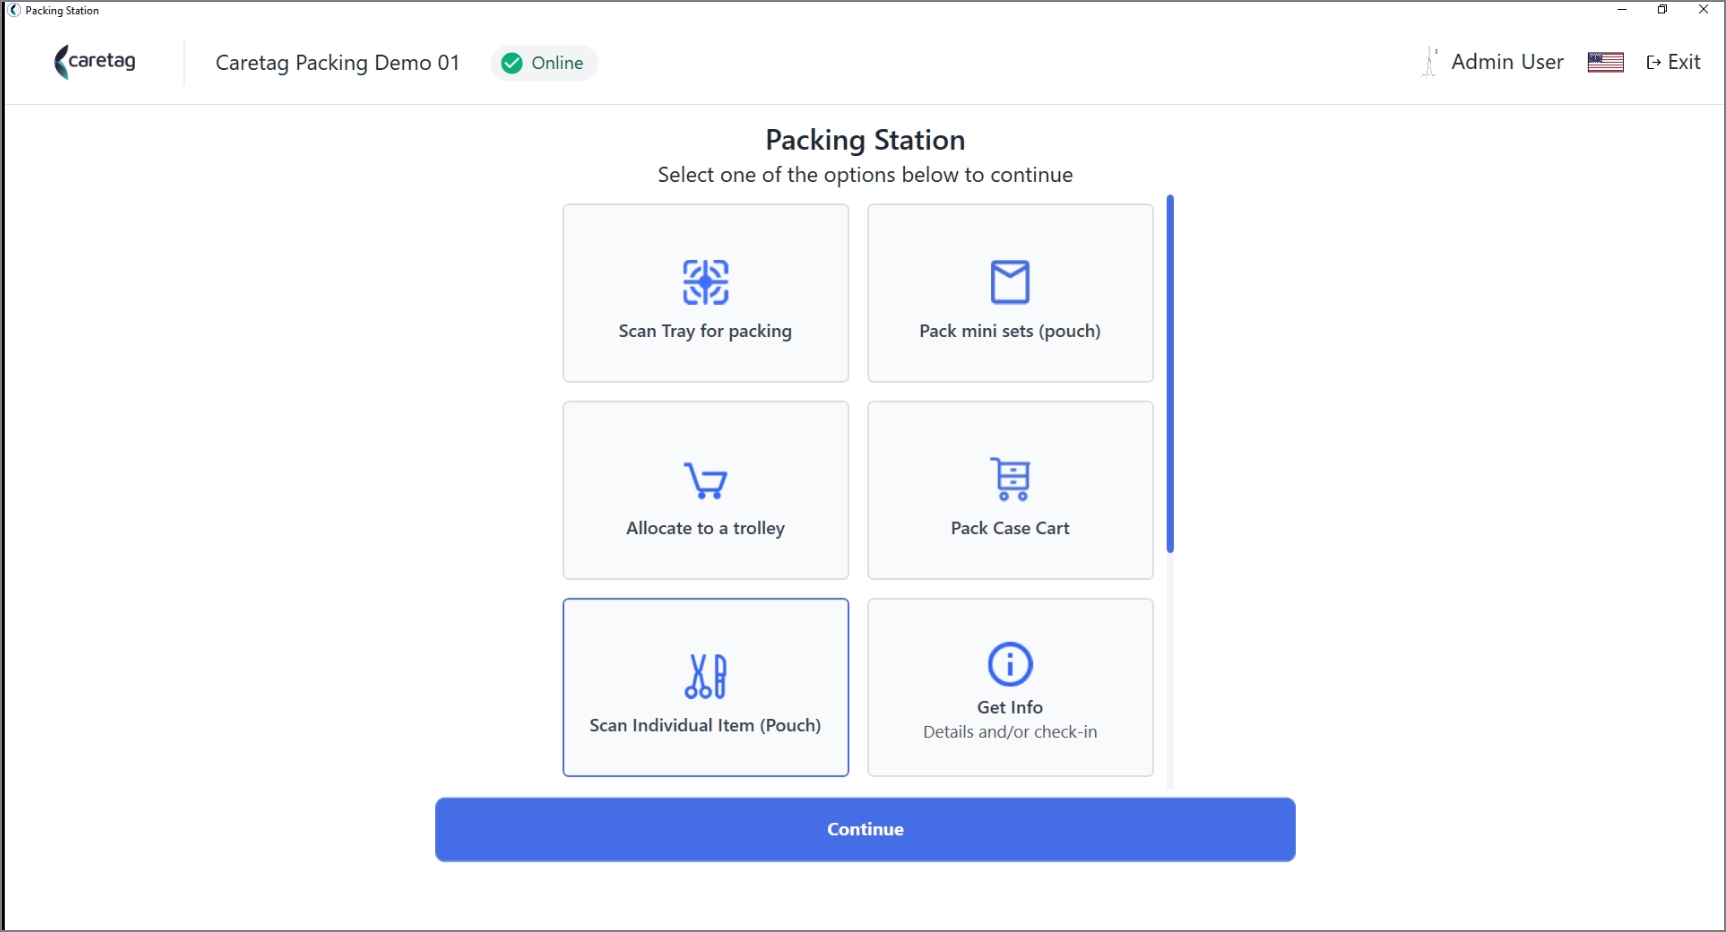
- Select scan individual item(pouch) and click continue
- As this a free style pouch, there will not be any items displayed until an instrument is scanned or added manually.
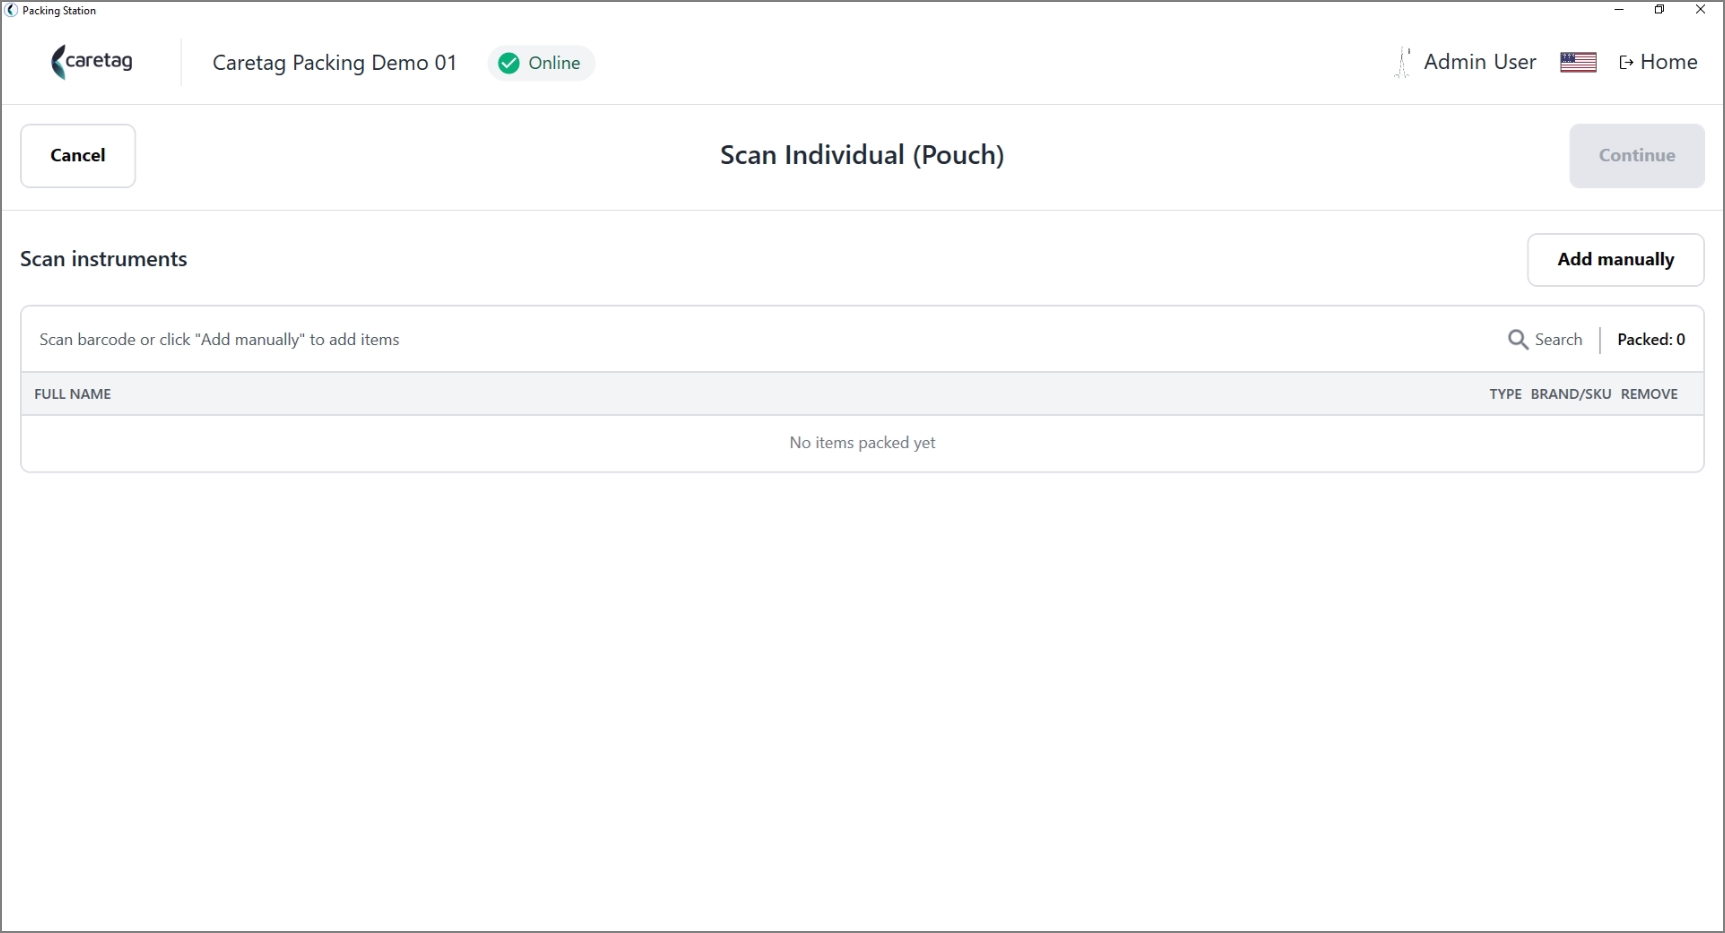
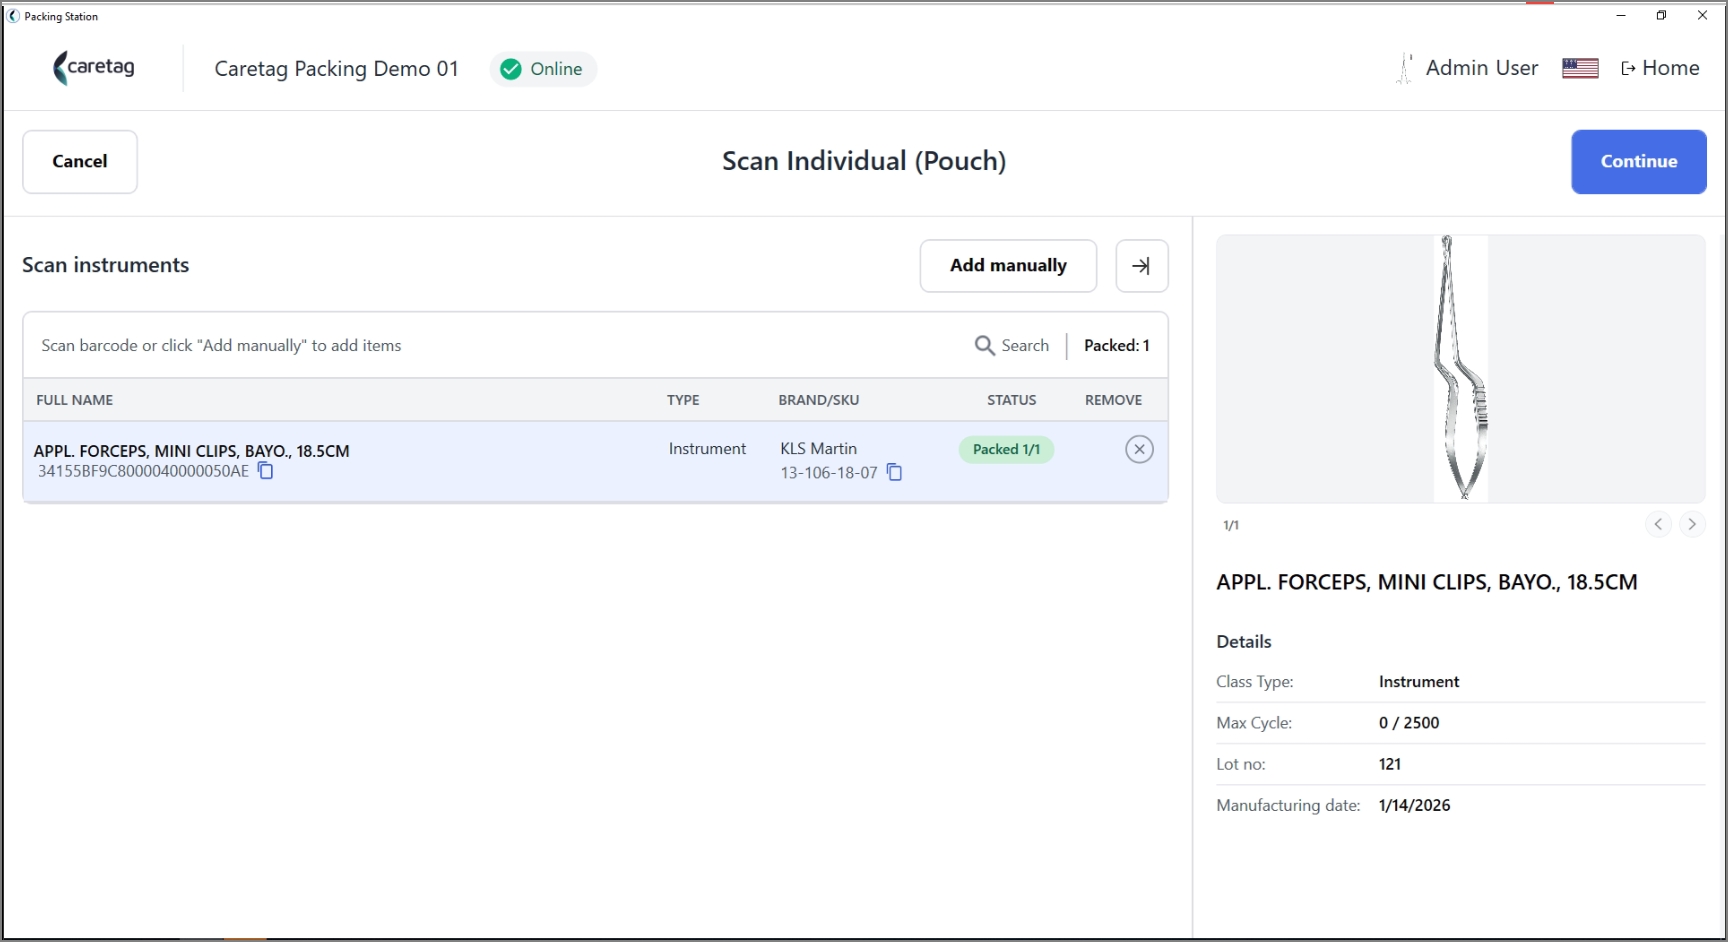
- Once the instrument tag is placed on the reader it reads and displays the details as shown below.
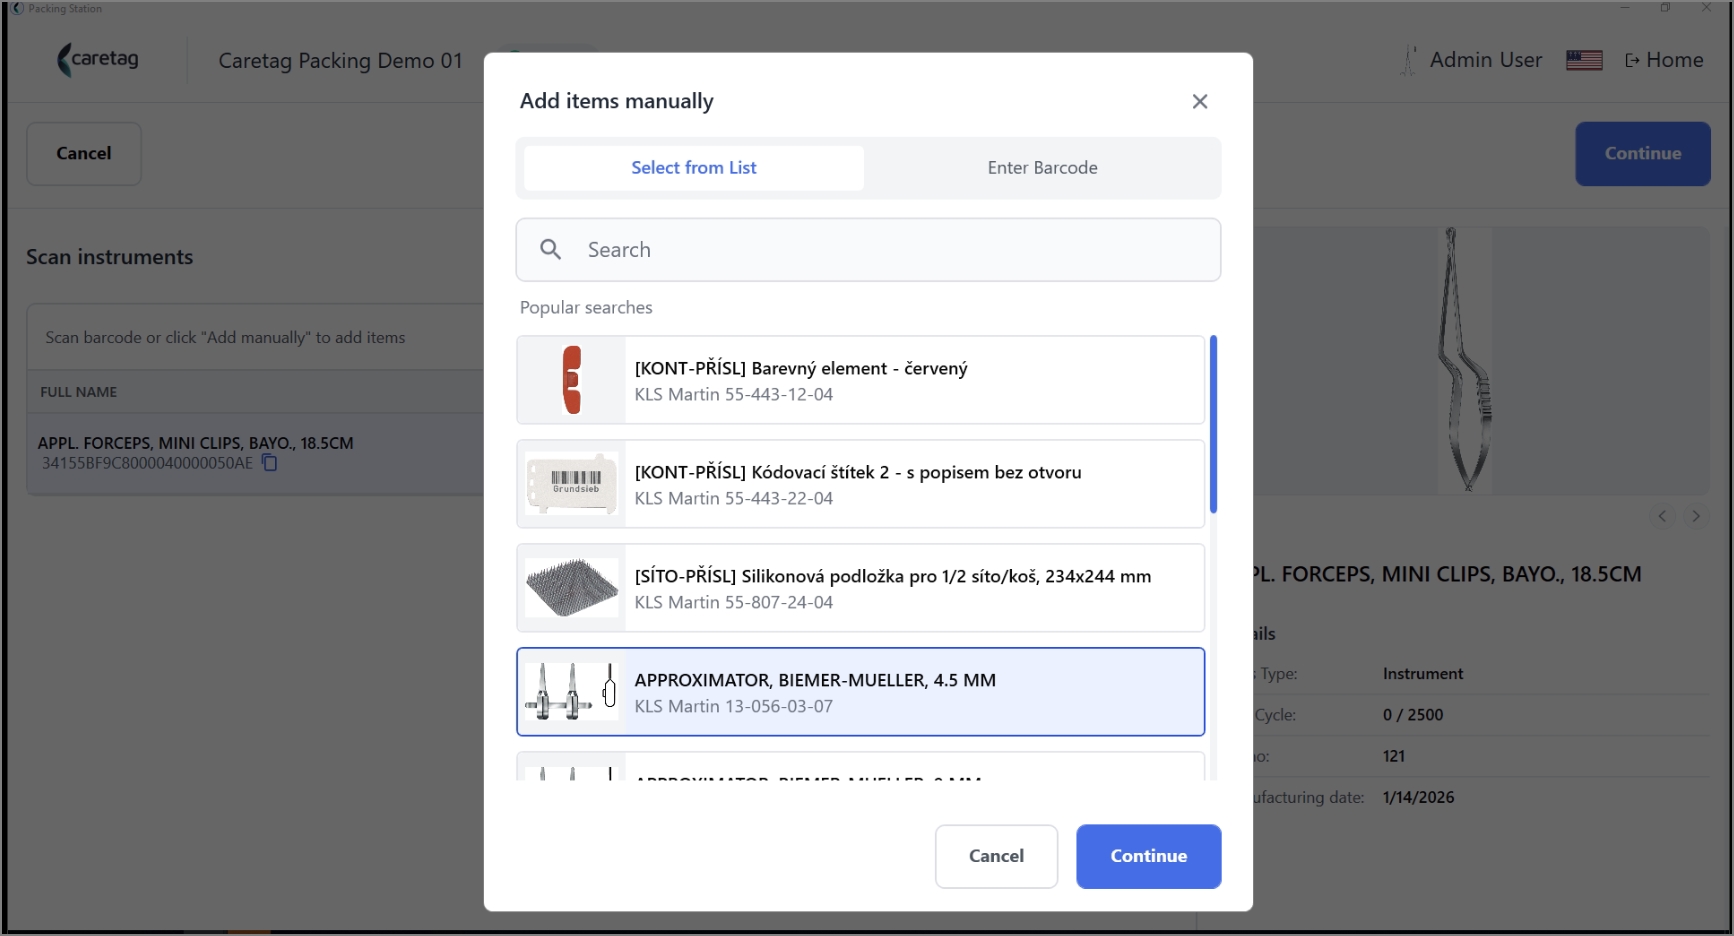
- To add an instrumnet manually, click the Add manually button.
- Select the untagged items from the list and click continue
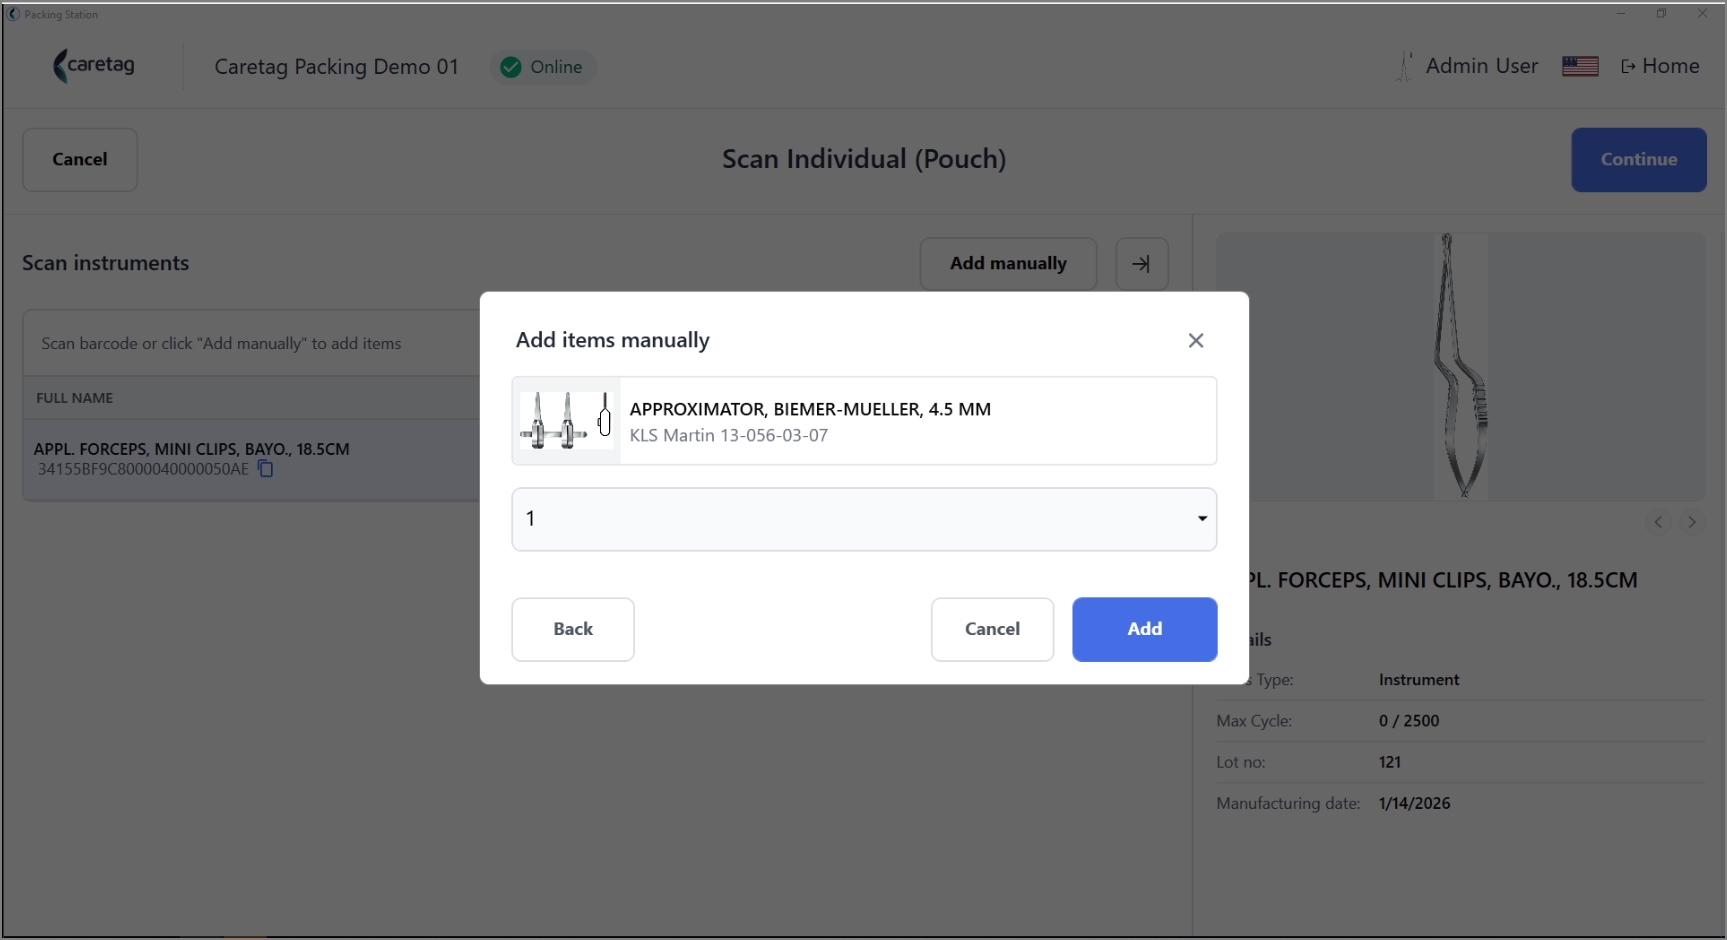
- Enter the count of the untagged items to be added.
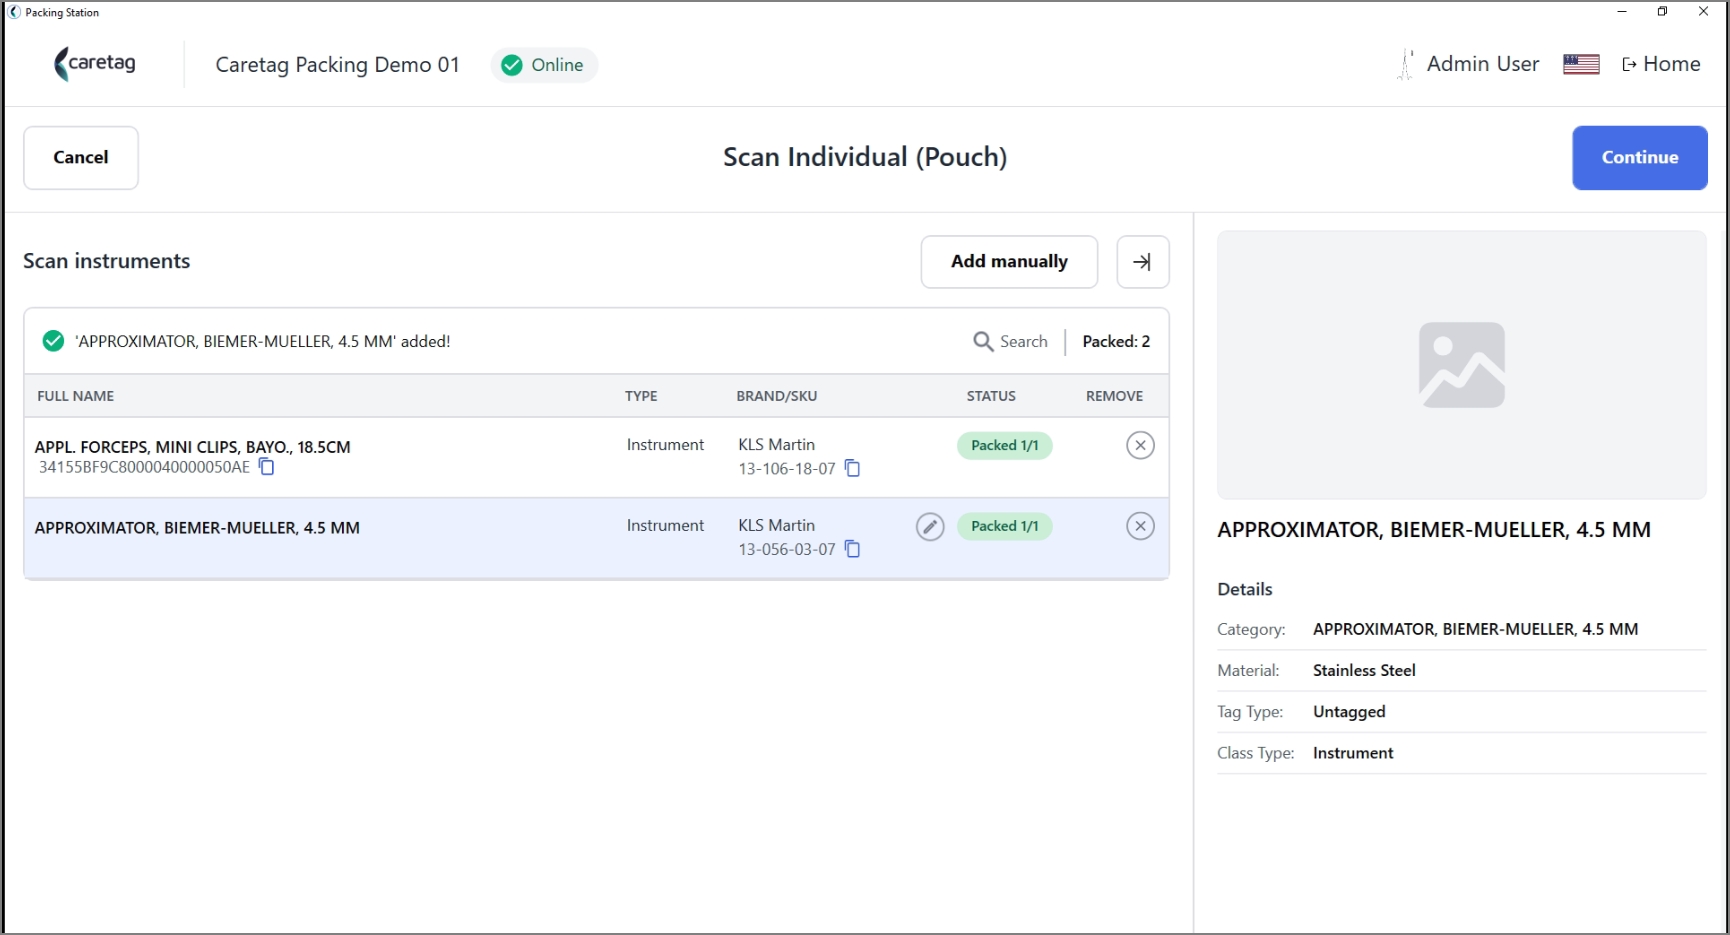
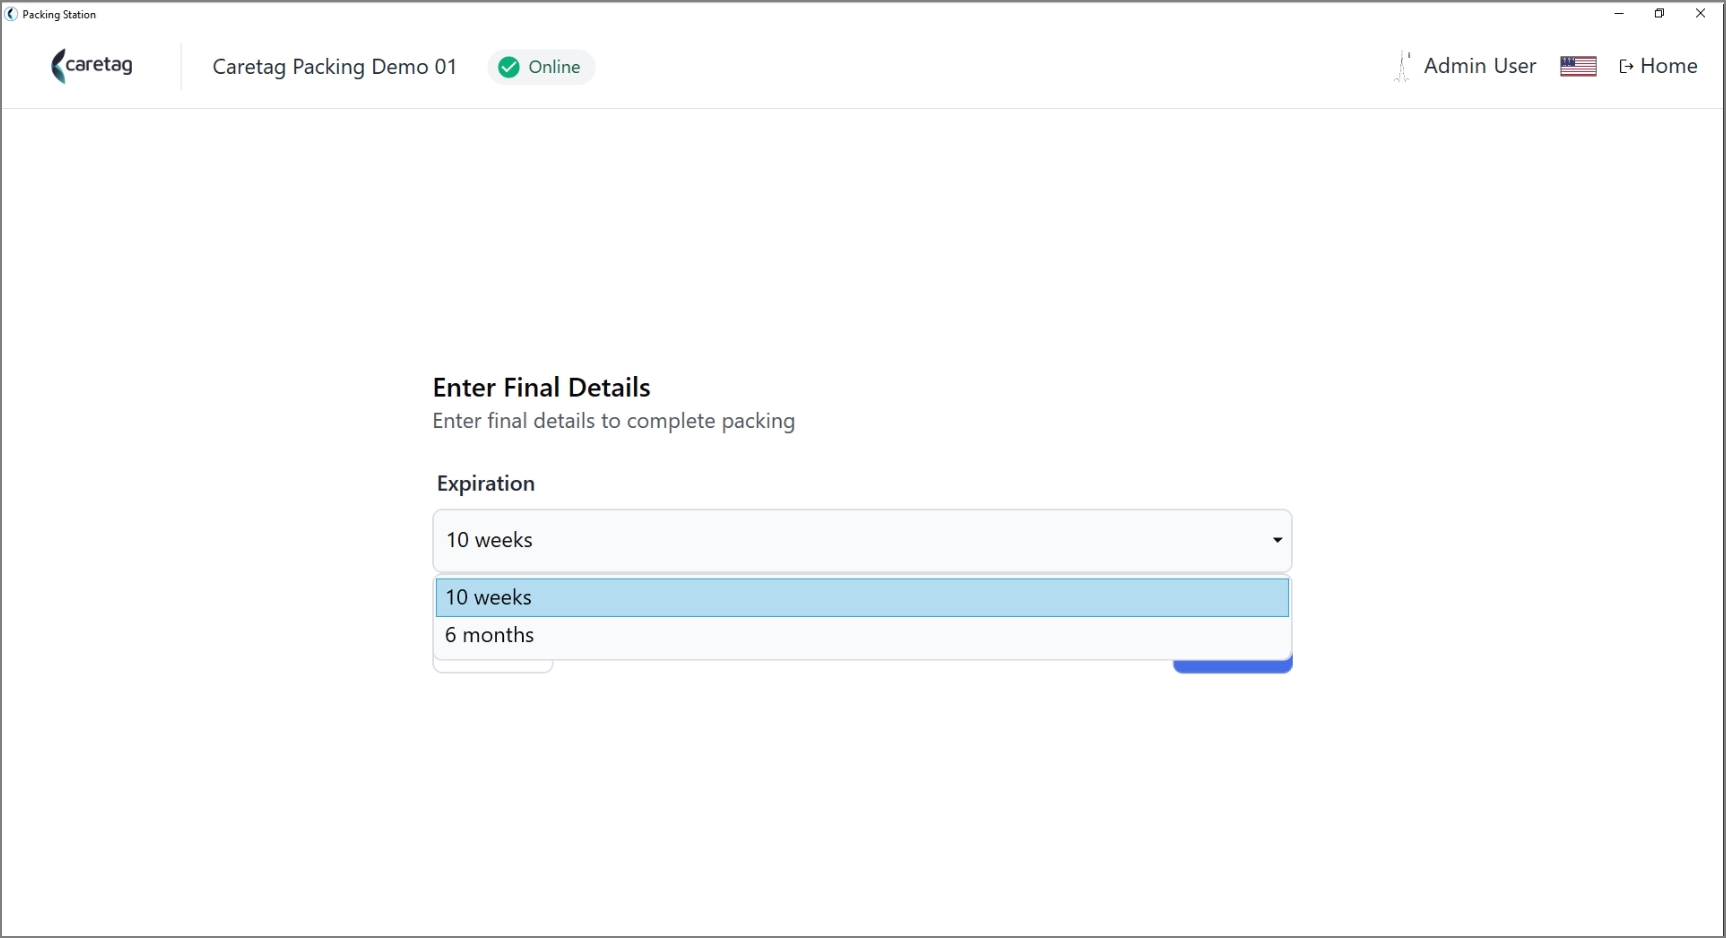
- Select the expiration period
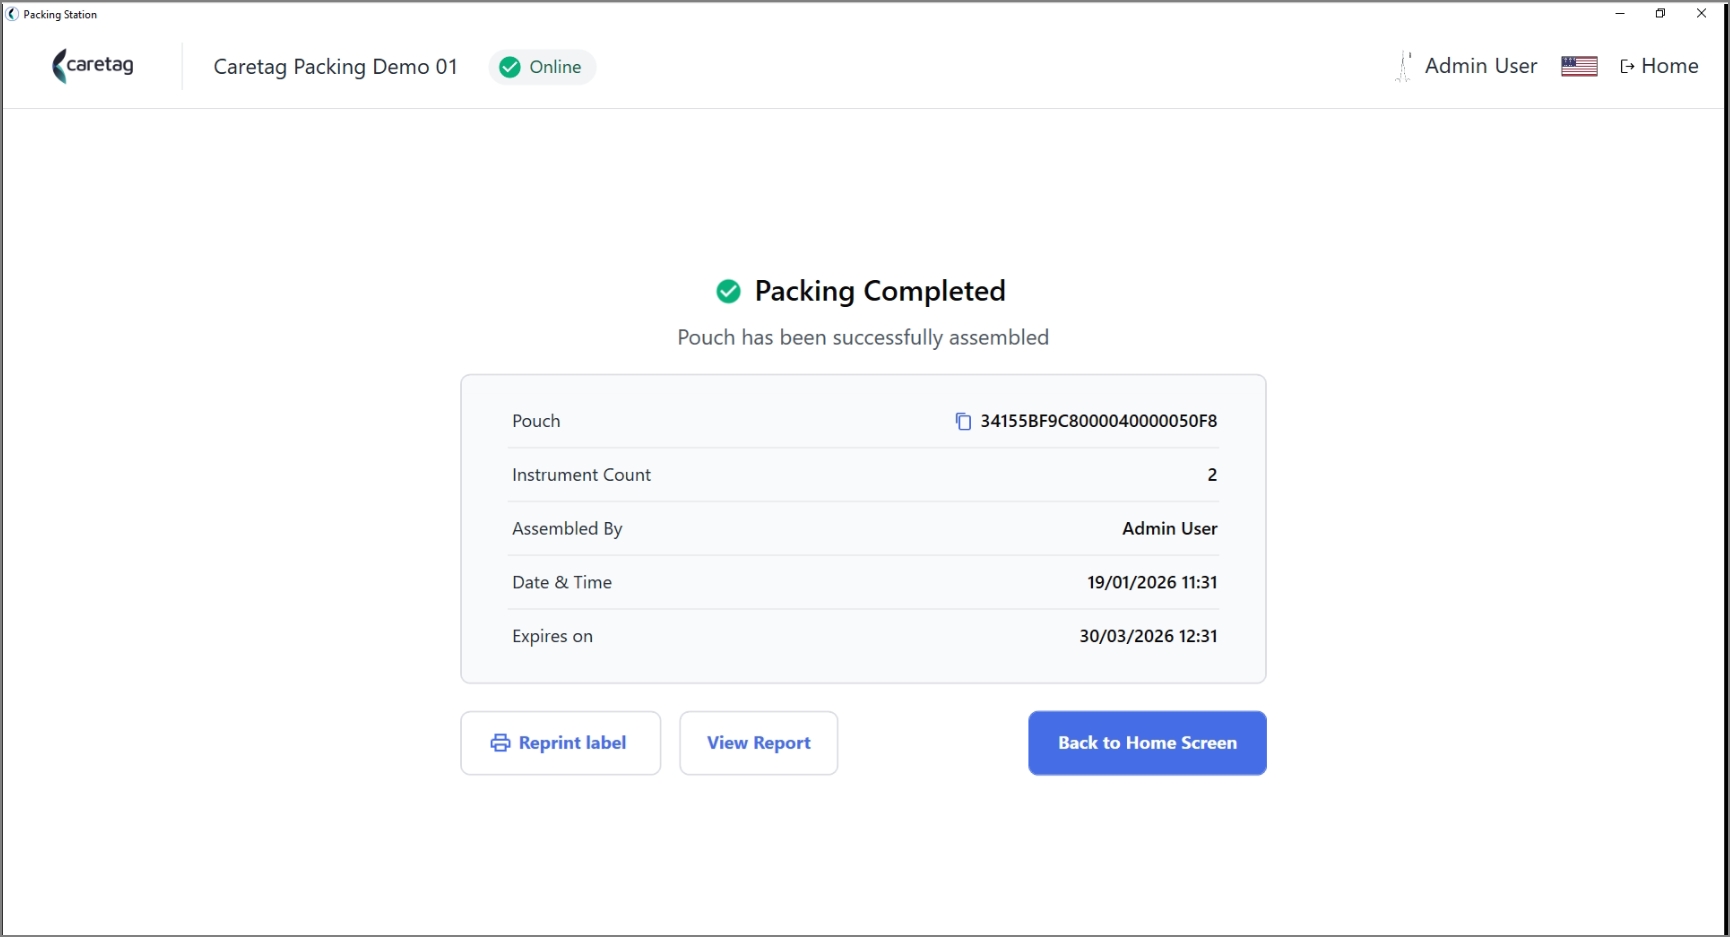
- In the Packing Summary the following details are displayed: Pouch UDI, instrument count, Assembled by, Expiration time.
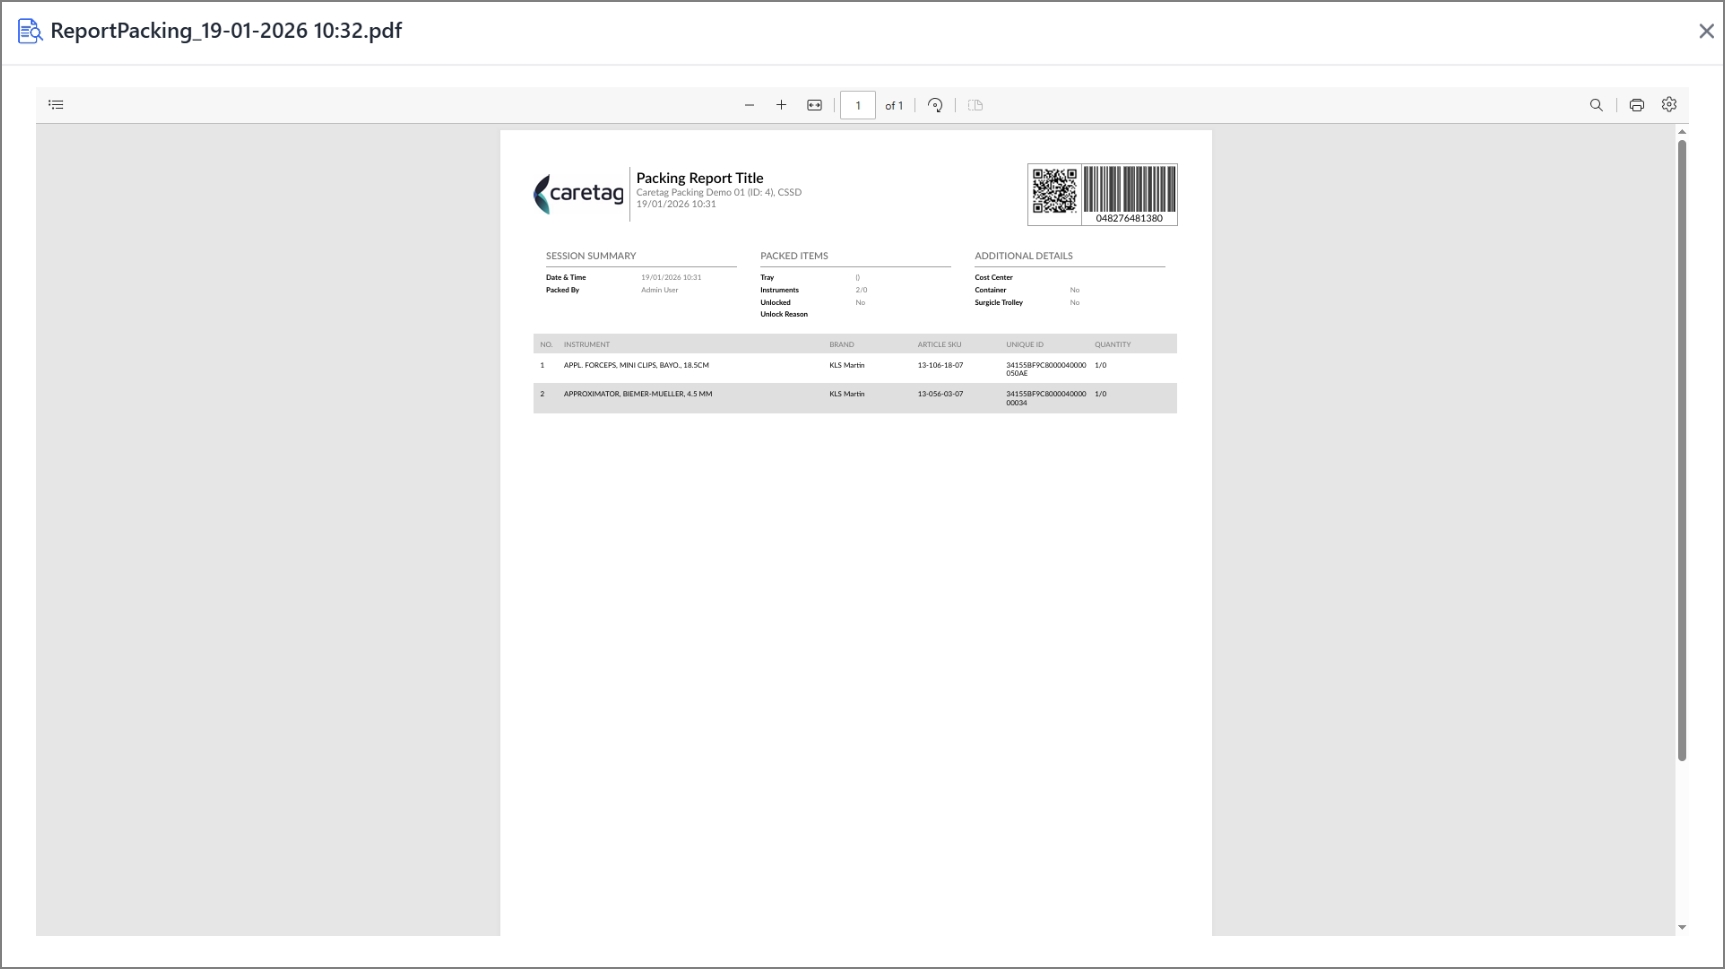
- Packing Report
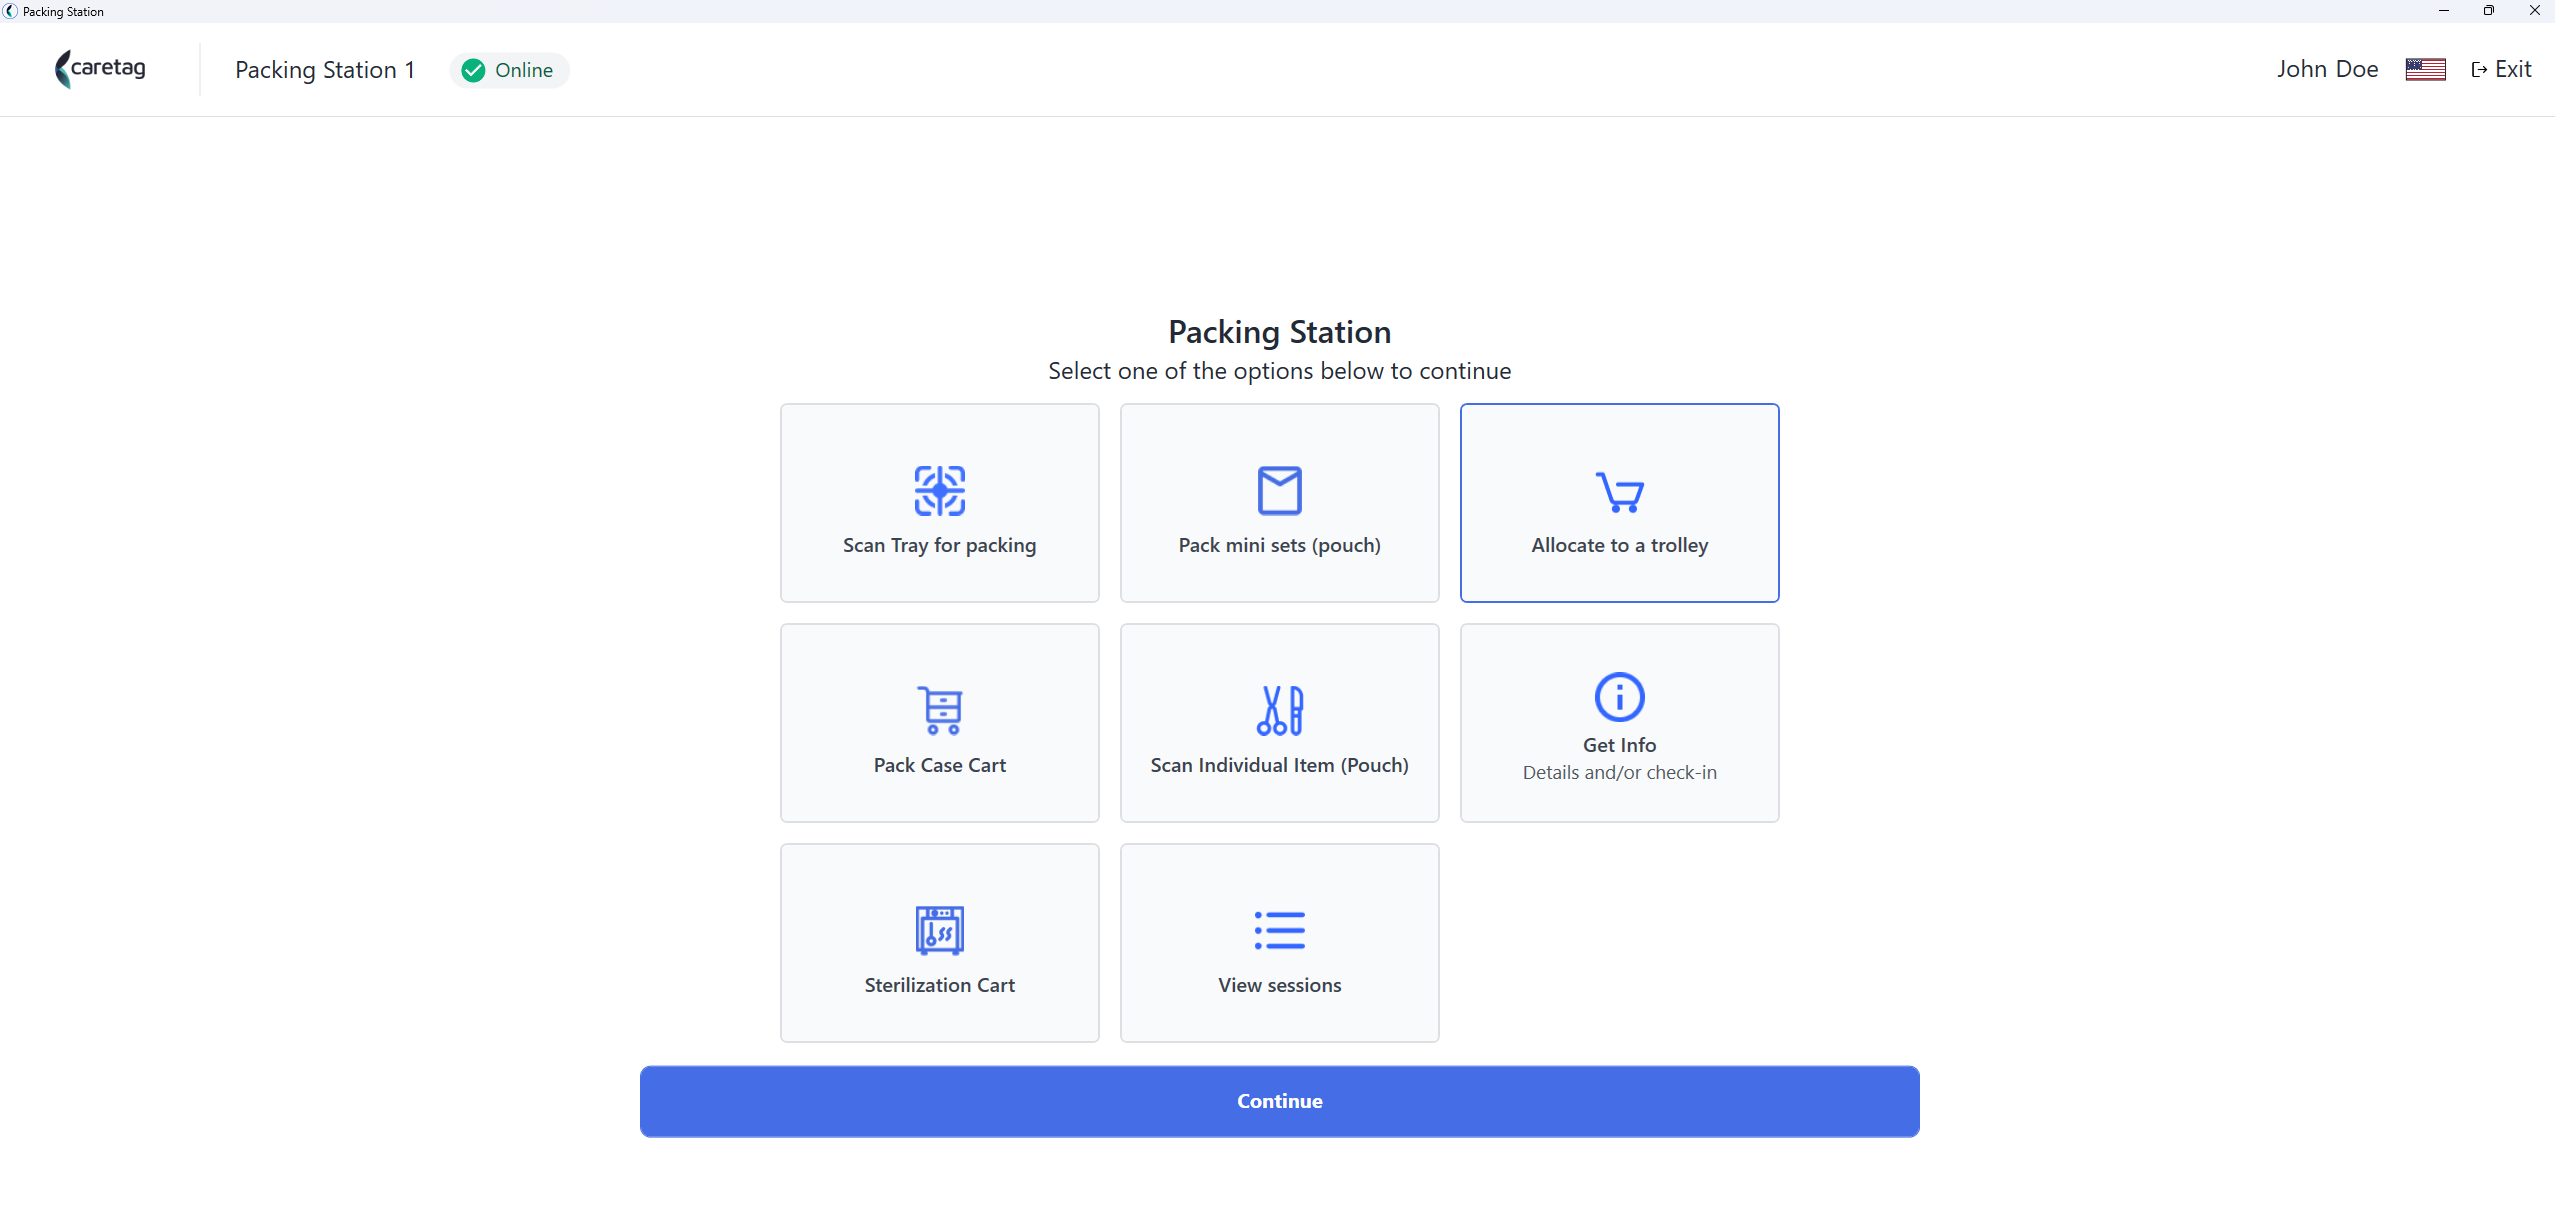
Allocate to a trolley
- Select the option “Allocate to a trolley”
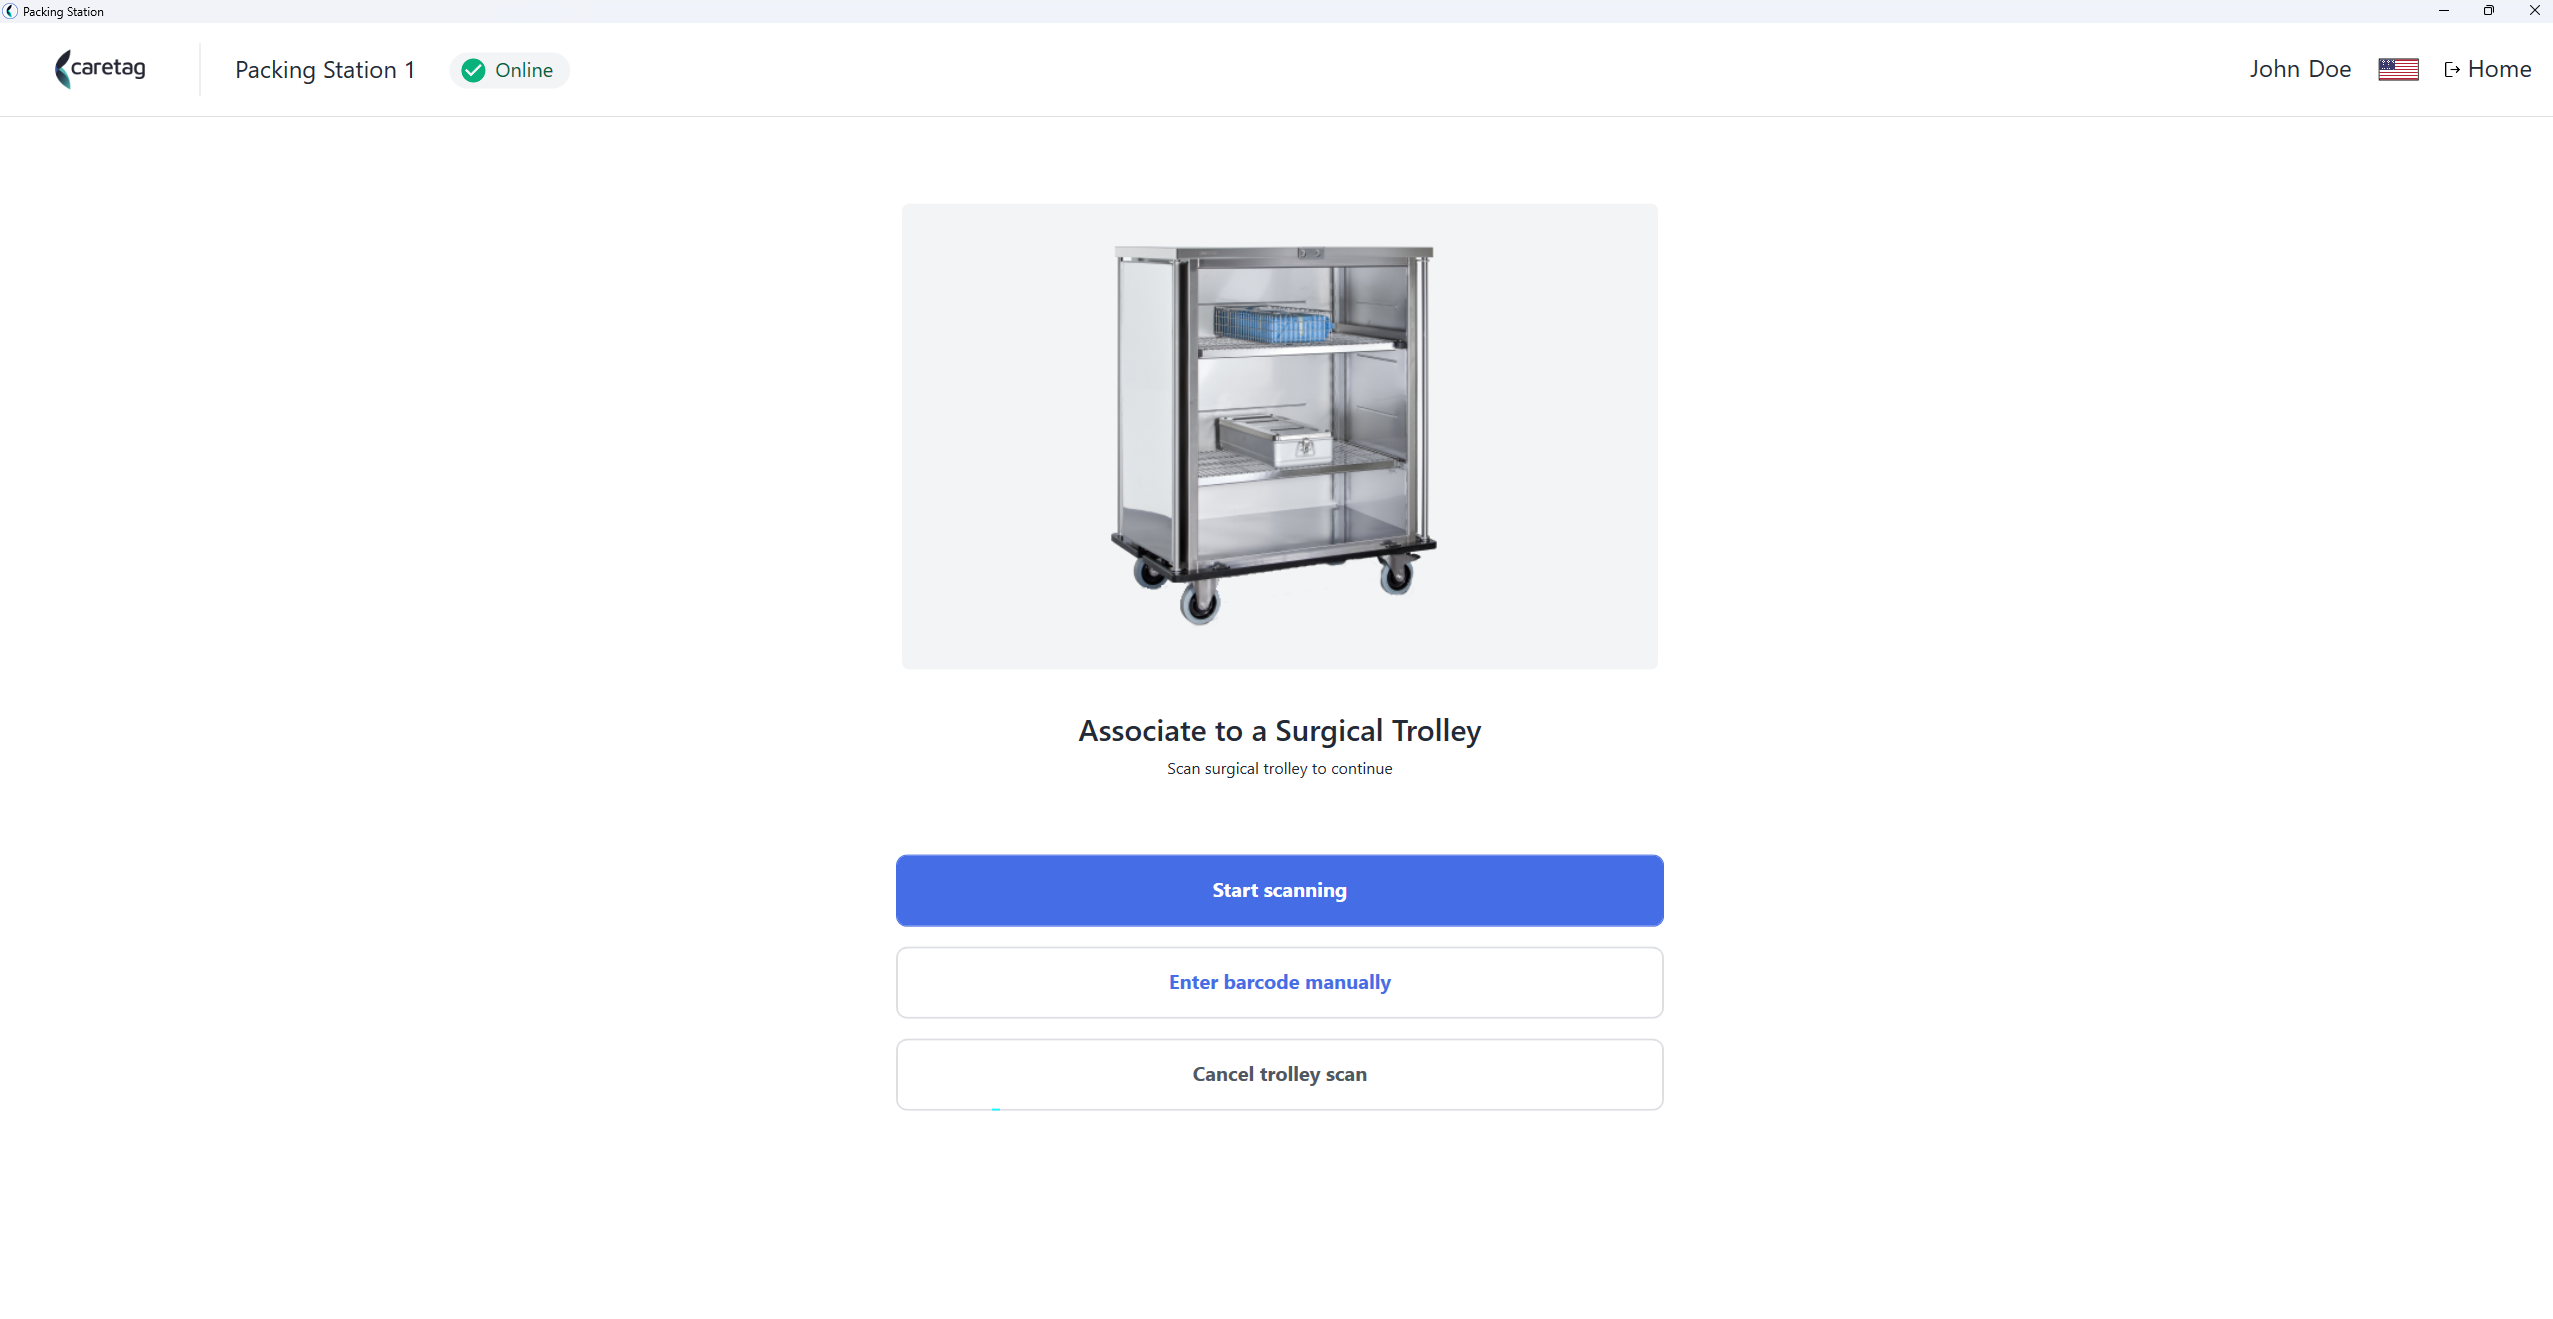
- Scan the trolley tag
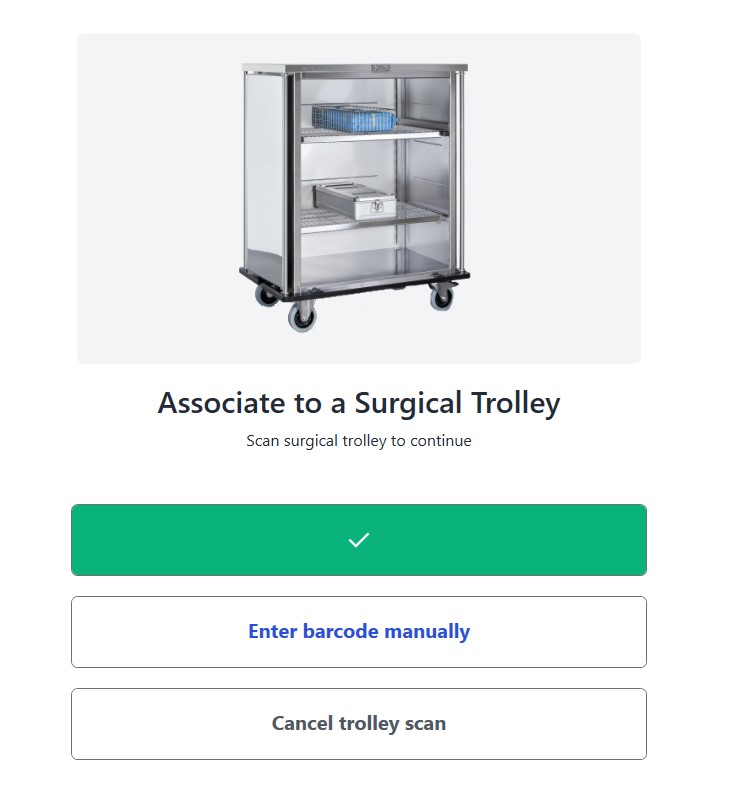
- Once the trolley is scanned successfully, you are able to see a green bar
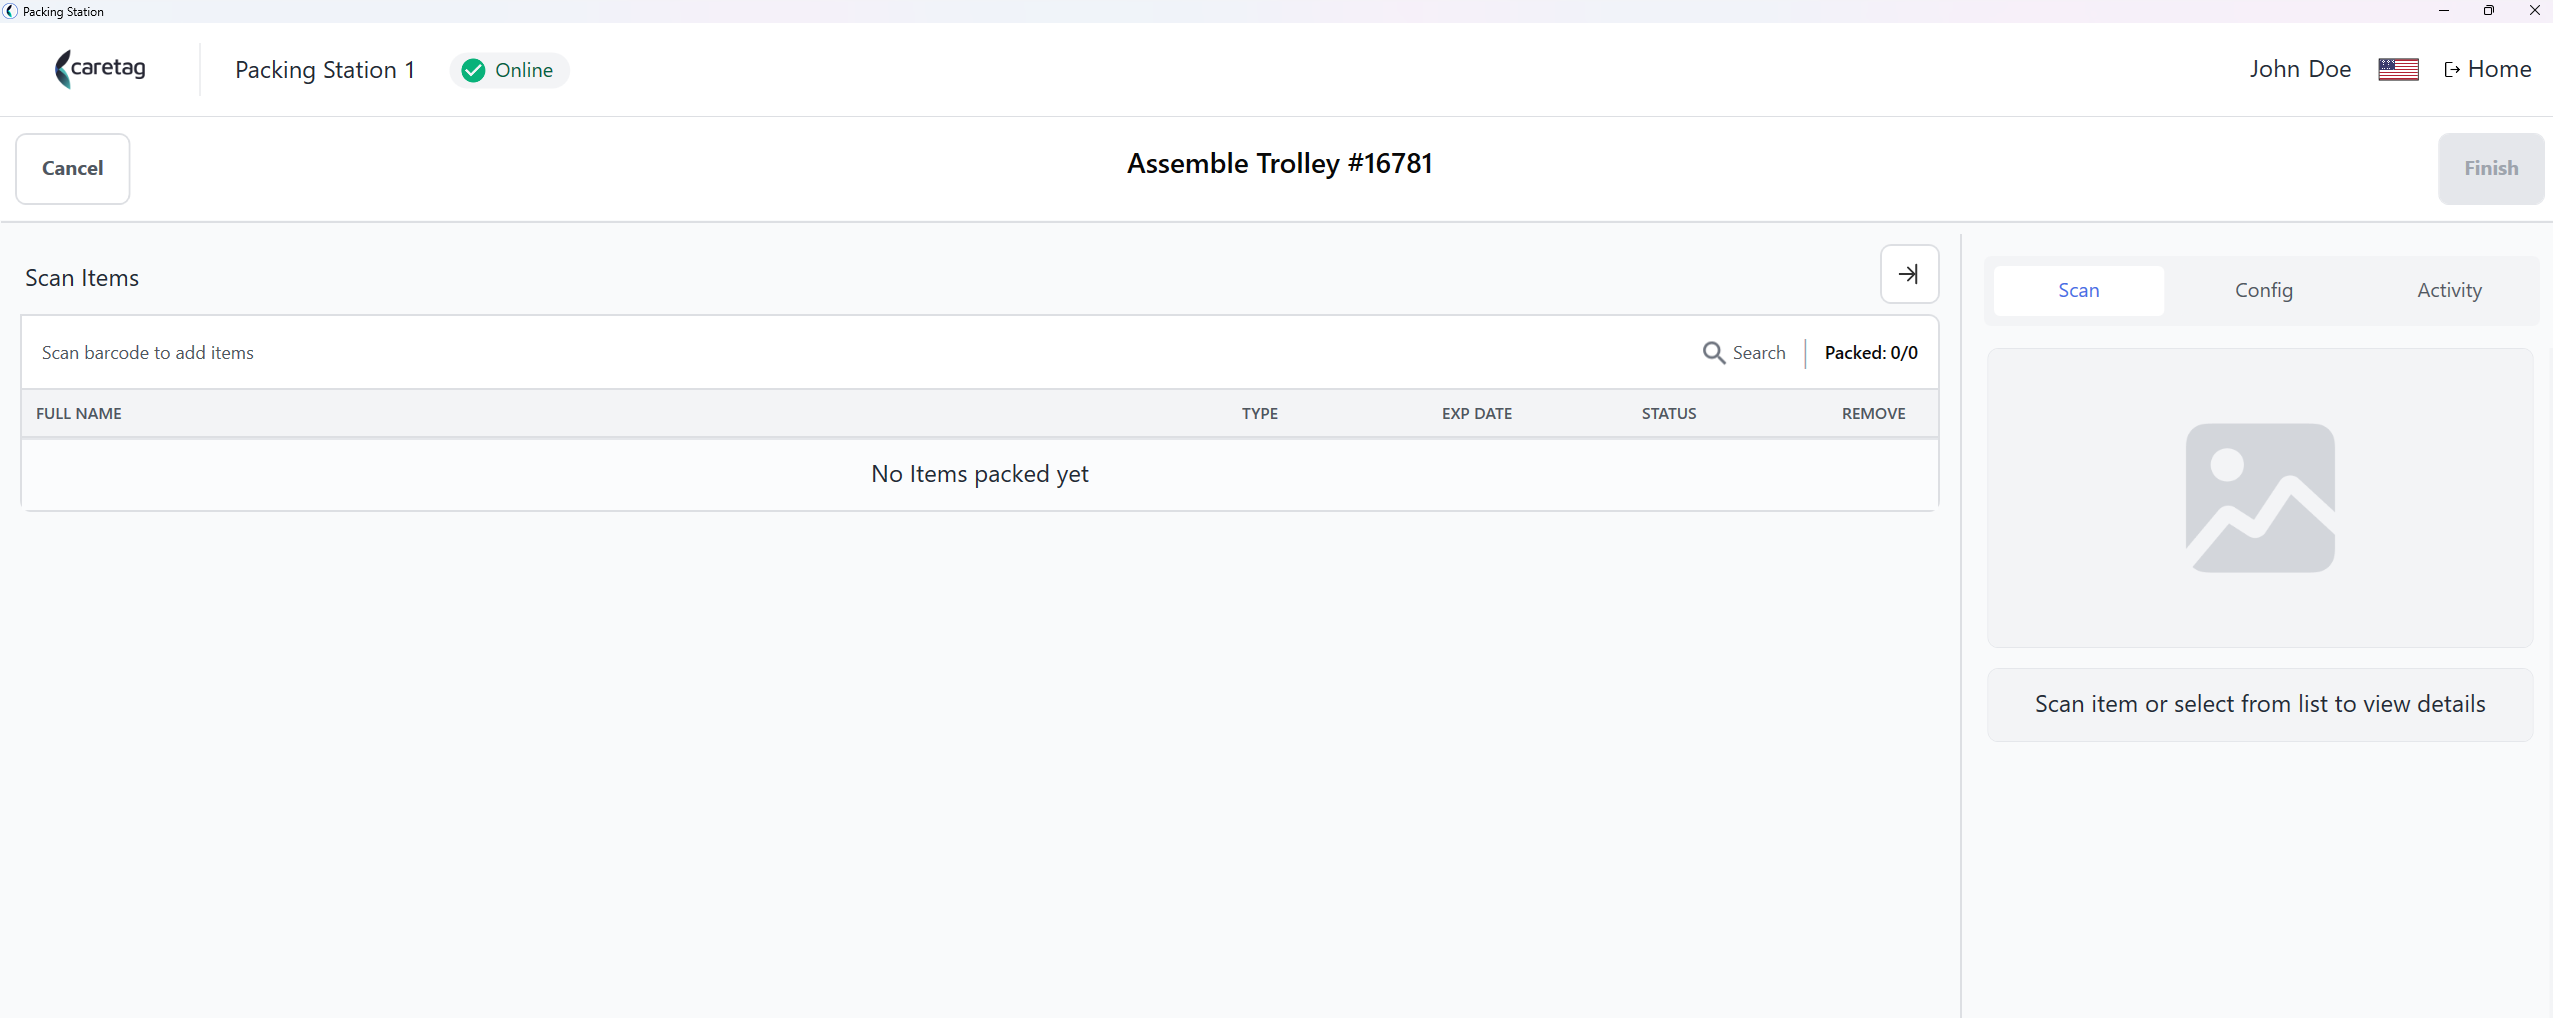
- Now the trolley page is empty and you have to scan the packed trays/container’s tag and/or pouches.
- Scan the tray or container that has been packed and is ready to be associated to a trolley.
Note
If a tray is packed inside a container, the trolley will display the container regardless of whether the user scans the tray or container.
- It displays the details of the packing set and on the right side window it shows the details of the tray such as tray name, ID, instrument count, date of packing.
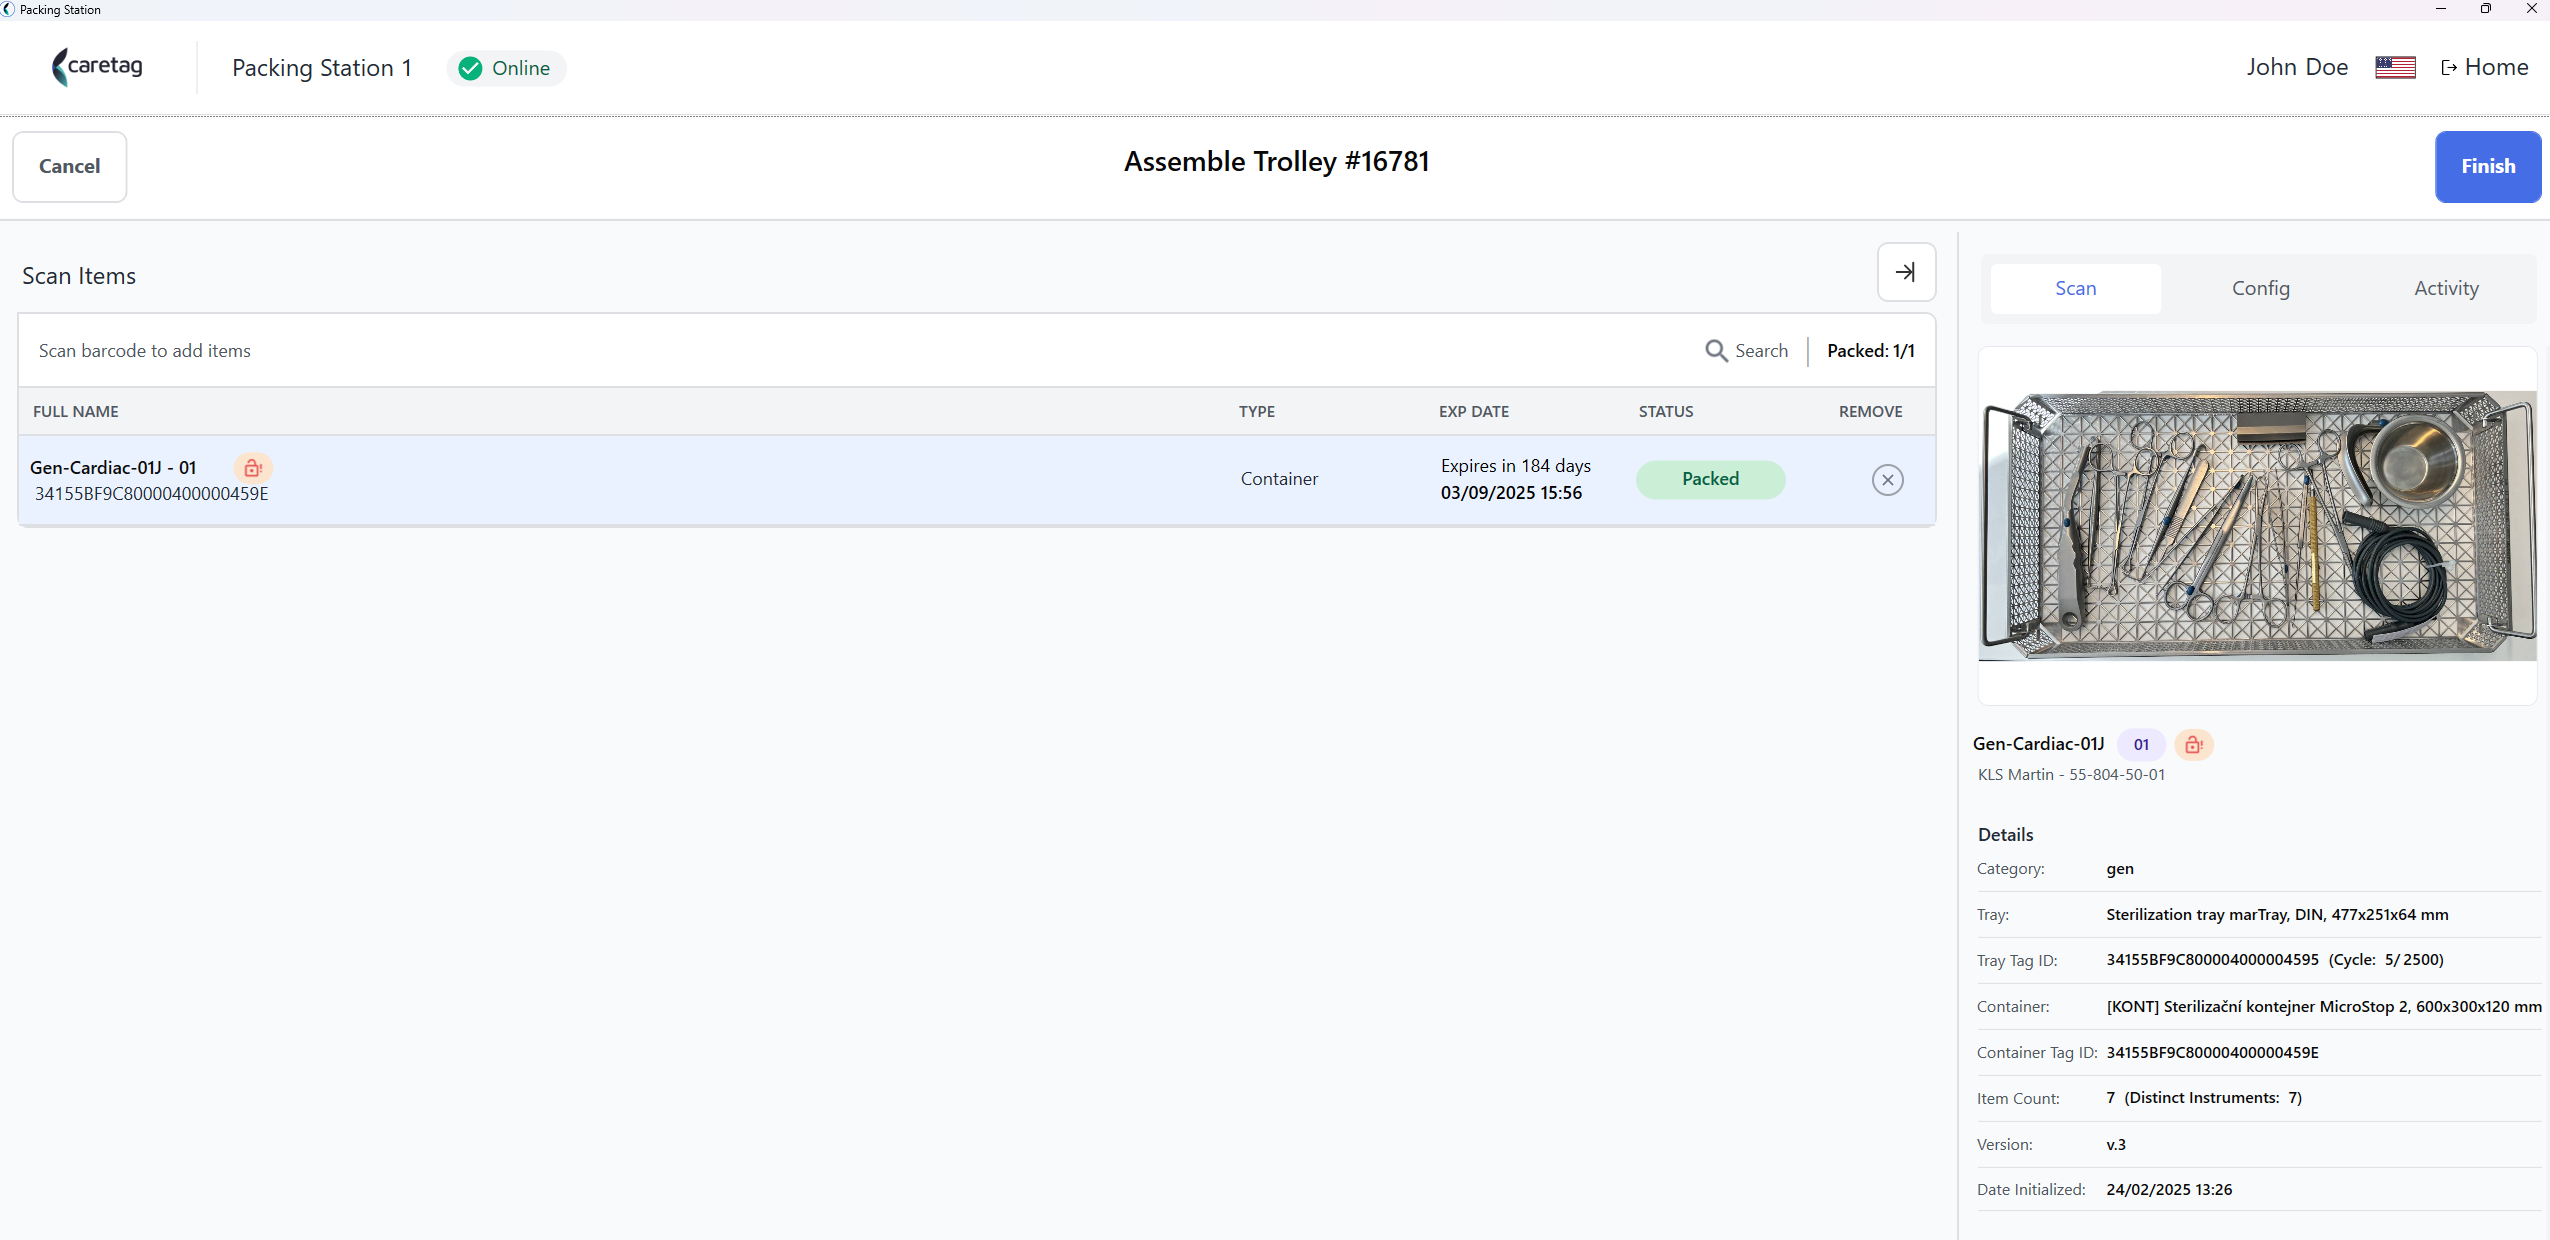
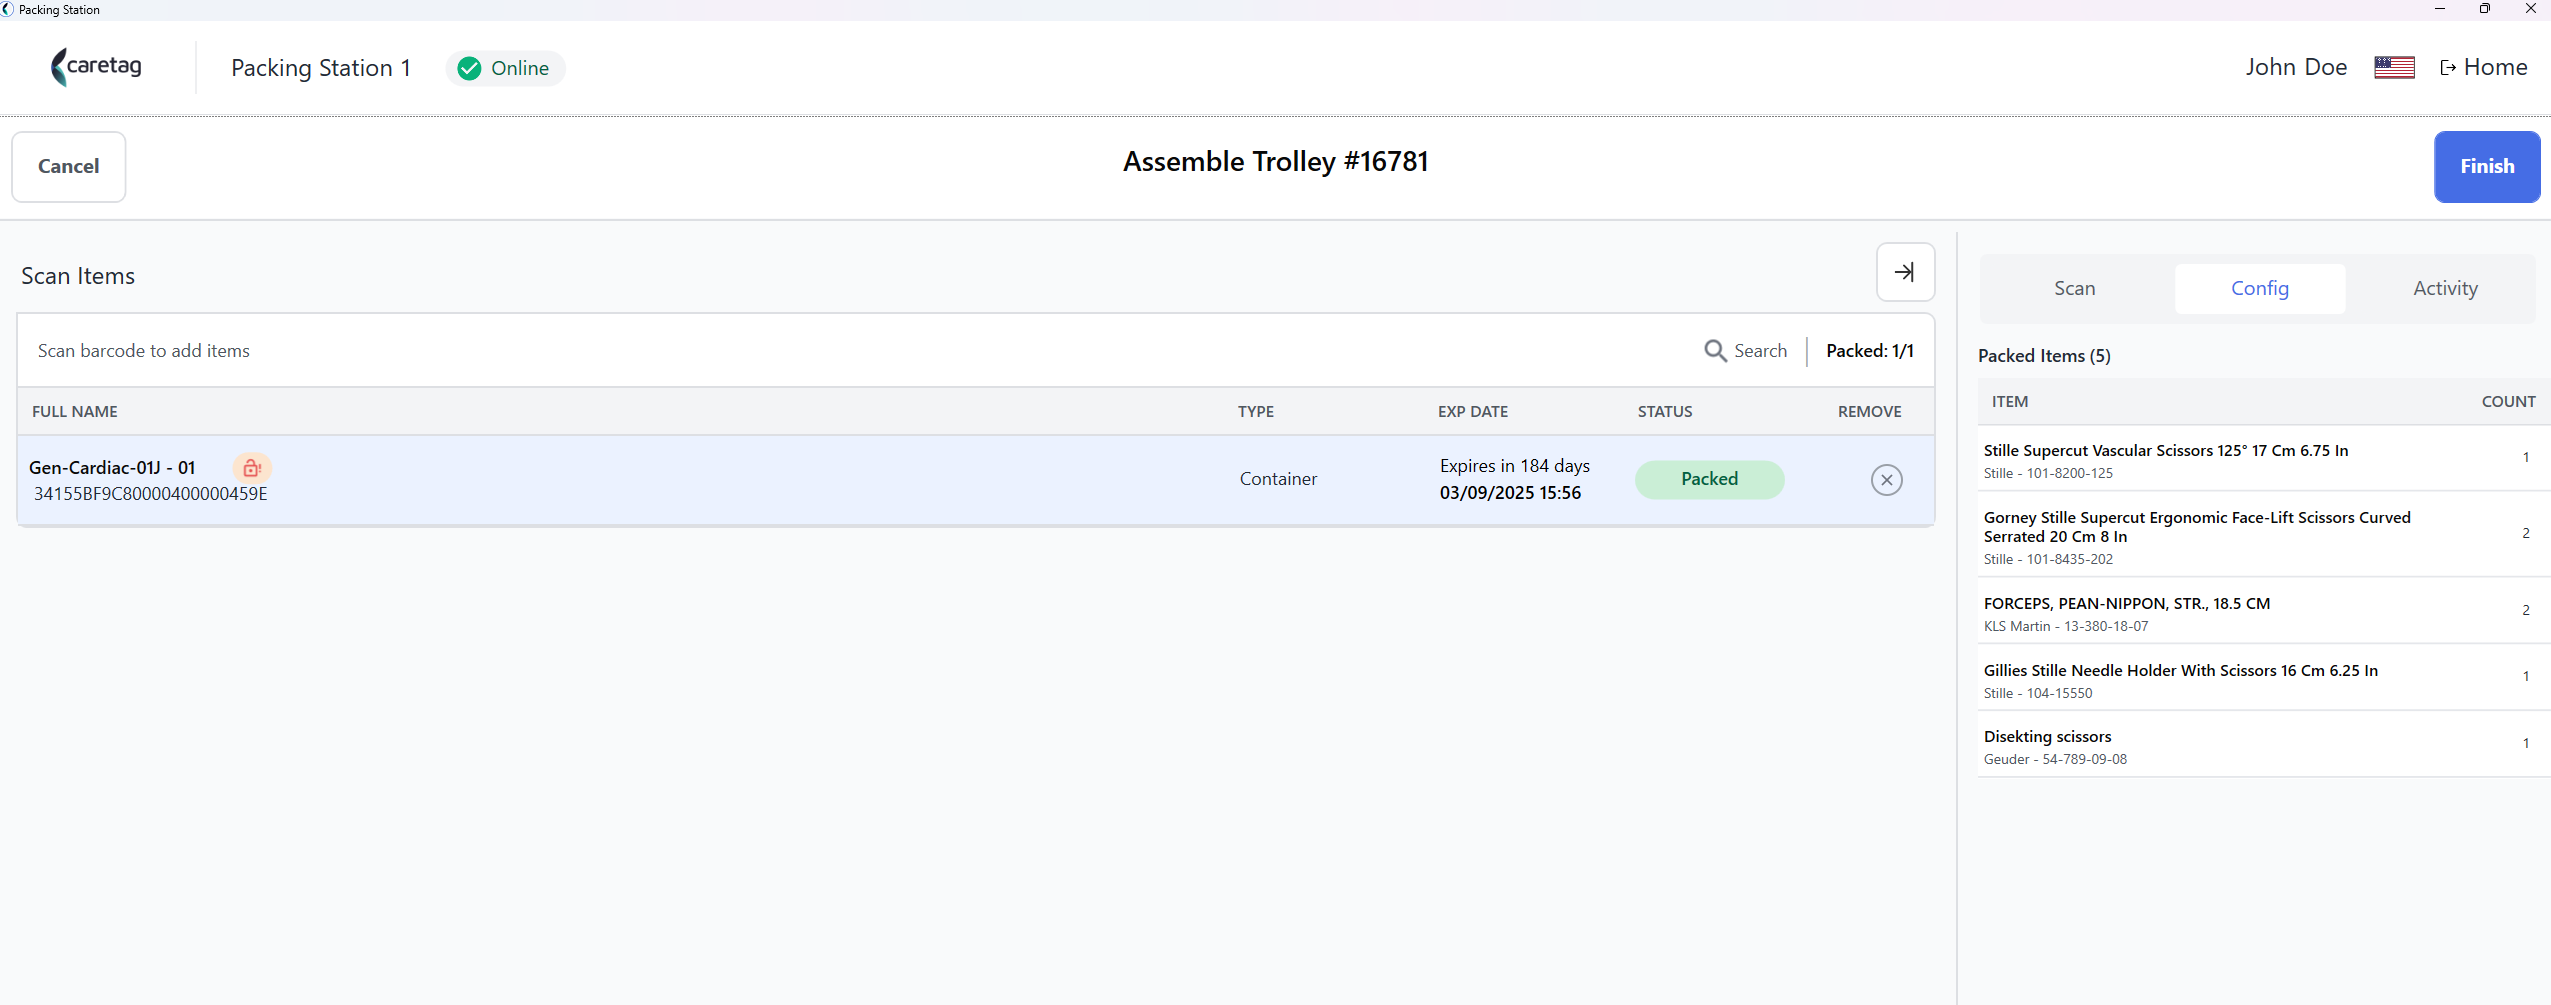
- In the Config tab on the right side the app displays the details of the instruemnts.
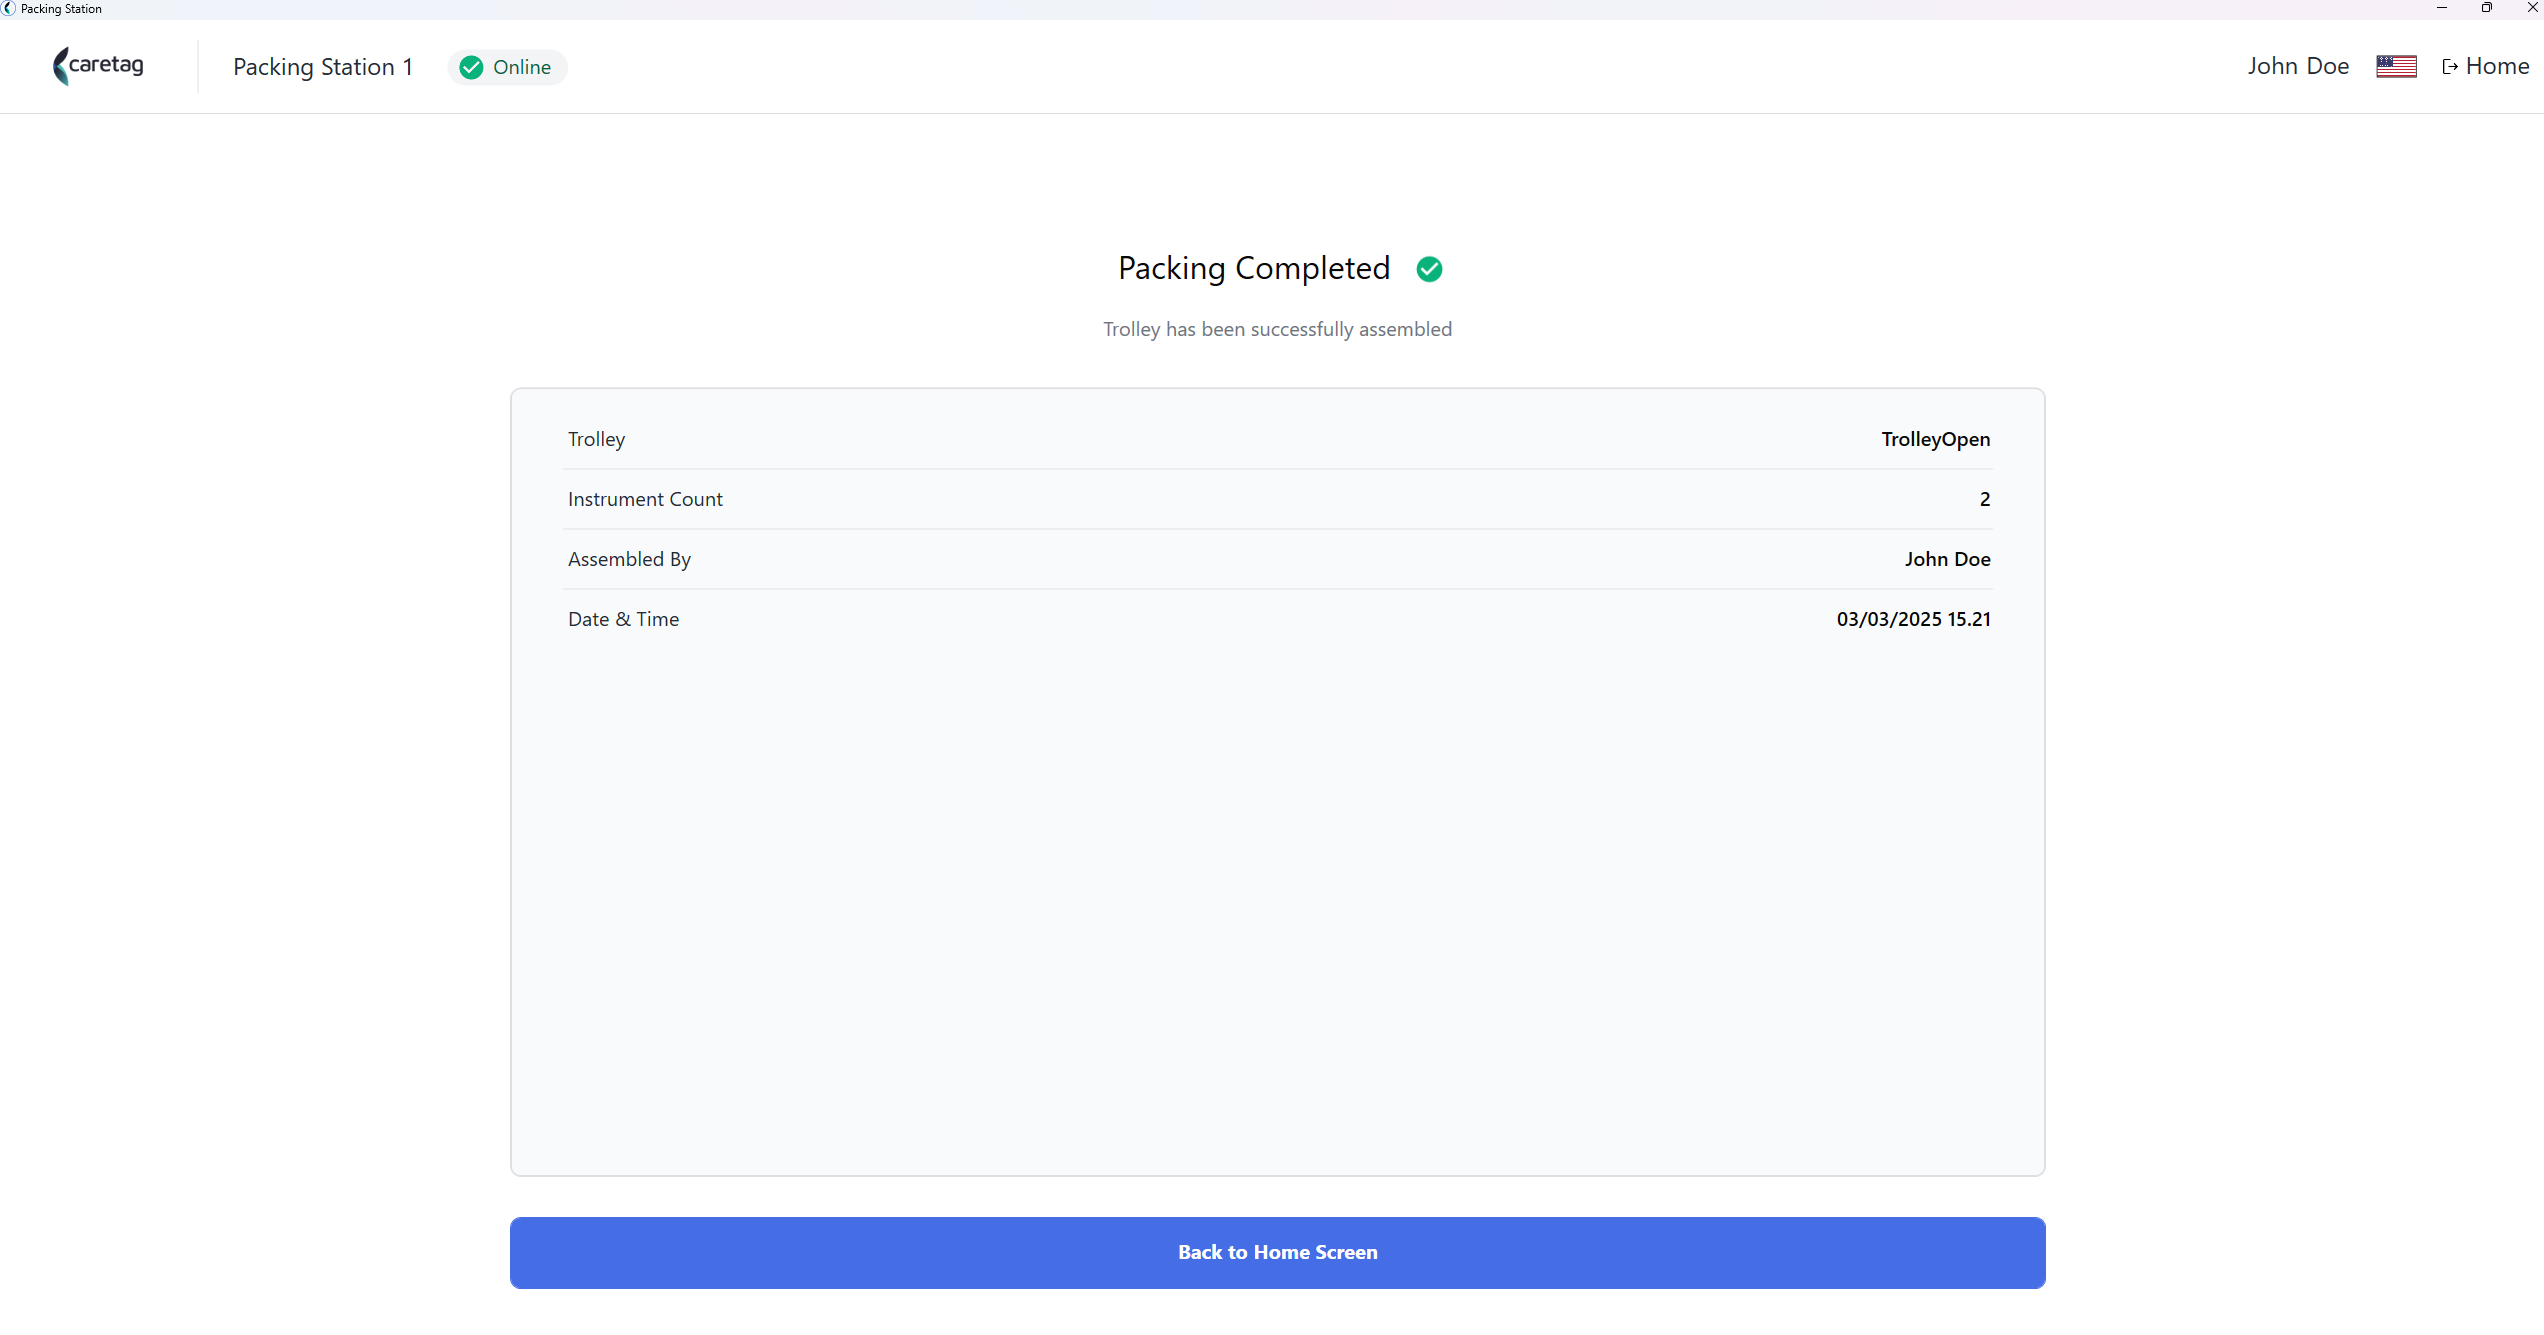
- In the activity tab, you can see the activites of this particular packing set. Click the Finish button to complete the trolley allocation.
- Trolley allocation is completed.
View Sessions
- Select the View Sessions option and click continue
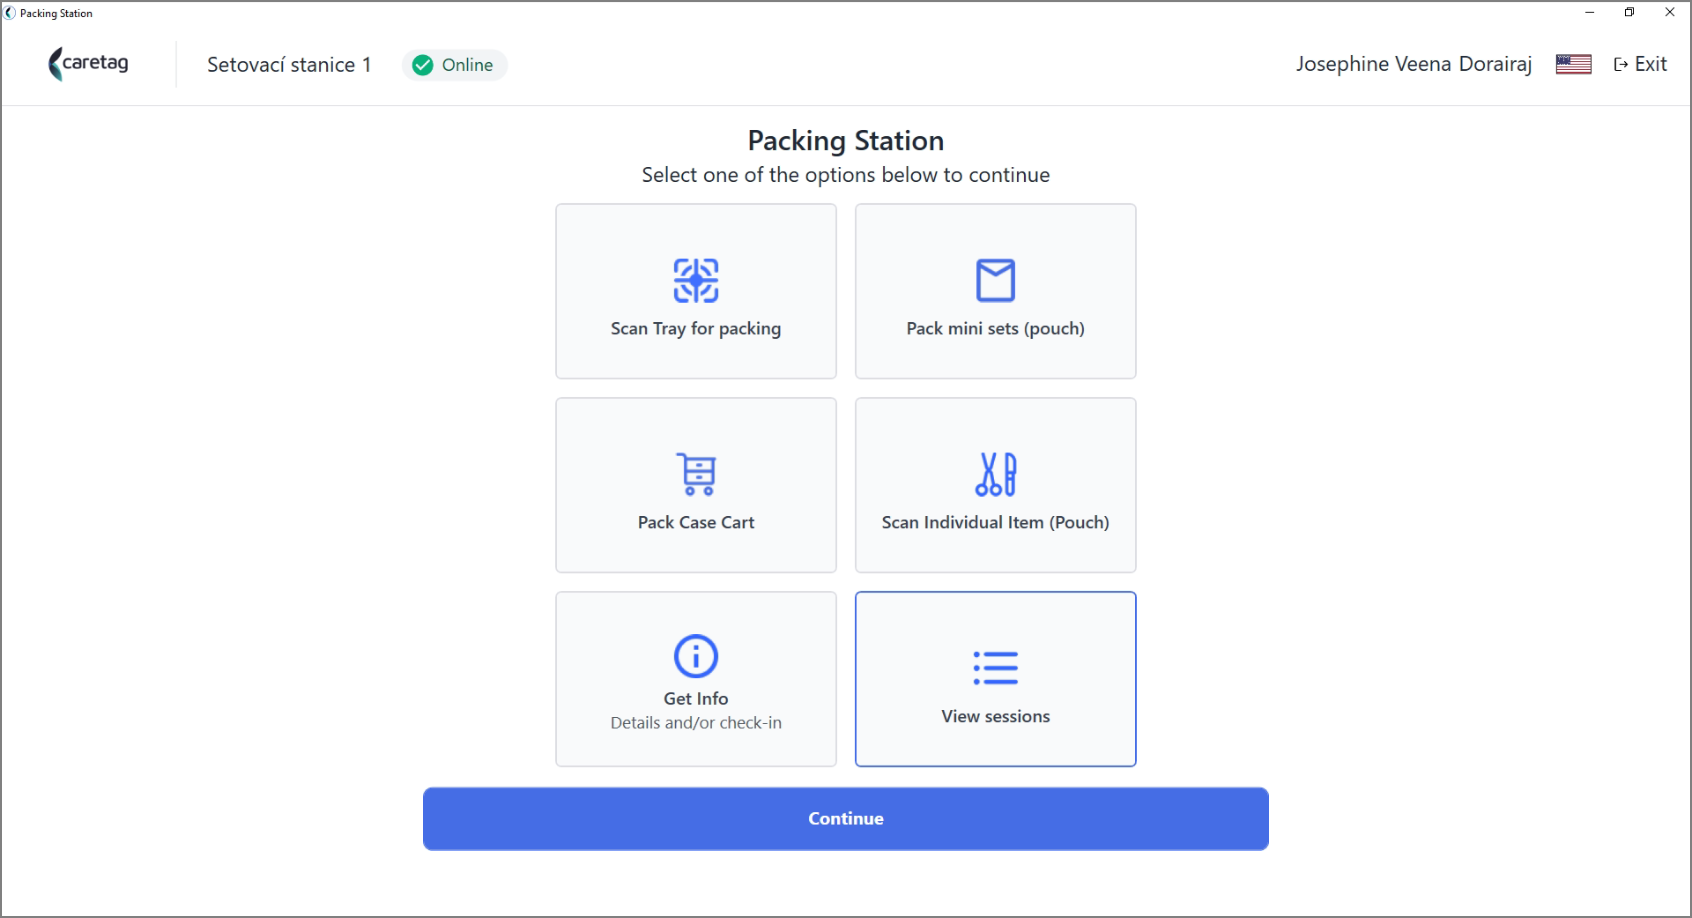
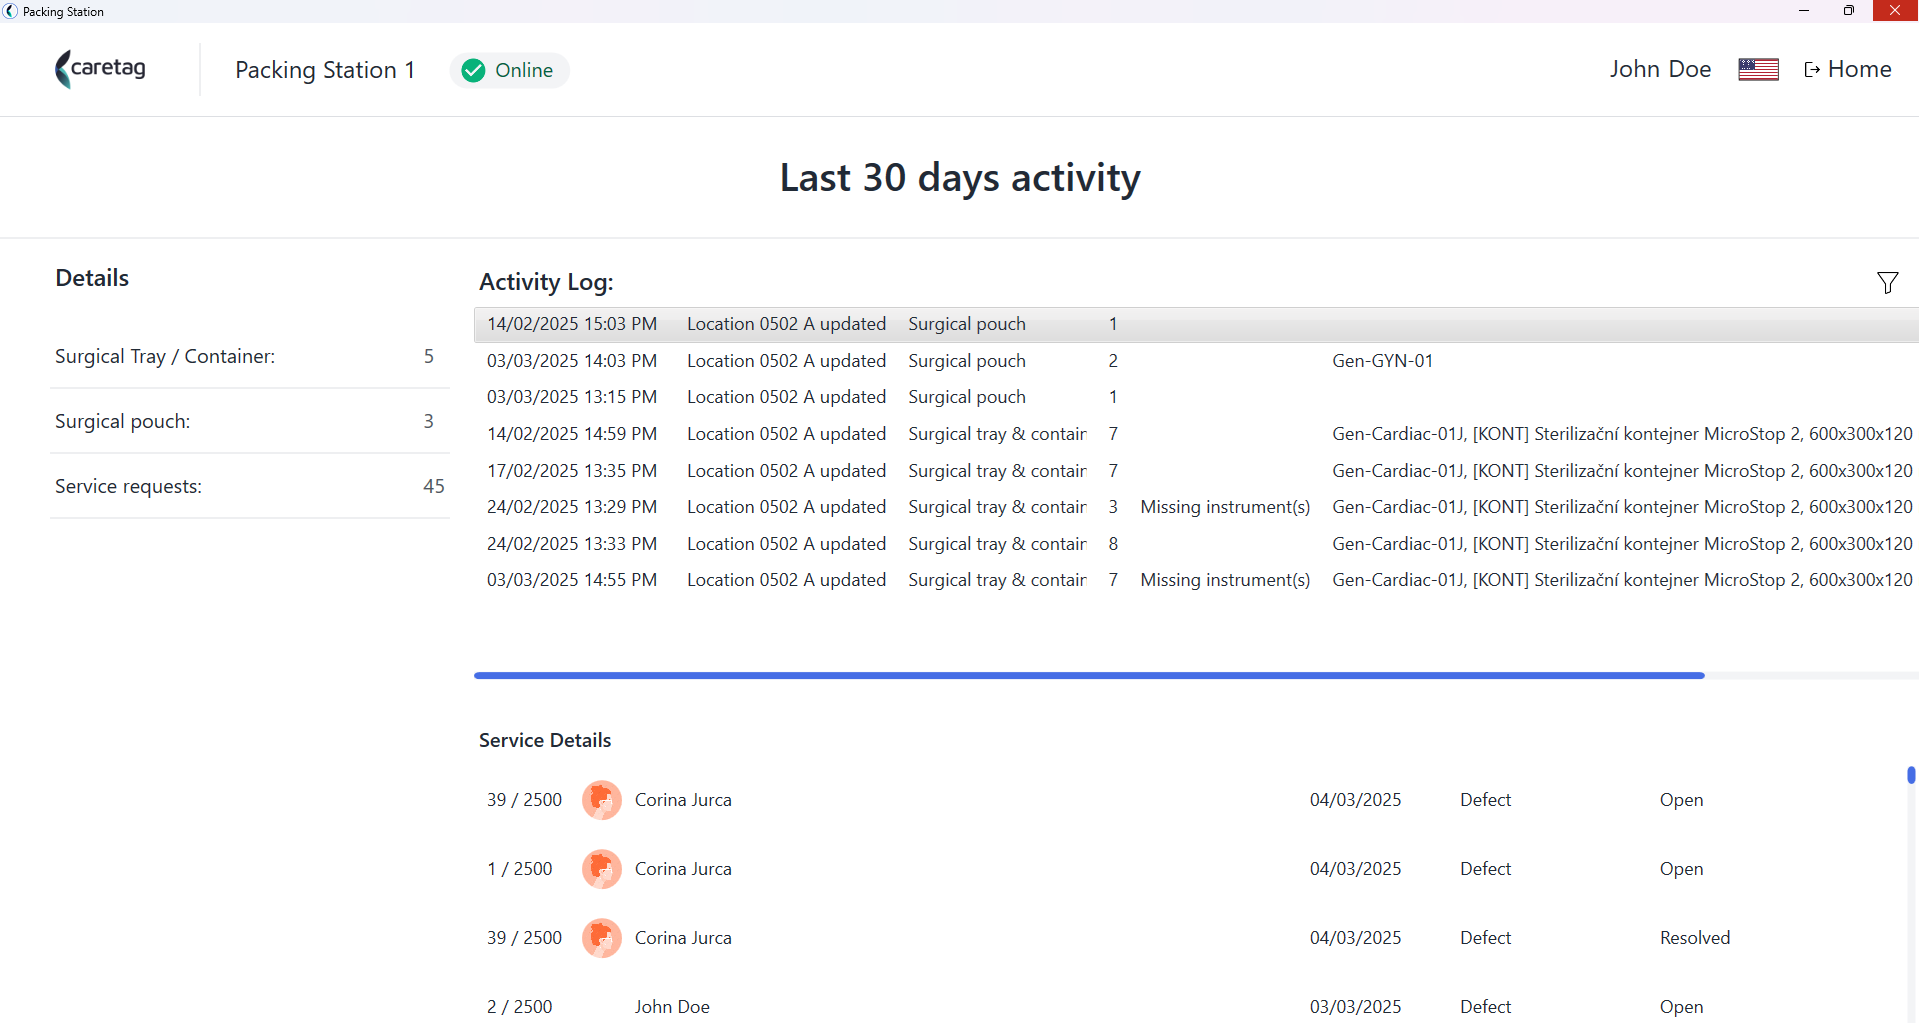
- It shows the last 30 days activity.
- On the left side the user can see the details of how many surgical trays or container have been packed in the last 30 days and how many service requests are created.
- In the center, it displays the activity logs that contains date&time, location, type, count and details.
- Service request details are shown at the bottom of the page.
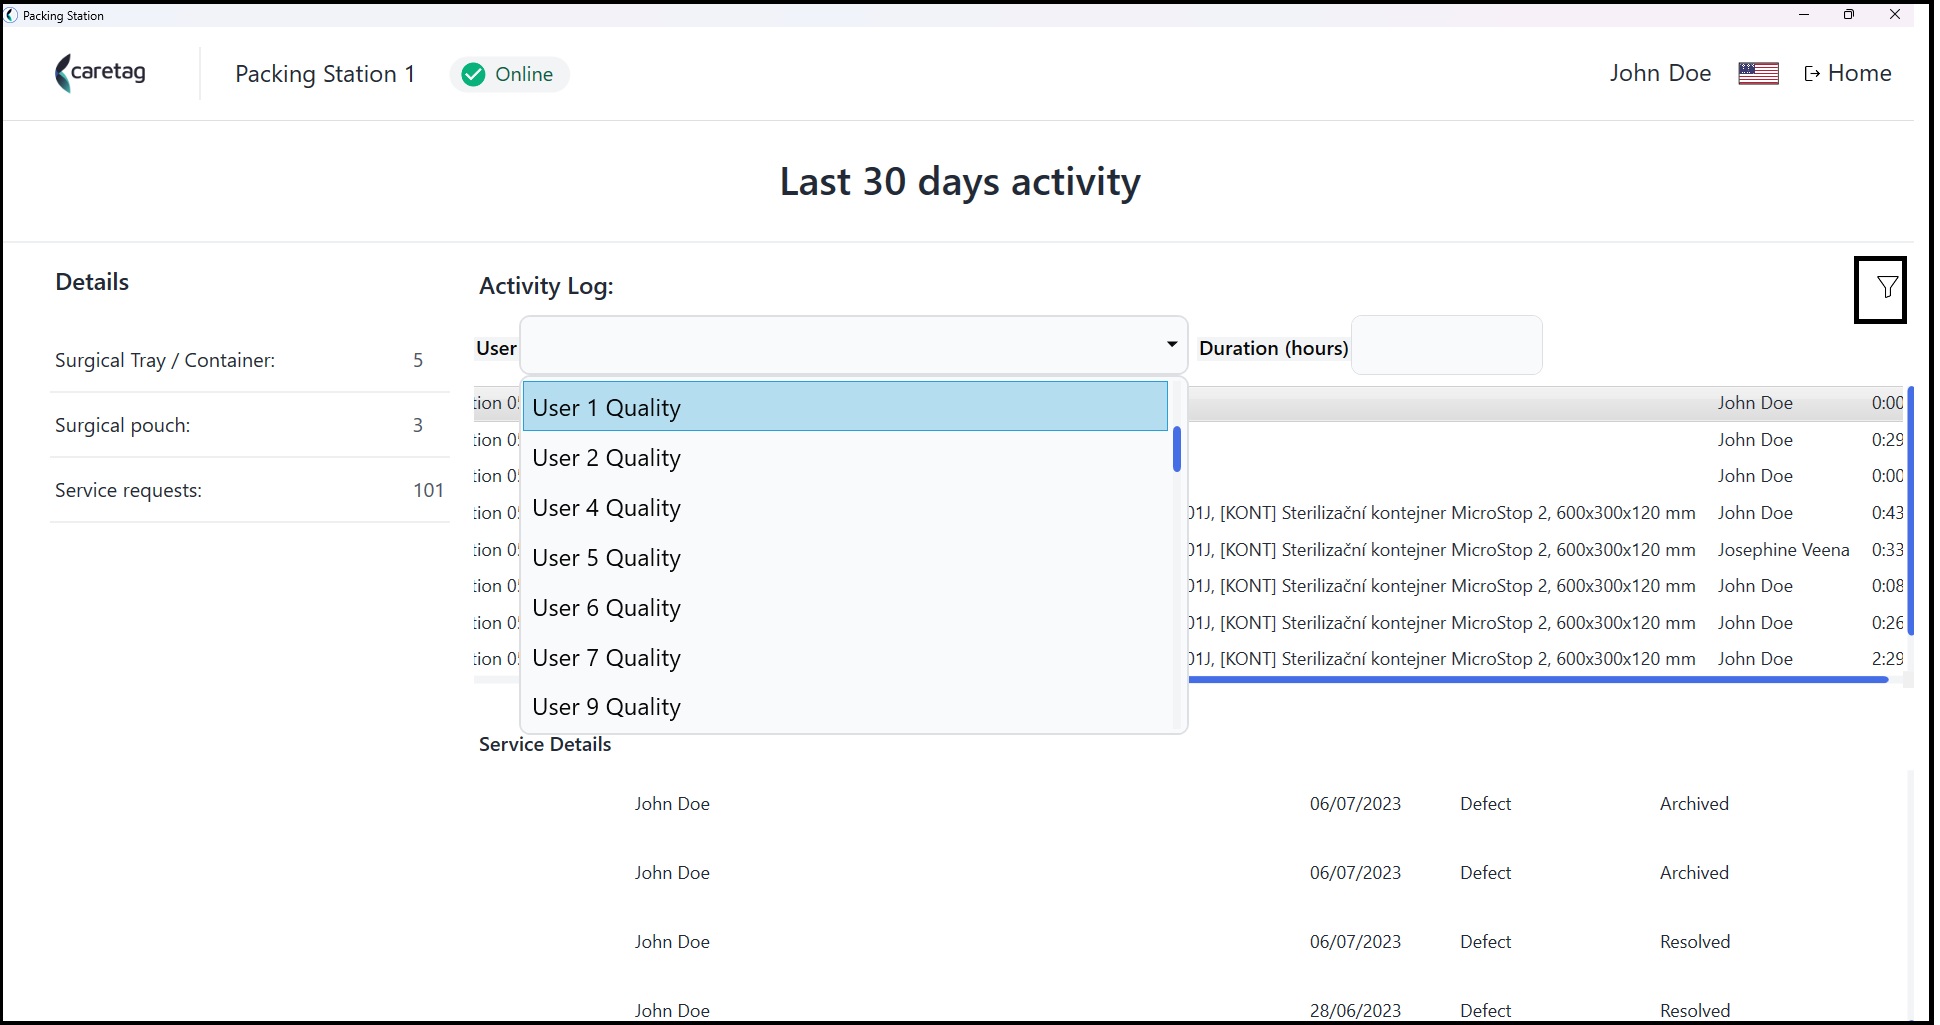
On the top right corner, there is a filter which can be used to see a particular user’s activity
Sterilization
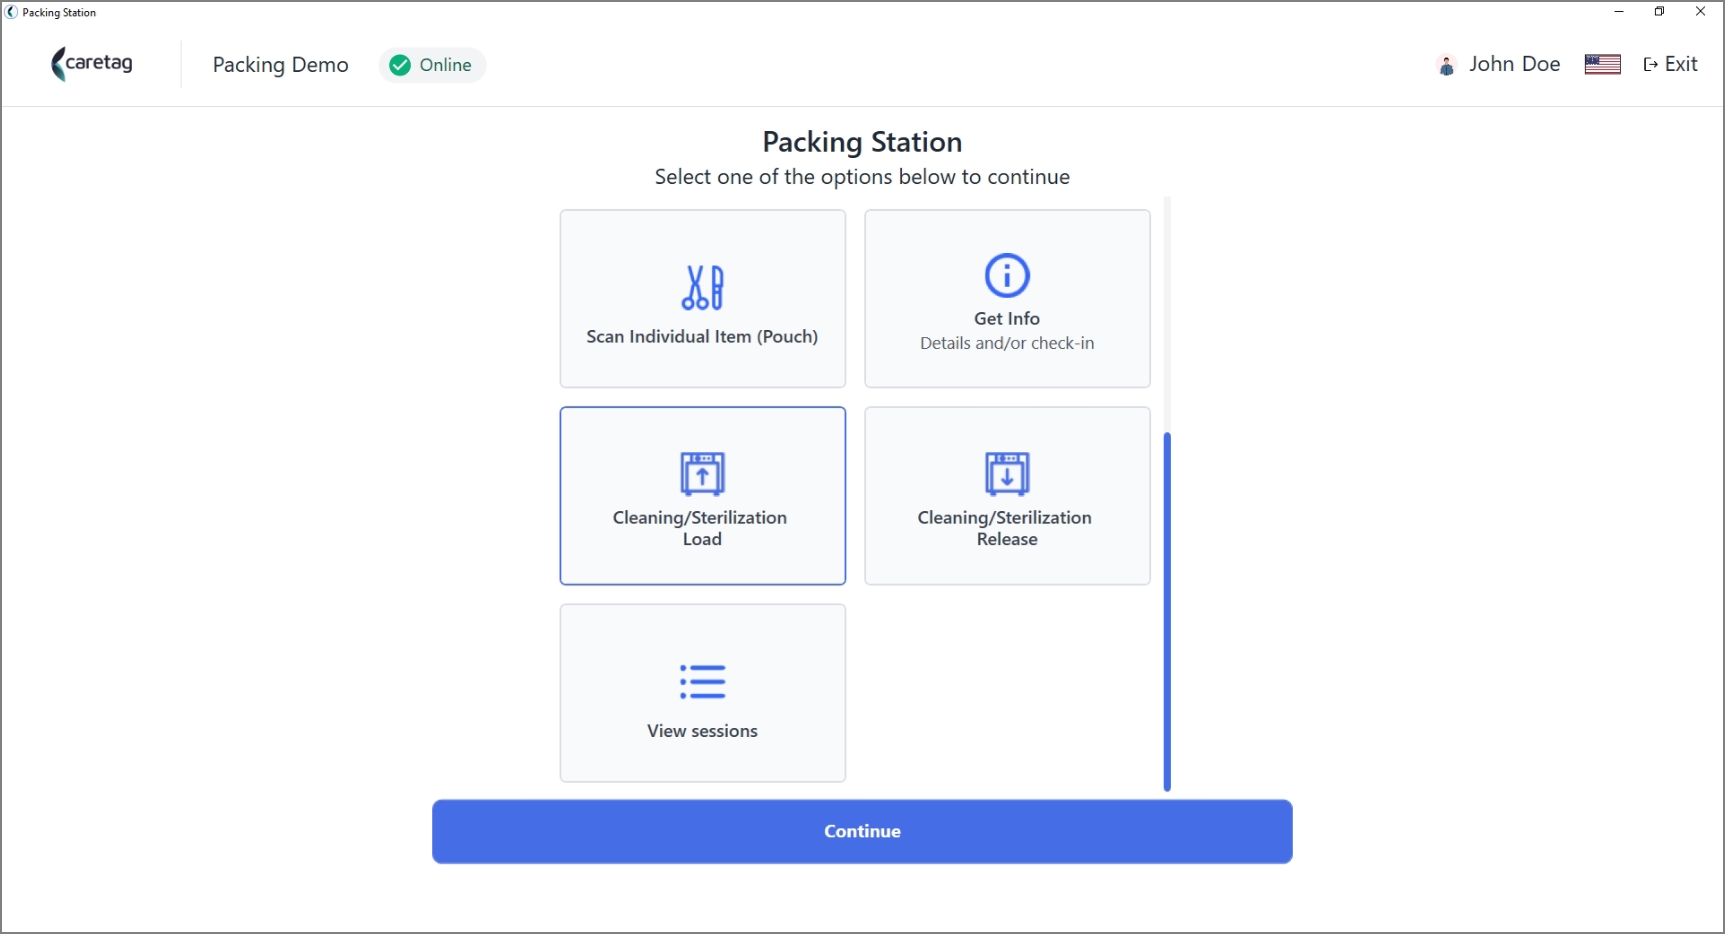
- Select Cleaning/sterilization Load/Release option
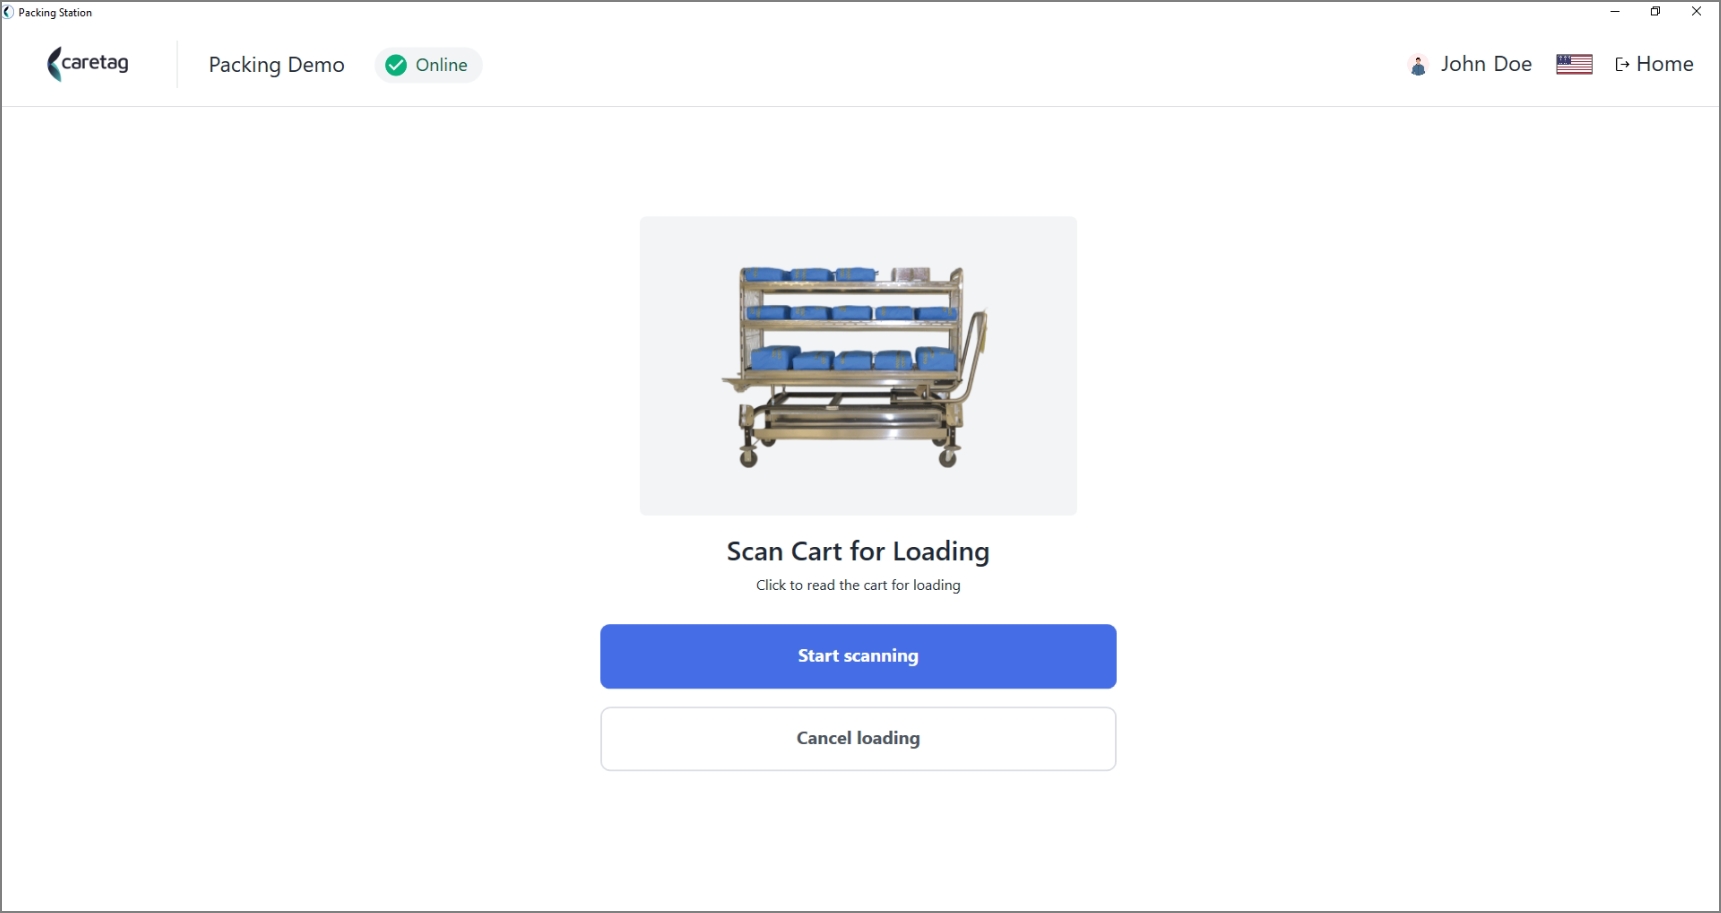
- Scan the sterilization cart tag
- Scan the items to load for Sterilization
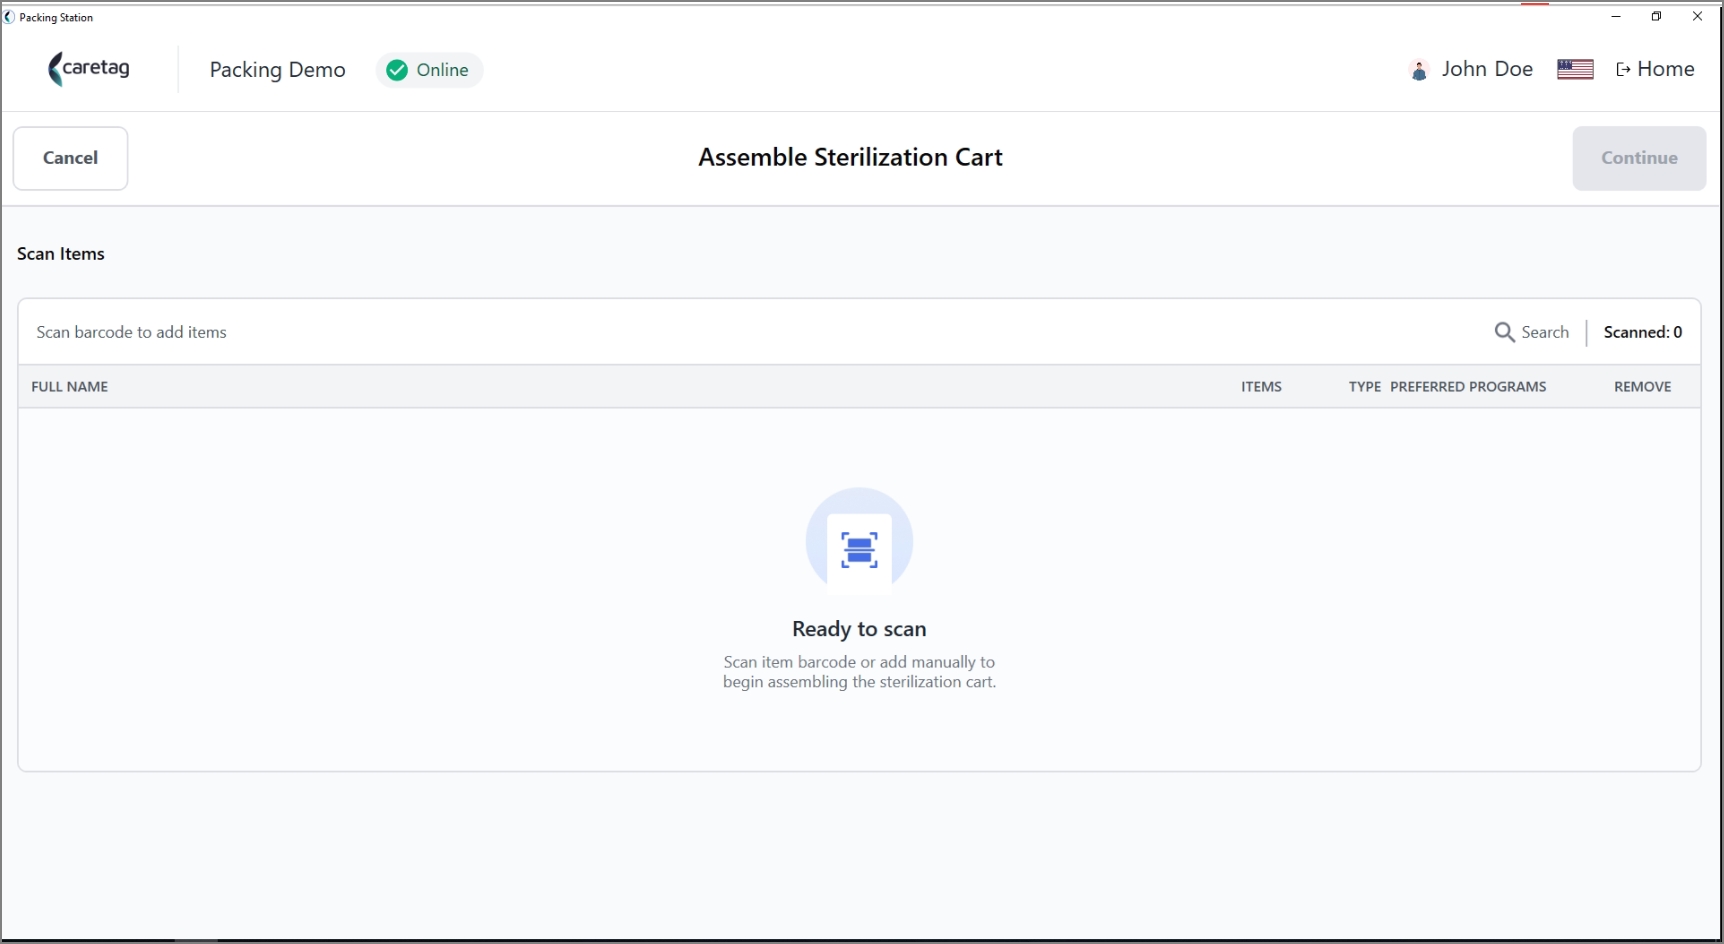
- If a single instrument of any tray is scanned, it will ask the user if they wish to add the full tray.
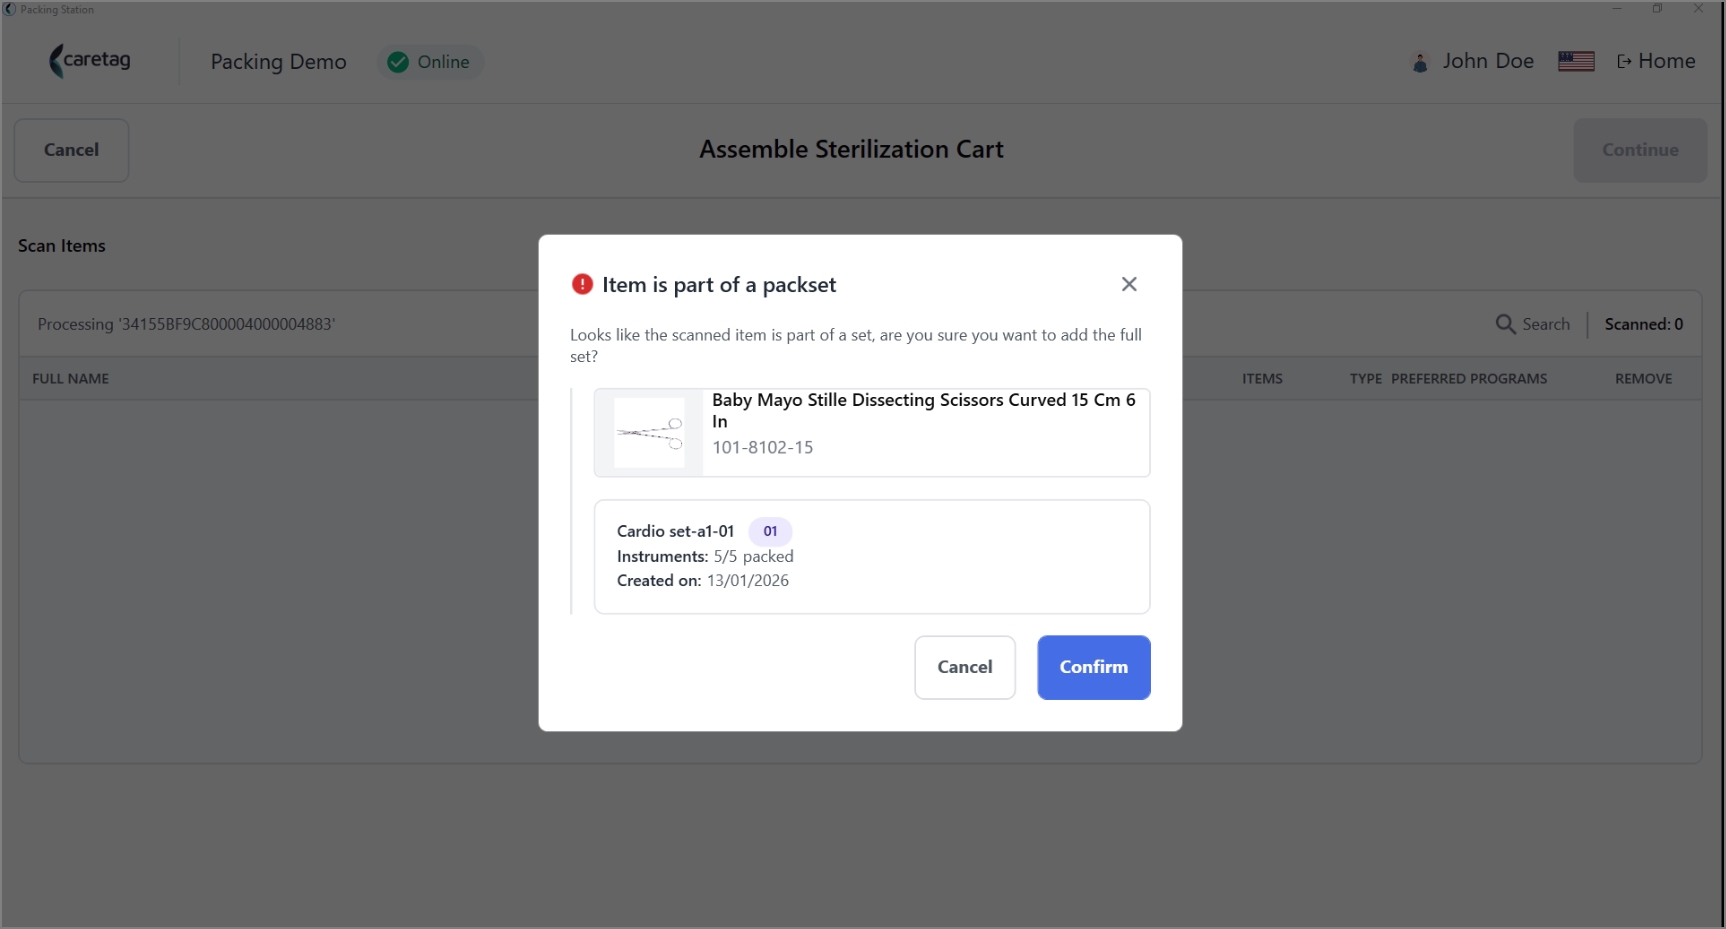
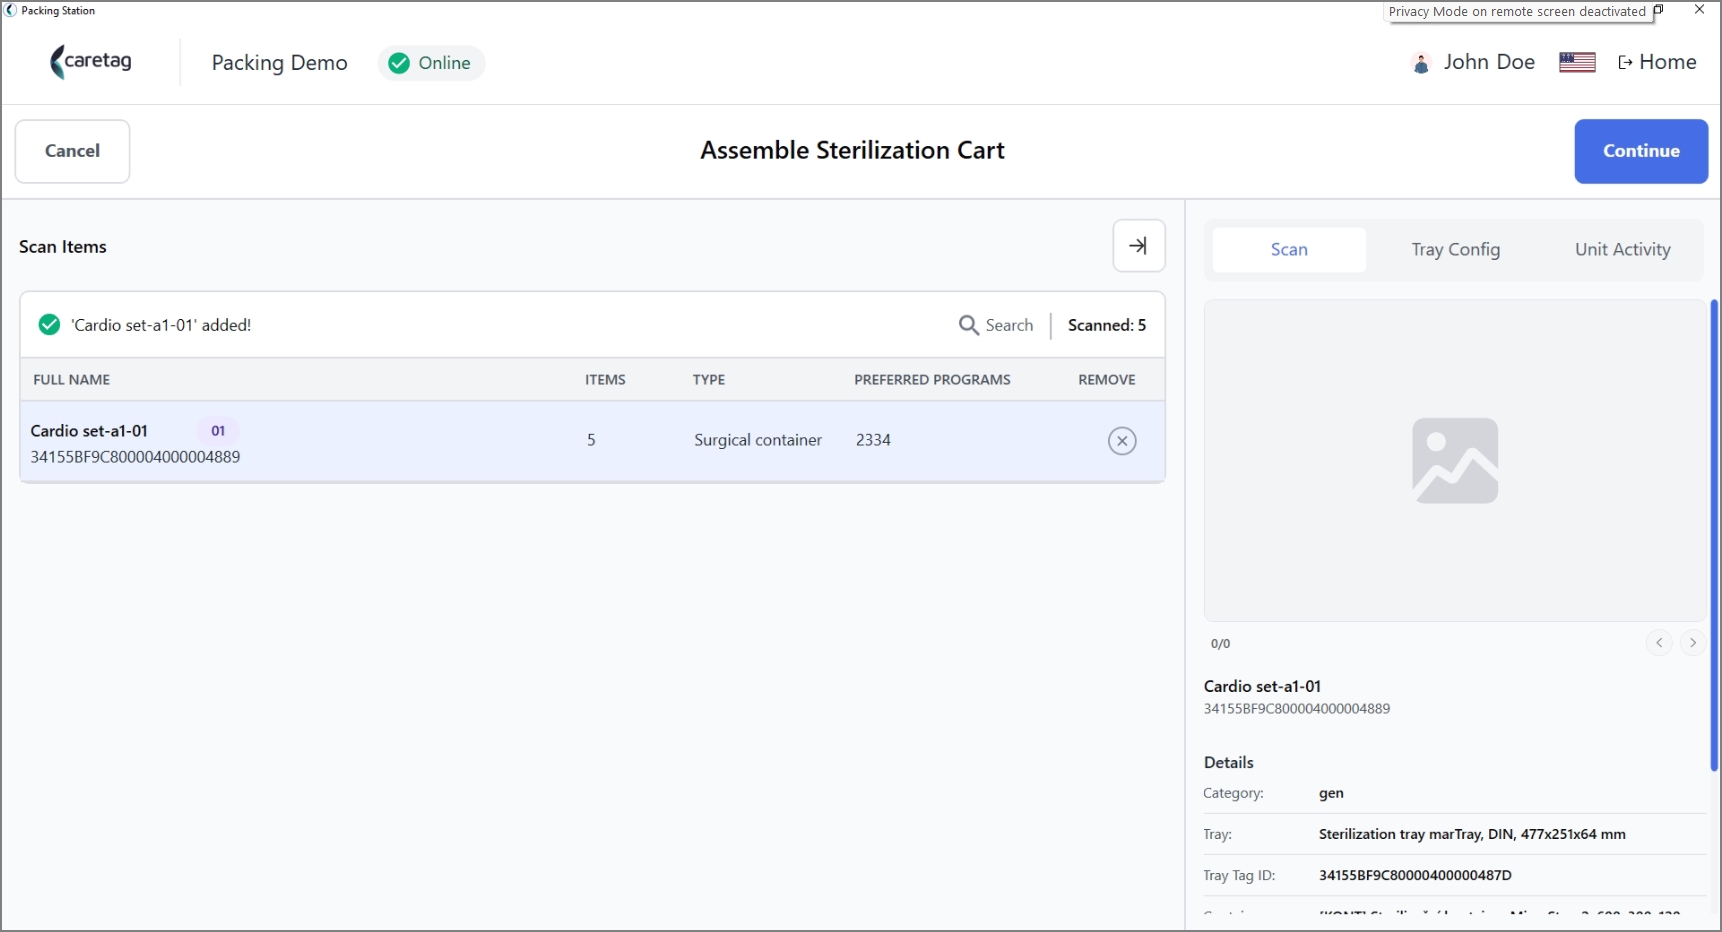
- Once the confirm button is pressed, the fuli tray is loaded for sterilization
-
On the right side panel there are 3 tabs: Scan, Tray config and Unit activity
-
In the Scan tab it provides the details of th packing set name, type of tray/container used, count of the items, version, etc.
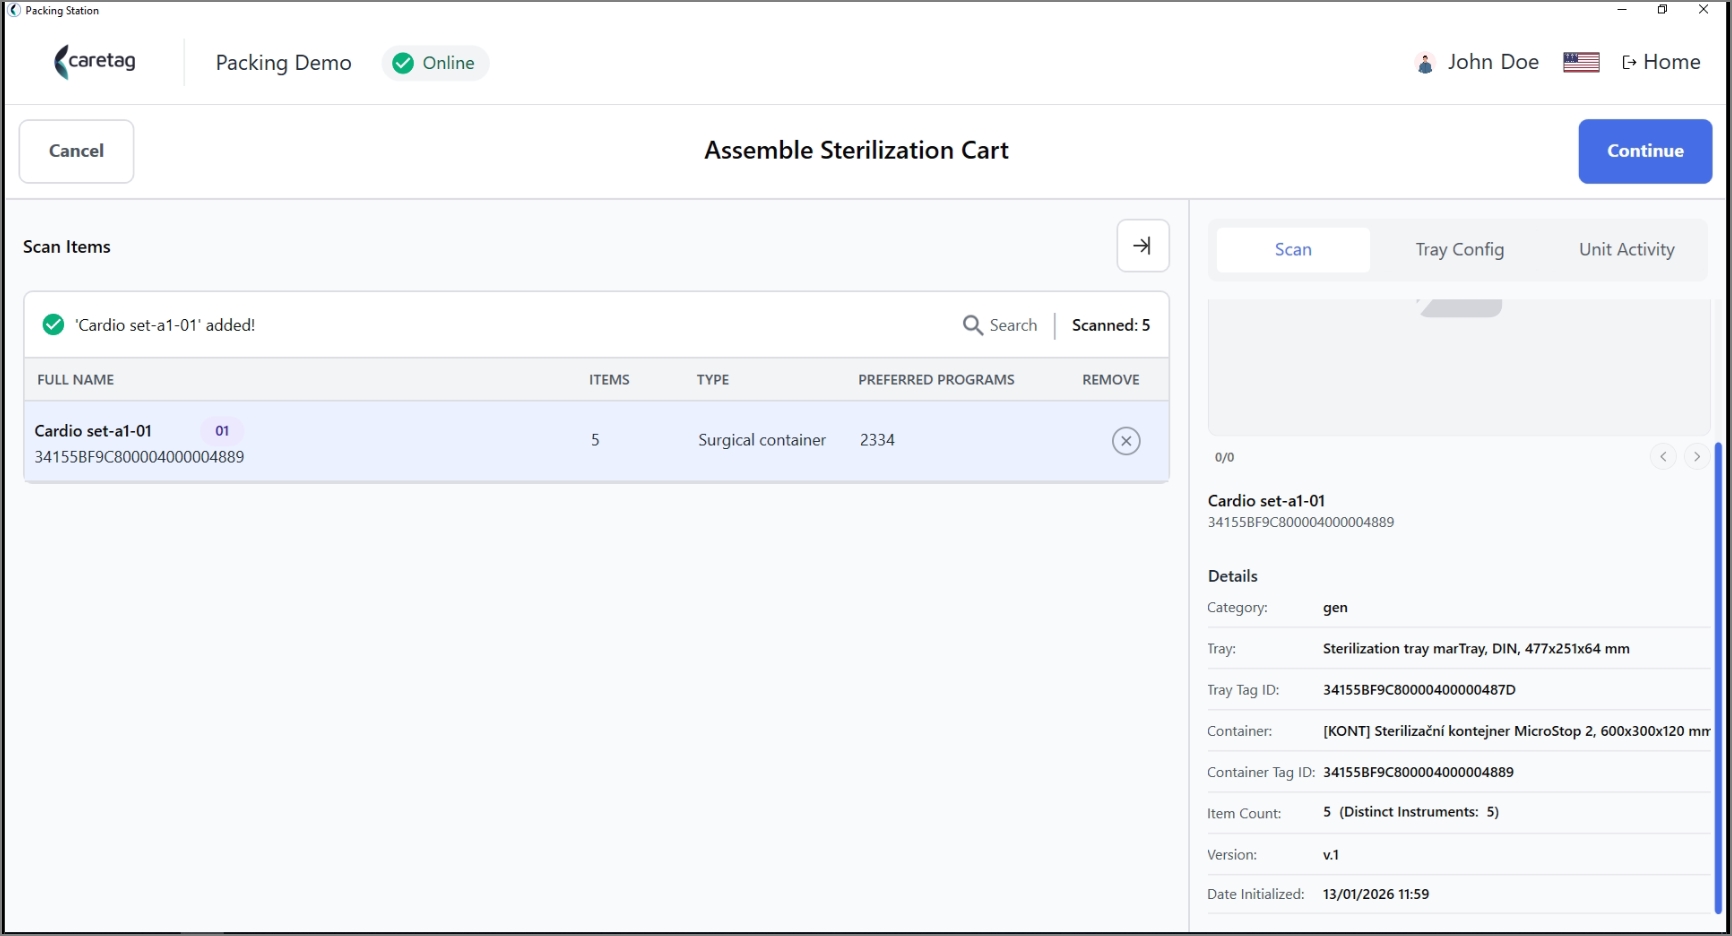
- In the Tray config, it provides the details of each item that belongs to the Packset Vs Packed
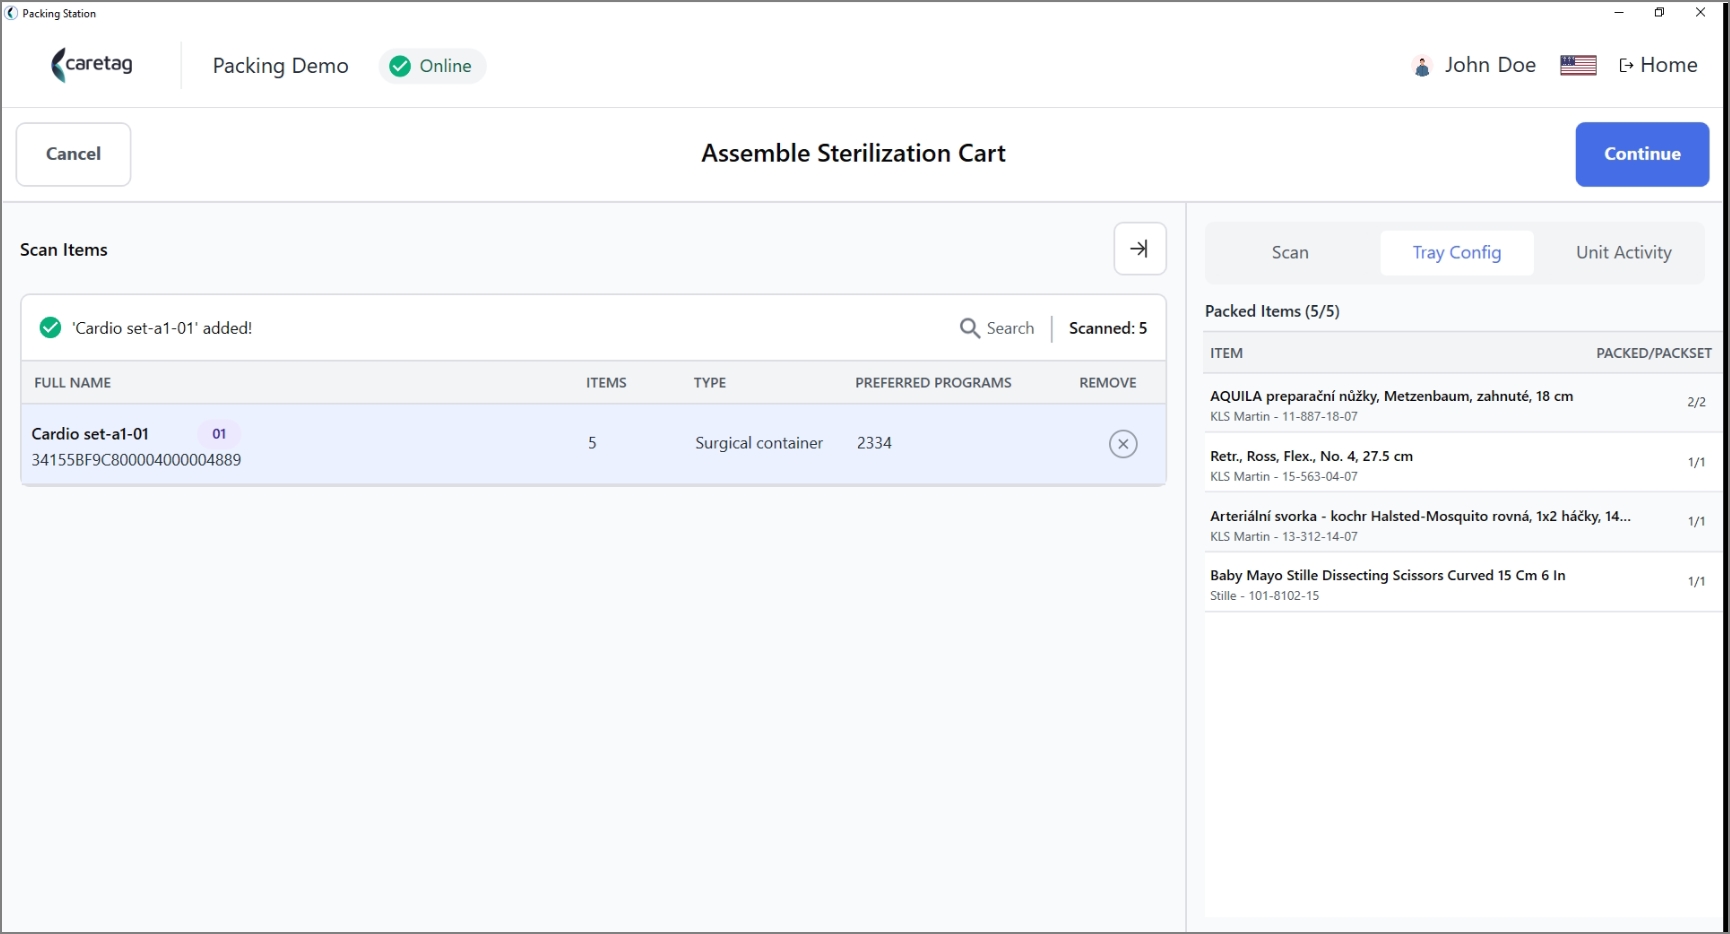
- In the Unit activity, it displays when the packset was last used, location, action and the name of the User.
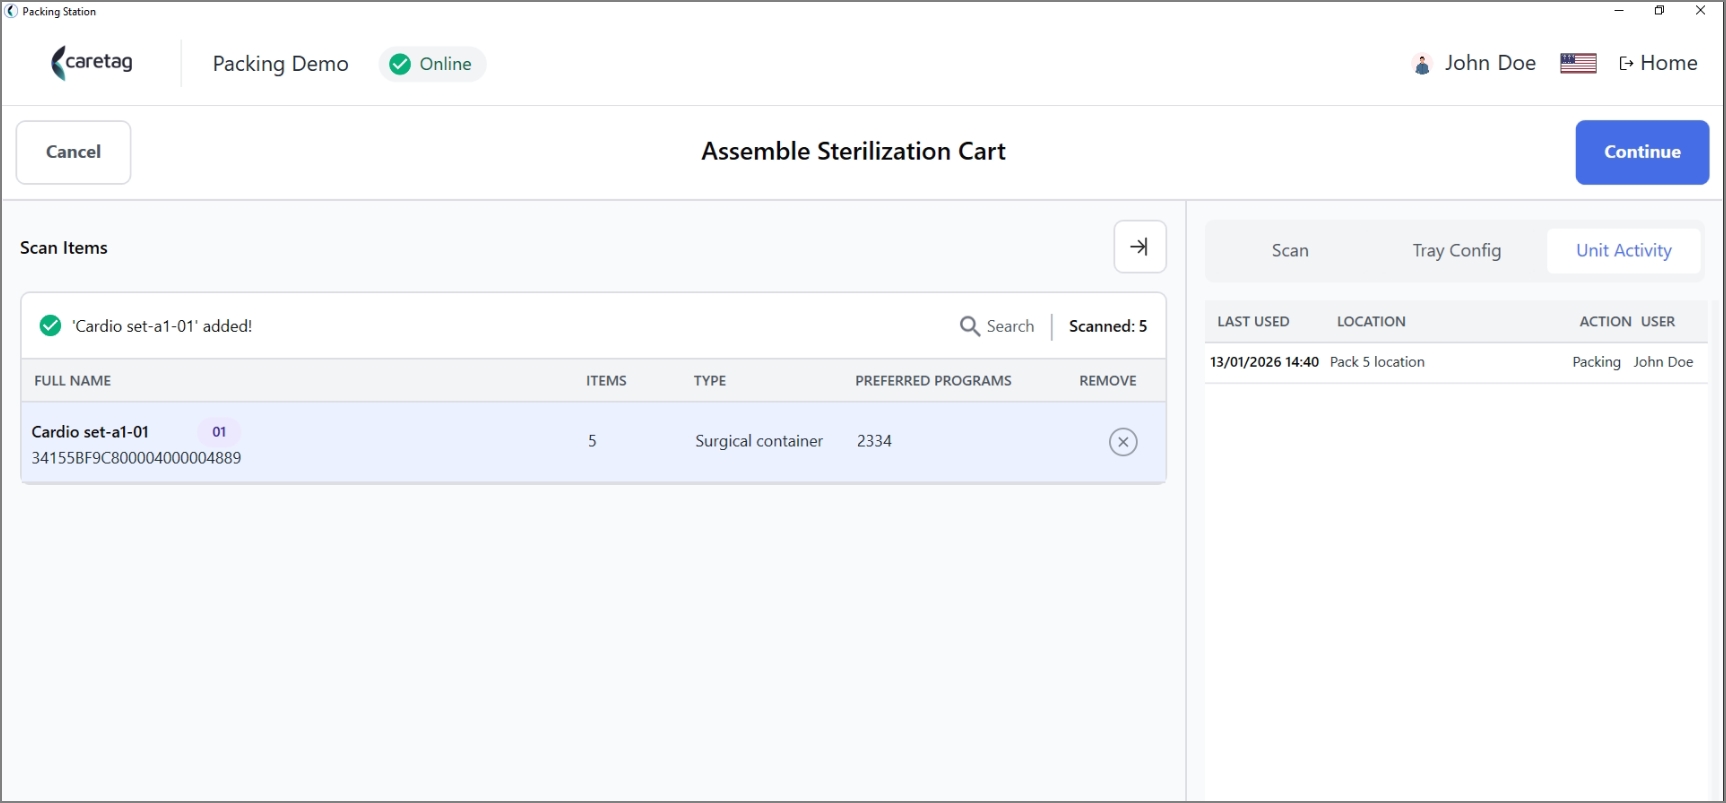
- click Continue and select the sterilization unit
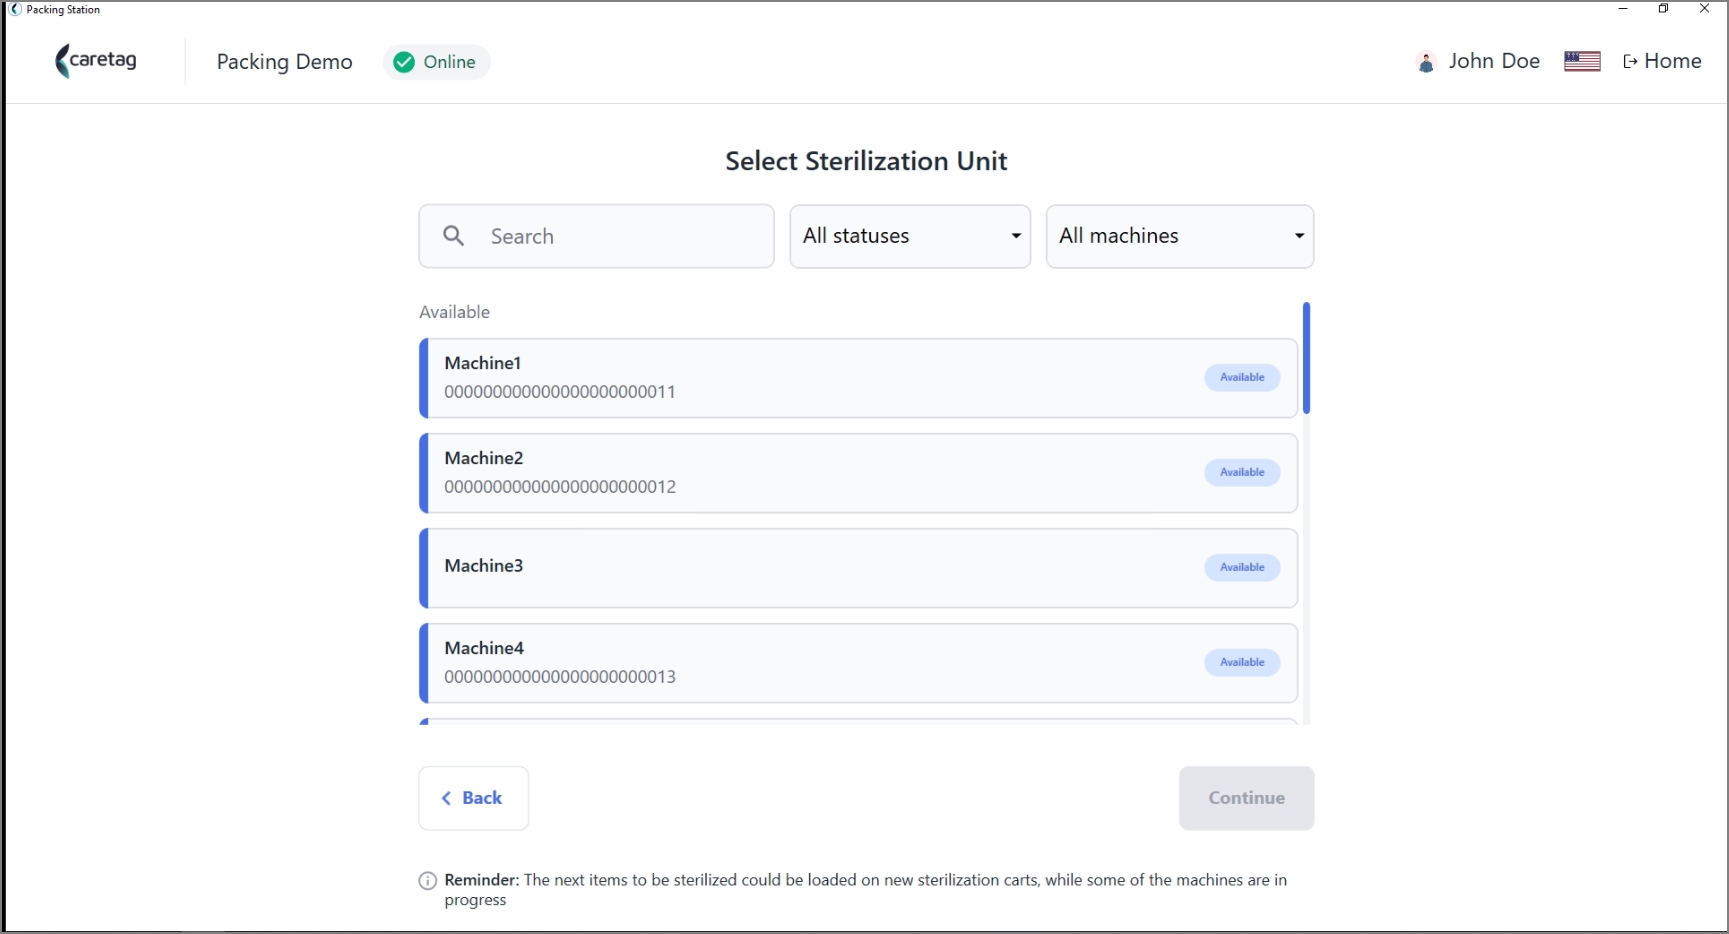
- There are 2 filters, one is to filter the status of the machines and the other one is to filter the type of machines.
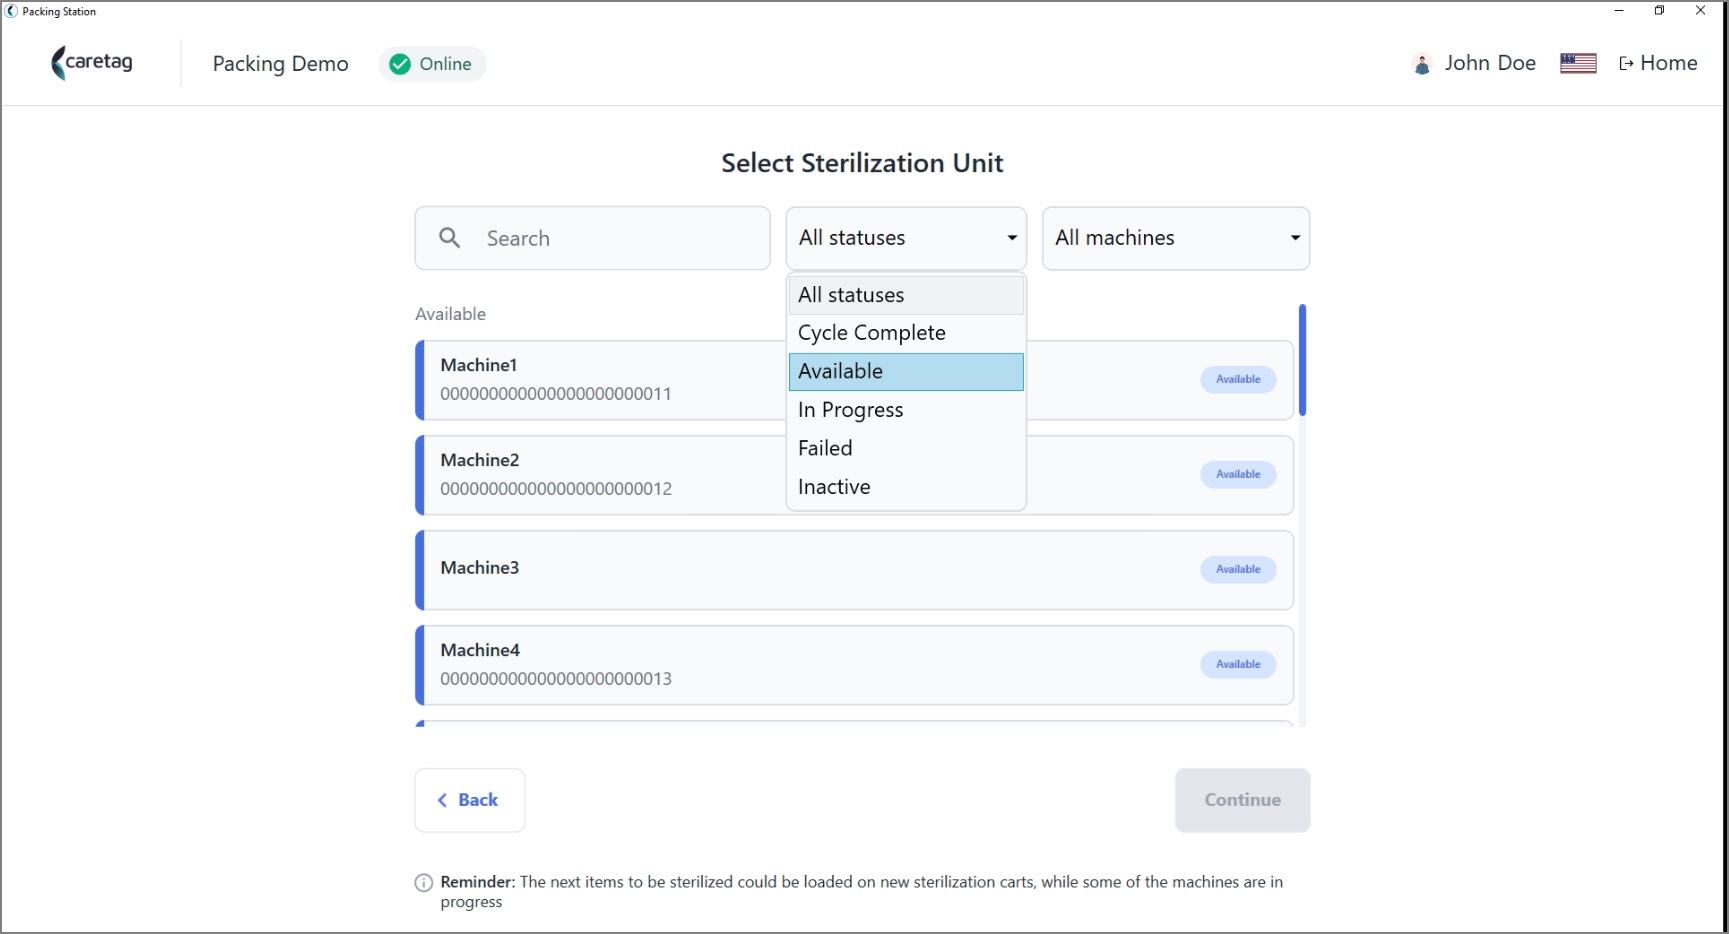
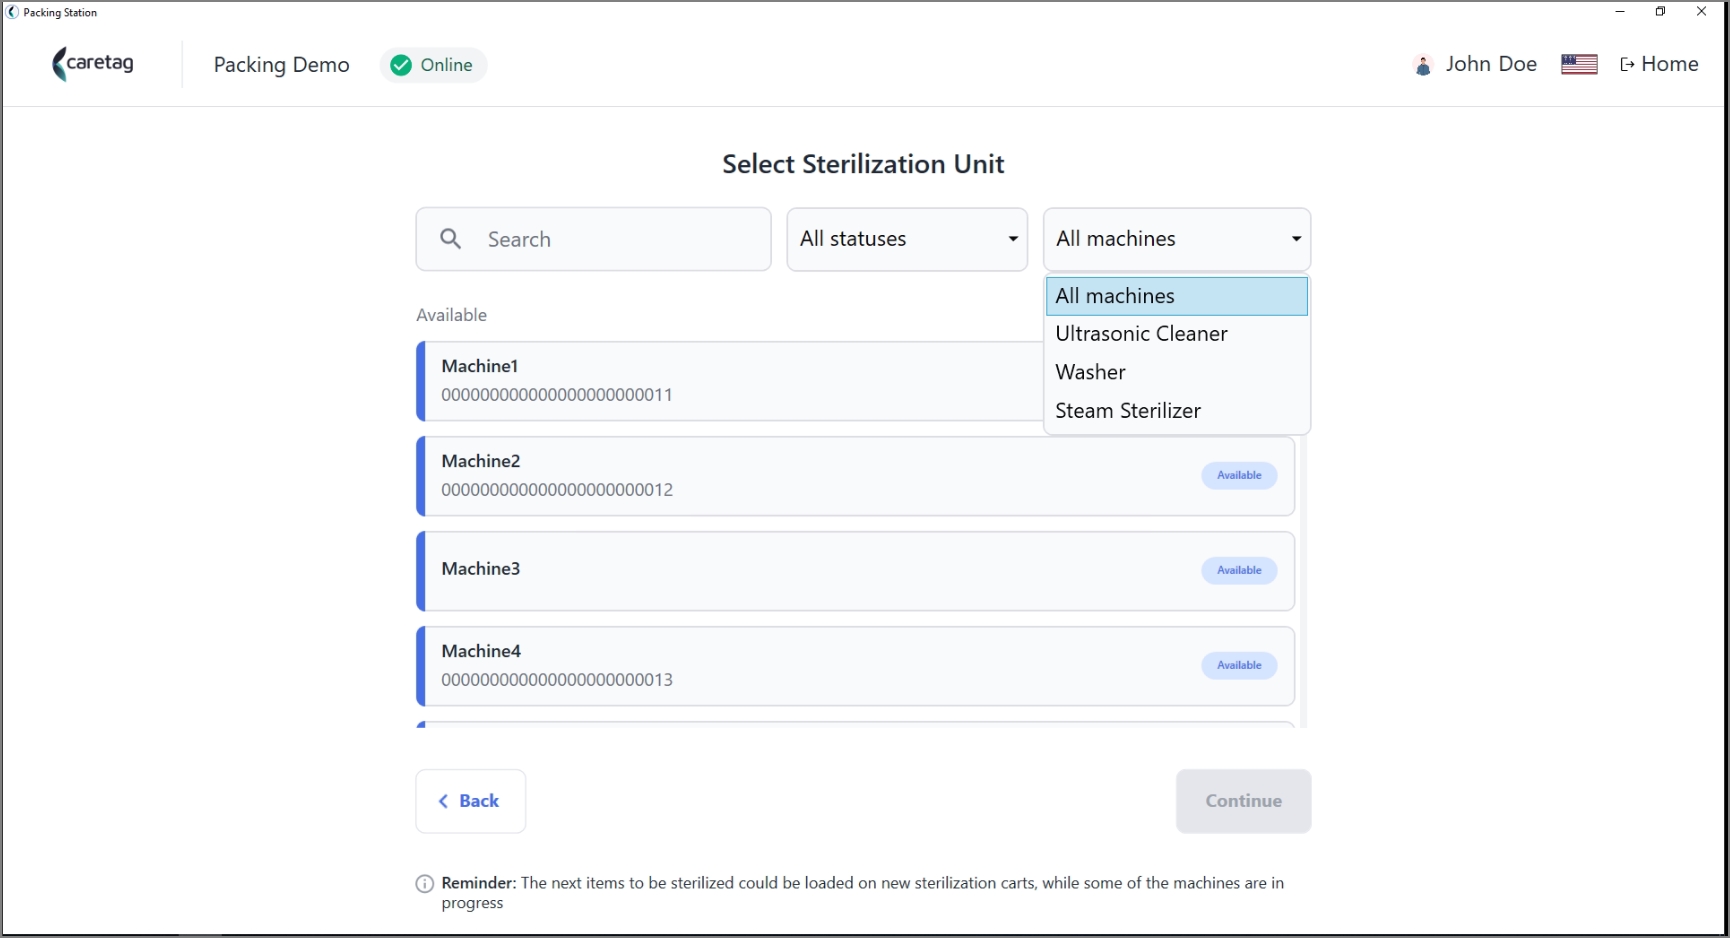
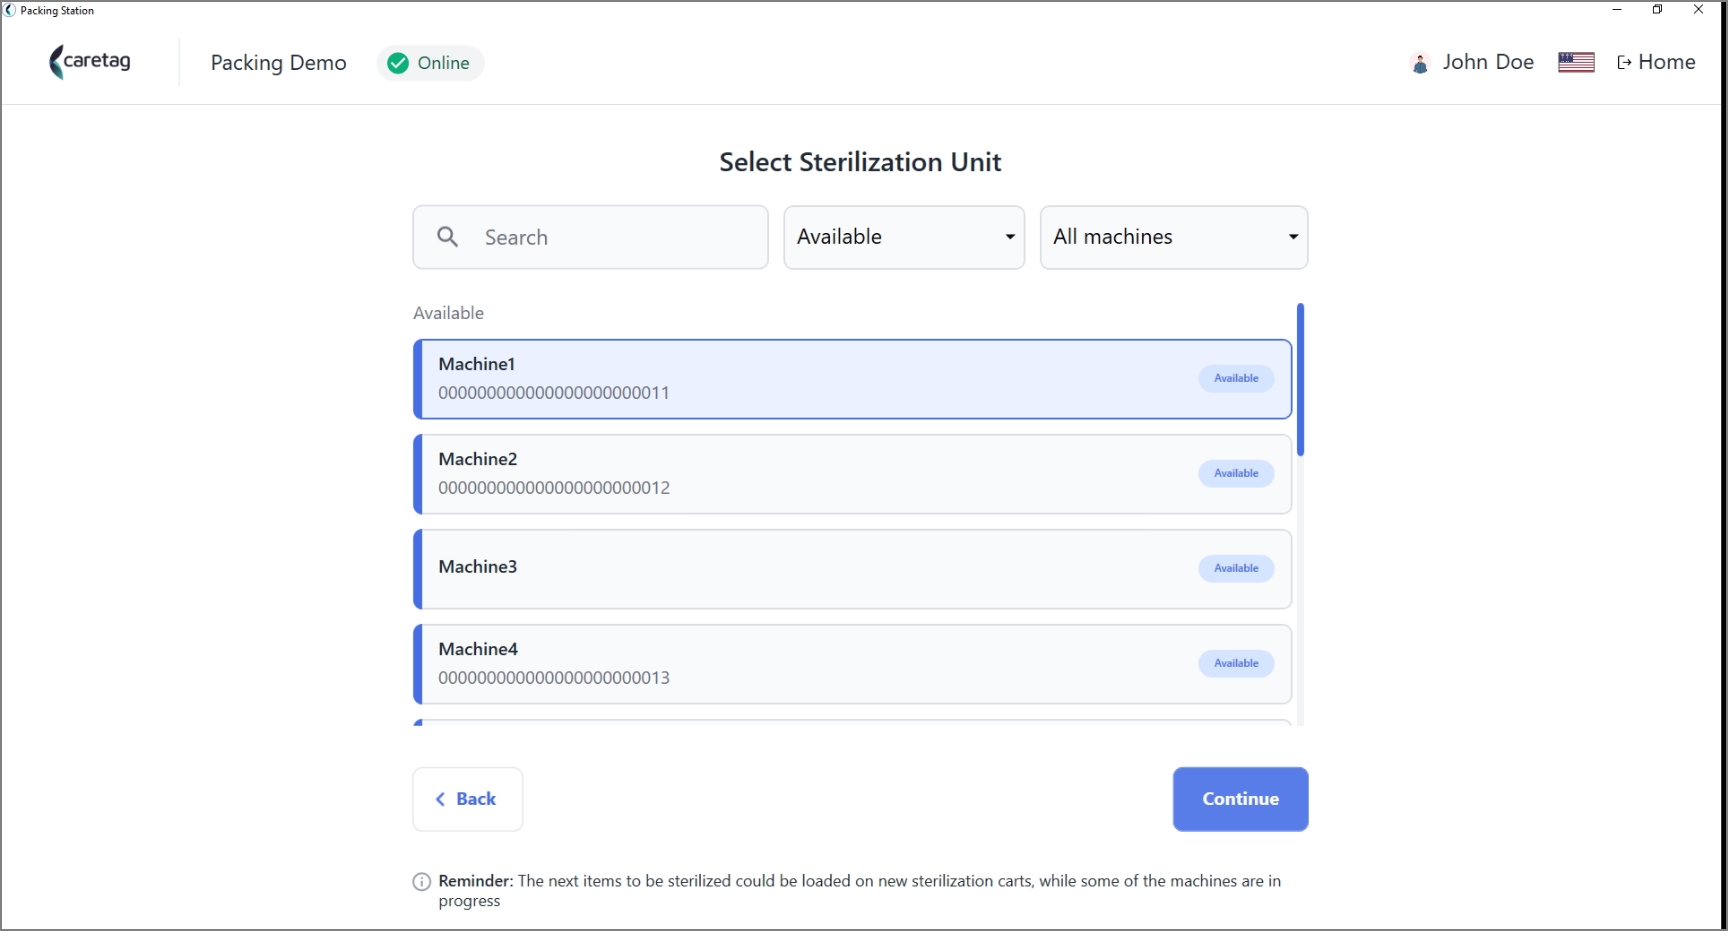
- Select the available machine and click continue
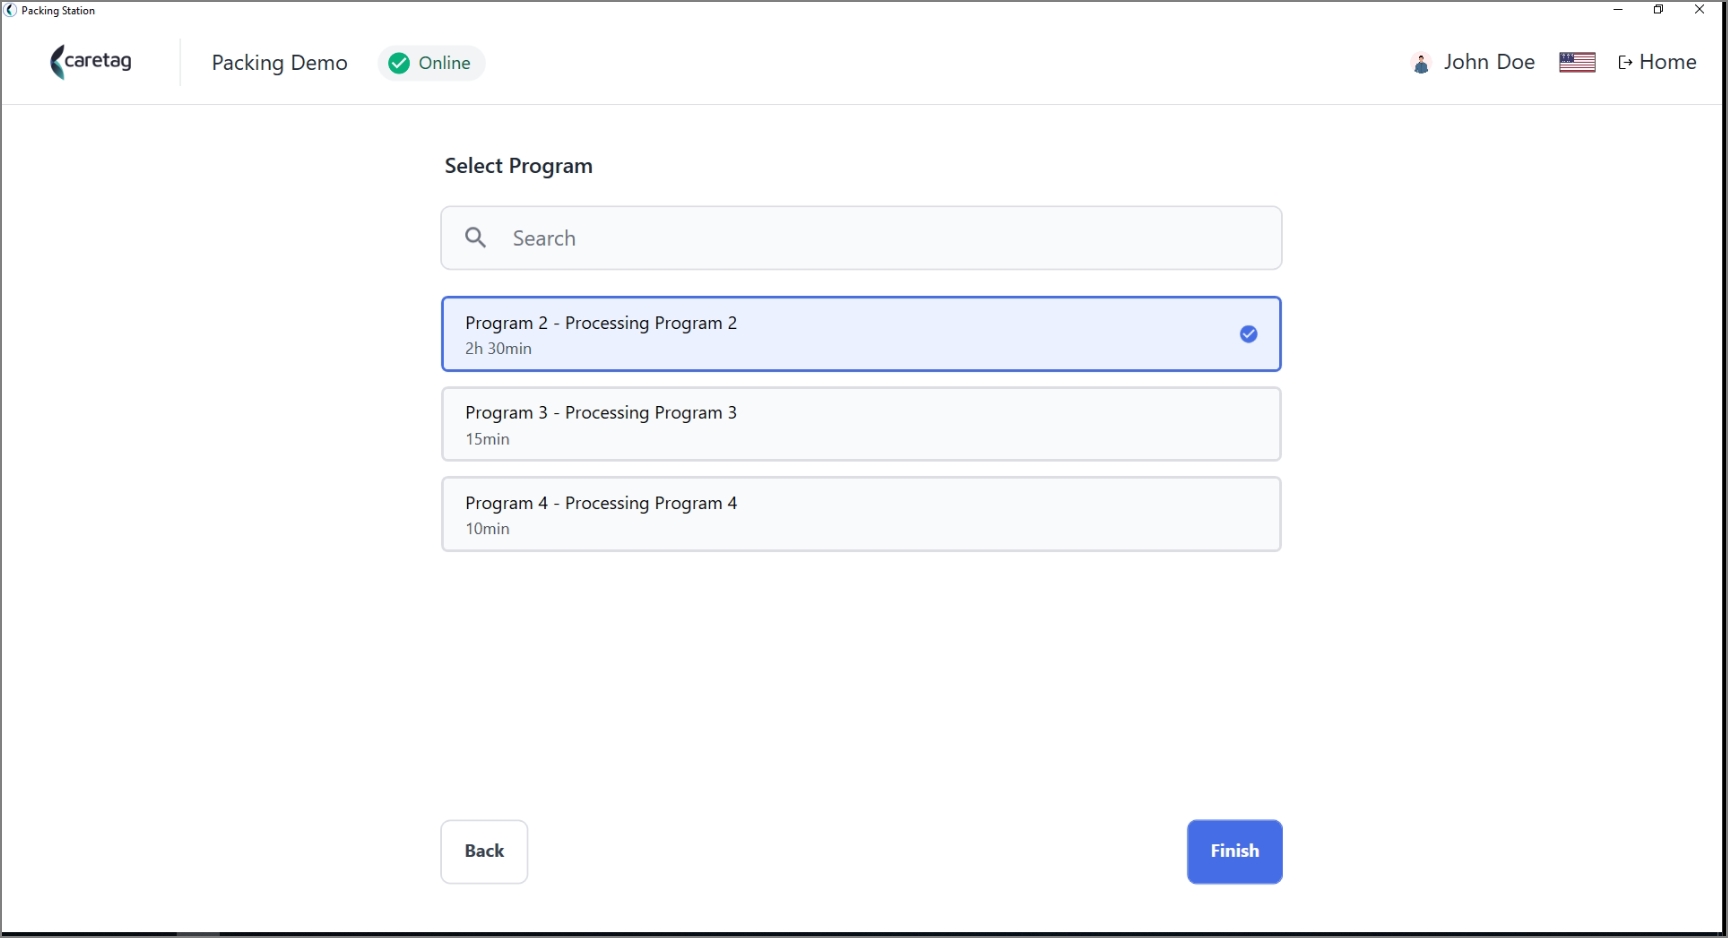
- Select Program and click Finish
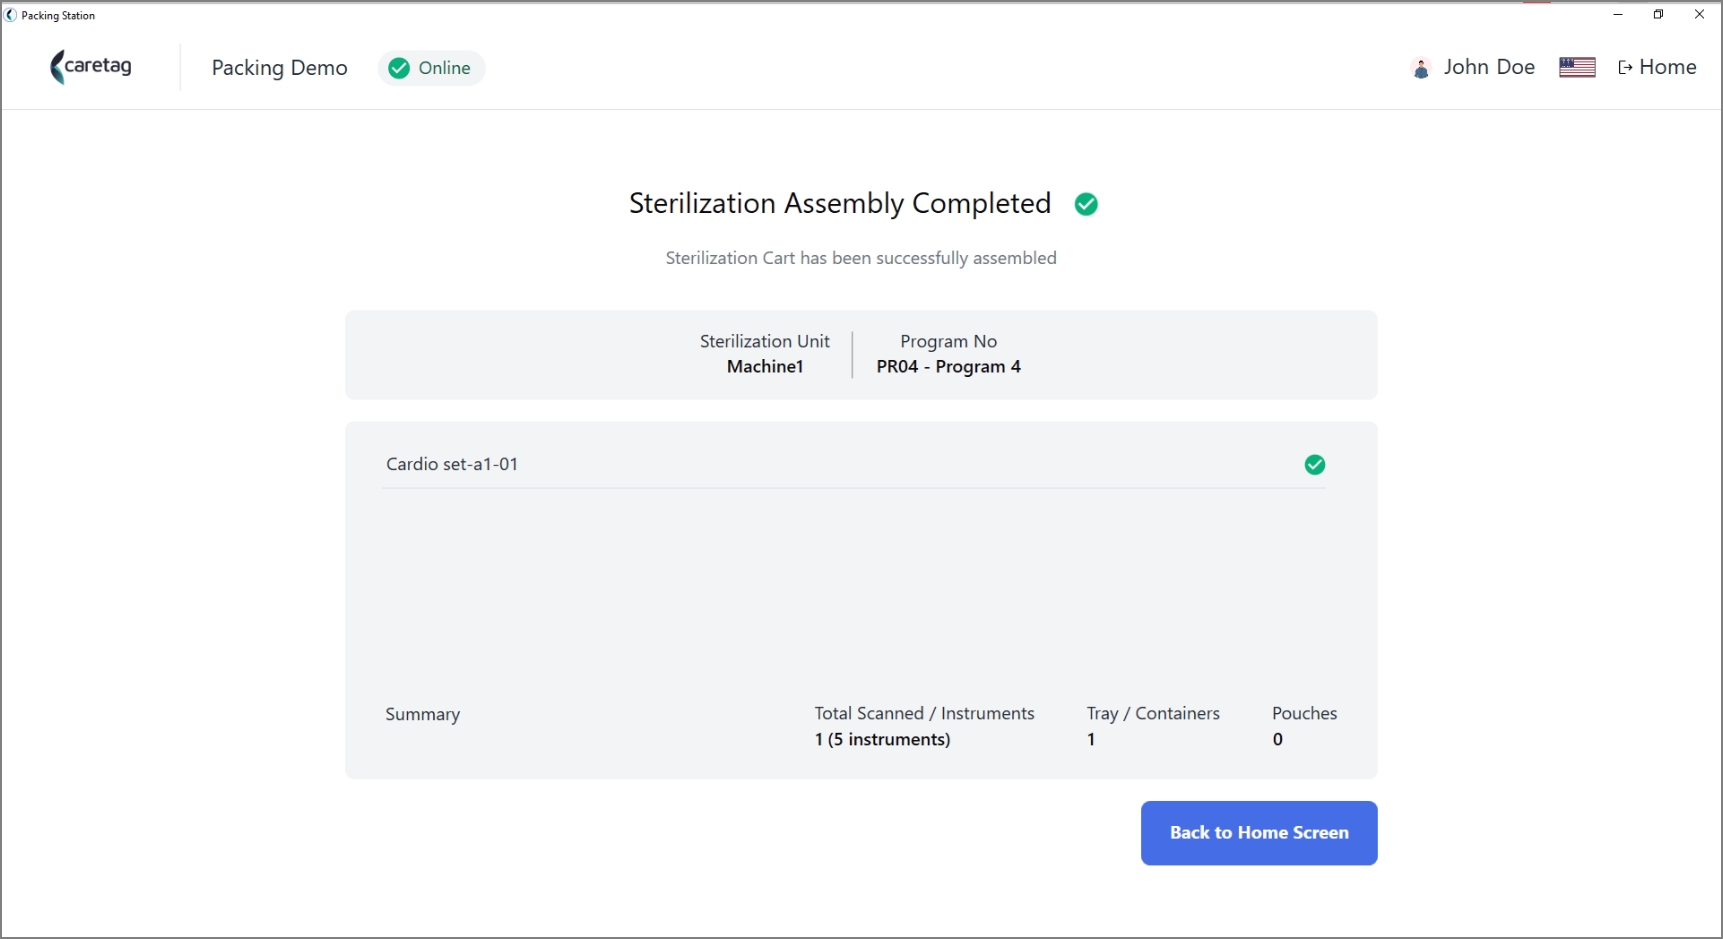
- Summary of the Sterilization
GET-INFO is explained detaily under Get-Info section in both user manual and in Get started guide.